I have been, or can be if you click on a link and make a purchase, compensated via a cash payment, gift, or something else of value for writing this post. As an Amazon Associate, I earn from qualifying purchases. Please read my full Affiliate Disclosure for more information.
Imagine walking into a room where every wall exudes elegance and personality—that’s the magic of wall molding! These classic design elements have made a stylish comeback, captivating homeowners with their ability to add depth, character, and sophistication to any space.
In this article, you’ll find a diverse array of wall molding ideas that can suit any decor style, from timeless and traditional to modern and minimalist. Whether you’re looking to make a subtle upgrade or a bold statement, these ideas will inspire you to transform your walls into stunning focal points and elevate your home’s overall aesthetic.
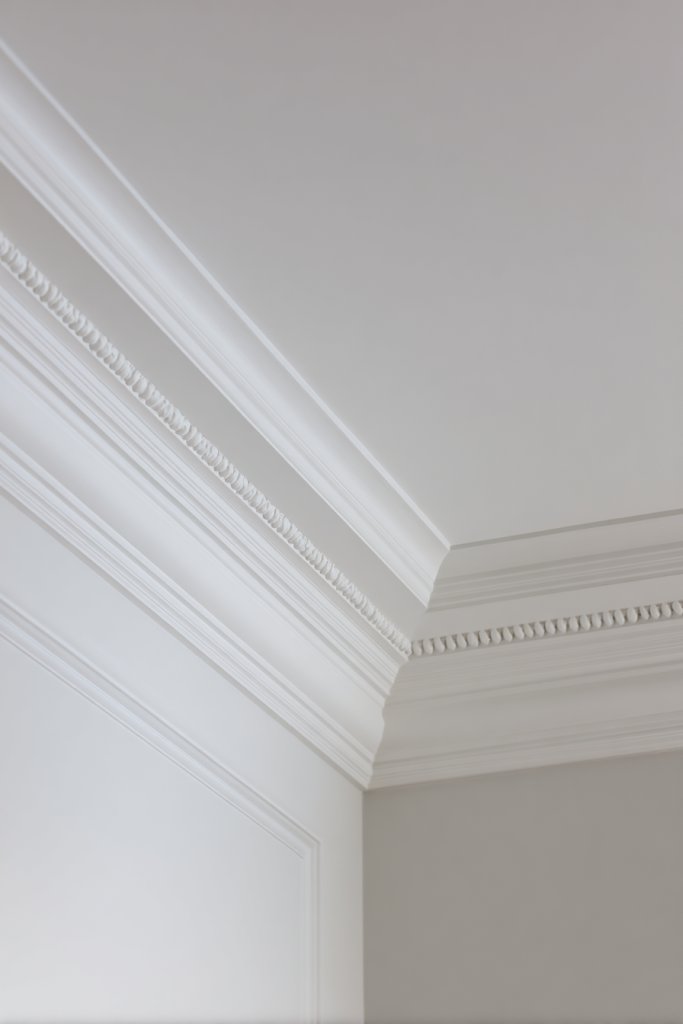
1. Classic Crown Molding with Intricate Detailing for a Regal Atmosphere
Ever wonder how some homes just seem to exude elegance effortlessly? The secret often lies in the details—like crown molding that adds a touch of royalty to any room. If your space feels flat or lacks character, upgrading to classic crown molding can transform it instantly. It’s a simple fix with big visual impact, making your home feel more refined.
Recommended Products to replicate this idea
| # | Preview | Product | |
|---|---|---|---|
| 1 |

|
Creative Crown Foam Crown Molding Installation Kit - 80 ft. | Check Latest Price |
| # | Preview | Product | |
|---|---|---|---|
| 1 |

|
5 Pcs Peel and Stick Ceiling Crown Molding Trim Total 16.4 ft Length 2" Wide Self-Adhesive Crown... | Check Latest Price |
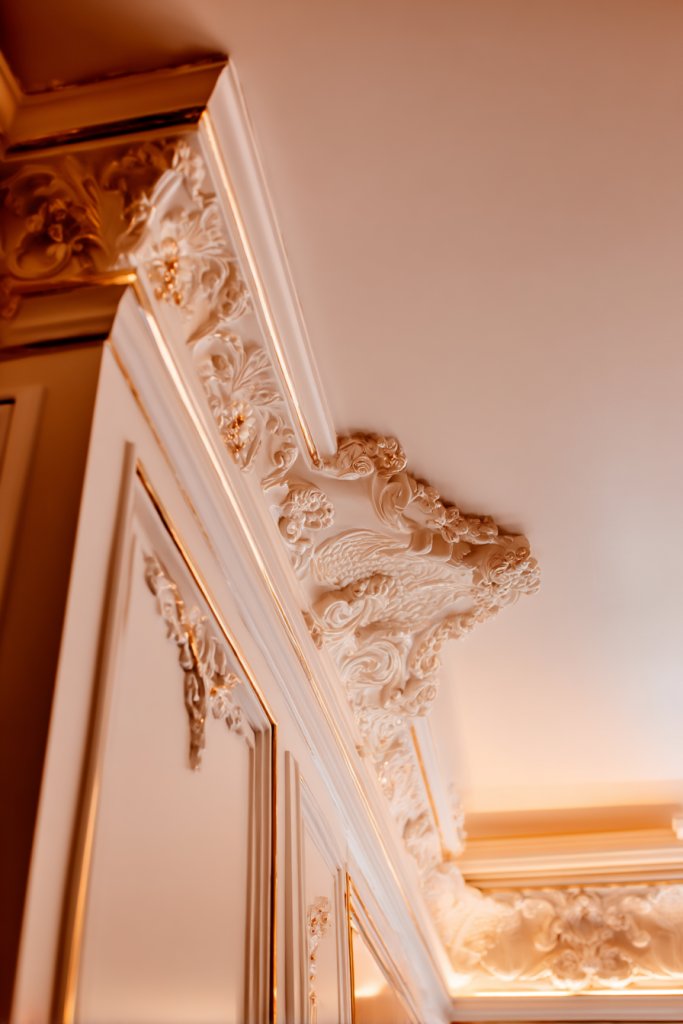
Imagine a ceiling adorned with ornate crown molding featuring delicate scrollwork and intricate floral patterns. The molding’s rich, painted finish contrasts beautifully against a soft neutral wall, catching the eye. Light bounces subtly off the detailed carvings, creating shadows that add depth and drama. It’s like giving your ceiling a jewelry-like crown that elevates the entire room’s ambiance.
Choose from a variety of styles, from traditional to modern interpretations. For a more regal look, opt for gilded or gold-leaf accents. If your style is more minimalist, go for simpler profiles with clean lines. Seasonal touches could include painting the molding a contrasting color or adding metallic finishes for festive occasions. The key is matching the detail to your overall decor theme.
Start with measuring your room’s perimeter to determine how much molding you need. Select a profile that complements your ceiling height and room style. Use a miter saw for precise cuts at corners and corners, and adhesive or nails for secure installation. Sand and paint or stain the molding beforehand for a polished look. Consider hiring a professional if you’re unfamiliar with carpentry; it’s worth the extra cost for perfect results.
Add a touch of personality by customizing the molding with a metallic or glitter finish. Pair it with coordinating ceiling medallions or light fixtures for a cohesive look. You can also stencil subtle patterns or borders along its length for added flair. For a vintage vibe, antiquing the paint or adding weathered effects can create a timeless appeal.
Incorporating intricate crown molding instantly elevates your space and boosts your home’s perceived value. It’s a classic feature that fits both traditional and contemporary styles, proving its versatility. With patience and attention to detail, you can achieve a stunning, regal environment that you’ll be proud of. Ready to crown your space with elegance?
2. Simple Beadboard Paneling to Add Texture and Charm to Living Rooms
Does your living room feel a little too plain or bland? Sometimes, all it takes is a touch of texture to make a big difference. Beadboard paneling offers that charming, cottage-inspired look without overwhelming the space. It’s perfect for adding warmth and character to a room that needs a facelift.
Recommended Products to replicate this idea
| # | Preview | Product | |
|---|---|---|---|
| 1 |
|
Pre-Cut Wainscoting Panels Kit, WPC Slats Accent Wall Panel for Home Decor Covers 39 x 79 in, Ready... | Check Latest Price |
| # | Preview | Product | |
|---|---|---|---|
| 1 |
|
Qidejoy 33 Pcs 3D PVC Slat Wall Panels 12X12in Fluted Textured Paneling Modern Decorative Tiles... | Check Latest Price |
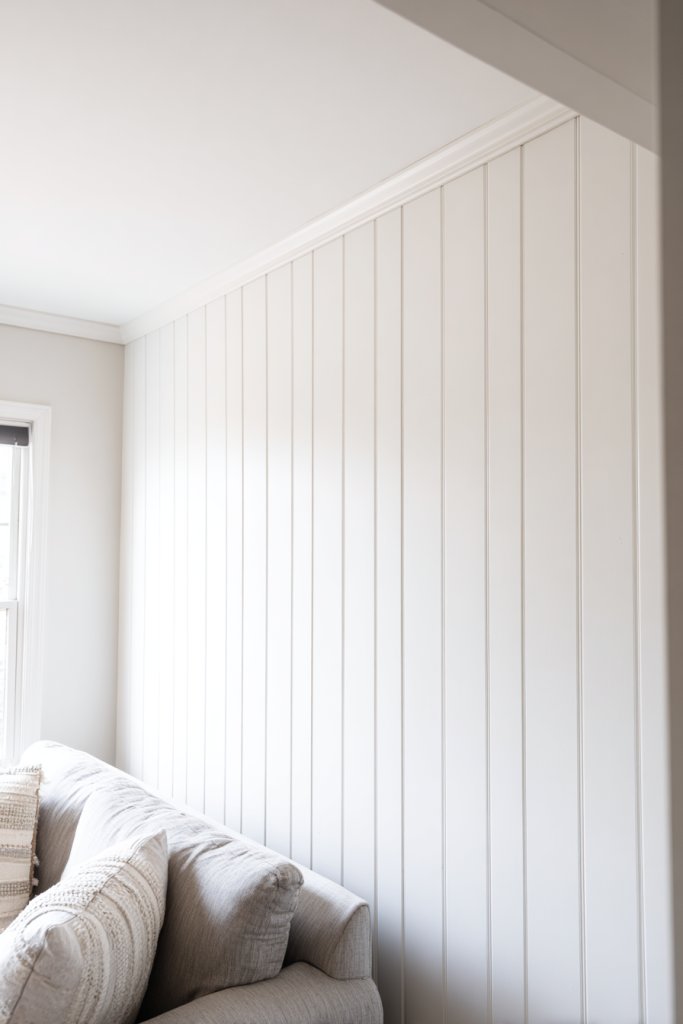
Picture soft, vertical lines running from floor to ceiling, creating a cozy, inviting vibe. The beadboard’s subtle ridges catch the light, giving the walls a gentle shimmer. Paired with a fresh coat of white or pastel paint, it transforms a dull wall into a focal point full of personality. The texture invites touch and adds a layer of visual interest that’s both classic and cozy.
You can choose full wall paneling or just apply beadboard halfway up, known as wainscoting, for a more subtle effect. For a rustic look, leave the wood natural or stain it darker. Bright colors or bold contrasts work well in eclectic spaces. Seasonal updates could include adding decorative trim or painting stripes for a modern twist.
Begin by measuring your walls and purchasing enough beadboard panels. Use a level to ensure straight alignment and secure panels with nails or adhesive. For a neat finish, add molding or trim along the top and bottom edges. Sand any rough edges and paint or stain your panels for durability and style. This project is straightforward enough for a DIY beginner with a few basic tools.
Personalize your beadboard by painting it in bold, unexpected colors for a contemporary look. Add decorative accents like hooks, shelves, or picture ledges to make it functional. For a vintage feel, distress the paint or add wallpaper behind the panels. Mix textures by combining beadboard with other materials like shiplap or wallpaper.
Beadboard paneling offers an easy way to add charm and texture, making your space feel more inviting. It’s a timeless look that can be adapted to any style from shabby chic to coastal. With minimal effort, you can create a warm, textured backdrop that elevates your entire room. Ready to add some cozy character?
3. Wide Chair Rail Molding for a Sophisticated Dining Room Look
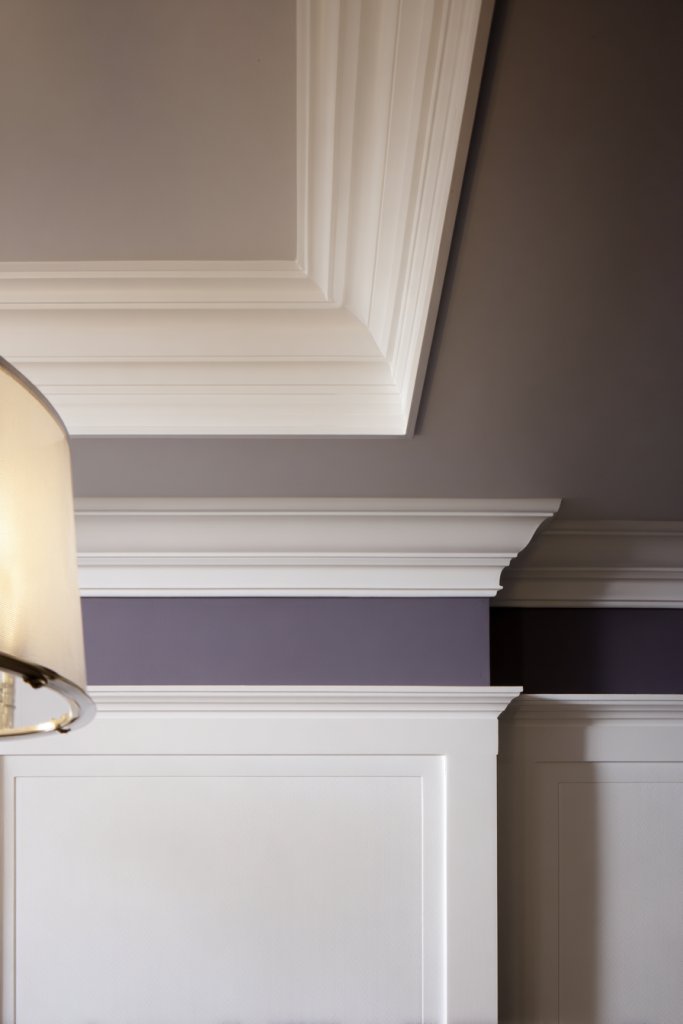
Want to make your dining room look more polished without a complete overhaul? Wide chair rail molding is a simple yet effective way to add sophistication. It creates a visual boundary that elevates the space and draws attention to your decor. This classic feature can make even a modest room feel luxurious.
Recommended Products to replicate this idea
| # | Preview | Product | |
|---|---|---|---|
| 1 |
|
WM390 - Americraft Chair Rail Solid Hardwood Moulding, 11/16"D x 2 5/8"W x 96"L, Stain Grade White... | Check Latest Price |
| # | Preview | Product | |
|---|---|---|---|
| 1 |

|
Pangda 3 Set Peel and Stick Wall Molding Kit, 3D Premade Accent Molding Wainscoting Panel for... | Check Latest Price |
Envision a room where the wall is divided by a wide, painted molding, with the upper section painted a soft, muted tone and the lower in a rich, contrasting color. The molding’s smooth, bold line adds structure and elegance. The textured wall paint or wallpaper above pairs beautifully with the clean line of the chair rail, creating a layered, upscale look. It’s like giving your dining space a tailored, bespoke feel.
For a more traditional look, choose ornate or carved wide molding. Modern spaces benefit from sleek, simple profiles in matte finishes. Change the color scheme seasonally—perhaps a darker hue for fall or a bright pastel for spring. You can also combine the chair rail with wainscoting or paneling to add more dimension.
Measure your walls carefully to determine the length of the molding needed. Use a miter saw to cut the molding at 45-degree angles at corners. Secure the molding with nails into wall studs for stability. Fill nail holes and paint or stain the molding before installation to avoid drips. Be sure to tape off areas for crisp, clean lines. The process is straightforward and can be completed in a few hours.
Add decorative touches such as gold or metallic leaf accents to the molding for a luxe effect. Use contrasting colors or textures on either side of the chair rail for visual interest. Incorporate lighting like wall sconces or LED strips behind the molding to highlight it. Personalize with monograms or patterns painted directly onto the molding for a custom touch.
A wide chair rail instantly elevates your dining room’s style and creates a refined environment. It’s a timeless feature that works well with various decor styles, from vintage to modern. With a little effort, you can craft a space that feels both elegant and inviting—perfect for entertaining or family dinners. Your home deserves a touch of class!
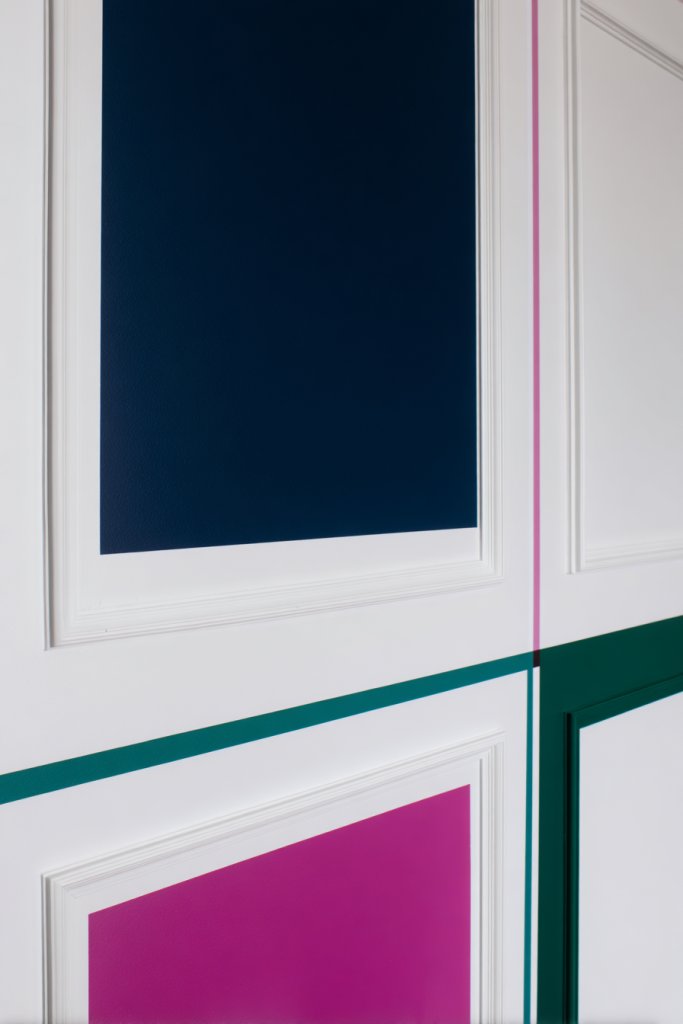
4. Picture Frame Molding Creates a Gallery Wall Effect on Any Wall
Ever wanted to showcase your favorite photos or art without cluttering your space? Picture frame molding offers a chic way to turn any wall into a curated gallery. It’s a clever method to give your wall a polished, artistic feel that feels intentional and stylish. Plus, it’s easier than it looks to DIY.
Recommended Products to replicate this idea
| # | Preview | Product | |
|---|---|---|---|
| 1 |
|
16.4FT x 1.02'' White Peel and Stick Crown Molding Trim – Flexible Decorative Mirror Frame Border,... | Check Latest Price |
| # | Preview | Product | |
|---|---|---|---|
| 1 |

|
Vittanly 15 Pack Picture Frames Collage Wall Decor for Mounting or Tabletop Display, Gallery Frame... | Check Latest Price |
Imagine a wall divided into multiple rectangular frames, each painted in contrasting colors or textures. The molding creates clean, sharp borders that mimic real picture frames, but without the need for actual artwork. The effect is striking—like a modern art installation—adding personality and sophistication to your space. The textured wall behind the molding adds depth, making the entire display pop.
Vary the widths and heights of the moldings for a dynamic layout, or keep it uniform for a more structured appearance. Use bold colors for a statement or keep it monochrome for subtle elegance. Incorporate lighting to highlight the framed areas or add decorative elements like mirrors or textured panels within the border. Seasonal themes can be achieved by swapping out the contents inside the frames.
Start by sketching your design and measuring the wall space. Cut the molding pieces with a miter saw at 45-degree angles for perfect corners. Attach the moldings with nails into wall studs or anchors, ensuring they’re level and aligned. Fill in nail holes and paint or finish the moldings before attaching. For a clean look, consider caulking gaps and sealing edges. The project is manageable with basic carpentry skills.
Personalize your gallery by painting the moldings in contrasting shades or metallic finishes. Add small shelves or ledges inside the frames to display mini sculptures or decorative objects. Create themed sections—such as family, travel, or hobbies—by customizing the inside with paint or wallpaper. You can also incorporate LED lighting behind the moldings for a stunning glow.
Transform a blank wall into a personalized art gallery that reflects your style. It’s a versatile look that adapts to any decor, from minimalist to eclectic. The best part? You control the layout, making it genuinely yours. Ready to turn your wall into a masterpiece?
5. Shiplap Wall Paneling for a Rustic yet Elegant Vibe
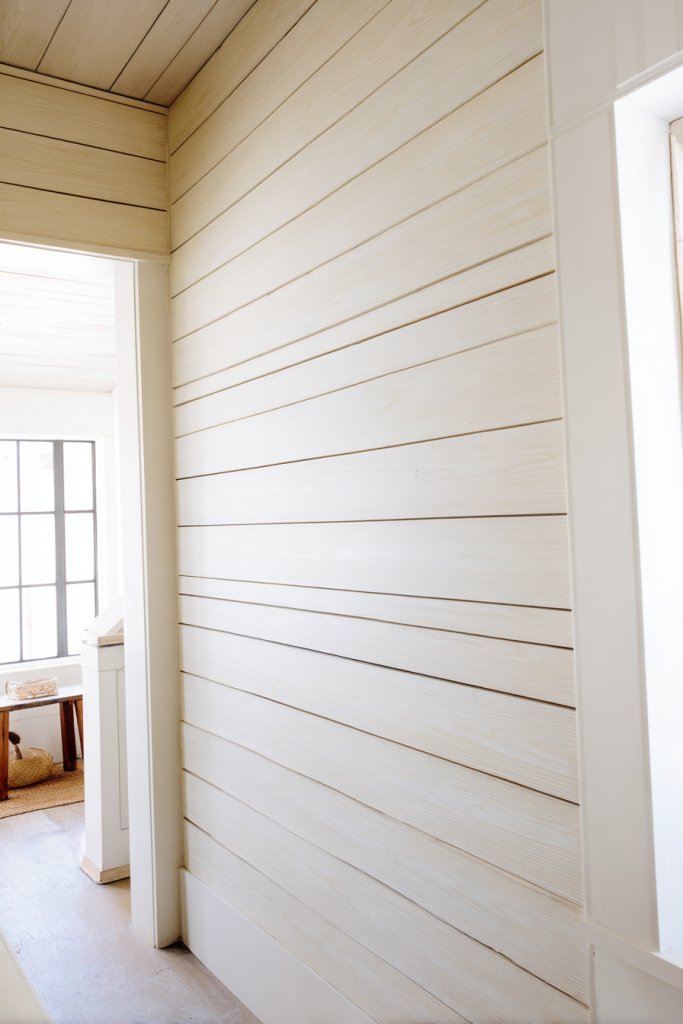
Are your walls feeling a little too plain or sterile? Shiplap paneling offers a perfect blend of rustic charm and modern elegance. It adds warmth and texture, making any space feel cozy and welcoming. Plus, it’s surprisingly easy to DIY if you’re up for some hands-on fun.
Recommended Products to replicate this idea
| # | Preview | Product | |
|---|---|---|---|
| 1 |

|
Luxdecor Real Wood Wall Planks - White Shiplap Boards 5" Peel and Stick - 10 Pieces, 12.5 Sq Ft | Check Latest Price |
| # | Preview | Product | |
|---|---|---|---|
| 1 |

|
Art3d Premade Board and Batten Paintable Wainscoting Kit, MDF Accent Wall Panel for Kitchen Bedroom... | Check Latest Price |
Picture wide, horizontal planks with a slight gap between each, painted in soft white or warm wood tones. The overlapping boards create a textured surface that catches the light differently throughout the day. It’s like giving your wall a layered, tactile quality that invites touch and adds depth. The subtle shadowing enhances the rustic appeal, making your room feel like a countryside retreat.
Use natural wood for a true farmhouse look, or paint it in bold colors for a contemporary twist. Vertical or diagonal layouts can add visual interest and break the traditional mold. Combine shiplap with other materials like stone or metal accents for a custom-designed space. For seasonal updates, add decorative hooks or shelves for plants or ornaments—just avoid restricted items.
Begin by measuring your wall and selecting shiplap boards that suit your style. Use a saw to cut boards to length, and install with nails or adhesive, ensuring even spacing. Seal gaps with caulk for a seamless look. Sand rough edges and paint or stain the panels before installation for a smooth finish. It’s a project that’s doable for DIYers with basic carpentry skills and tools.
Add character by distressing painted shiplap or applying weathered finishes for vintage appeal. Incorporate decorative hooks, lanterns, or fabric drapes to enhance the rustic vibe. Mix with modern elements like sleek lighting or metallic fixtures for contrast. Personal touches like monograms or painted patterns can make your wall truly one-of-a-kind.
Shiplap transforms plain walls into stunning focal points that radiate warmth and charm. It’s a timeless feature that complements many decor styles, from coastal to farmhouse. Whether you’re a seasoned DIYer or just starting out, this project can boost your confidence in home improvement. Ready to add some rustic elegance?
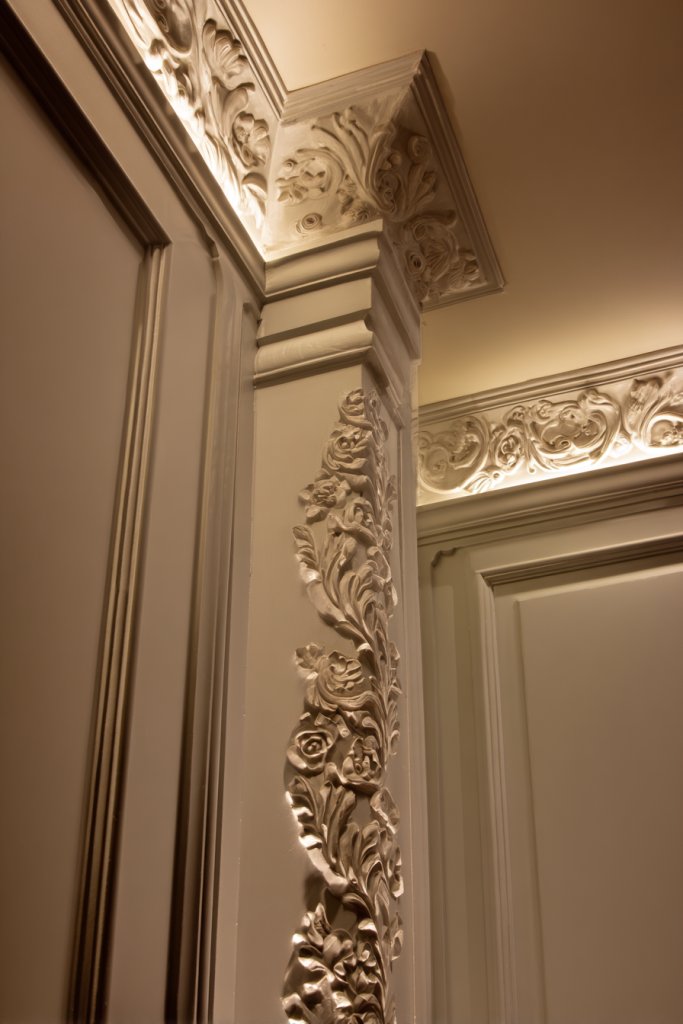
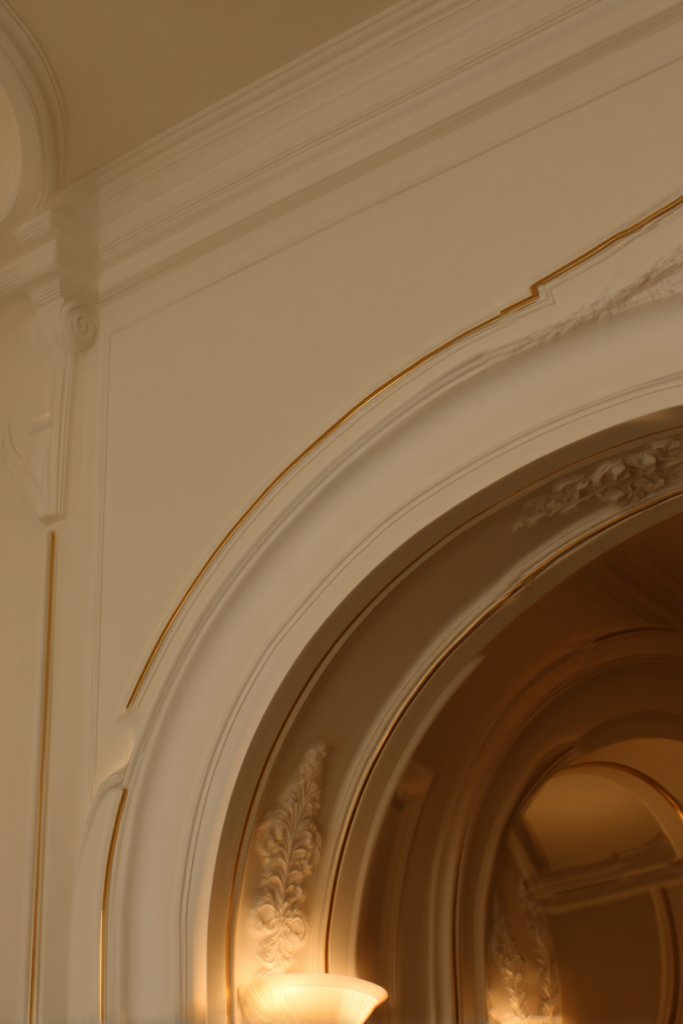
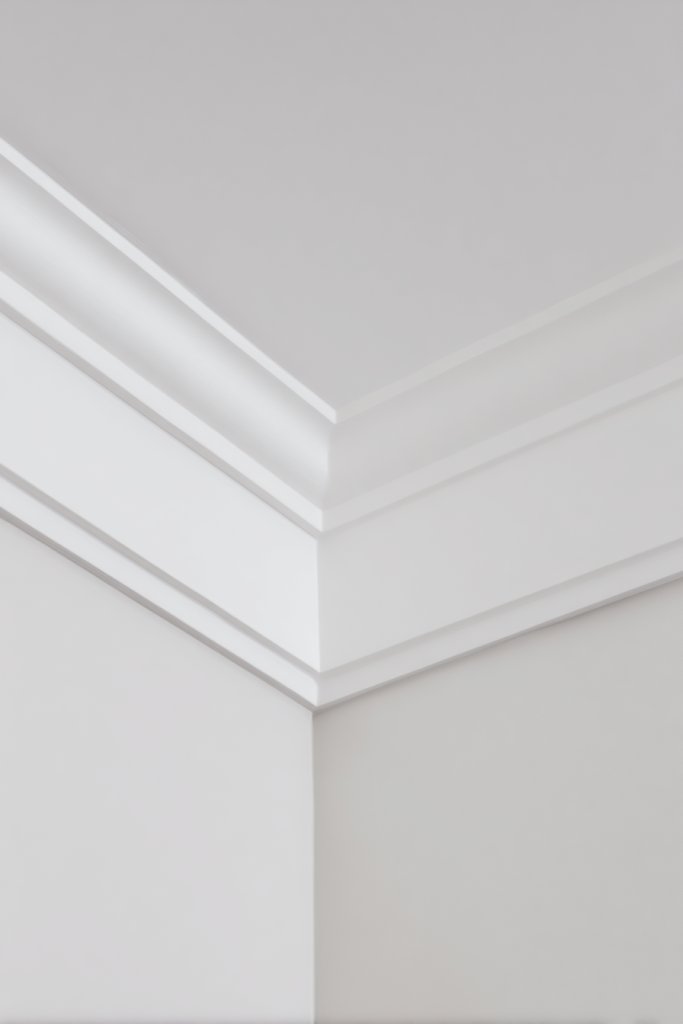
6. Architectural Wall Cornices for a Vintage, Luxurious Feel
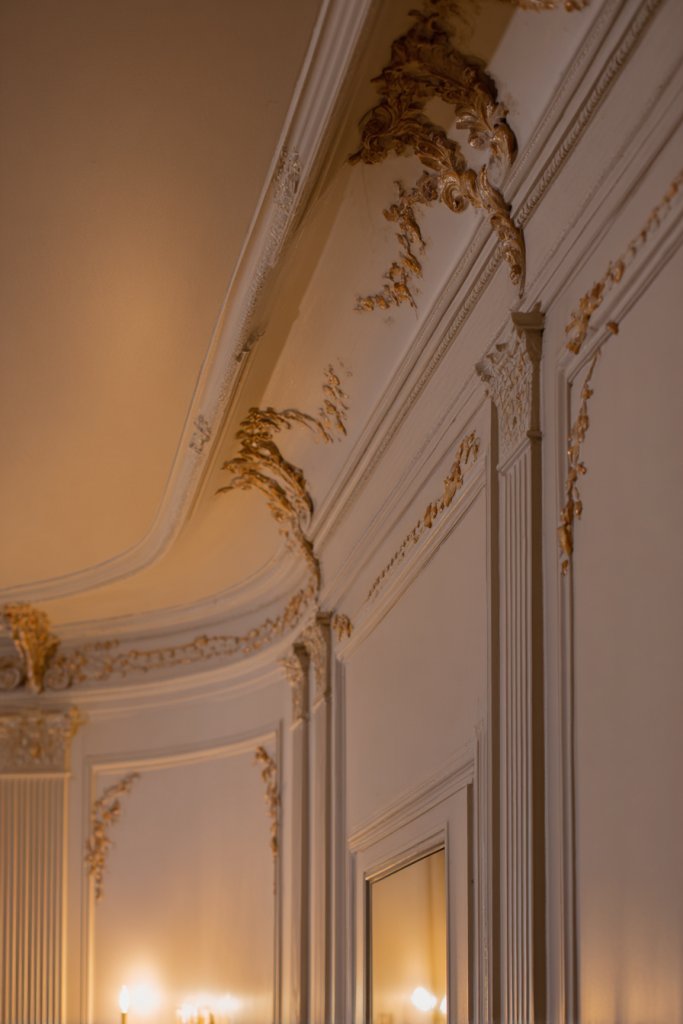
Ever wish your home had that classic, high-end look? Architectural wall cornices can bring vintage luxury to any room with minimal effort. These ornate moldings add visual height and drama, making even small spaces feel grand. It’s like dressing your walls in jewelry—subtle but undeniably elegant.
Recommended Products to replicate this idea
| # | Preview | Product | |
|---|---|---|---|
| 1 |

|
Art3d 10-Pack 47Ft White Ceiling Crown Molding Trim, High Impact Polystyrene Decorative Ceiling... | Check Latest Price |
| # | Preview | Product | |
|---|---|---|---|
| 1 |
|
Styrofoam Cornice Molding Trim 12x12cm 4 Meters White Decorative Ceiling Border Classic Style Home... | Check Latest Price |
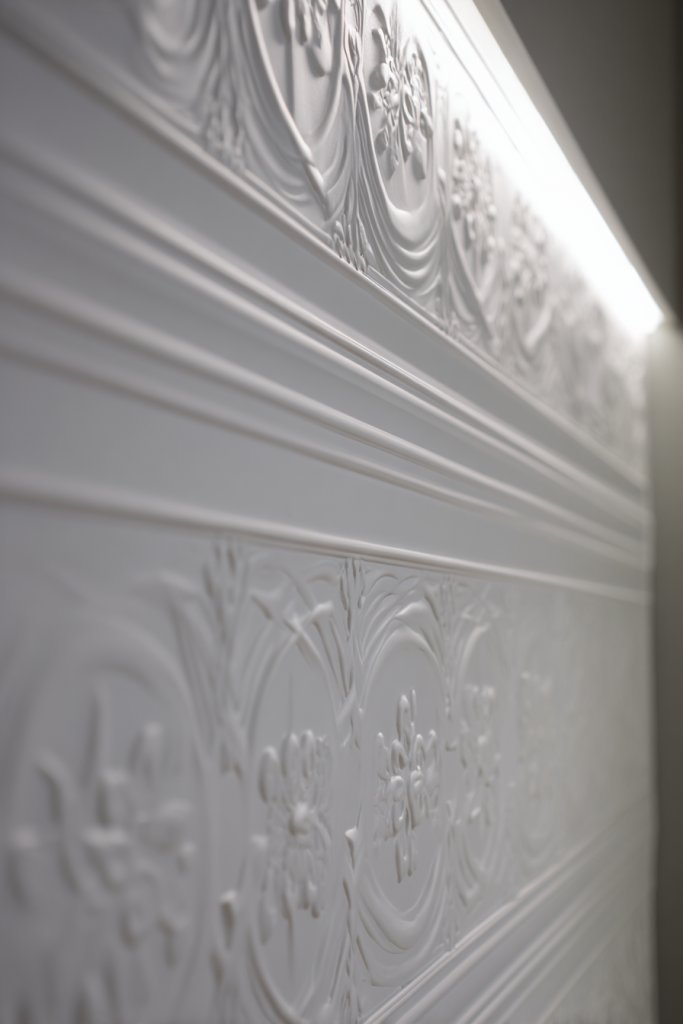
Imagine a ceiling lined with elaborate cornices featuring floral motifs and scrollwork. The detailed profiles cast shadows that change with the light, emphasizing their craftsmanship. Painted in a glossy or metallic finish, they reflect light beautifully, adding a touch of opulence. The cornices frame the room, creating a sense of depth and richness that’s hard to ignore.
Opt for highly detailed, carved designs for a Victorian or Baroque feel. For a more understated look, go for simpler, clean-lined profiles in matte finishes. Paint them in contrasting shades or metallics to match your decor. Seasonal accents could include gilded touches or adding fabric drapes that complement the ornate vibe.
Choose a profile that suits your ceiling height and room style. Measure carefully and cut the cornices with a miter saw at precise angles. Secure with specialized adhesive or small nails, especially into ceiling joists. Fill gaps and sand for a smooth finish before painting or finishing. Consider hiring a professional if you’re unfamiliar with intricate carpentry; the details matter.
Personalize by adding gold or metallic leaf accents for extra glamour. Use contrasting paint colors or textures to emphasize the molding’s details. Pair with vintage furniture or ornate lighting fixtures for a cohesive, luxurious theme. For special occasions, adorn with decorative tassels or embellishments that match your decor.
Adding vintage wall cornices instantly elevates your space’s elegance and charm. It’s a timeless feature that suits traditional and eclectic styles alike. With patience and care, you can achieve a look that feels both historic and refined. Your home will exude a sense of understated luxury—are you ready to indulge?
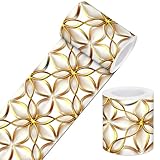
7. Geometric Molding Patterns for a Modern, Stylish Accent
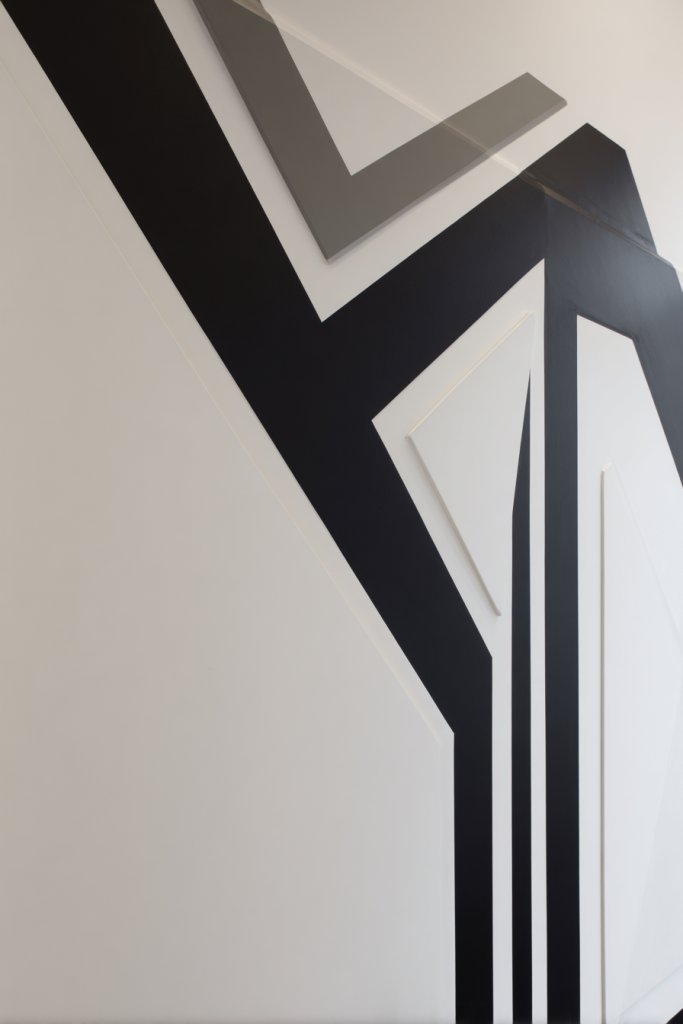
Looking to add a bold, contemporary touch to your walls? Geometric molding patterns are the perfect way to make a statement. They break away from traditional lines and introduce dynamic shapes that energize any space. If your decor feels flat or uninspired, these patterns can instantly boost its modern appeal.
Recommended Products to replicate this idea
| # | Preview | Product | |
|---|---|---|---|
| 1 |
|
IVN Peel and Stick Wallpaper Border 4 x 196 Inch Gold Geometric Circle Pattern Self Adhesive... | Check Latest Price |
| # | Preview | Product | |
|---|---|---|---|
| 1 |
|
Art3d Premade Board and Batten Paintable Wainscoting Kit, MDF Accent Wall Panel for Kitchen Bedroom... | Check Latest Price |
Visualize a wall adorned with repeating triangles, squares, or hexagons created with clean, sharp molding. The contrasting colors of the moldings and wall paint highlight the geometric shapes, creating a visual labyrinth that draws the eye. The textured surfaces catch light at different angles, adding depth and dimension. It’s a contemporary art piece that you live inside.
Choose from minimalist designs with thin, sleek profiles or go for bold, oversized shapes with thick molding. Mix and match geometric patterns with different finishes—matte, gloss, or metallic—to suit your aesthetic. You can cover entire walls or create focal points with a single pattern. Seasonal updates could include changing color schemes or adding subtle lighting.
Start by sketching your pattern and measuring the wall. Cut the molding pieces precisely with a miter saw, ensuring angles align perfectly. Use strong adhesive and nails for secure attachment, especially at corners. Fill gaps with caulk and sand for smooth edges. Painting or finishing the moldings last ensures a crisp, professional look. This project is suitable for intermediate DIYers familiar with basic carpentry.
Personalize by choosing metallic or contrasting colors for the moldings to enhance the geometric effect. Incorporate lighting behind or within the shapes to add a glow. Use different textures—such as combining matte paint with shiny moldings—for extra visual interest. Creating a custom pattern that reflects your personality boosts the uniqueness of your space.
Geometric molding patterns redefine your walls into modern masterpieces that reflect your style. They’re versatile enough to fit minimalist, industrial, or eclectic interiors. With some planning and patience, you can craft a bold feature wall that commands attention. Embrace the geometric revolution and give your home a fresh, stylish edge.
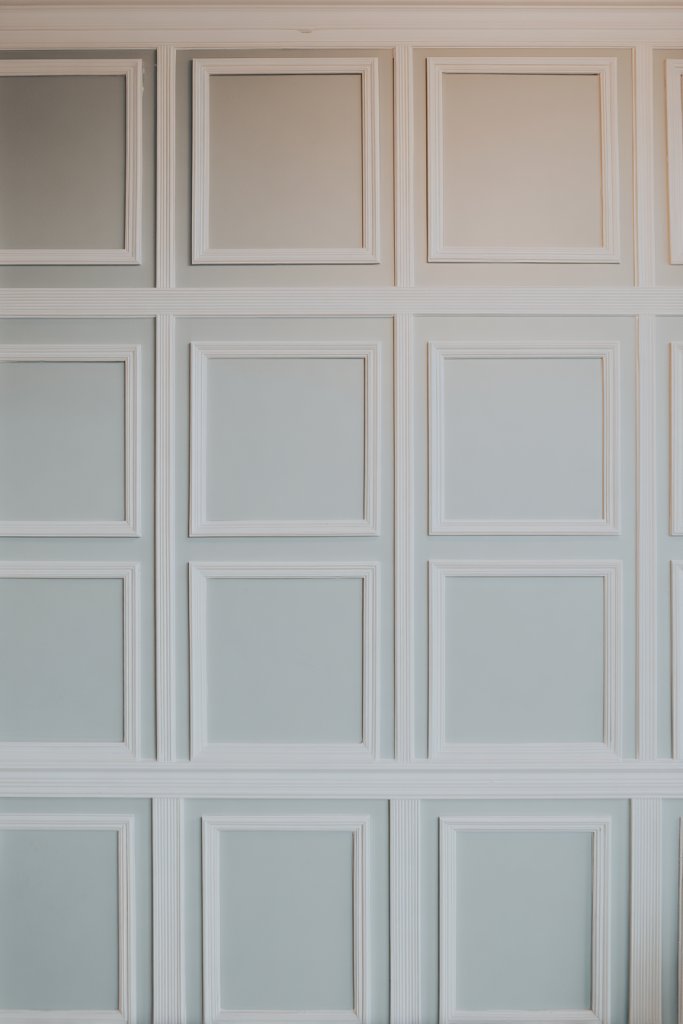
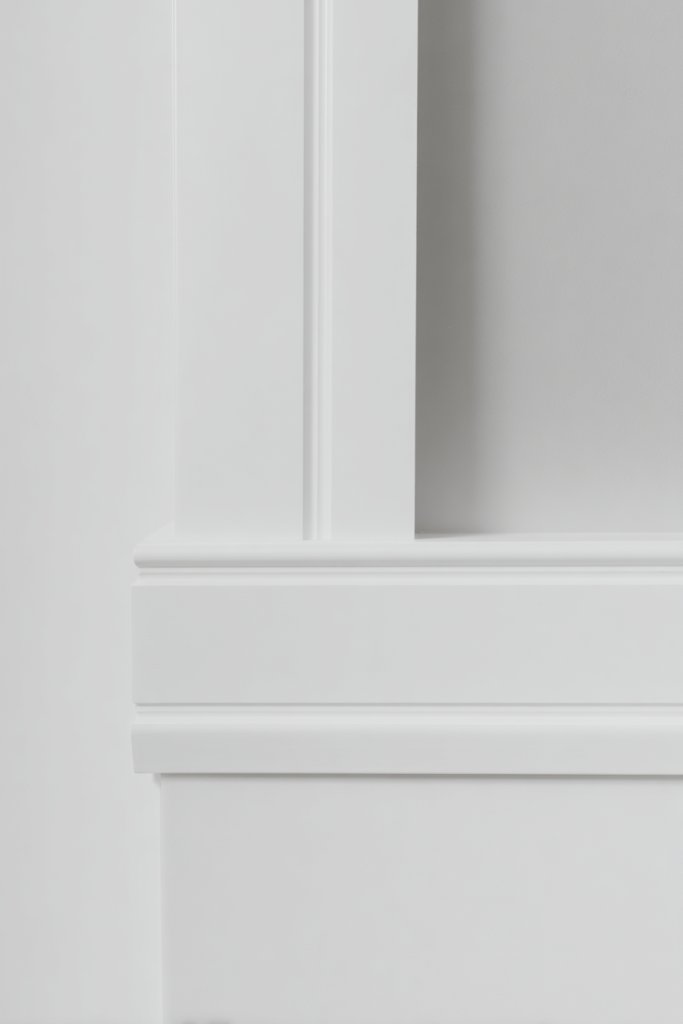
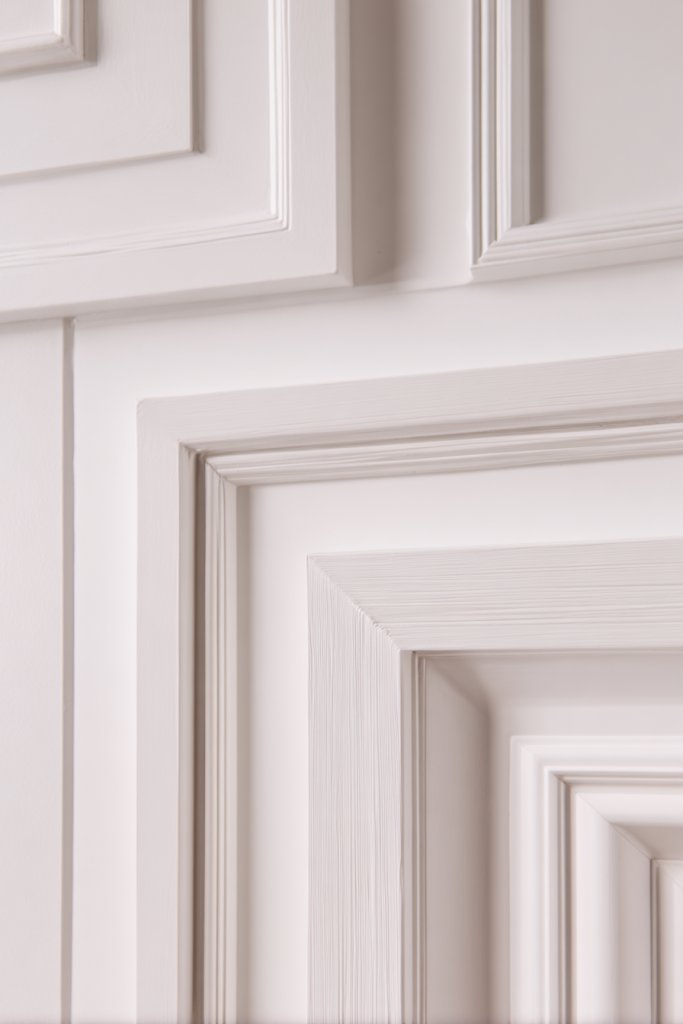
8. Wainscoting with Decorative Molding for Classic Elegance in Entryways
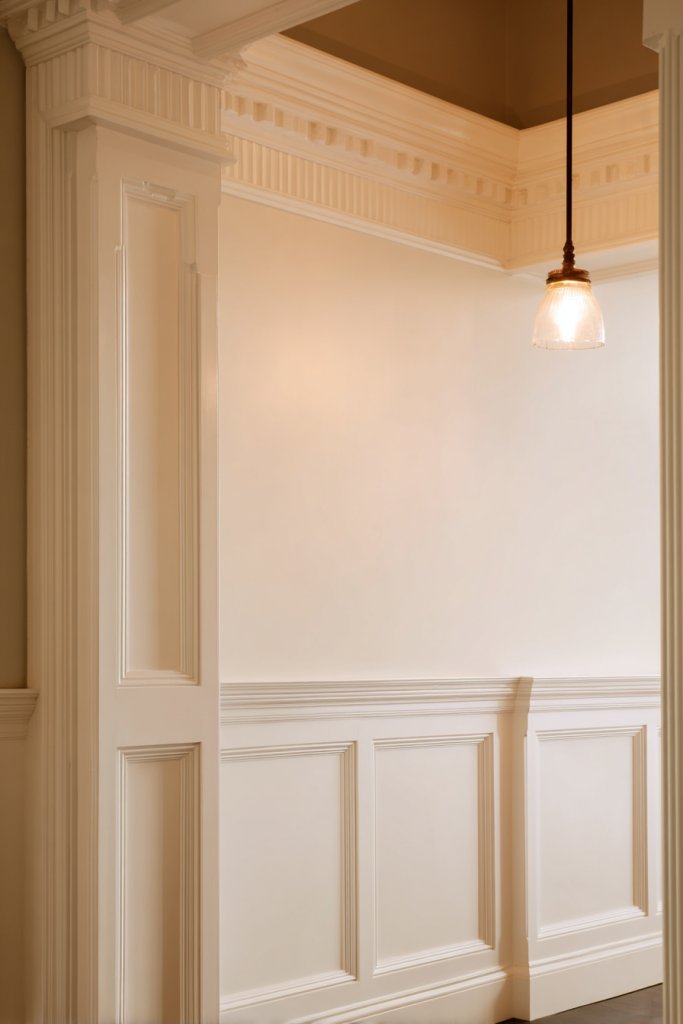
Want to give your entryway a touch of timeless elegance? Wainscoting with decorative molding instantly elevates any space, making it look polished and inviting. It’s a classic design element that adds sophistication without overwhelming the room. If your entry feels lackluster, this upgrade can create an impressive first impression.
Recommended Products to replicate this idea
| # | Preview | Product | |
|---|---|---|---|
| 1 |
|
Art3d Premade Board and Batten Paintable Wainscoting Kit, MDF Accent Wall Panel for Kitchen Bedroom... | Check Latest Price |
| # | Preview | Product | |
|---|---|---|---|
| 1 |

|
Art3d Pre-Cut Wall Molding Set of 6 pcs, Ready-to-Assemble Wainscoting Panels for Interior Wall... | Check Latest Price |
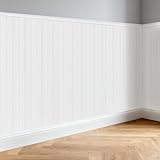
Imagine a panelled wall with raised or recessed sections framed by intricate molding. The textured surface draws the eye upward, creating a sense of height and grandeur. Painted in crisp whites, soft creams, or bold contrasting colors, the wainscoting becomes a statement piece. Subtle shadows and highlights emphasize the craftsmanship, giving your entryway a refined, boutique hotel vibe.
Choose from beadboard, raised panels, or flat panels depending on your style. Ornate molding suits Victorian or traditional themes, while sleek, simple profiles work for modern or transitional spaces. You can extend the wainscoting to other rooms for continuity. Seasonal updates include adding decorative hooks, small shelves, or contrasting paint accents.
Start by measuring wall height and planning your panel layout. Cut panels and molding to size with a miter saw, carefully fitting corners. Attach panels with nails or adhesive, ensuring they’re level and evenly spaced. Fill holes and seams with wood filler, then sand smooth. Prime and paint or stain for a durable, finished look. This project is accessible for DIYers with basic carpentry skills.
Add decorative trim or caps at the top for a more elaborate look. Incorporate contrasting colors or wallpaper behind the panels for extra flair. Use decorative hardware like hooks or knobs to personalize the space further. For a vintage theme, distress the paint or add weathered effects for charm.
Wainscoting transforms simple entryways into elegant spaces that wow guests and boost your home’s style. It’s a versatile feature that works across various decor styles, from classic to contemporary. Achieving this look boosts your confidence in carpentry and DIY skills. Ready to impress everyone who walks through your door?
9. Double-Layered Molding to Add Depth and Visual Interest
Feeling like your walls need a little extra something? Double-layered molding creates a layered effect that adds depth and sophistication. It’s an easy way to make flat walls pop without a complete redesign. If your space looks dull or monotonous, this technique offers a quick upgrade with wow factor.
Recommended Products to replicate this idea
| # | Preview | Product | |
|---|---|---|---|
| 1 |
|
Art3d Pre-Cut Wall Molding Set of 6 pcs, Ready-to-Assemble Wainscoting Panels for Interior Wall... | Check Latest Price |
| # | Preview | Product | |
|---|---|---|---|
| 1 |

|
moonoom 20 Ft x 1.6''Wall Decoration Molding Trim,Self-Adhesive 3D Chair Rail Panel Molding,... | Check Latest Price |
Picture two sets of moldings stacked with a small gap in between, each painted in contrasting or complementary colors. The layered profiles cast shadows that change throughout the day, giving your wall a dynamic, three-dimensional appearance. This technique works well in living rooms or bedrooms, creating a gallery-like effect. It’s like turning your wall into a piece of sculptural art.
Use simple flat moldings for a modern look, or opt for ornate, carved profiles for a vintage vibe. Vary the height and thickness of each layer for more drama. Combining different finishes—matte, gloss, metallic—can further enhance the effect. Seasonal updates could include painting one layer a bold color while keeping the other neutral.
Start by sketching your design and measuring the wall. Cut the moldings to size, paying attention to the layering effect. Install the bottom layer first, securing with nails or adhesive, then add the second with a slight overlap. Fill gaps and sand for smoothness. Paint both layers in your chosen schemes, ensuring crisp edges and clean lines. This project requires precision but is manageable with basic tools.
Personalize by adding decorative accents like rosettes or medallions at the intersections. Change the color scheme seasonally or for special occasions. Mix textures by combining matte and shiny finishes. Incorporate LED lighting behind the layers for a subtle glow that highlights the depth.
Double-layered moldings add an architectural richness to your walls that feels custom and high-end. The layered effect can be tailored to match your decor style, from sleek modern to ornate vintage. With patience, you can master this technique and give your walls a stunning, textured upgrade. Ready to add depth and interest?
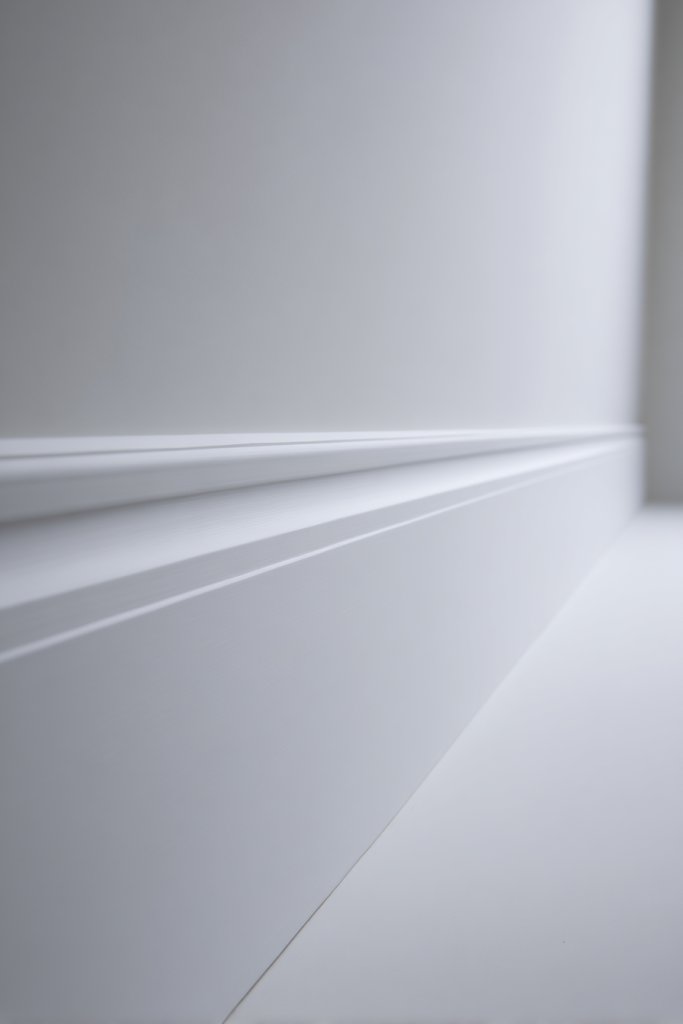
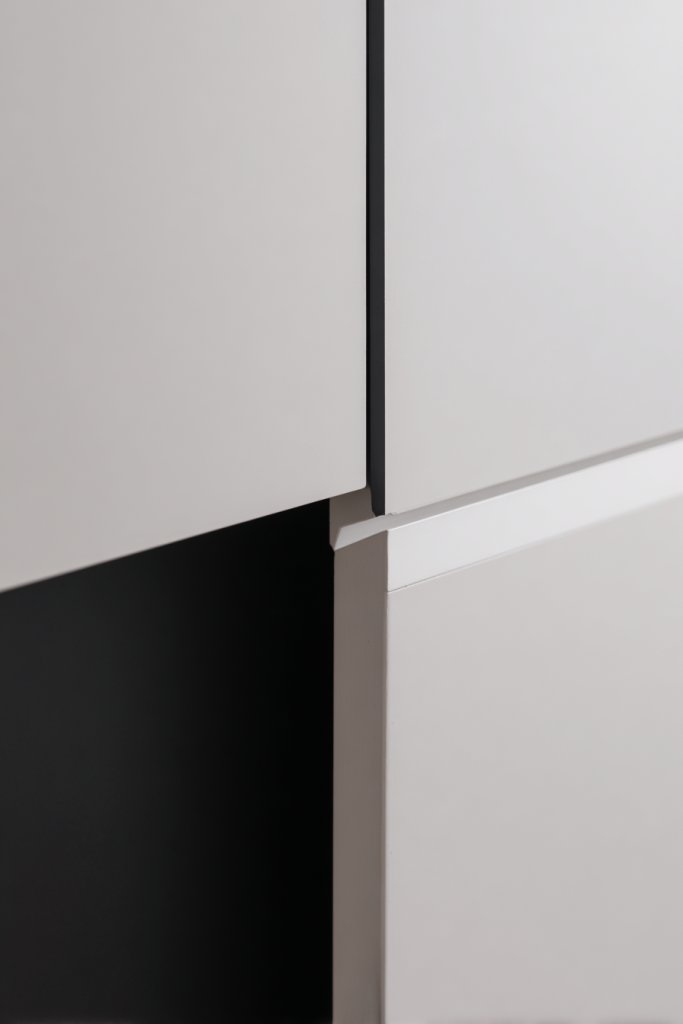
10. Flush Mount Molding for a Minimalist, Seamless Wall Finish
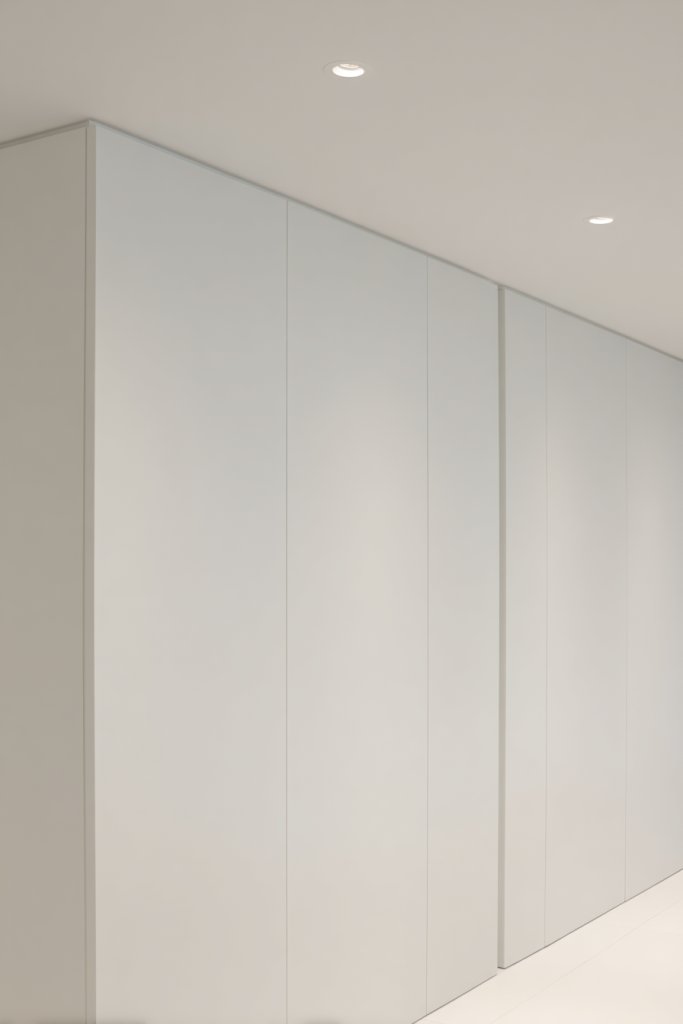
Tired of bulky moldings cluttering your clean, modern aesthetic? Flush mount molding offers a sleek, minimalist solution that creates a seamless transition between wall and ceiling. It provides just enough definition to add interest without disrupting the visual flow. If you crave understated elegance, this is your go-to upgrade.
Recommended Products to replicate this idea
| # | Preview | Product | |
|---|---|---|---|
| 1 |

|
Sunco 6 Pack Goof Rings for 6 Inch Recessed Lights, Flush Mount White Can Light Trim Ring Cover,... | Check Latest Price |
| # | Preview | Product | |
|---|---|---|---|
| 1 |

|
Pushglossy 8 Pcs 47.24″(Total 31.5 Ft) Ceiling Crown Molding with LED Duct Kit for Seamless... | Check Latest Price |
Imagine a wall where the molding sits flush with the surface, painted in the same color for a nearly invisible effect. Shadows and light subtly define the edges, giving a soft, continuous look. The simplicity amplifies the room’s spaciousness and modern vibe. It’s like giving your home a subtle, sophisticated frame that’s hardly there but makes all the difference.
Opt for very thin profiles or even hidden channels for a truly seamless look. Match the molding color to the wall or ceiling for a monochrome effect, or choose a contrasting hue for a subtle border. This style adapts well to open-concept layouts or small spaces, making them feel larger. Seasonal updates might include adding textured paint or slight color accents.
Measure and cut the moldings precisely, ensuring they align perfectly in corners. Use specialized adhesive or hidden fasteners to secure them without visible nails. Fill any gaps or seams with paintable caulk for an invisible finish. Sand lightly and paint in the same color as your walls or ceiling. The key is careful measurement and neat finishing.
Add subtle textures or matte finishes to enhance the minimalist feel. Incorporate lighting behind the moldings for a soft glow that enhances depth without visual clutter. You can also experiment with different colors on the moldings to create a subtle border effect. Keep accessories and decor simple to maintain the clean look.
Flush mount molding exemplifies modern elegance, proving less is more. It’s a minimalistic feature that can make your space look larger and more cohesive. When executed with precision, it elevates your entire decor effortlessly. Ready to embrace the sleek, seamless aesthetic?
11. Panel Molding with Painted Insets for a Bold, Colorful Touch
Looking to add a punch of color and pattern to your walls? Panel molding with painted insets offers a bold way to break up large wall spaces. It creates a striking visual contrast and adds personality without overwhelming your decor. If your walls are feeling dull, this design can revive the entire room.
Recommended Products to replicate this idea
| # | Preview | Product | |
|---|---|---|---|
| 1 |
|
Art3d Pre-Cut Wall Molding Set of 6 pcs, Ready-to-Assemble Wainscoting Panels for Interior Wall... | Check Latest Price |
| # | Preview | Product | |
|---|---|---|---|
| 1 |

|
Chroma Mural Paint, Assorted Primary Colors, Pints, Set of 6 | Check Latest Price |
Visualize a grid of rectangular panels framed with molding, each painted in a different vibrant hue or muted tone. The inset colors pop against the surrounding moldings, creating a playful or sophisticated pattern depending on your palette. The textured surface and contrasting colors make the wall a true feature wall that draws attention and sparks conversations.
Mix solid colors with subtle patterns or textured finishes for a layered look. Use contrasting colors for the frames and insets or keep a monochrome palette for elegance. Incorporate different shapes—such as diamonds or circles—into your panel design for variety. Seasonal themes can include metallic or glitter finishes for special occasions.
Sketch your layout and measure your wall space carefully. Cut molding pieces with precision, and secure them with nails or adhesive. Paint the inset sections before installation for cleaner edges. Fill gaps and seams with caulk, then prime and paint the entire panel for a uniform finish. This project is ideal for DIYers comfortable with detailed painting and carpentry.
Personalize your panels with stencils, metallic accents, or textured paints. Add decorative molding or trim within the panels for extra dimension. Incorporate removable decals or wallpaper behind the panels for quick seasonal updates. Use lighting to highlight the color contrasts and create a dynamic visual effect.
Panel molding with painted insets transforms plain walls into bold, artistic statements. It’s a versatile technique that suits many decor styles, from modern to eclectic. With a little planning, you can craft a feature wall that’s both colorful and sophisticated. Ready to turn your walls into a canvas?
12. Beveled Edge Molding to Create Subtle Shadows and Depth
Are your walls feeling flat and uninspired? Beveled edge molding introduces a subtle shadow line that adds depth and dimension. It’s a simple way to create visual interest without overwhelming the space. If you want a refined look that plays with light and shadow, this is an elegant choice.
Recommended Products to replicate this idea
| # | Preview | Product | |
|---|---|---|---|
| 1 |
|
Sacubee Peel and Stick PVC Crown Molding Trim Flexible Molding Trim 13.1 ft x 1.8" Self Adhesive... | Check Latest Price |
| # | Preview | Product | |
|---|---|---|---|
| 1 |

|
GARTOL Miter Shears- Multifunctional Trunking Shears for Angular Cutting of Moulding and Trim,... | Check Latest Price |
Picture a narrow molding with a beveled edge that catches the light differently throughout the day. The angled profile creates a gentle shadow, emphasizing the molding’s shape and adding a sculptural element to the wall. It pairs beautifully with soft paint tones or textured finishes, giving your room a quiet sophistication. The shallow bevel lends a modern, understated charm.
Choose from simple, narrow profiles for a minimalist look or wider, more ornate designs for a classic vibe. Finish with matte, satin, or gloss paints depending on your decor style. Use contrasting colors or textures to make the beveled edges stand out more. This technique works well in bedrooms, living rooms, or even hallways for a subtle upgrade.
Measure carefully and cut the moldings at precise angles to ensure clean joints. Secure with nails or adhesive, ensuring the beveled edge is prominent and even. Fill nail holes and seams with putty, then sand smooth. Paint or stain the moldings, emphasizing the beveled edge to maximize shadow effects. Precision is key for a seamless, professional appearance.
Highlight the beveled edges with a contrasting paint or finish to make them pop. Incorporate lighting to accentuate the shadows created by the beveled profile. Opt for metallic or glossy paint to add a touch of glamour. You can also combine beveled molding with other textures or patterns for a sophisticated layered look.
Beveled edge molding offers a subtle yet impactful way to add depth and elegance to your walls. It’s versatile enough to complement various decor styles while remaining understated. With careful installation, you can achieve a sleek, refined finish that elevates your entire space. Ready to play with light and shadow?
13. Decorative Moldings with Carved Details for Artistic Intricacy
Craving a statement feature that combines artistry and craftsmanship? Decorative moldings with carved details can turn plain walls into works of art. They add intricate patterns and textures that evoke a sense of history and luxury. If subtlety isn’t your style, this bold choice will surely impress.
Recommended Products to replicate this idea
| # | Preview | Product | |
|---|---|---|---|
| 1 |

|
MUXSAM Carved Wood Appliques Onlays, Long Wooden Decals Trim Molding Rosette Inlays for Door Wall... | Check Latest Price |
| # | Preview | Product | |
|---|---|---|---|
| 1 |

|
AZ Faux High-Density Polyurethane Faux Stone Wall Covering Panels for Interior and Exterior Decor |... | Check Latest Price |
Imagine a ceiling or wall framed with moldings featuring elaborate floral, leaf, or geometric carvings. The detailed craftsmanship creates shadows and highlights, emphasizing the artistry. Painted in rich colors or gilded finishes, these moldings become focal points that tell a story of craftsmanship and opulence. They invite the eye to explore every curve and motif.
Opt for highly detailed, ornate carvings for a Victorian or Baroque ambiance. Simplify with more restrained motifs for a modern or transitional decor. Use contrasting finishes—glossy, matte, or metallic—to enhance the carved details. Seasonal accents include gilding or weathered effects to evoke antique charm.
Choose a moldings profile with carved details that suit your space. Measure and cut carefully, especially at corners, to preserve the details. Secure with nails or adhesive, ensuring the intricate carvings are not damaged in the process. Fill gaps and sand gently, then paint or gild to highlight the carvings. This project may require skilled craftsmanship or a professional touch.
Highlight carved details with metallic or glossy finishes for extra richness. Incorporate decorative elements like tassels, fabric accents, or small sculptural pieces for added flair. Use contrasting paint schemes to make the carvings stand out or replicate antique finishes for a vintage feel. Personalize with monograms or custom motifs.
Decorative carved moldings bring a high level of artistry and elegance to your home. They’re ideal for creating a luxurious, vintage, or eclectic ambiance. With patience and care, you can master this craft and enjoy a truly unique, artistic wall feature. Your home will radiate craftsmanship and style—are you ready to elevate your decor?
14. Floating Molding for a Contemporary, Clean Look
Want a sleek, modern finish that looks effortlessly stylish? Floating molding offers just that—clean lines with a subtle, almost invisible mounting. It’s perfect for contemporary spaces that favor minimalism and simplicity. If your walls need a subtle upgrade, this is a smart, understated option.
Recommended Products to replicate this idea
| # | Preview | Product | |
|---|---|---|---|
| 1 |
|
Frienda 16.4 ft x 1/2 Inch Peel and Stick Baseboard Molding Trim Flexible Self-Adhesive Wall Base... | Check Latest Price |
| # | Preview | Product | |
|---|---|---|---|
| 1 |

|
DOITOOL Adjustable Cabinet Toe Kick Clips Cabinet Leg Leveler Feet Plastic Plinth Clips for Kitchen... | Check Latest Price |
Picture a narrow, floating strip running along the wall’s edge, painted the same color as the wall for invisibility. The floating profile creates a shadow gap that adds depth without bulk, giving the illusion of a levitating border. The effect is crisp and modern, emphasizing the room’s clean lines and spacious feel. It’s like a subtle frame that defines space without drawing attention.
Use thin profiles for a barely-there look, or slightly thicker versions for more presence. Match the molding color to the wall for a seamless look, or contrast with darker shades for a defined border. Combine with other modern elements like glass, metal, or textured walls for a layered aesthetic. Seasonal updates might include changing paint colors or adding LED backlighting.
Measure carefully and cut the moldings with a precision saw, ensuring tight, seamless joints. Attach using hidden mounting clips or strong adhesive designed for floating installations. Fill any gaps with paintable caulk, then sand and paint to match the wall. The key is a clean, level installation that emphasizes the floating effect. It’s a project suitable for DIYers comfortable with precise measurements.
Add LED strip lights behind the moldings for a subtle glow. Use contrasting colors or textures on the wall or molding to enhance visibility. Incorporate decorative wall panels or textured paint for added depth. Personalize with small decorative elements that complement the sleek aesthetic—think minimal hardware or sculptural accents.
Floating molding creates a contemporary, refined look that can elevate any modern interior. It’s a subtle upgrade that makes a big impact without clutter. Mastering this technique boosts your confidence in clean, minimalist design. Ready to give your walls a sleek, modern edge?
15. Faux Board and Batten with Molding for a Textured, Elegant Style
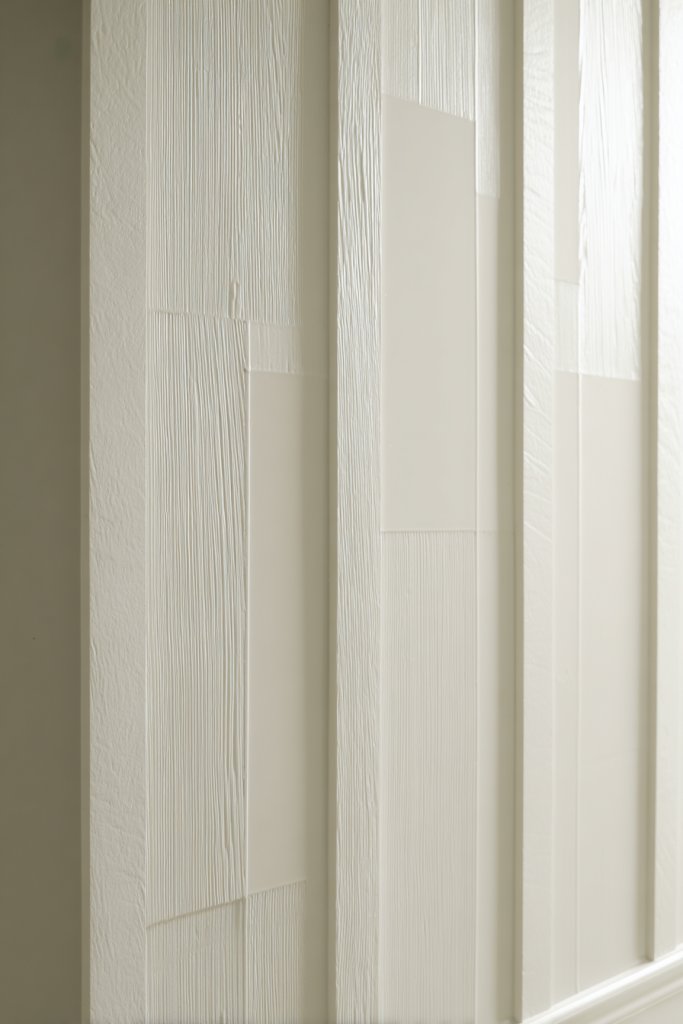
Looking for a sophisticated wall treatment that’s easy on your wallet? Faux board and batten offers a textured, elegant look without the hassle of real wood panels. It’s a popular choice for adding architectural interest while maintaining affordability. If your walls feel dull, this project will bring instant charm.
Recommended Products to replicate this idea
| # | Preview | Product | |
|---|---|---|---|
| 1 |
|
Art3d Premade Board and Batten Paintable Wainscoting Kit, MDF Accent Wall Panel for Kitchen Bedroom... | Check Latest Price |
| # | Preview | Product | |
|---|---|---|---|
| 1 |
|
Art3d Pre-Cut Wall Molding Set of 6 pcs, Ready-to-Assemble Wainscoting Panels for Interior Wall... | Check Latest Price |
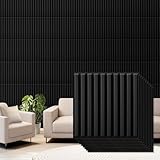
Imagine vertical strips of MDF or MDF-look panels arranged in a grid pattern, painted in crisp white or bold colors. The alternating wide and narrow sections create a rhythmic visual pattern that adds depth and dimension. Shadows cast by the battens enhance the texture, making the walls feel more dynamic and inviting. It’s like giving your walls a tailored, crafted appearance.
Use different widths and colors to customize the look—perhaps darker battens on a light wall or vice versa. For a more rustic effect, stain or distress the panels. Combine with other textures like wallpaper or textured paint for layered interest. Seasonal updates could include painting the battens in metallic or glitter finishes for special occasions.
Start by dividing your wall into sections and marking the battens’ positions. Cut MDF strips to size, then attach with nails or adhesive, ensuring they’re plumb and evenly spaced. Fill nail holes, sand smooth, and paint or stain. For a clean look, caulk the edges where the battens meet the wall. This project is beginner-friendly and quick to complete.
Personalize with contrasting colors, metallic paints, or textured finishes. Add decorative accents like small shelves or hooks within the panels. Incorporate fabric or wallpaper behind the battens for added pattern. Use LED lighting or uplights to accentuate the textured surface at night.
Faux board and batten is a versatile, stylish way to add sophistication and texture. It works well in entryways, dining rooms, or bedrooms, adaptable to many decor styles. Achieving this look boosts your confidence in DIY projects and elevates your home’s interior. Ready to add depth and elegance?
16. Curved or Arched Molding for a Soft, Romantic Ambiance
Want to soften your space and create a dreamy, romantic vibe? Curved or arched molding introduces elegant, flowing lines that break away from straight edges. It’s perfect for bedrooms, sitting areas, or any space where you want a gentle, inviting feel. If your rooms are too angular, this feature can add a touch of whimsy.
Recommended Products to replicate this idea
| # | Preview | Product | |
|---|---|---|---|
| 1 |

|
Leinuosen Flexible Molding Trim Peel and Stick for Walls 10ft Decorative Bead Pearl DIY Wall Trim... | Check Latest Price |
| # | Preview | Product | |
|---|---|---|---|
| 1 |

|
Nuanchu 4 Set Arch MDF Wall Molding Kit 118 x 31.5 Inch Pre-Cut Arch Wainscoting Panel Board and... | Check Latest Price |
Visualize a gentle arch framing a doorway or accentuating a curved wall. The flowing shape catches the light differently, creating subtle shadows that enhance the room’s softness. Painted in pastel shades or metallics, it adds a luxurious touch that feels both delicate and refined. The curves soften the geometry, making your space feel more welcoming and less rigid.
Choose from soft, shallow arches for a modern look or more elaborate, ornate curves for a vintage or romantic style. Pair with scalloped or floral details for added charm. Use contrasting colors to emphasize the curves or blend them for a seamless, subtle effect. Seasonal accents could include fabric drapes or floral motifs.
Design your arch carefully, either by using templates or custom-cutting plywood or MDF. Secure the curved molding with nails or adhesive, ensuring it follows your template precisely. Fill gaps and smooth the surface before painting or finishing. Choose durable finishes for arches that frame doorways or extend across walls. This project may require some carpentry skills but is achievable with patience.
Highlight the curves with contrasting or metallic paints. Add decorative elements like floral appliques or textured finishes to enhance the romantic feel. Incorporate soft lighting or candles for ambience. Personal touches like monograms or painted patterns inside the arches can make the feature unique.
Curved and arched moldings add a soft, elegant touch that can transform your space into a romantic retreat. They work beautifully in vintage, boho, or contemporary interiors. With some planning and precision, you can craft a dreamy feature that impresses and comforts. Ready to soften your walls?
17. Metallic Accents on Molding for a Touch of Glamour
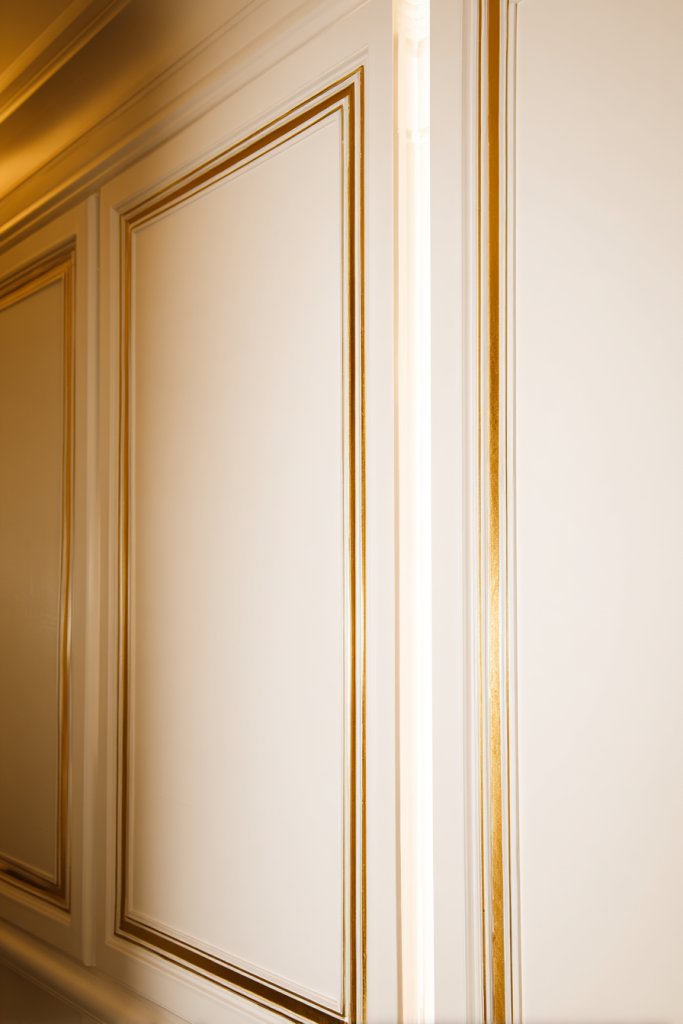
Looking to add a dash of glamour and sparkle? Metallic accents on molding instantly elevate your decor, making your walls shimmer with sophistication. It’s a simple way to introduce luxury without a complete overhaul. If your space feels dull or flat, a touch of metallic can turn it into a showstopper.
Recommended Products to replicate this idea
| # | Preview | Product | |
|---|---|---|---|
| 1 |

|
Rub n Buff Wax Metallic Antique Gold, Rub and Buff Finish, 0.5-Fluid Ounce, Pixiss Blending and... | Check Latest Price |
| # | Preview | Product | |
|---|---|---|---|
| 1 |

|
SICCOMA Metallic Gold Mirror Border Trim Peel and Stick PVC Wall Molding Trim Tape Self Adhesive... | Check Latest Price |
Imagine a traditional crown molding painted with gold or silver leaf, catching the light with every movement. The reflective surface contrasts beautifully against matte walls, creating a rich, layered effect. Highlights and shadows dance across the detailed carvings, adding depth and intrigue. It’s like giving your home a jewelry upgrade—subtle but stunning.
Choose from gold, silver, bronze, or metallic paints to match your existing decor. Use metallic accents on crown moldings, picture frames, or even wall panels for a cohesive look. Pair with plush textiles, velvet cushions, or glossy finishes for a luxurious feel. Seasonal updates might include adding metallic paint to other trim or furniture for a coordinated theme.
Select a molding profile that suits your style and prepare it by sanding and priming. Apply metallic paint or leaf with a brush, foam roller, or adhesive sheet, depending on the finish. Seal with a clear protective coat for durability. Use painter’s tape to keep edges sharp and avoid overspray. This project requires patience but results in high-impact glamour.
Combine metallic finishes with textured paints or patterns for more visual interest. Add decorative accents like metallic studs, appliques, or inlays. Use lighting—like spotlights or uplights—to enhance the shimmer and create a dynamic ambiance. Personalize by mixing metals for a layered, eclectic look.
Metallic accents add instant luxe and sophistication to any decor style, from art deco to modern glam. They’re easy to incorporate and can be changed out seasonally or for special events. With a little effort, you can achieve a high-end look that impresses guests and elevates your home’s style. Ready to shine?
18. Two-Tone Molding and Wall Paint for a Striking Visual Contrast
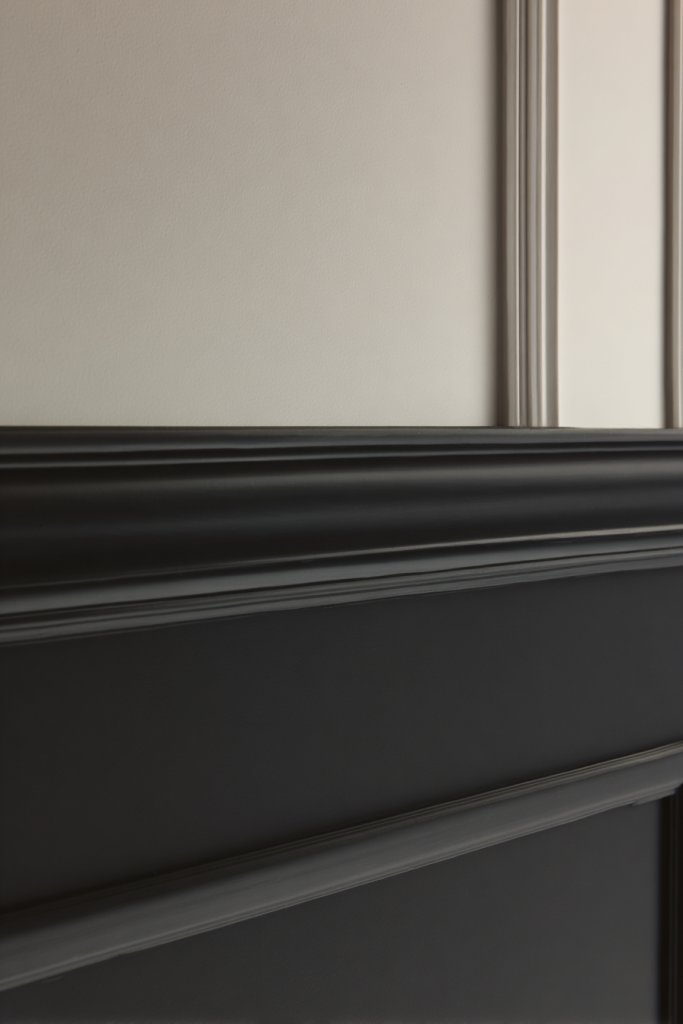
Want your walls to stand out and make a bold statement? Two-tone molding and wall paint create a striking visual contrast that draws the eye and adds depth. It’s an easy way to add personality and modern flair to any room. If you’re tired of plain, monochrome walls, this technique is a game-changer.
Recommended Products to replicate this idea
| # | Preview | Product | |
|---|---|---|---|
| 1 |

|
ScotchBlue PROSharp Painter's Tape 2 Inch Wide (1.88 in x 60 yd) 1 Roll Blue Tape Protects Surfaces... | Check Latest Price |
| # | Preview | Product | |
|---|---|---|---|
| 1 |
|
Art3d Pre-Cut Wall Molding Set of 6 pcs, Ready-to-Assemble Wainscoting Panels for Interior Wall... | Check Latest Price |
Imagine a wall painted in a deep, rich hue with a crisp, lighter-colored molding framing the top or bottom. The sharp contrast emphasizes the molding’s shape and creates a layered, dimensional effect. The visual break between colors adds sophistication and can define different areas within open-plan spaces. It’s like creating a mural that’s all about the colors and lines.
Use bold, contrasting colors for maximum impact or subtle shades for a refined look. Consider painting the wall one color and the molding another, or splitting the wall horizontally with two different hues. Seasonal updates include swapping colors for holidays or special occasions. You can also experiment with textured or metallic paints for added richness.
Start with careful measurements and tape off sections for clean lines. Paint the walls first, then apply painter’s tape along the molding edges. Paint the molding in your chosen contrasting color, using a small brush for sharp lines. Remove tape before the paint dries to prevent smudging. Finish with a clear coat or touch-ups as needed. This project is straightforward for DIY enthusiasts.
Create custom patterns or stripes within the two-tone scheme for a more dynamic look. Use contrasting colors for the molding and wall or experiment with metallics for extra shine. Incorporate decorative elements like stenciled patterns or decals. Lighting can also enhance the contrast and highlight the color differences.
Two-tone walls transform your space into a modern, artistic environment that reflects your personality. It’s a flexible technique adaptable to any decor style, from minimalist to eclectic. The bold contrast adds a layer of sophistication and confidence in your design choices. Ready to play with color?
19. Layered Moldings with Different Heights for Architectural Drama
Craving a space that feels rich and architecturally interesting? Layered moldings with varying heights create a dramatic, multi-dimensional look that transforms flat walls into artful features. It’s perfect for those who want to add depth and sophistication without a complete renovation. If your walls lack character, this technique can change everything.
Recommended Products to replicate this idea
| # | Preview | Product | |
|---|---|---|---|
| 1 |
|
Art3d Pre-Cut Wall Molding Set of 6 pcs, Ready-to-Assemble Wainscoting Panels for Interior Wall... | Check Latest Price |
| # | Preview | Product | |
|---|---|---|---|
| 1 |
|
Art3d 10-Pack 47Ft White Ceiling Crown Molding Trim, High Impact Polystyrene Decorative Ceiling... | Check Latest Price |
Imagine a wall with a series of moldings stacked at different elevations, creating a stepped or tiered effect. The varying heights cast different shadows, emphasizing the layered structure. Painted in contrasting or matching colors, this setup creates a bold, textured backdrop that commands attention. It’s like turning your wall into a sculptural masterpiece.
Use a mix of profiles—wide, narrow, ornate, or simple—to add complexity. For a modern look, keep the layers monochrome but vary their heights. For a vintage or eclectic style, mix ornate and simple profiles in different finishes. Seasonal updates could involve changing colors or adding decorative accents at different levels.
Sketch your layered design and measure precisely. Cut each molding piece to size, ensuring the heights differ as planned. Attach each layer securely with nails or adhesive, starting from the bottom. Fill gaps and seams, then sand for a smooth finish. Paint or finish each layer separately, emphasizing the differences in height for maximum impact. This project requires patience and attention to detail.
Highlight the layered effect with contrasting colors or metallic finishes. Add small decorative elements like medallions or rosettes at different levels. Incorporate lighting—such as uplights or spotlights—to cast shadows that enhance the three-dimensionality. Personalize the layers with patterns, textures, or faux finishes.
Layered moldings redefine your walls as architectural statements that add drama and depth. They’re versatile enough to suit various styles, from classical to contemporary. Mastering this look boosts your confidence in creating complex, layered designs. Ready to add height and character?
20. Molding with Inlay Wood or Veneer for a Rich, Luxe Finish
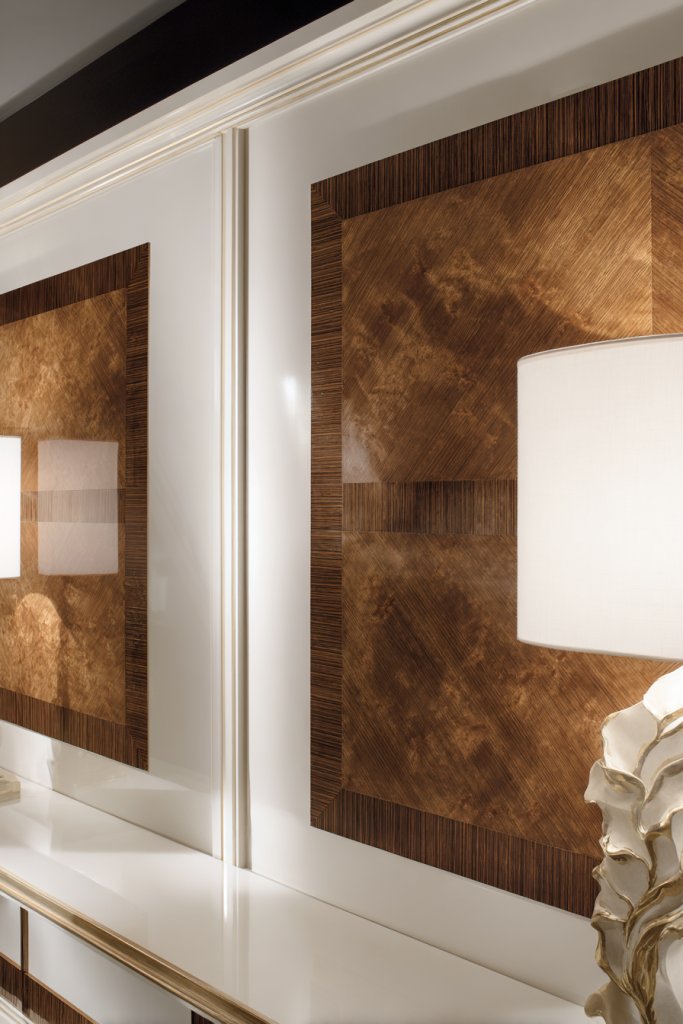
Searching for a way to add a luxe, upscale feel to your walls? Moldings with inlay wood or veneer provide a rich, textured finish that screams sophistication. They’re perfect for creating a statement piece that elevates your entire decor. If you love the look of fine craftsmanship, this is a project worth exploring.
Recommended Products to replicate this idea
| # | Preview | Product | |
|---|---|---|---|
| 1 |

|
Maple Wood Veneer Sheet - 9ft x 10in, Flexible Natural Wood Skin for DIY Enthusiasts, Woodworkers,... | Check Latest Price |
| # | Preview | Product | |
|---|---|---|---|
| 1 |
|
Art3d Pre-Cut Wall Molding Set of 6 pcs, Ready-to-Assemble Wainscoting Panels for Interior Wall... | Check Latest Price |
Visualize a molding embedded with contrasting veneer strips or intricate inlay patterns, creating a mosaic-like effect. The natural grain of the wood adds warmth and depth, catching light differently depending on the angle. The combination of textures and finishes results in a luxurious, high-end appearance. It’s like framing your walls with wearable art.
Select from various wood species, veneers, or inlays—think ebony, maple, or exotic woods—to match your decor. Use geometric, floral, or abstract patterns to customize the look. Pair with other natural textures like stone or linen for a layered, organic vibe. Seasonal updates include changing inlay patterns or finishing techniques.
Begin with precise measurements and cutting the molding with a fine saw. Inlay or veneer strips are glued into grooves or recesses cut into the molding. Secure with clamps and let dry thoroughly. Sand and finish with stain, oil, or lacquer to enhance the grain and protect the surface. Installation requires patience but results in a stunning, luxurious finish.
Accent the inlay with contrasting stains or finishes. Add metallic or glossy topcoats for extra richness. Incorporate personalized patterns or initials into the veneer design. Use lighting to highlight the inlay details and create a warm, inviting glow. This feature becomes a true centerpiece of your decor.
Molding with inlay wood or veneer elevates your interior to a bespoke level, blending craftsmanship with design. It’s a statement of quality and taste that can impress guests and increase your home’s value. With practice, you’ll master a technique that produces gallery-quality results. Ready to add a touch of luxury?
21. Beaded Ceiling Molding to Match Wall Details and Enhance Room Height
Ever feel like your ceilings are a little too low or your walls lack a finishing touch? Beaded ceiling molding creates a cohesive, elegant look that elevates the entire room. It adds a subtle decorative detail that draws the eye upward, making spaces feel taller and more refined. If your ceilings are plain, this small addition makes a big difference.
Recommended Products to replicate this idea
| # | Preview | Product | |
|---|---|---|---|
| 1 |

|
JSIWOTH 12 Pcs Beaded Wood Trim, Half Round Wood Beads Molding Strips, 15.75" Unfinished Wooden... | Check Latest Price |
| # | Preview | Product | |
|---|---|---|---|
| 1 |

|
Colingmill 4 Pcs Ceiling Molding Kit Corners Murals Trim French Style Accent Wall Decor for Interior... | Check Latest Price |
Imagine a soft bead pattern running along the ceiling edge, painted in a complementary color to the walls. The rounded beads catch the light, creating tiny highlights that add texture. The molding’s continuous line guides the eye upward, giving the illusion of increased height. It’s like giving your ceiling a delicate frame that enhances the room’s overall elegance.
Opt for small, uniform beads for a subtle look or larger, more ornate designs for a statement. Match the bead color to the wall or choose a contrasting finish for emphasis. Combine with crown molding or other ceiling details for layered interest. Seasonal updates could include painting the beads in metallic or glitter paints for special occasions.
Measure around the room’s perimeter and cut the beaded molding to length. Secure with adhesive or nails, keeping beads aligned and even. Fill in nail holes and seams, then sand for smoothness. Paint or stain to match or contrast with your walls. The project is manageable for DIYers and adds a refined, finished touch.
Personalize by painting the beads in metallic or bold hues. Add small decorative accents like tiny tassels or metallic caps at the ends. Use lighting—such as uplights or cove lighting—to highlight the beaded texture. Incorporate other ceiling details, like medallions or patterned panels, for a layered, sophisticated look.
Beaded ceiling molding subtly elevates your room’s elegance and height. It’s a timeless detail that complements various decor styles—from coastal to classic. Mastering this small project enhances your confidence in DIY upgrades. Ready to give your ceilings a delicate, refined frame?
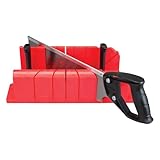
22. Mitered Corner Molding for Seamless Transitions and a Polished Look
Tired of ugly, jagged corners where moldings meet? Mitered corner molding ensures clean, seamless transitions that look professionally finished. It’s a small detail that significantly enhances the overall aesthetic. If you want your moldings to look flawless, mastering mitered joints is essential.
Recommended Products to replicate this idea
| # | Preview | Product | |
|---|---|---|---|
| 1 |
|
CRAFTSMAN Mitre Saw, 12-Inch Saw & Clamping Box (CMHT20600) | Check Latest Price |
| # | Preview | Product | |
|---|---|---|---|
| 1 |

|
Endurathane Universal Inside Corner for Moulding Profiles, 3 1/8"P x 3 1/8"W x 7 3/4"H (Less than 3... | Check Latest Price |
Visualize two pieces of molding cut at 45-degree angles, fitting perfectly together at corners. The precise miter creates a seamless, continuous line that tricks the eye into seeing a single piece. Painted in matching or contrasting colors, the joints appear almost invisible, giving your walls a high-end, polished appearance.
Use for crown molding, baseboards, or chair rails. Larger or more ornate moldings require careful mitering for clean joints. For a subtle look, opt for simple profiles; for more decorative moldings, precise cuts are even more critical. Seasonal updates include painting or gilding to match your decor.
Measure and mark your cuts carefully, using a miter saw for accuracy. Test fit the pieces before nailing or gluing to ensure perfect alignment. Fill any gaps with caulk or wood filler and sand smooth. Paint or finish the moldings after installation for a seamless look. Practice makes perfect—don’t rush this step.
Highlight the joints with contrasting paint or metallic accents for visual interest. Add decorative corner blocks or rosettes for a more ornate effect. Incorporate lighting or contrasting colors to emphasize clean, sharp lines. Personalize your corners with custom carvings or painted motifs.
Mastering mitered joints results in a professional, seamless finish that elevates your decor. It’s a fundamental skill that pays off in many projects—baseboards, crown moldings, and more. With patience and precision, you can achieve a flawless look that impresses everyone. Ready to perfect your corners?
23. Molding with Integrated LED Strip Lighting for a Soft, Ambient Glow
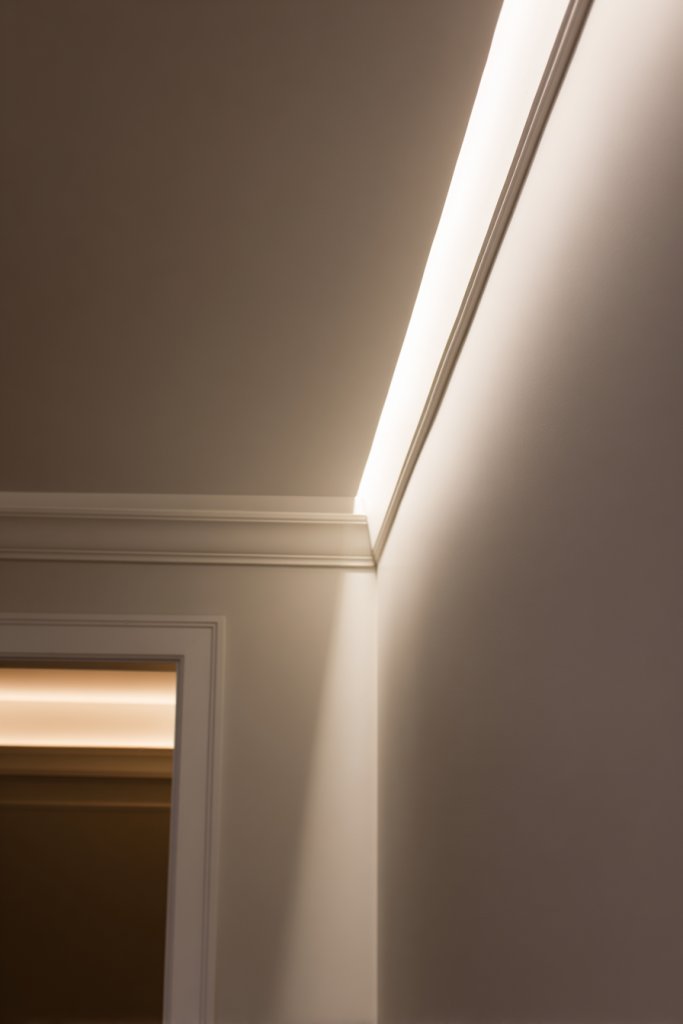
Want to add a cozy, modern ambiance without cluttering your space? Molding with integrated LED strip lighting combines function with style. It provides a soft, ambient glow that enhances the mood and highlights architectural details. If your lighting is dull or uneven, this upgrade can create a stunning atmosphere.
Recommended Products to replicate this idea
| # | Preview | Product | |
|---|---|---|---|
| 1 |

|
Pushglossy 9Pcs 47.24″(Total 35.4 Ft) Ceiling Crown Molding with LED Duct Kit for Seamless Ambient... | Check Latest Price |
| # | Preview | Product | |
|---|---|---|---|
| 1 |
|
Govee Warm White LED Strip Lights, Bright 300 LEDs, 3000K Dimmable Light Strip 16.4ft with Control... | Check Latest Price |
Picture a sleek molding installed along the ceiling or wall edge, with hidden LED strips embedded inside. The diffused light softly illuminates the room, creating a warm, inviting glow. The molding’s clean lines keep the look minimalist, while the lighting adds a layer of sophistication. It’s like giving your walls their own gentle, luminous frame.
Choose from different profiles—slim, wide, or ornate—to match your decor. Use warm white or color-changing LEDs to set different moods. Install behind crown moldings, wall panels, or along ceiling edges for a seamless effect. Seasonal updates include changing light colors or dimming options for special occasions.
Select molding profiles with built-in channels or space for LED strips. Secure the molding with nails or adhesive, ensuring the LED wiring is hidden inside. Connect the strips to a power source and configure dimming or color controls. Seal the edges and test the lighting before finalizing the paint or finish. This project requires some electrical knowledge but yields high-impact results.
Personalize with color-changing LEDs or smart controls to sync with music or routines. Use diffusers or frosted covers to soften the glow further. Add decorative elements like metallic accents or textured finishes to complement the lighting. Incorporate remote controls or voice commands for convenience.
Integrated LED lighting turns your walls into dynamic, mood-enhancing features. It’s a modern upgrade that combines style and function, perfect for creating cozy or dramatic effects. With some planning, you can master this tech-savvy project and elevate your home ambiance. Ready to glow differently?
24. Custom Molding Designs with Unique Patterns for Personalized Elegance
Tired of cookie-cutter walls that lack personality? Custom molding with unique patterns allows you to craft a truly one-of-a-kind space. It’s a chance to showcase your style and creativity while adding architectural interest. If you want your home to stand out, this is the ultimate DIY challenge.
Recommended Products to replicate this idea
| # | Preview | Product | |
|---|---|---|---|
| 1 |
|
Art3d Pre-Cut Wall Molding Set of 6 pcs, Ready-to-Assemble Wainscoting Panels for Interior Wall... | Check Latest Price |
| # | Preview | Product | |
|---|---|---|---|
| 1 |
|
À LA MAISON CEILINGS CM-ICB Crown Molding Inside Corner Block Medium - 3.5 x 3.5 x 11.25 Inches... | Check Latest Price |
Imagine a wall framed with a bespoke pattern—maybe a series of interlocking geometric shapes, floral motifs, or personalized initials. The moldings can be carved, layered, or textured to create a tactile experience. Painted in your favorite colors or finishes, they transform blank walls into storytelling canvases that reflect your personality. It’s a statement of originality and craftsmanship.
Design your pattern digitally or sketch it out, then cut the moldings accordingly. Use a mix of profiles—flat, ornate, beveled—to add complexity. Incorporate elements like inlays or layered profiles for more depth. Seasonal or thematic updates include changing colors or adding decorative accents like appliques or motifs.
Create a detailed template or stencil for your pattern. Cut your moldings precisely, and secure them with nails or adhesive, following your design. Fill gaps and seams, then sand for a smooth finish. Paint or finish the moldings with your chosen colors or textures. This project demands patience and precision but offers a bespoke result.
Add embellishments like metallic or glitter finishes, or incorporate small sculptural elements. Use lighting to highlight the pattern or paint sections with metallic or contrasting colors for visual pop. Personalize by engraving or etching initials, dates, or symbols into the moldings. The result is a truly personalized feature.
Custom patterned moldings turn your walls into artwork that tells your story. They add a level of craftsmanship that’s impressive and unique. With dedication, you can master this creative process and enjoy a home that’s truly yours. Ready to make your walls a masterpiece?
Conclusion
From intricate crown moldings to sleek paneling and creative accent designs, the ideas shared here showcase the endless ways to enhance your walls with elegance. Don’t hesitate to experiment with different styles and finishes to find what best complements your home. Embrace these ideas and turn your walls into beautiful works of art—your dream space is just a project away!