I have been, or can be if you click on a link and make a purchase, compensated via a cash payment, gift, or something else of value for writing this post. As an Amazon Associate, I earn from qualifying purchases. Please read my full Affiliate Disclosure for more information.
Imagine transforming a tiny kitchen into a space that feels both functional and inviting—welcome to the world of tiny kitchen ideas! These clever tips and tricks are gaining popularity because they prove that size isn’t everything; with the right approach, even the smallest kitchens can be optimized for efficiency and style.
In this article, you’ll uncover a variety of innovative ideas designed to maximize every inch of your compact cooking space. From smart storage solutions to space-saving layouts, these tips will inspire you to make the most of your tiny kitchen and turn it into your favorite spot at home.
1. Optimize Vertical Storage with Hanging Racks and Hooks
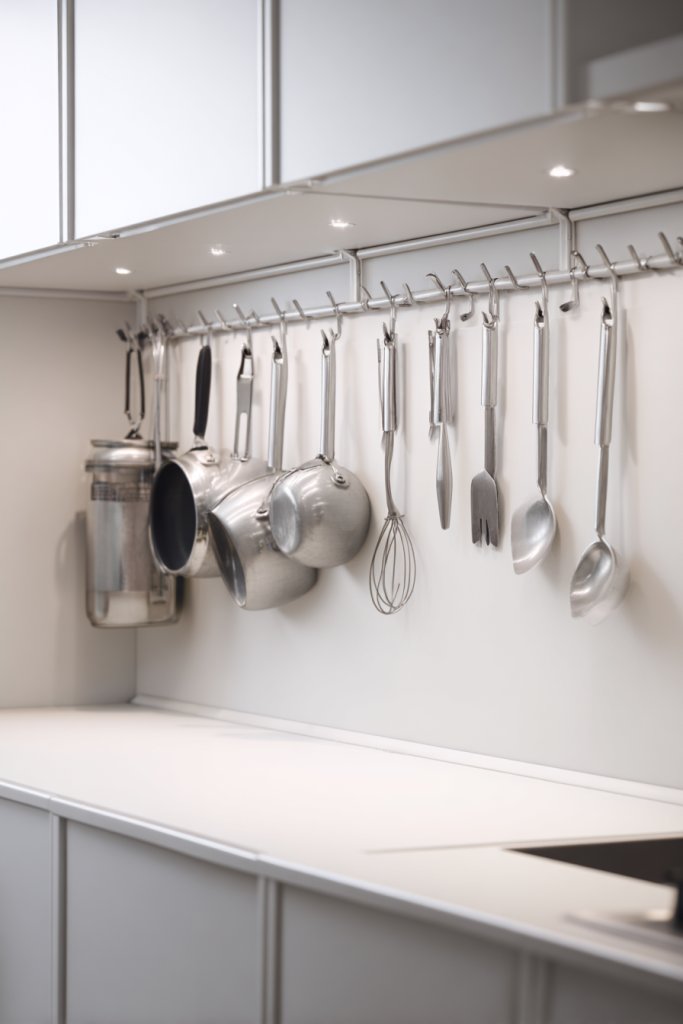
Ever struggle with cluttered countertops and cramped cabinets? Tiny kitchens often feel like they lack enough storage space for all your utensils, pots, and pans. The constant juggling makes cooking less enjoyable and more frustrating. The good news? Vertical storage solutions can turn those wasted wall spaces into organized, accessible areas.
Recommended Products to replicate this idea
| # | Preview | Product | |
|---|---|---|---|
| 1 |

|
Cooks Standard Wall Mounted Wooden Pot Rack, 36 by 8-Inch | Check Latest Price |
| # | Preview | Product | |
|---|---|---|---|
| 1 |

|
YiZhi Adhesive Wall Hooks Rack Kitchen Rail, Space Saving Utensil Holder No Drilling Wall Mounted... | Check Latest Price |
Imagine sleek metal hooks hanging from a painted wall, holding shiny pots and colorful spatulas. Alongside, narrow racks display a collection of hanging ladles and measuring spoons, all within arm’s reach. The textured wall behind adds depth, while the overall layout feels both modern and functional. The space transforms from chaotic to charming, with everything visible and easy to grab.
You can customize hanging racks with rustic wood accents for a farmhouse vibe or go minimalist with stainless steel. For seasonal flair, swap out hooks with themed or decorative ones. Use color-coordinated utensils for a playful touch or stick to monochrome for sleek consistency. This approach easily adapts to small apartments or tiny RV kitchens, making every inch count.
Start by selecting sturdy wall-mounted racks and rust-resistant hooks suitable for frequent use. Measure wall space to avoid overcrowding and plan for enough hooks for your collection. Install with a drill and appropriate anchors, ensuring they can support weight without sagging. Group similar items for visual harmony and efficiency. Regularly check for stability, especially in high-traffic areas.
Add decorative elements like patterned fabric or painted wooden plaques behind hooks for a personalized touch. Use labels or color-coded tags to organize utensils by type or frequency of use. Incorporate small baskets underneath for storing less-used items or accessories. This not only boosts functionality but also makes your tiny kitchen uniquely yours.
Vertical hanging solutions are a game-changer for maximizing tiny space. They keep counters clear and bring a sense of order to chaos. With a bit of creativity, your kitchen will feel more spacious and inviting. Ready to hang up your new organization system and transform your cooking space?
2. Incorporate Slim Pull-Out Pantry Shelves
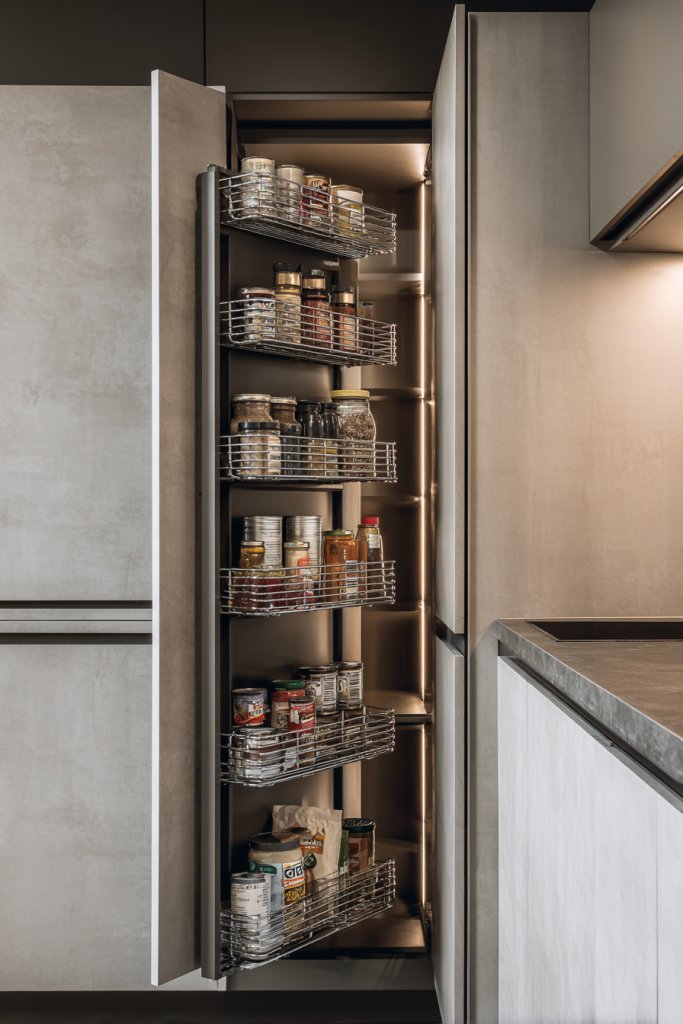
Does your tiny kitchen feel like a never-ending game of Tetris? Finding space for spices, canned goods, or snacks can be a nightmare. Cluttering up your counters or cramming items into awkward corners only adds to the chaos. Slim pull-out pantry shelves are the secret weapon to keep everything organized and within reach.
Recommended Products to replicate this idea
| # | Preview | Product | |
|---|---|---|---|
| 1 |
|
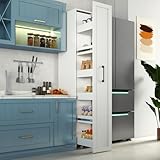
6-Tier Slim Mobile Shelving Cart with Wheels, Rolling Pantry Cabinet with 6 Baskets, Narrow Pull-Out... | Check Latest Price |
| # | Preview | Product | |
|---|---|---|---|
| 1 |

|
VASAGLE 4-Tier Slide-Out Storage Cart, Slim Kitchen Cart for Small Spaces, with Wheels, Handle,... | Check Latest Price |
Picture a narrow, discreet cabinet next to your stove, with sleek, sliding shelves filled with jars of herbs, stacks of canned beans, and tiny spice containers. When you pull the shelf out, everything is beautifully arranged and visible—no more digging or knocking over other items. The shelves glide smoothly, revealing a well-organized mini pantry that makes meal prep faster and less stressful.
Choose shelves with adjustable heights for flexible storage, or opt for pull-out drawers for smaller items like spices. For a modern look, go for matte black or white finishes that blend into your cabinets. In retro or rustic spaces, wood accents add warmth. Adapt these shelves for under-sink storage or inside deep cabinets, making every nook functional.
Measure your cabinet width and depth to find the perfect slim shelves. Install sturdy slides or rails with minimal tools, ensuring they can support weight without sagging. Organize items by frequency, placing everyday essentials at the front. Use clear containers or labels to enhance visibility. Regularly clean and rearrange for optimal efficiency.
Add small baskets or dividers within the shelves for grouping similar items. Customize with decorative liners or labels to match your kitchen aesthetic. Consider color-coded containers to quickly identify spices or snacks. These tweaks make your tiny pantry both functional and visually appealing.
Slim pull-out shelves turn tight spaces into treasure troves of organization. They simplify your cooking routine and reduce clutter. With a little effort, your tiny kitchen can feel just as spacious and efficient as a full-sized one. Ready to pull out some shelves and tidy up?
3. Use Multi-Functional Furniture like Fold-Down Tables

Ever wish your small kitchen had more workspace without sacrificing precious room? Cluttering countertops with prep stations or dining areas eats up space fast. Multi-functional furniture like fold-down tables offers a clever solution that saves space while adding versatility.
Recommended Products to replicate this idea
| # | Preview | Product | |
|---|---|---|---|
| 1 |

|
COSTWAY Wall Mounted Folding Table, 31.5" x 23.5" Drop-Leaf Floating Writing Desk for Small Spaces,... | Check Latest Price |
| # | Preview | Product | |
|---|---|---|---|
| 1 |

|
HOMCOM 55" Solid Wood Kitchen Table for 4-6 People, Oval Drop Leaf Tables for Small Spaces, Folding... | Check Latest Price |
Imagine a sleek wall-mounted table that folds down when needed and tucks away flush against the wall afterward. It’s perfect for quick breakfasts or meal prep, and when folded up, the space opens up for movement or other activities. The surface is smooth, with a durable finish, and the hardware blends seamlessly into your decor. It’s like a secret weapon in disguise.
Choose minimalist designs for a clean look or rustic wood for a cozy vibe. Some tables come with built-in storage or shelves underneath for utensils, cookbooks, or decorative items. For seasonal use, opt for lightweight, portable tables that can be moved outdoors or to other rooms. Adjust the size to fit your space and needs.
Secure a sturdy wall mount with appropriate anchors, ensuring it can handle the weight of your typical meal prep. When in use, unfold the table and lock it into place. Use high-quality hinges for smooth operation. Keep the surface clean and free of clutter when folded away. Regular checks ensure safety and functionality.
Add a colorful tablecloth or placemats to liven up the space for mealtime. Attach decorative hooks or small baskets on the sides for utensils or napkins. You can also paint or stain the table to match your decor, turning a practical piece into a statement element.
Fold-down tables turn a tiny kitchen into a multi-purpose hub without sacrificing style. They make cooking and dining more flexible, especially for entertaining guests. With this simple upgrade, your space feels larger and more functional—proof that small doesn’t mean limited.
4. Create a Corner Carousel for Lazy Susan Storage

Corner cabinets in tiny kitchens often become black holes for pots, pans, and spices. It’s frustrating to dig around for that one elusive item, wasting time and patience. A corner carousel—aka lazy Susan—can make these awkward spaces work for you instead of against you.
Recommended Products to replicate this idea
| # | Preview | Product | |
|---|---|---|---|
| 1 |
|
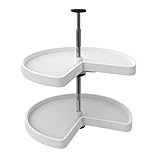
Rev-A-Shelf 2 Tier Kidney Cut Lazy Susan for Corner Base Cabinets, Plastic, 24" Double Shelf Swivel... | Check Latest Price |
| # | Preview | Product | |
|---|---|---|---|
| 1 |

|
2 Pack, 2 Tier 10" Turntable Lazy Susan Spice Organizer - Rotating Seasoning Rack Spinner for Pantry... | Check Latest Price |
Picture a rotating shelf tucked into the corner of your cabinet, filled with organized jars, small bowls, and utensils. Turn it smoothly, revealing everything at once—no more reaching or knocking things over. The carousel’s sleek design fits snugly into the corner, making the most of every inch while adding a touch of charm.
Opt for adjustable or tiered versions to customize height and capacity. Materials range from wire racks to solid wood or plastic, depending on your decor. For a modern look, choose matte finishes; for a rustic vibe, distressed wood works well. It adapts to corner spaces in pantry, cabinet, or countertop applications.
Measure your cabinet’s corner dimensions to select the right size. Install the carousel on a sturdy base or shelf, ensuring it spins smoothly without wobbling. Organize contents by type or frequency of use, and label sections if needed. Regularly clean and rotate items to keep everything accessible and fresh.
Decorate jars or containers with colorful labels or patterned wraps. Add small baskets or dividers within the carousel for better organization. Incorporate decorative accents like painted trims or handles to match your style, transforming storage into a design feature.
Lazy Susans maximize corner storage and reduce clutter. They make grabbing ingredients effortless, speeding up your cooking process. With this simple addition, your tiny kitchen becomes smarter and more efficient—proof that clever solutions make a big difference.
5. Add Under-Cabinet Lighting for Brightness and Visibility

Ever feel like your tiny kitchen is a cave once the lights go out? Poor lighting hampers visibility and creates a gloomy atmosphere. Under-cabinet lighting brightens your workspace instantly and makes cooking safer and more enjoyable.
Recommended Products to replicate this idea
| # | Preview | Product | |
|---|---|---|---|
| 1 |
|
JUSJUBR Plug-in Under Cabinet Lighting, 2pcs 12 Inch Dimmable Closet Light, Cold White 6000K... | Check Latest Price |
| # | Preview | Product | |
|---|---|---|---|
| 1 |

|
Gritin 10.2inch Under Cabinet Lighting Rechargeable 2 Pack- 3 Color Temps&5 Level Brightness, Super... | Check Latest Price |
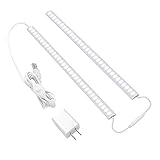
Imagine a strip of warm LED lights installed beneath your upper cabinets, casting a gentle glow over your countertop. The light highlights your chopping, mixing, and plating, making every task easier. The sleek, tape-like fixtures blend seamlessly, adding a modern touch without cluttering your space.
Choose from LED strip lights, puck lights, or thin linear fixtures based on your aesthetic. Warm whites create cozy atmospheres, while daylight LEDs boost visibility for detailed tasks. Some models are dimmable or color-changing, allowing you to set the mood or adapt to seasonal decor. Install in kitchens, laundry rooms, or workspaces for versatile lighting.
Measure the length of your cabinet undersides to select the appropriate lighting. Use an adhesive backing or mounting clips for easy installation—no wiring expertise needed. Connect to a power source, preferably with a switch or dimmer for control. Test the lighting before finalizing the placement, and hide wires along the edges for a clean look.
Add diffusers or frosted covers for softer light and reduced glare. Incorporate motion sensors or remote controls for convenience. Decorate the area with complementary finishes, like brushed nickel or matte black, to match your fixtures and hardware for a cohesive look.
Under-cabinet lighting transforms a dark, cramped space into a bright, inviting hub. It enhances safety and efficiency, making cooking feel more like a pleasure. Small upgrades like this prove that lighting can truly change your kitchen’s vibe—think of it as the spotlight your tiny kitchen deserves.
6. Use Clear, Stackable Containers for Pantry Organization
Is your pantry a jumble of mismatched bags, boxes, and cans? Finding what you need becomes a scavenger hunt, and clutter makes everything look chaotic. Clear, stackable containers offer a simple fix to bring order and visibility to your tiny kitchen storage.
Recommended Products to replicate this idea
| # | Preview | Product | |
|---|---|---|---|
| 1 |

|
Vtopmart 6 Pack Clear Stackable Storage Bins with Lids, Large Plastic Containers with Handle for... | Check Latest Price |
| # | Preview | Product | |
|---|---|---|---|
| 1 |
|
PRAKI Airtight Food Storage Containers Set with Lids - 24 PCS, BPA Free Kitchen and Pantry... | Check Latest Price |
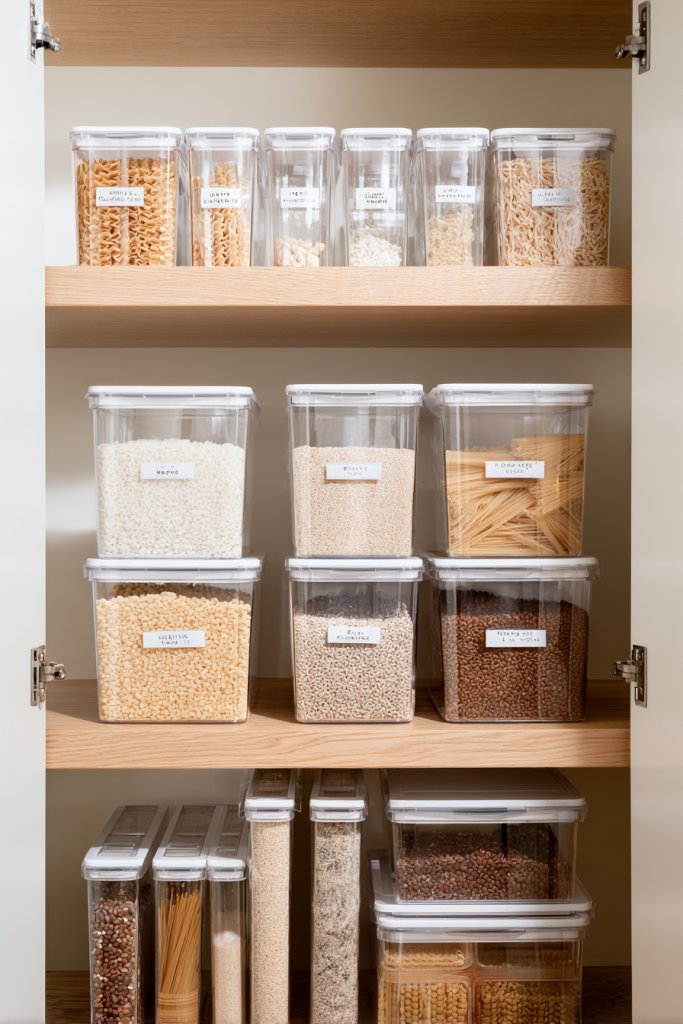
Envision uniform transparent containers neatly stacked on shelves, each labeled with contents like rice, pasta, or snacks. The clear material allows you to see exactly what’s inside, reducing the need to open every box. The uniform shape creates a tidy, streamlined appearance that maximizes space and makes the pantry feel more spacious.
Choose containers with airtight seals for freshness, or opt for decorative jars for a vintage look. Use different sizes to accommodate various items, and consider stacking or nesting for space efficiency. Match container colors or styles with your kitchen decor for a cohesive aesthetic. These containers work equally well in small fridge drawers or open shelving.
Sort your pantry items by category and transfer them into the containers. Label each with a label maker or adhesive tags for easy identification. Stack containers in a way that allows quick access to frequently used ingredients. Regularly check for expired items and clean the containers for hygiene. This system encourages neatness and reduces waste.
Decorate labels with fun fonts or colors to add personality. Use stackable risers or tiered inserts inside containers to maximize vertical space. Incorporate seasonally relevant themes or color schemes to refresh the look periodically. This approach keeps your pantry both functional and visually appealing.
Clear, stackable containers turn chaos into calm, making cooking more efficient. They help you keep track of supplies and reduce waste. With a little organization, your tiny kitchen will feel more open and inviting—proof that small changes make a big difference.
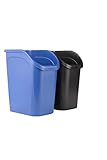
7. Incorporate Pull-Out Trash and Recycling Bins
Trash cans and recycling bins in tiny kitchens often take up valuable floor space and look unsightly. Having waste bins visible and accessible makes cleaning and disposal a hassle. Pull-out systems hide the mess while keeping everything within arm’s reach, maintaining a sleek look.
Recommended Products to replicate this idea
| # | Preview | Product | |
|---|---|---|---|
| 1 |

|
Rev-A-Shelf RV-18KD-18C S Double Pullout Trash Can for Kitchen Cabinets 35 Qt Garbage Recycling Bin... | Check Latest Price |
| # | Preview | Product | |
|---|---|---|---|
| 1 |
|
Rubbermaid Undercounter Small Trash Can, 2 Pack Blue and Black for Recycling/Waste, 9.4-Gallon, Fits... | Check Latest Price |
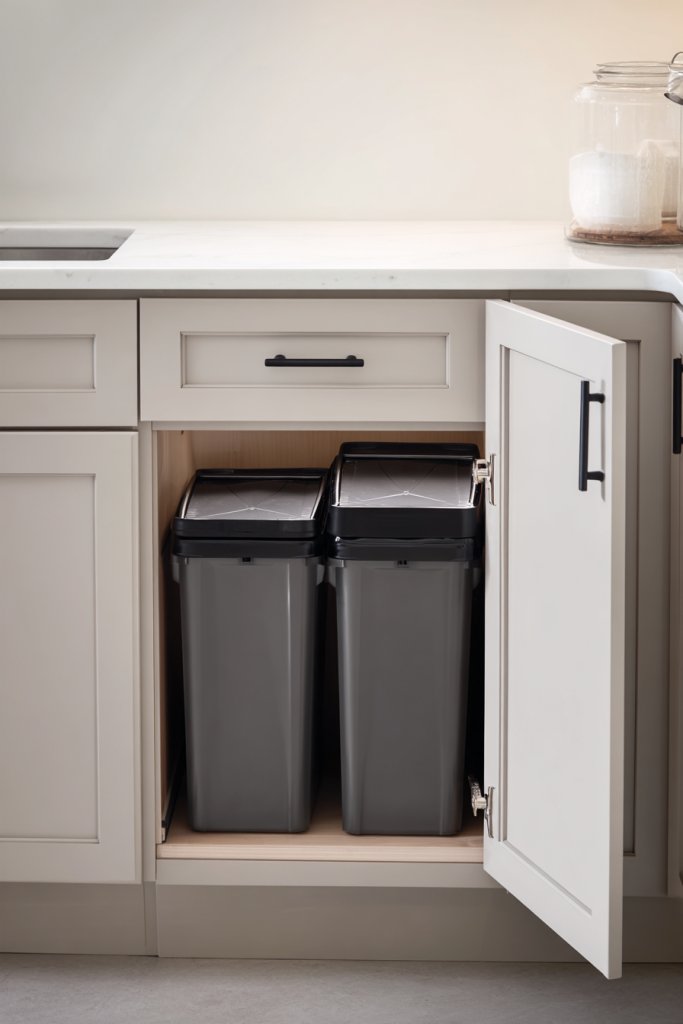
Imagine a discreet cabinet under your sink with a slide-out tray housing separate bins for trash and recyclables. When needed, you pull out the tray, which fits snugly against the cabinet opening. The bins are concealed when not in use, maintaining a clean, clutter-free aesthetic, yet accessible when you need to toss or sort waste.
Select slim, removable bins that fit your cabinet dimensions. Use color-coded or labeled bins to differentiate waste types easily. For added style, choose containers with sleek finishes or matching cabinet hardware. This system works well in under-sink cabinets or custom-built pantry units, adapting seamlessly to your space.
Measure your cabinet opening and select pull-out hardware compatible with your cabinet thickness. Install the slides on the inside of the cabinet, then attach the bins securely. Ensure the system glides smoothly and is easy to remove for cleaning. Regularly empty and rinse the bins to prevent odors. Consider a lid or cover for odor control if needed.
Decorate the bins with labels or themed stickers to add personality. Use odor-absorbing liners or charcoal filters inside the bins for freshness. Incorporate small hooks inside the cabinet door for cleaning supplies or trash bag holders. This keeps everything organized and stylish.
Pull-out trash systems declutter your kitchen and streamline waste management. They make cleaning easier and keep your tiny space looking tidy. Small adjustments like this show how smart storage solutions can transform your entire cooking area.
8. Opt for Compact, Stackable Appliances

Counter space in tiny kitchens feels like a precious commodity you don’t want to waste. Bulky appliances clutter your countertops and make cooking a chore. Compact and stackable appliances are a lifesaver, freeing up space while still giving you all the features you need.
Recommended Products to replicate this idea
| # | Preview | Product | |
|---|---|---|---|
| 1 |

|
Elite Gourmet ETO236 Personal Compact 2 Slice Countertop Toaster Oven with 15 Minute Timer &... | Check Latest Price |
| # | Preview | Product | |
|---|---|---|---|
| 1 |

|
Hamilton Beach Stack & Snap 4-Cup Mini Food Processor & Vegetable Chopper, 250 Watts, for Slicing,... | Check Latest Price |
Picture a small microwave stacked atop a mini toaster oven, both fitting neatly on a narrow countertop. A slim coffee maker doesn’t take up much room but brews your favorite morning drink. These units are sleek, with modern finishes, and designed to maximize vertical space, creating a clean, clutter-free surface.
Choose appliances with multi-functionality, like a microwave with convection features or a toaster with a built-in grinder. Opt for stackable sets that can double or triple your cooking options without expanding your footprint. Select colors or finishes that match your kitchen decor, from matte black to stainless steel.
Measure your available counter and cabinet space before purchasing. Look for compact models with good reviews on durability and ease of use. Arrange appliances in a logical workflow, keeping frequently used items within easy reach. Use vertical stacking kits or risers to ensure stability and safety. Regularly clean and maintain to keep them running smoothly.
Add personalized touches like custom decals or color wraps to match your kitchen style. Use cord organizers or clips to keep cables tidy and out of sight. Incorporate small storage bins or trays for accessories or utensils that complement your appliances.
Choosing compact, stackable appliances makes tiny kitchens more functional and less cluttered. They help you cook more efficiently and look stylish doing it. Small upgrades like these prove that smart design can turn limited space into a culinary haven.
9. Install Open Shelving for Frequently Used Items
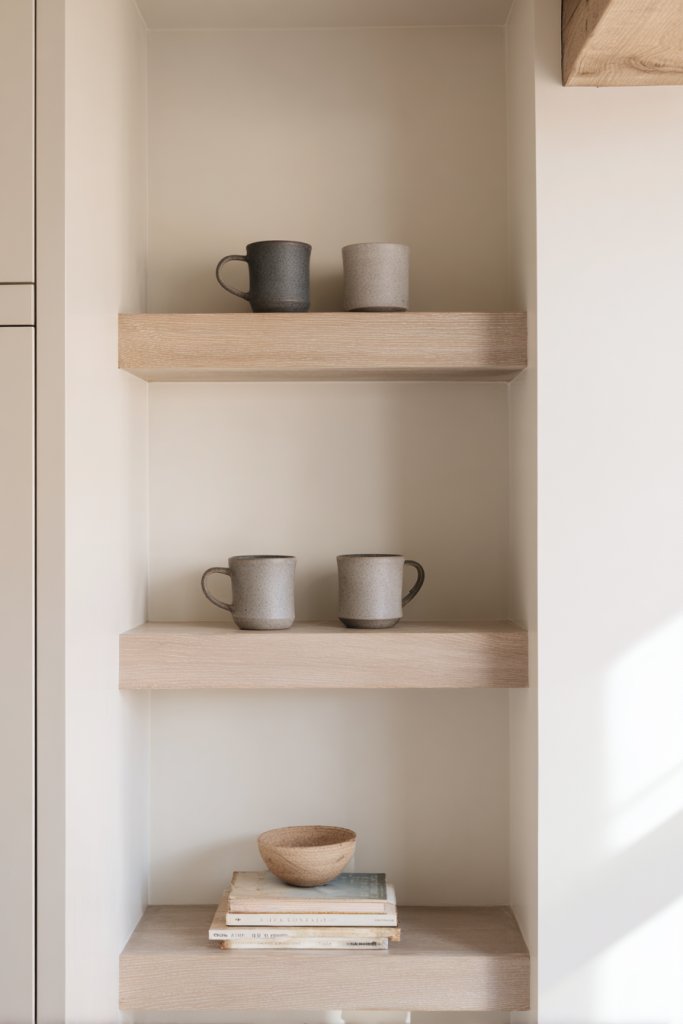
Cluttering up your cabinets with everyday essentials makes your tiny kitchen feel cramped and chaotic. Hidden storage is practical, but sometimes you need quick access to your most-used items. Open shelving offers an easy, stylish way to keep essentials at your fingertips.
Recommended Products to replicate this idea
| # | Preview | Product | |
|---|---|---|---|
| 1 |
|
BAYKA Floating Shelves for Wall, Wall Mounted Rustic Wood Shelves for Bathroom, Bedroom, Living... | Check Latest Price |
| # | Preview | Product | |
|---|---|---|---|
| 1 |

|
12 Pack L12 x H 8" Black Heavy Duty Shelf Brackets with Screws Metal Shelf Brackets Shelf Support... | Check Latest Price |
Visualize a row of open shelves mounted on the wall, holding neatly arranged dishes, cups, and bowls. The open design creates a sense of space and accessibility, with everything visible and within reach. Use matching or contrasting dishware to add a pop of color or texture that complements your decor.
Opt for floating wood shelves for a warm, rustic look or sleek metal brackets for a modern vibe. Adjustable or modular shelves allow flexibility as your needs change. Incorporate decorative storage jars or baskets underneath for added organization. This setup works well in small kitchens, laundry rooms, or even bathroom spaces.
Secure wall anchors and brackets into studs or use appropriate drywall anchors for stability. Arrange frequently used items at eye level for convenience. Keep the shelves tidy by grouping similar items and using small containers. Regularly dust and reorganize for a fresh look.
Paint or stain shelves to match your kitchen decor for a cohesive look. Add decorative edging or trim for a finished appearance. Incorporate small hooks or clips underneath for hanging utensils or towels. Personal touches turn functional shelves into design features.
Open shelving combines style with practicality, making your tiny kitchen feel open and organized. They allow you to showcase your favorite dishes and accessories while keeping everyday essentials accessible. This simple upgrade can dramatically improve your space’s vibe.
10. Use Over-the-Door Storage Solutions
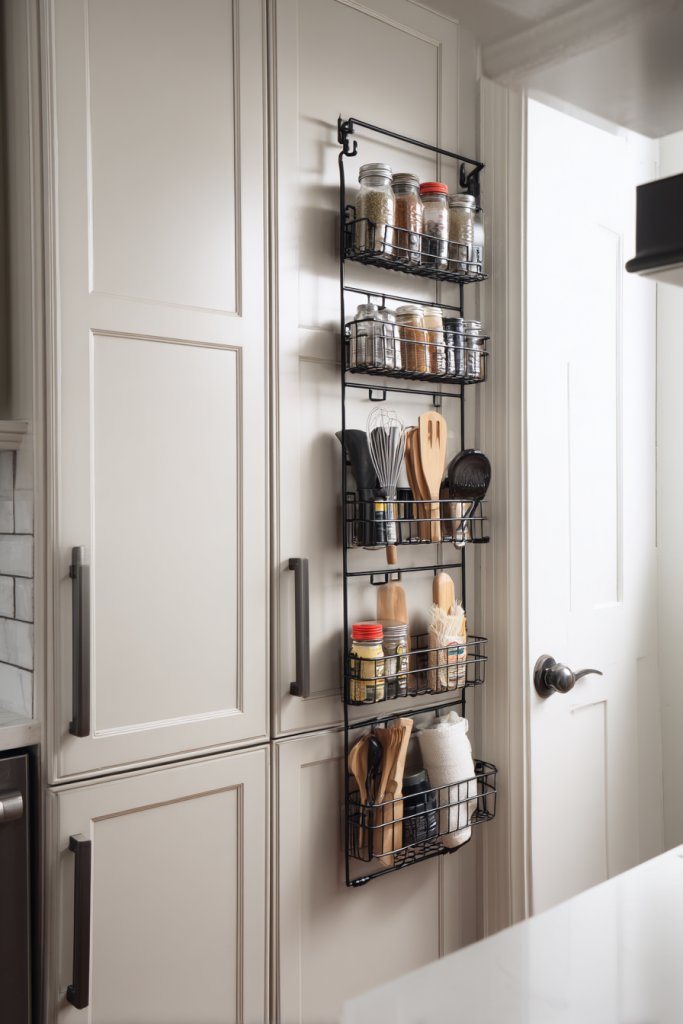
Small kitchens often lack storage for spices, cleaning supplies, or utensils. Cabinet space fills up fast, leaving little room for essentials. Over-the-door storage solutions help you utilize unused door space efficiently, turning a hidden spot into prime organization real estate.
Recommended Products to replicate this idea
| # | Preview | Product | |
|---|---|---|---|
| 1 |

|
Eastherry Over The Door Pantry Organizer,9-Tier Over The Door Organizer with Adjustable... | Check Latest Price |
| # | Preview | Product | |
|---|---|---|---|
| 1 |
|
JKsmart 6-Tier Spice Rack Organizer with Door Hook, Wall Mounted & Over the Door Spice Racks for... | Check Latest Price |
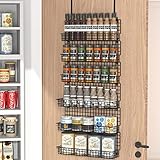
Imagine a rack of small hooks and pockets hanging behind a pantry door, holding spice jars, cleaning sprays, or kitchen tools. Everything stays organized and accessible without cluttering your counters or shelves. The solution is simple but incredibly effective, making every inch of your tiny kitchen work harder.
Select over-the-door racks with clear pockets, metal hooks, or fabric organizers depending on your needs. Use them for spices, utensils, or even cutting boards. Decorate with colorful labels or patterned fabrics to add a personal touch. This approach adapts to all types of doors—cabinet, pantry, or even laundry.
Choose a sturdy organizer that fits your door and holds your items securely. Mount hooks or pockets with adhesive strips or screws, depending on weight. Organize items logically, grouping similar or frequently used items near the top. Regularly clean and rotate items to keep everything fresh and handy.
Add decorative touches like painted or patterned fabric covers for a personalized look. Use small labels or tags to categorize contents. Incorporate a few decorative elements like tiny charms or stickers if you want to add a fun, quirky vibe.
Over-the-door storage is a simple hack that dramatically improves organization and efficiency. It frees up cabinet space and keeps essentials within easy reach. Small changes like this show how clever storage can transform your tiny kitchen into a well-oiled machine.
11. Incorporate a Magnetic Spice Rack on the Fridge
Spice racks often take up valuable counter or cabinet space, cluttering your small kitchen. Finding a convenient, accessible spot for your spice collection can be tricky. Mounting a magnetic spice rack on the fridge sideline offers a sleek, space-saving solution that keeps everything within easy reach.
Recommended Products to replicate this idea
| # | Preview | Product | |
|---|---|---|---|
| 1 |
|
HuggieGems Metal 4 Pack Magnetic Spice Storage Rack Organizer for Refrigerator and Oven, Black... | Check Latest Price |
| # | Preview | Product | |
|---|---|---|---|
| 1 |

|
Homazing Set of 24 Hexagon Glass Spice Jars with Shaker Lids and Labels for Refrigerator, Kitchen,... | Check Latest Price |
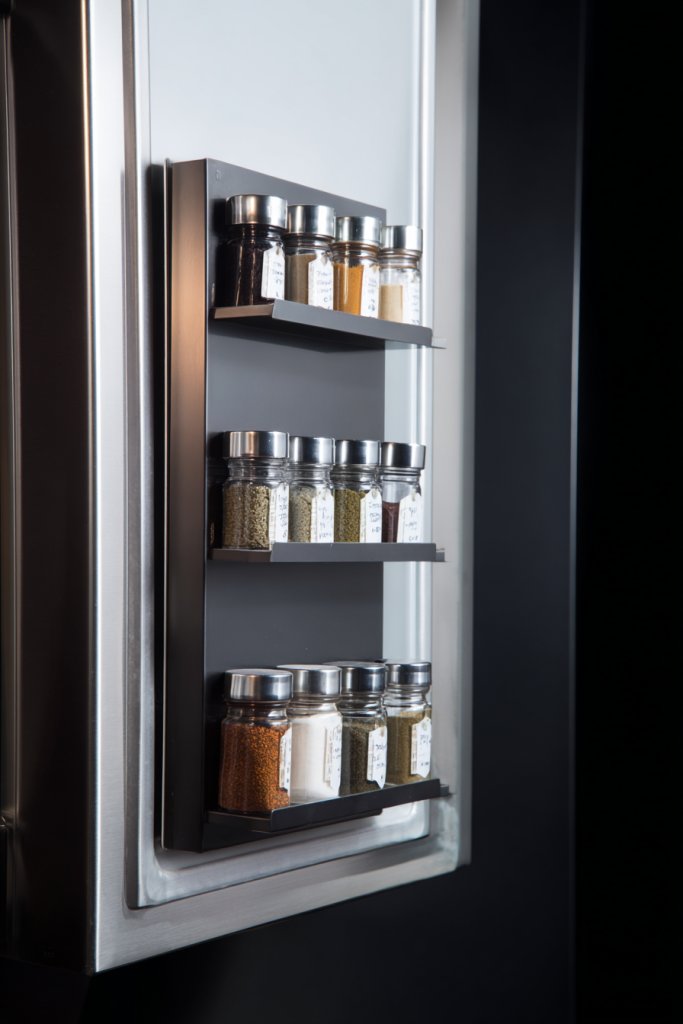
Picture a slim magnetic strip attached to the side of your fridge, with tiny glass jars or metal tins filled with colorful spices. When you need oregano or cumin, you simply grab the container from the magnetic strip. The setup adds a pop of color and keeps your spices organized in a compact, attractive display.
Choose magnetic spice jars with clear lids for easy identification or decorative labels for a personalized look. Mount multiple strips if you have a large collection. You can also place a magnetic strip on metal cabinets or appliances for additional storage. This solution adapts perfectly to small kitchens with limited cabinet space.
Secure the magnetic strip to a clean, dry surface using adhesive or screws for extra strength. Arrange your spice jars or tins in an organized manner, possibly by cuisine or frequency of use. Keep the jars sealed tightly to prevent leaks or spills. Regularly check and refill or rotate spices for freshness.
Decorate jars with custom labels, stickers, or paint for a personalized touch. Add a small magnetic brush or tongs nearby for quick cleaning or stirring. Consider a small clip or hook for measuring spoons or small accessories. This keeps everything tidy and accessible.
A magnetic spice rack on the fridge saves cabinet space and adds visual appeal. It makes cooking more efficient and keeps your favorite flavors close at hand. Small, clever ideas like this prove that organization can be both functional and fun.
12. Design a Compact, Wall-Mounted Folding Workstation
Limited counter space makes meal prep and small projects feel cramped and messy. You need a surface that can be there when you need it and disappear when you don’t. A wall-mounted folding workstation turns a blank wall into a versatile, space-saving prep area that’s perfect for tiny kitchens.
Recommended Products to replicate this idea
| # | Preview | Product | |
|---|---|---|---|
| 1 |

|
Neoaider Upgrade Wall Mounted Folding Table 31.5”L x 15.7”W, Laundry Folding Table with Heavy... | Check Latest Price |
| # | Preview | Product | |
|---|---|---|---|
| 1 |

|
HOMCOM Foldable Convertible Writing Table, Wall Mounted Space-Saving Computer Desk with Chalkboard... | Check Latest Price |
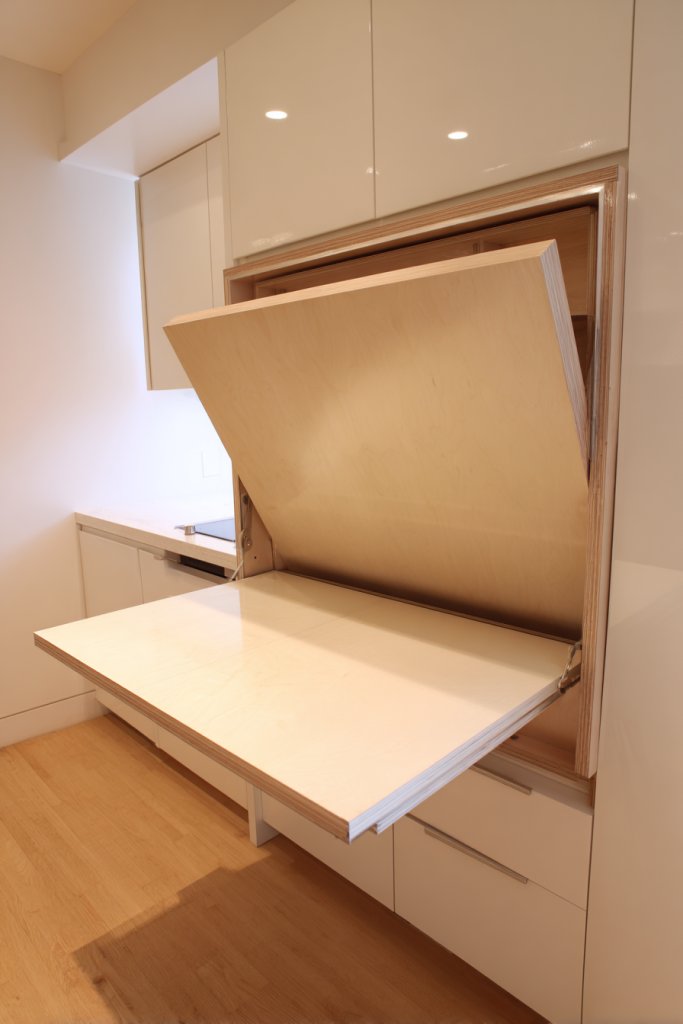
Imagine a sleek panel folded down from the wall, revealing a sturdy surface for chopping, mixing, or even serving snacks. When not in use, it folds back seamlessly, leaving your kitchen open and uncluttered. The surface can be finished in durable laminate, wood, or even stainless steel, blending into your decor. It’s like having an extra countertop without sacrificing space.
Choose minimalist designs with clean lines for a modern look or rustic wood for a cozy vibe. Incorporate small fold-out shelves or hooks for utensils or towels. Adjust the size based on your space—larger for full meal prep, smaller for quick tasks. This flexible setup adapts to various kitchen styles and needs.
Install a sturdy wall bracket with anchors that can support the weight of the folded-down surface. Attach the panel securely, ensuring smooth hinges for easy operation. Use waterproof or stain-resistant finishes for durability. When folded down, keep it free of clutter for quick access. Regularly check hardware for stability.
Add decorative touches like painted patterns, decals, or custom finishes to match your decor. Incorporate small magnetic or adhesive containers on the wall for utensils or spices. Use coordinated hardware or trims for a polished look. Turn functional into fabulous with thoughtful details.
A fold-down workstation maximizes your small space’s potential. It makes cooking, prepping, and even crafting easier and more organized. Small, smart upgrades like this show that even tiny kitchens can handle big ideas—are you ready to fold into a smarter space?
13. Utilize Tall, Slim Cabinets for Maximal Storage
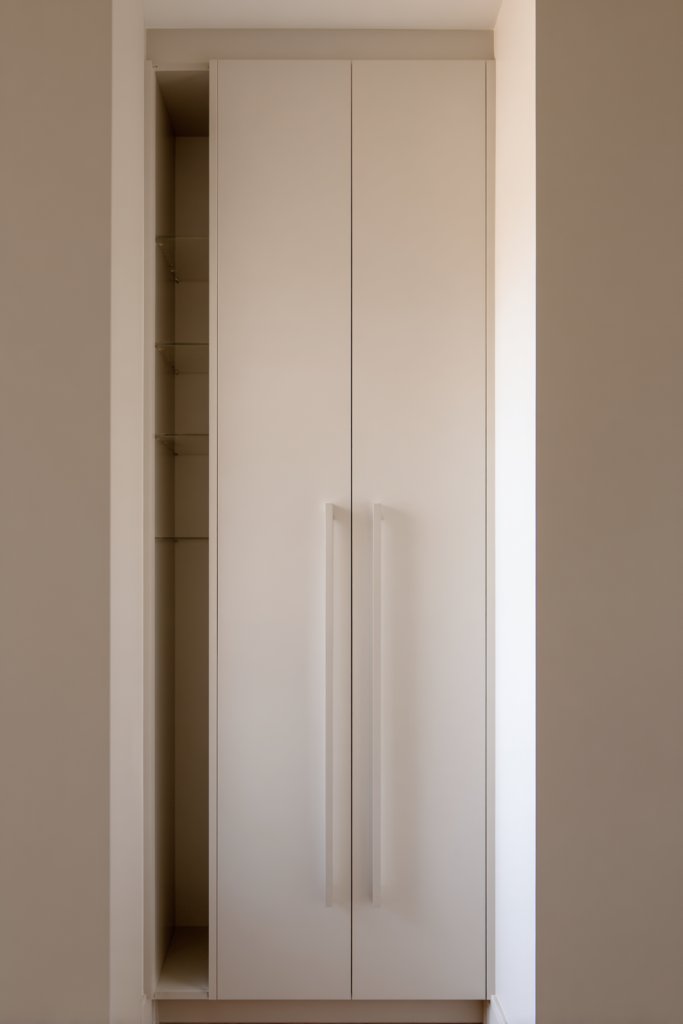
In tiny kitchens, every inch of space counts, especially vertically. Short cabinets limit storage, forcing you to cram items into tight spots. Tall, slim cabinets stretch your storage capacity upward, utilizing unused vertical space efficiently and keeping your kitchen looking sleek.
Recommended Products to replicate this idea
| # | Preview | Product | |
|---|---|---|---|
| 1 |

|
Homhedy 67" H Tall Bathroom Storage Cabinet with 2 Barn Doors and 1 Drawer, Narrow Storage Unit,... | Check Latest Price |
| # | Preview | Product | |
|---|---|---|---|
| 1 |

|
kepptory 47” Pantry Cabinet, Kitchen Pantry Storage Cabinet with Doors and Adjustable... | Check Latest Price |
Visualize a narrow, floor-to-ceiling cabinet with multiple shelves, filled with neatly stacked dishes, jars, or small appliances. The cabinet’s height draws the eye upward, creating an illusion of larger space. Its slim profile means it fits into tight corners or between existing units, maximizing every available inch.
Select cabinets with adjustable or removable shelves for flexibility. Use different finishes—glossy, matte, or textured—to match your style. Incorporate pull-out drawers or baskets inside for better organization. These cabinets adapt perfectly to small kitchens, pantry corners, or even laundry rooms.
Measure available wall space carefully before purchasing. Securely install with appropriate anchors, ensuring stability for full-height units. Organize inside with labeled containers, baskets, or dividers to maximize usability. Regularly declutter and reorganize to keep the space functional. Consider adding lighting inside for easy visibility.
Decorate with paint, wallpaper, or decals to add personality. Incorporate decorative hardware or trims for a custom look. Use color-coded containers or labels inside to streamline your workflow. These touches turn functional storage into a design feature.
Tall, slim cabinets unlock vertical space and boost storage without crowding your tiny kitchen. They help keep everything organized and accessible, making your small space more efficient. Smart storage solutions like this prove small is mighty—ready to elevate your kitchen?
14. Add a Tension Rod Under the Sink for Cleaning Supplies
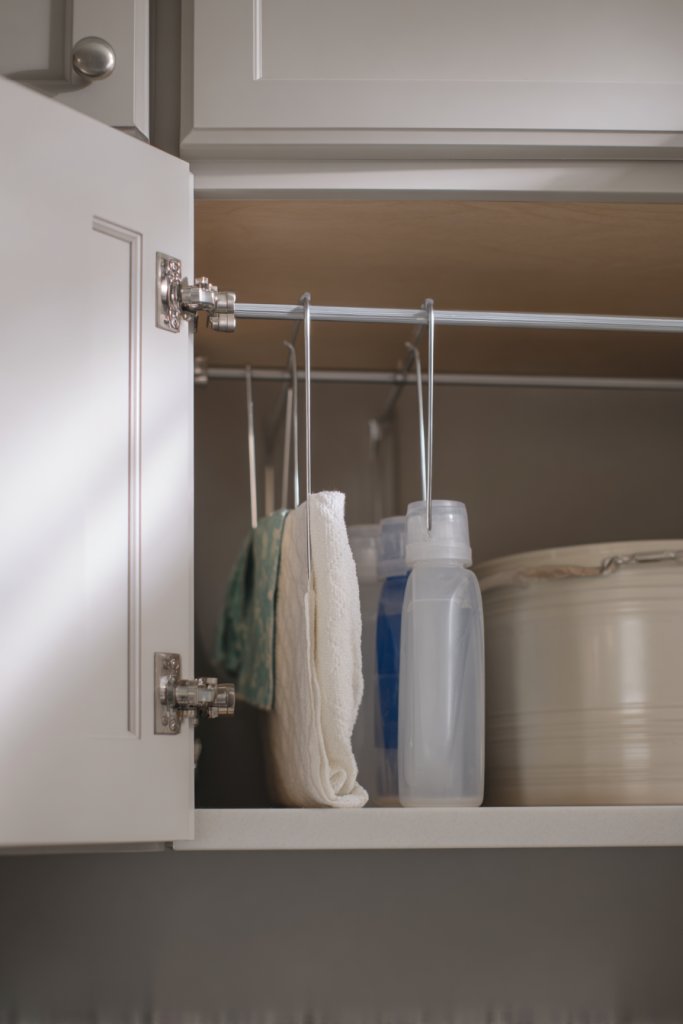
Under the sink often becomes a cluttered catch-all for cleaning supplies and tools. It’s frustrating to dig through bottles and rags every time you need something. A tension rod offers a simple, effective way to organize these items and keep your space tidy.
Recommended Products to replicate this idea
| # | Preview | Product | |
|---|---|---|---|
| 1 |

|
AIZESI 2pcs Spring Tension Rods Adjustable 26 to 39 inch Small Tension Curtain Rod No Drilling... | Check Latest Price |
| # | Preview | Product | |
|---|---|---|---|
| 1 |

|
Command Spray Bottle Hangers, Holds up to 32 fl oz, 2 Hangers with 4 Strips, Damage-Free Spray... | Check Latest Price |
Imagine a sleek metal tension rod stretched across the inside of your cabinet, with spray bottles hanging from hooks or resting on the rod. Rags and scrub brushes are neatly stored on either side, ready for action. The setup keeps everything off the cabinet floor and easy to access, making your cleaning routine smoother.
Choose rust-resistant, adjustable rods that fit your cabinet width. Add small hooks or clips for sponges, brushes, or cloths. Decorate the rod with colorful or patterned wraps for a personalized touch. This setup works well in kitchen cabinets, laundry rooms, or craft spaces.
Measure the width of your cabinet’s interior before purchasing. Stretch the tension rod tightly across the space, securing it in place without drilling. Hang bottles or tools with hooks or clips, ensuring they hang securely. Keep heavier items toward the back or on the floor of the cabinet for stability. Regularly check and readjust as needed.
Decorate hooks or clips with paint or fabric covers for a fun look. Use labels to identify cleaning solutions or tools. Add small baskets or caddies for miscellaneous items like sponges or scrubbers. This keeps everything organized and visually appealing.
A tension rod under the sink turns chaos into order and saves space. It makes cleaning supplies easy to find and reach, saving you time and effort. Small upgrades like this prove that organization starts with simple solutions—are you ready to try?
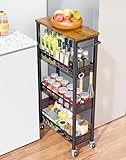
15. Incorporate a Narrow Rolling Cart for Flexible Storage
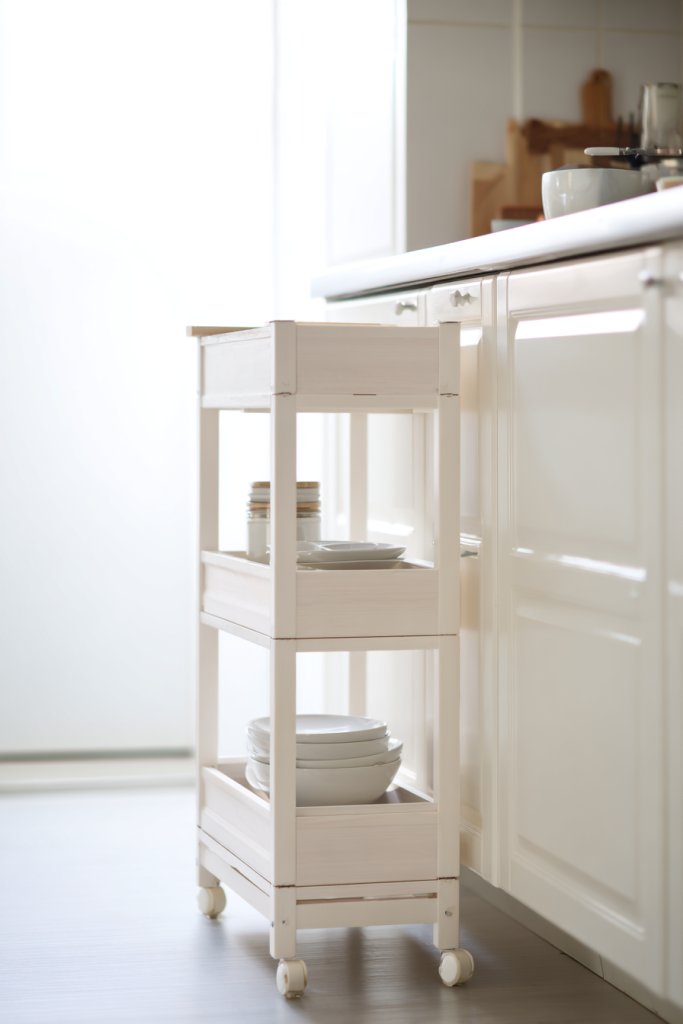
Limited storage in tiny kitchens makes it hard to find space for everything, especially during meal prep or hosting. A narrow rolling cart offers portable, flexible storage that can slide into tight spots and be moved around as needed. It’s a versatile solution that adapts to your changing needs.
Recommended Products to replicate this idea
| # | Preview | Product | |
|---|---|---|---|
| 1 |
|
VASAGLE 4-Tier Slide-Out Storage Cart, Slim Kitchen Cart for Small Spaces, with Wheels, Handle,... | Check Latest Price |
| # | Preview | Product | |
|---|---|---|---|
| 1 |
|
OKZEST Utility Slim Storage Cart, 4 Tier Small Rolling Kitchen Laundry Room Cart with Wood Top,... | Check Latest Price |
Picture a slim metal cart with multiple tiers, filled with utensils, cookbooks, or small appliances. When you need extra space, roll it closer; when done, tuck it away in a corner or closet. The wheels make it easy to reposition without effort, and the open design keeps everything visible. It’s like a mobile pantry or prep station at your command.
Choose from materials like wood, metal, or plastic, depending on your decor style. Opt for carts with locking wheels for stability when stationary. Use baskets, bins, or trays on the tiers for organized storage. Adjust the height or add hooks for hanging utensils or towels. It’s perfect for small kitchens, balconies, or even as a bar cart.
Measure your available space to ensure the cart fits comfortably. Assemble according to manufacturer instructions, securing wheels and shelves firmly. Fill with frequently used items for quick access, and store less-used items on the bottom. When not in use, roll it away or tuck into a closet to save space. Regularly clean and reorganize for efficiency.
Decorate with paint, stickers, or fabric accents to match your style. Add labels to bins or baskets for quick identification. Use hooks or clips on the sides for utensils or towels. Personal touches make it both functional and fun.
A rolling cart brings flexible storage and easy mobility, perfect for small kitchens. It helps you stay organized and adapt quickly for cooking or entertaining. Small tweaks like this prove that mobility can dramatically improve your space’s usability.
16. Use Peel-and-Stick Wall Tiles for Easy Backsplash Updates
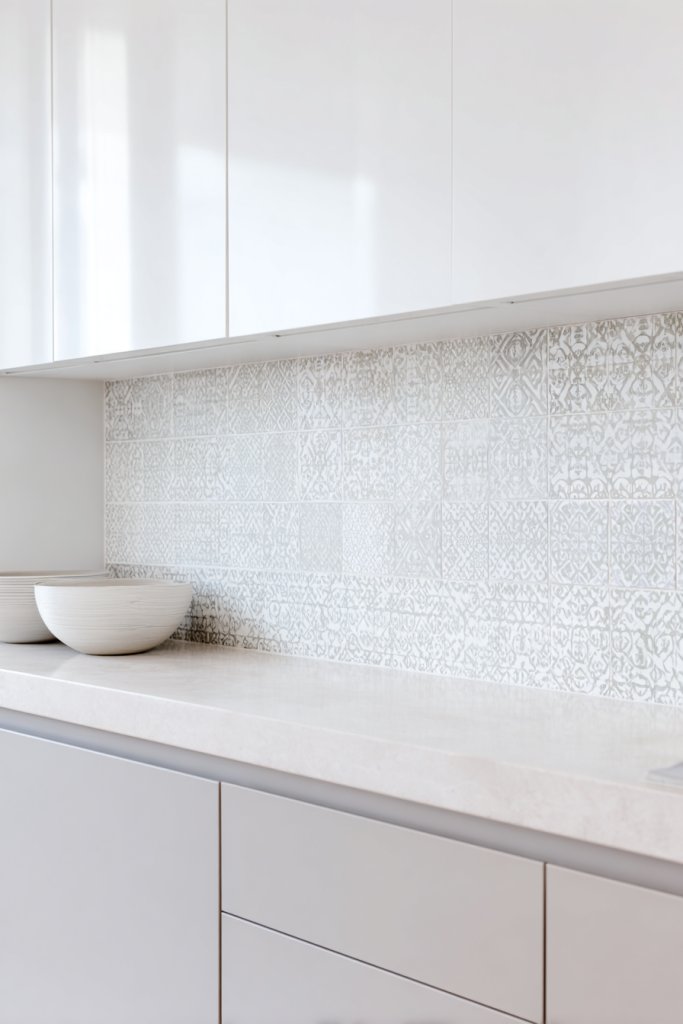
Tired of plain walls and outdated backsplashes in your tiny kitchen? Remodeling can be expensive and time-consuming, but peel-and-stick tiles offer a quick, affordable facelift. They instantly add style and personality without the mess of traditional tiling.
Recommended Products to replicate this idea
| # | Preview | Product | |
|---|---|---|---|
| 1 |

|
Art3d 102-Piece Peel and Stick Wall Tile for Kitchen Backsplash, Bathroom, Fireplace, 3in. × 6in.... | Check Latest Price |
| # | Preview | Product | |
|---|---|---|---|
| 1 |

|
Art3d 10 Ft Peel and Stick Flexible Vinyl Molding Trim for Wall Tile Edges, Kitchen backsplash,... | Check Latest Price |
Imagine installing stylish, patterned tiles on your backsplash with ease—no grout, no mortar, just peel and stick. The textured surface adds depth and visual interest, transforming your cooking area into a chic focal point. With a variety of designs, you can match your decor or create an eclectic, vibrant look.
Select from modern geometric patterns, classic subway tiles, or colorful mosaics. Use them to accent walls, inside cabinets, or as a border. For seasonal updates, swap out tiles or add decorative accents. These tiles are perfect for renters or anyone wanting a quick upgrade.
Clean and dry the wall surface thoroughly before application. Measure and cut tiles carefully with scissors or a utility knife. Peel off the backing and press firmly onto the wall, smoothing out bubbles. Trim excess with a utility blade for clean edges. Seal edges with clear caulk if needed for a finished look.
Combine different tile patterns or colors for a custom mosaic. Add decorative trims or borders for a polished finish. Incorporate LED strip lighting above or below for enhanced effect. This easy update adds personality and makes your tiny kitchen feel fresh.
Peel-and-stick tiles are a quick way to elevate your space without breaking the bank. They boost your kitchen’s style and make cleaning easier with wipeable surfaces. Small upgrades like this prove that you don’t need a renovation to make a big impact.
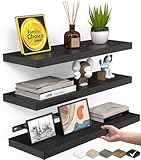
17. Choose Light Colors and Minimalist Decor for a Spacious Feel
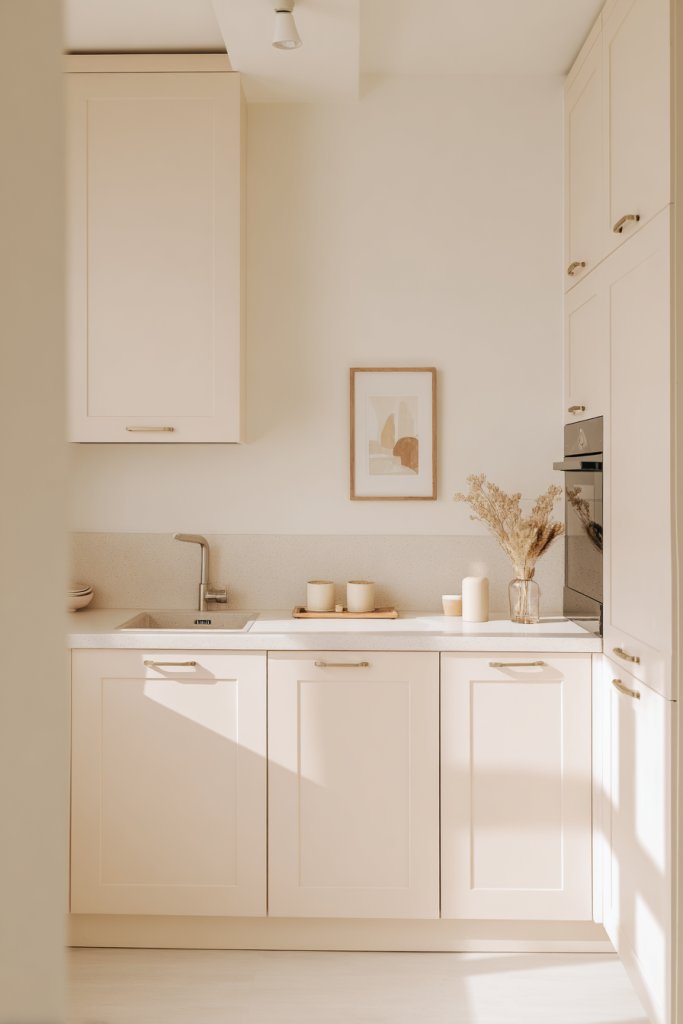
Dark walls and cluttered decor can make your tiny kitchen feel cramped and oppressive. Bright, light colors and minimalist design open up the space, making it feel larger and more inviting. It’s an easy way to boost your mood and functionality.
Recommended Products to replicate this idea
| # | Preview | Product | |
|---|---|---|---|
| 1 |

|
Dimoon 17.7''x118'' Peel and Stick Wallpaper White Contact Paper for New Environmentally Friendly... | Check Latest Price |
| # | Preview | Product | |
|---|---|---|---|
| 1 |

|
Boswillon Floating Shelves Wall Mounted Set of 2, Modern Black Wall Shelves for Storage with Lip,... | Check Latest Price |
Visualize walls painted in soft neutrals like whites, creams, or pastels, reflecting natural light beautifully. Keep countertops clear of clutter, and choose simple, sleek hardware and fixtures. A few well-chosen accessories, like a soft cream throw blanket with chunky knit texture, add warmth without overwhelming the space. The overall effect is airy, calm, and welcoming.
Opt for minimalist decor with clean lines and simple shapes. Use monochrome or pastel palettes for a cohesive look. Incorporate subtle textures—like matte finishes or soft fabrics—to add depth without visual clutter. Seasonal accents can be added sparingly to keep the space fresh without overloading.
Start by painting walls with light, reflective shades, and replace heavy drapes with sheer curtains. Choose streamlined cabinets and avoid ornate hardware. Keep surfaces free of excess decor, and organize essentials in concealed storage. Use lighting strategically to enhance brightness and ambiance. Regular tidying amplifies the spacious feel.
Add a few statement pieces like a sculptural light fixture or a textured rug to personalize the space. Incorporate subtle patterns in textiles or placemats to add interest without clutter. Use decorative storage boxes or baskets to keep items tidy and stylish.
A light, minimalist decor approach makes your tiny kitchen feel more open and calm. It encourages better organization and a happier cooking experience. Remember, simplicity often leads to sophistication—your space can be both functional and beautiful.
18. Install a Magnetic Knife Strip on the Side of the Refrigerator

Counter space is precious in tiny kitchens, and drawers filled with knives can be unsafe and inefficient. Mounting a magnetic knife strip on the side of your fridge offers a safe, space-saving way to keep your cutting tools organized and accessible. Plus, it frees up drawer space.
Recommended Products to replicate this idea
| # | Preview | Product | |
|---|---|---|---|
| 1 |
|
Home Kitchen Magnetic Knife Block Holder Rack Magnetic Stands with Strong Enhanced Magnets... | Check Latest Price |
| # | Preview | Product | |
|---|---|---|---|
| 1 |

|
Magnetic Knife Holder for Wall, No Drilling Magnetic Knife Strip Adhesive Knife Holder Magnet Knife... | Check Latest Price |
Imagine a sleek magnetic strip affixed vertically on the side of your fridge, with gleaming knives aligned neatly. The strip holds everything securely, and you can quickly grab the right knife without rummaging through cluttered drawers. It’s both practical and adds a modern touch to your kitchen’s aesthetic.
Choose magnetic strips with decorative frames or different finishes—stainless steel, painted wood, or colorful silicone—to match your style. Mount them at an ergonomic height for easy access. If space allows, combine with a small magnetic strip for utensils or a magnetic spice container nearby.
Clean the surface thoroughly before applying the adhesive or mounting with screws for extra security. Arrange knives in order of use or size for convenience. Regularly clean the strip with a damp cloth to remove residue or dust. Replace or reposition knives as needed for safety and efficiency.
Decorate the knife handles with colorful sleeves or paint for a pop of personality. Use labels or color coding to identify different types of knives—chef’s, paring, serrated, etc. Incorporate small magnetic containers for small tools or clips for scissors.
A magnetic knife strip makes your tiny kitchen safer and more organized. It streamlines your prep process and keeps your tools in perfect view. Small upgrades like this elevate your cooking experience and add a sleek, modern touch.
19. Use Under-Shelf Baskets for Extra Storage
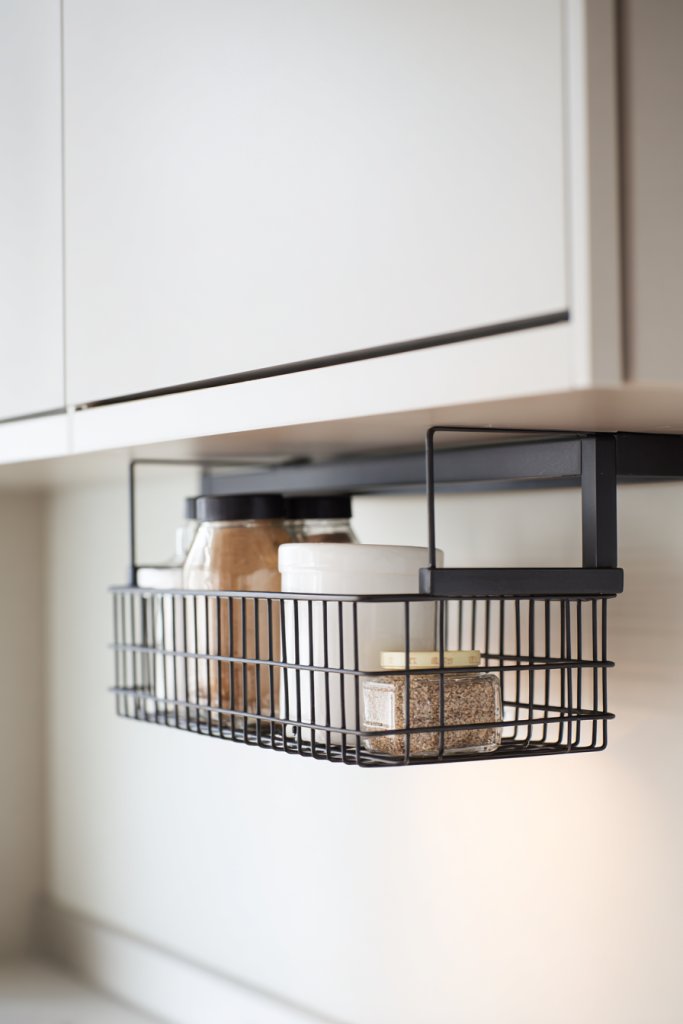
Limited cabinet space often leaves you with cluttered shelves and hard-to-reach items. Under-shelf baskets are a clever way to add extra storage without taking up additional space. They’re perfect for organizing utensils, spices, or small kitchen gadgets.
Recommended Products to replicate this idea
| # | Preview | Product | |
|---|---|---|---|
| 1 |

|
Tebery 4 Pack Black Under Shelf Wire Basket, Hanging Storage Baskets Under Cabinet Add-on Storage... | Check Latest Price |
| # | Preview | Product | |
|---|---|---|---|
| 1 |

|
Tebery 4 Pack White Under Shelf Wire Basket Hanging Storage Baskets, Small Add-on Storage Racks... | Check Latest Price |
Imagine a wire basket hanging underneath a shelf, filled with neatly stacked utensils, small jars, or cleaning supplies. The basket’s open design allows for quick access and easy visibility. It creates a layered storage system that maximizes vertical space and keeps everything tidy.
Choose baskets in different sizes or materials—metal, wicker, or plastic—to match your decor. Secure them with hooks or clips, and add labels or color coding for easy identification. Use multiple baskets stacked or side-by-side to suit your storage needs.
Install a sturdy shelf or rail where you want to add baskets. Hook or clamp the baskets underneath, ensuring they are secure and level. Organize items logically—frequently used items at the front or top, infrequently used at the back or bottom. Regularly clean and reorganize for optimal efficiency.
Decorate baskets with paint, fabric liners, or labels that reflect your style. Use decorative tags or stickers to categorize contents. Incorporate small hooks on the baskets for hanging utensils or towels. This system keeps essentials within easy reach and adds visual interest.
Under-shelf baskets expand your storage options vertically, making your tiny kitchen more organized. They help keep clutter off countertops and improve workflow. Small organizational tweaks like this show that clever solutions can dramatically improve your space.
20. Incorporate a Compact, Wall-Mounted Pot Rack
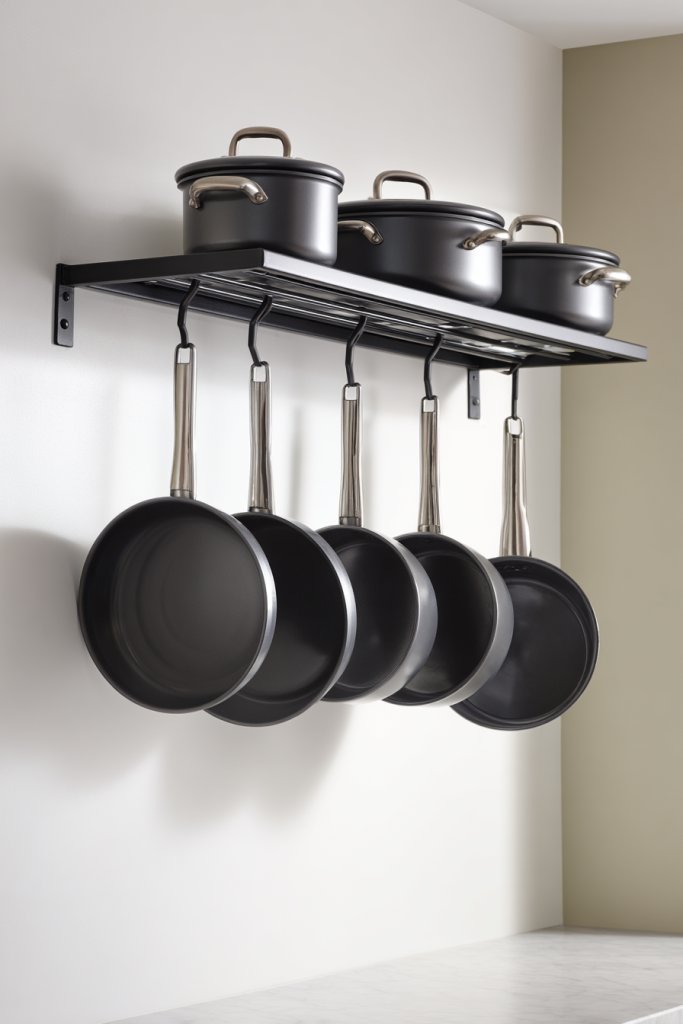
Pots and pans can quickly take over cabinet space, leaving your tiny kitchen feeling cluttered and hard to navigate. Wall-mounted pot racks free up cabinet room and add a decorative element. They’re practical, stylish, and make your cookware easily accessible.
Recommended Products to replicate this idea
| # | Preview | Product | |
|---|---|---|---|
| 1 |
|
Cooks Standard Wall Mounted Wooden Pot Rack, 36 by 8-Inch | Check Latest Price |
| # | Preview | Product | |
|---|---|---|---|
| 1 |

|
Heavy Duty Large S Hooks, 4.96 inch Large S Hooks, Set for Hanging Plants, Kitchen Cabinet Handles,s... | Check Latest Price |
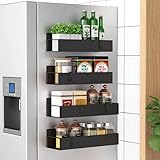
Picture a sleek metal rail or grid mounted on the wall, with pots, pans, and lids hanging from hooks. The open display adds a rustic or industrial charm while keeping your essentials within arm’s reach. The visual impact is both functional and decorative, transforming a blank wall into a focal point.
Choose from minimalist bars, vintage racks, or custom designs to match your decor. Opt for hooks that can adjust or rotate for flexible storage. Incorporate decorative elements like wooden handles or painted finishes for a personalized look. This setup works well above cooking islands, sinks, or open wall spaces.
Secure the rack to studs or wall anchors using appropriate hardware for safety. Arrange cookware by size or frequency of use for efficiency. Regularly clean and check hooks for stability. Consider adding a shelf above for storing utensils or small accessories to maximize vertical space.
Decorate with matching or contrasting finishes—matte black, brushed nickel, or brass—to suit your style. Add decorative handles or painted accents to the rack for extra flair. Use labeled hooks or tags to keep track of your cookware collection.
A wall-mounted pot rack frees up cabinet space and elevates your kitchen’s style. It makes cooking more efficient and showcases your cookware collection. Small touches like this prove that even tiny kitchens can handle big, stylish ideas.
Conclusion
Exploring different tiny kitchen ideas can help you create a space that is both practical and beautiful. With a mix of clever storage hacks, smart layouts, and inspiring decor tips, you’ll be empowered to transform your small kitchen into a highly functional area. Don’t hesitate to try these ideas and customize them to suit your style—your perfect tiny kitchen is just an effort away, ready to make cooking a joy every day.