I have been, or can be if you click on a link and make a purchase, compensated via a cash payment, gift, or something else of value for writing this post. As an Amazon Associate, I earn from qualifying purchases. Please read my full Affiliate Disclosure for more information.
Living in a studio apartment has become a stylish and practical choice for many city dwellers, offering convenience and a minimalist lifestyle. The appeal lies in maximizing small spaces with clever design and multifunctional solutions, making every square foot count while maintaining a chic aesthetic.
In this article, you’ll find a diverse range of ideas that cater to various tastes and needs, from clever storage hacks to stylish zoning tips. Whether you’re aiming for modern minimalism or a cozy, personalized vibe, these ideas will inspire you to transform your small space into a functional and fabulous home.
1. Multi-Functional Fold-Down Murphy Bed to Maximize Floor Space
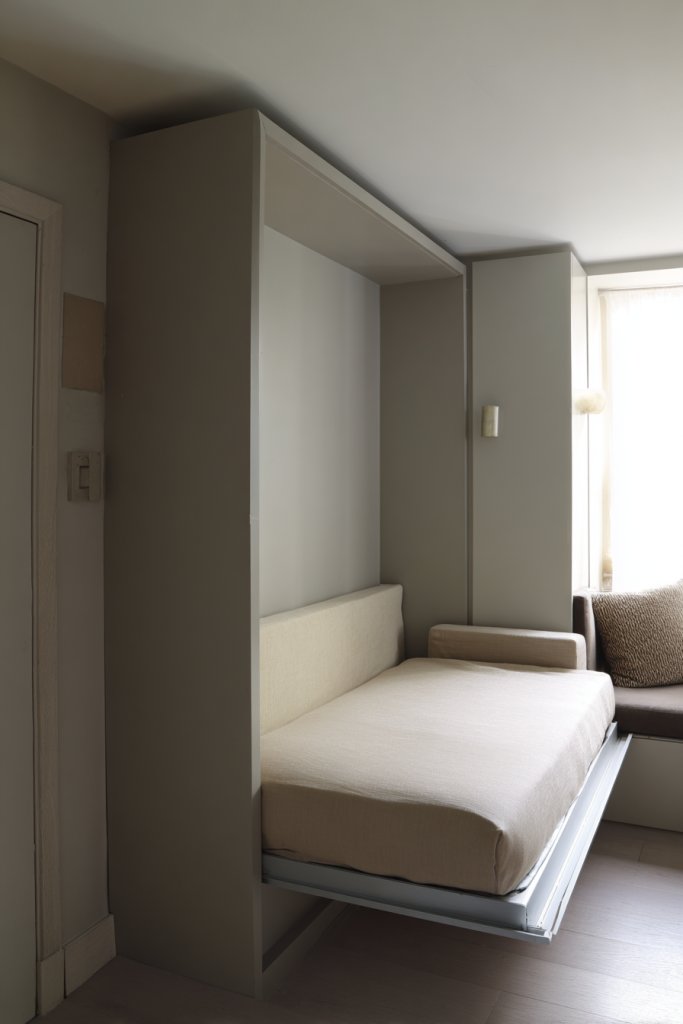
Living in a small studio often feels like fitting a square peg into a round hole. You crave space for living, but your bed takes up half the room when it’s not bedtime. The idea of a comfortable sleeping spot that doesn’t dominate your living area is a dream come true. Who wouldn’t want a solution that frees up precious floor space during the day?
Recommended Products to replicate this idea
| # | Preview | Product | |
|---|---|---|---|
| 1 |
|
TooCust Vertical Murphy Wall Bed Frame Queen Size With Two-Stage Deluxe Gas Spring - DIY Free... | Check Latest Price |
| # | Preview | Product | |
|---|---|---|---|
| 1 |

|
Wilding Wallbeds Murphy Bed Mechanism Hardware Kit (Universal Size Fits King, Queen, Full, & Twin)... | Check Latest Price |
Imagine a sleek wall panel that conceals a plush mattress, folding down smoothly at night. During the day, it folds back up, leaving a clean, open space filled with a cozy rug and multi-purpose furniture. The bed’s frame blends seamlessly with the wall, painted in a soft matte finish, making it almost invisible when stored. Soft ambient lighting highlights the minimal design, creating a calm sanctuary that transforms with your needs.
Choose a Murphy bed with a built-in desk or storage cabinets for extra functionality. You can opt for a modern, industrial look with metal hardware, or a warm, rustic vibe with wood finishes. Seasonal accents like a soft throw blanket or textured cushions can add cozy charm. Some designs include fold-out side tables or shelves, perfect for different lifestyles or aesthetic preferences. This idea adapts perfectly whether you prefer clean minimalism or cozy boho.
Start by measuring your available wall space to ensure the bed fits comfortably. Pick a sturdy, quality mechanism that supports your mattress weight and allows smooth folding. You’ll need basic carpentry tools or a professional to install the mounting hardware. Choose a mattress that is lightweight but comfortable, like memory foam or latex, for easy handling. Consider adding wall anchors for safety, and plan for proper clearance around the bed for easy folding and unfolding. A few hours of DIY or a handyman’s help can make this transformation happen.
Personalize your Murphy bed with a custom-painted mural or textured wall panels behind it for visual interest. Incorporate a fold-away headboard with built-in reading lights or a small shelf for nighttime essentials. Use decorative textiles like a patterned duvet cover or a soft, textured throw to add personality. When not in use, hide clutter with stylish storage baskets or decorative bins integrated into the surrounding cabinetry. This setup makes your space not only functional but also uniquely yours.
A fold-down Murphy bed turns a small space into a versatile haven, perfect for modern city living. It’s a clever way to maximize function without sacrificing comfort. Once installed, you’ll wonder how you ever lived without this space-saving marvel. Ready to reclaim your floor and enjoy a sleek, clutter-free environment? Your dream studio is just a fold away!
2. Compact Modular Sofa with Hidden Storage Compartments
Ever sit on your couch and feel overwhelmed by clutter? A typical sofa takes up half the room and often becomes a dumping ground for blankets, magazines, or seasonal gear. You want a stylish seating solution that keeps your space tidy without sacrificing comfort. The idea of hidden storage within your furniture sounds like a dream, right?
Recommended Products to replicate this idea
| # | Preview | Product | |
|---|---|---|---|
| 1 |

|
SUAWY 108 Inch Modular Sectional Sofa with Pull Out Bed, U Shaped 7 Seat Sectional Sleeper Sofa with... | Check Latest Price |
| # | Preview | Product | |
|---|---|---|---|
| 1 |

|
Zihanhome 30 Inch Round Storage Ottoman Coffee Table, Modern Boucle Ottoman with Lift-Off Lid and... | Check Latest Price |
Picture a sleek, modern sofa with plush cushions covered in a soft, neutral fabric. Beneath the seat cushions, discreet compartments hold spare bedding, throw blankets, or even shoes. The sofa’s design features clean lines and a low profile, making your space look open and inviting. When you sit down, you feel the plushness of the upholstery and the subtle promise of hidden treasures just beneath.
Select a modular sofa with removable sections that can be reconfigured for different occasions. Opt for a fabric that complements your overall decor—think cozy velvet or durable linen. Some models include built-in side pockets or armrest compartments for small essentials. Seasonal styles might feature bold colors or subtle earth tones, depending on your vibe. You can even add a chaise lounge extension for extra lounging space or a corner unit for larger rooms.
Start by measuring your space and deciding on the sofa’s configuration. Look for models with hidden storage compartments, ensuring they are easily accessible but discreet. Check the construction quality: sturdy frames, smooth-opening lids, and durable upholstery are key. Assembly might involve connecting modular sections or attaching feet; most come with straightforward instructions. To maximize storage, organize items in labeled bins or fabric organizers that slide easily in and out. Regular maintenance involves vacuuming and occasional fluffing of cushions, keeping the whole thing looking fresh.
Customize your sofa with decorative cushions in patterns or textures that reflect your personality. Use cozy textiles like a chunky knit throw or a velvet pillow to add warmth. For a pop of color, opt for vibrant accent cushions or contrasting piping. You can also add a small, portable side table or a sleek ottoman that doubles as extra storage or seating. These touches turn your sofa into a statement piece that’s both functional and stylish.
A modular sofa with hidden storage makes your living area more efficient and inviting. It’s perfect for small apartments where every inch counts. Once you experience the convenience of concealed compartments, you’ll wonder how you ever managed without them. Ready to upgrade your furniture game and keep clutter at bay? This smart choice transforms your space effortlessly.
3. Open-Plan Kitchen with Floating Shelves and Slim Cabinets
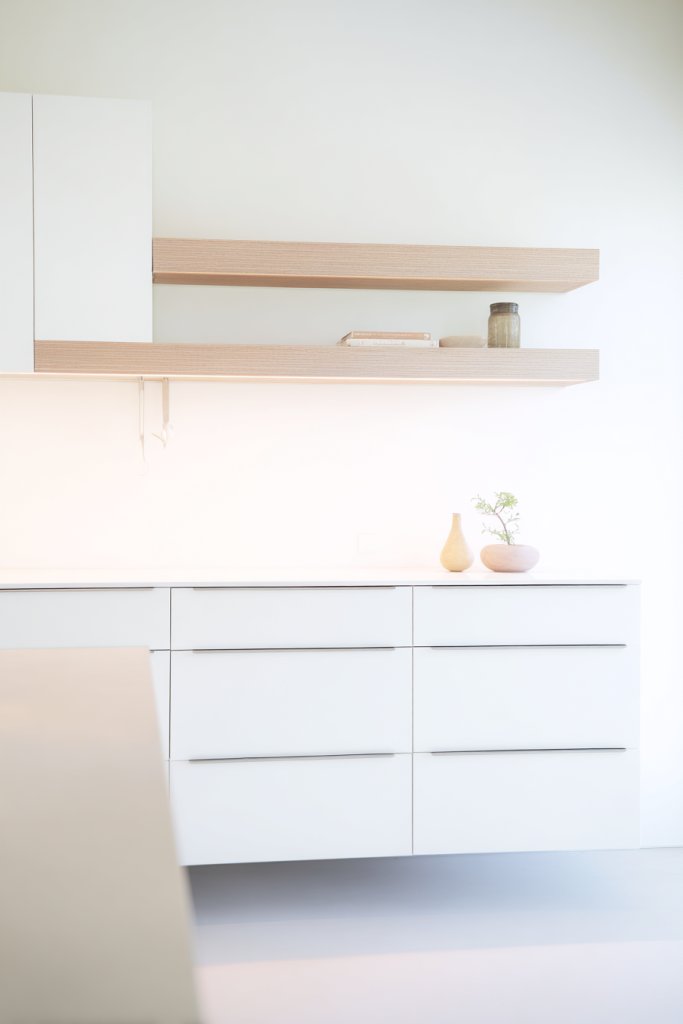
Cooking in a cramped, cluttered kitchen can turn even the simplest meal prep into a stressful event. You want an open, airy space that feels inviting and functional at the same time. The idea of a streamlined kitchen with clever storage that doesn’t weigh down the room is incredibly appealing. Who says you can’t have style and practicality coexisting?
Recommended Products to replicate this idea
| # | Preview | Product | |
|---|---|---|---|
| 1 |

|
QEEIG Floating Shelves for Wall Bathroom Shelf Bedroom Kitchen Living Room Hanging Book Shelves... | Check Latest Price |
| # | Preview | Product | |
|---|---|---|---|
| 1 |
|
ELYSIAN New 5 inch Width Pull Out Kitchen Slim Storage Cabinet Spice Rack Home Organizer 2025 | Check Latest Price |
Imagine a kitchen with sleek, slim cabinets painted in a soft matte tone, blending into the walls. Floating shelves above the countertop display your favorite dishes or glassware, all within easy reach. The counter space is open and uncluttered, with a subtle backsplash that adds a touch of texture. Natural light floods the space, bouncing off the surfaces and making it feel larger. The overall vibe is modern, minimalist, and effortlessly chic, perfect for cooking or entertaining.
Choose slim-line cabinets in bold colors for a statement or neutral tones for a calming effect. Incorporate open shelving with decorative storage jars or stylish dishware for visual interest. You can add under-cabinet lighting or LED strips for a warm glow. For a cozy feel, layer textiles like a soft cotton dish towel or a woven placemat. This layout suits various styles, from Scandinavian simplicity to industrial edge, depending on your personal taste.
Begin by decluttering and measuring your available wall space. Select slim cabinets with sufficient storage capacity but minimal bulk. Install floating shelves at eye level, using sturdy brackets and quality wood or acrylic for durability. Keep the countertops clear by adding wall-mounted hooks or magnetic strips for knives and utensils. Use organizational containers inside cabinets to maximize space, and add a small, portable cart for extra prep surface if needed. Regularly clean and organize to maintain the sleek look.
Decorate your open shelves with curated dishes, colorful bowls, or unique vintage finds for personality. Use stylish containers or baskets to hide away lesser-used items while keeping essentials accessible. Incorporate a pop of color with vibrant kitchen tools or a patterned rug in front of the sink. Personal touches like a handwritten chalkboard menu or a decorative tray elevate the space’s charm. This approach makes your kitchen both functional and a reflection of your style.
An open-plan kitchen with floating shelves invites interaction and makes cooking more enjoyable. It’s an investment in both style and efficiency, especially for small spaces. Seeing your favorite dishes displayed adds a personal touch that makes you proud. Ready to create a kitchen that’s stylish, practical, and perfectly you? This design puts you in control of your culinary space.
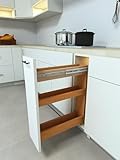
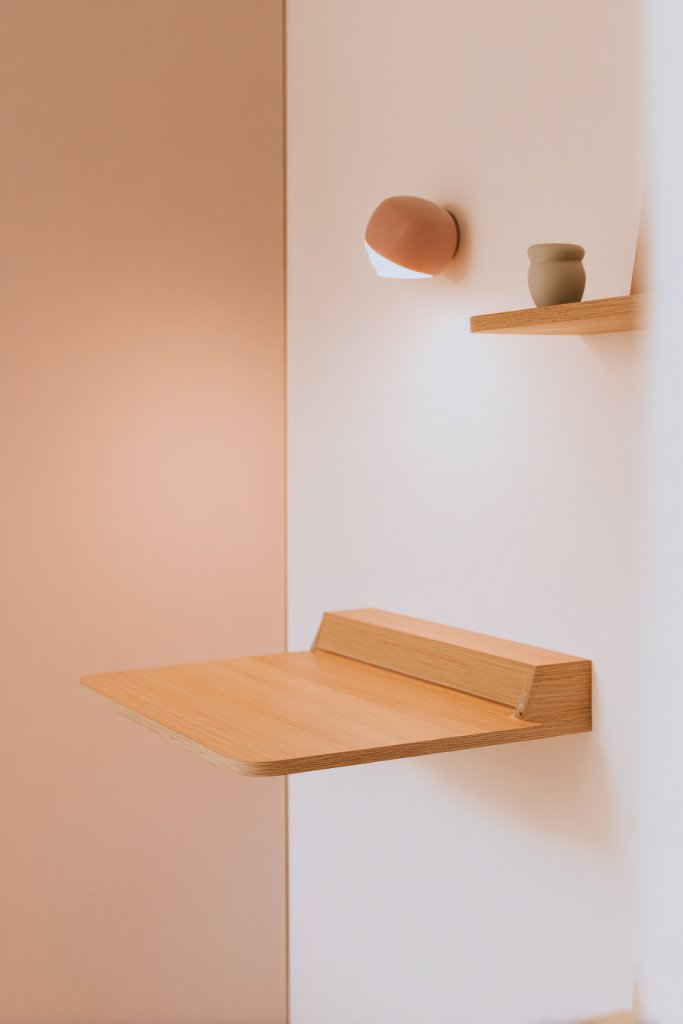
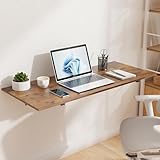
4. Space-Saving Wall-Mounted Desk for Work and Creativity
Working from a tiny apartment often feels like trying to fit a square peg into a round hole. Finding a dedicated workspace that doesn’t eat up your living area can be a real challenge. The idea of a flexible, space-saving desk that can vanish when not in use? Pure genius. Who wouldn’t want a work zone that’s as adaptable as their schedule?
Recommended Products to replicate this idea
| # | Preview | Product | |
|---|---|---|---|
| 1 |

|
HOMCOM Foldable Convertible Writing Table, Wall Mounted Space-Saving Computer Desk with Chalkboard... | Check Latest Price |
| # | Preview | Product | |
|---|---|---|---|
| 1 |
|
GOYLSER Wall Mounted Folding Table for Office, Rustic Brown Fold Down Desk Laundry Folding Table... | Check Latest Price |
Visualize a sleek wall-mounted desk with a smooth folding surface in a calming color like soft gray or pastel blue. When folded up, it becomes a minimal panel blending into the wall, with a small corkboard or magnetic strip above for notes and inspiration. During work hours, you unfold it effortlessly, revealing a sturdy workspace with a comfortable chair tucked underneath. Soft lighting and a few decorative accessories complete the scene, transforming your apartment into a productivity hub.
Opt for a fold-down desk with built-in storage compartments or a floating shelf with a fold-out surface. Choose a finish that matches your decor, from sleek lacquer to textured wood veneer. Add a cushioned foldable chair or a compact stool to keep the look clean. For a more artistic vibe, install a chalkboard or a pegboard on the wall for supplies. This setup can adapt to a home office, craft space, or even a study nook for kids.
Start by choosing a sturdy wall with enough clearance for the desk to fold down. Use a high-quality hinge system or a pivot mechanism for smooth operation. Install the desk at a comfortable height, ensuring stability when open. Organize your tools and supplies inside wall-mounted organizers or small containers. Consider cable management solutions for electronics, like clips or sleeves. Regularly wipe down surfaces and keep the area clutter-free for maximum efficiency.
Add a pop of color with a decorative cushion or a patterned desk mat. Personalize your workspace with motivational quotes or a small collection of inspiring objects on the shelf. Use a stylish pen holder or a set of colorful stationery to make it inviting. When not in use, keep a sleek storage box or a foldable chair nearby for quick setup. This space can reflect your personality while remaining functional.
A wall-mounted fold-down desk proves that small spaces can be big on productivity. It’s a smart solution for remote work, hobbies, or study areas. Once installed, you’ll appreciate how it frees up space and keeps your apartment looking tidy. Ready to create a versatile, stylish workspace? Your multi-use zone is just a fold away!
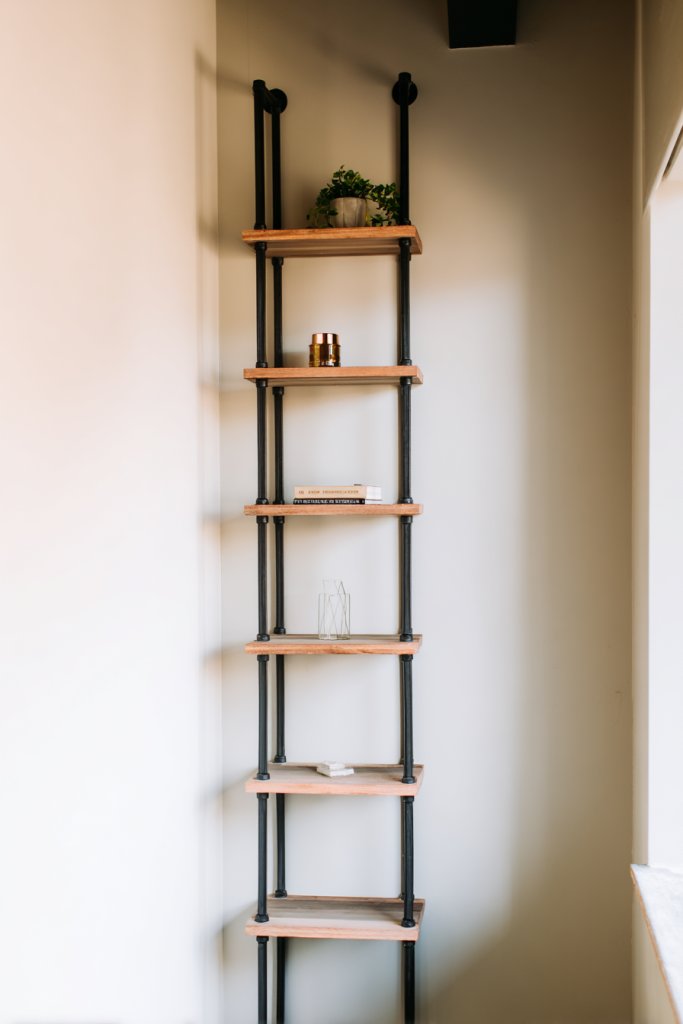
5. Vertical Storage Solutions with Tiered Shelving Units
Cluttered floors can make even the most stylish studio feel cramped and chaotic. You want to maximize every inch of your space without sacrificing style. The idea of tall, tiered shelving units that stretch upward offers a solution that’s both practical and visually appealing. Who wouldn’t want more storage without sacrificing precious floor space?
Recommended Products to replicate this idea
| # | Preview | Product | |
|---|---|---|---|
| 1 |

|
DUMOS 5-Tier Metal Wire Storage Shelves, Adjustable Standing Storage Rack Shelf, Heavy Duty Steel... | Check Latest Price |
| # | Preview | Product | |
|---|---|---|---|
| 1 |

|
Sakugi Storage Shelves - 5 Tier Shelf Organizer, Heavy Duty Garage Shelving Unit with Leveling Feet,... | Check Latest Price |
Picture a sleek, black metal tiered shelving unit reaching from floor to ceiling, filled with colorful books, decorative boxes, and curated accessories. The open design makes the room feel taller and more spacious, while the vertical lines draw the eye upward. The shelves are spaced at varying heights to accommodate plants, baskets, or art pieces, creating a layered, textured look. Soft lighting strips highlight your favorite items, giving the space a warm, inviting glow.
Choose a slim, minimalist design in neutral tones for a clean look. For a more eclectic vibe, mix materials like wood and metal or add decorative accents such as woven baskets or sculptural objects. Use the top shelves for items you rarely access, like seasonal decor, and keep everyday essentials within easy reach on lower tiers. Adjustable shelving options offer flexibility for different needs or room sizes. This system is adaptable for bedrooms, living rooms, or even hallway storage.
Start by measuring your wall space and selecting a tiered unit that fits comfortably. Anchoring the unit securely to the wall is essential for safety and stability, especially if tall. Arrange items by size for visual balance, placing heavier objects on the lower shelves. Use storage baskets or decorative bins to contain smaller items and keep everything organized. Regularly dust and rotate items to maintain a fresh appearance. This solution is straightforward to assemble and install with basic tools.
Decorate shelves with a mix of practical and pretty items—think sleek storage boxes paired with favorite books or framed photos. Incorporate textiles such as soft throws or textured pillow covers nearby for added warmth. You can also paint the unit in a bold color or add wallpaper backing for extra visual interest. Personal touches like a collection of vintage finds or curated art pieces can make the space uniquely yours.
Vertical shelving turns empty wall space into a showcase of personality and function. It’s an effortless way to keep clutter off the floor and create a vertical oasis of organization. Once set up, you’ll find your space feels more open and inviting. Ready to elevate your storage game? This tiered shelving system is a stylish, practical upgrade for any studio.
6. Transparent Room Dividers to Define Zones Without Clutter
Trying to separate sleeping, living, and workspace areas in a tiny studio often feels like putting up walls in a windstorm. You want clear boundaries but without making your space feel smaller or more cramped. The idea of transparent room dividers offers a way to carve out zones while maintaining an open, airy feel. Who says you need walls to create privacy?
Recommended Products to replicate this idea
| # | Preview | Product | |
|---|---|---|---|
| 1 |

|
Acrylic Room Divider,4-Panel Freestanding Partition Screen, Frosted Translucent Privacy Panel -... | Check Latest Price |
| # | Preview | Product | |
|---|---|---|---|
| 1 |

|
VEVOR Clear PVC Strip Curtain, 50 ft Length x 8 in Width, Ribbed Plastic Door Strip Bulk Roll, Walk... | Check Latest Price |
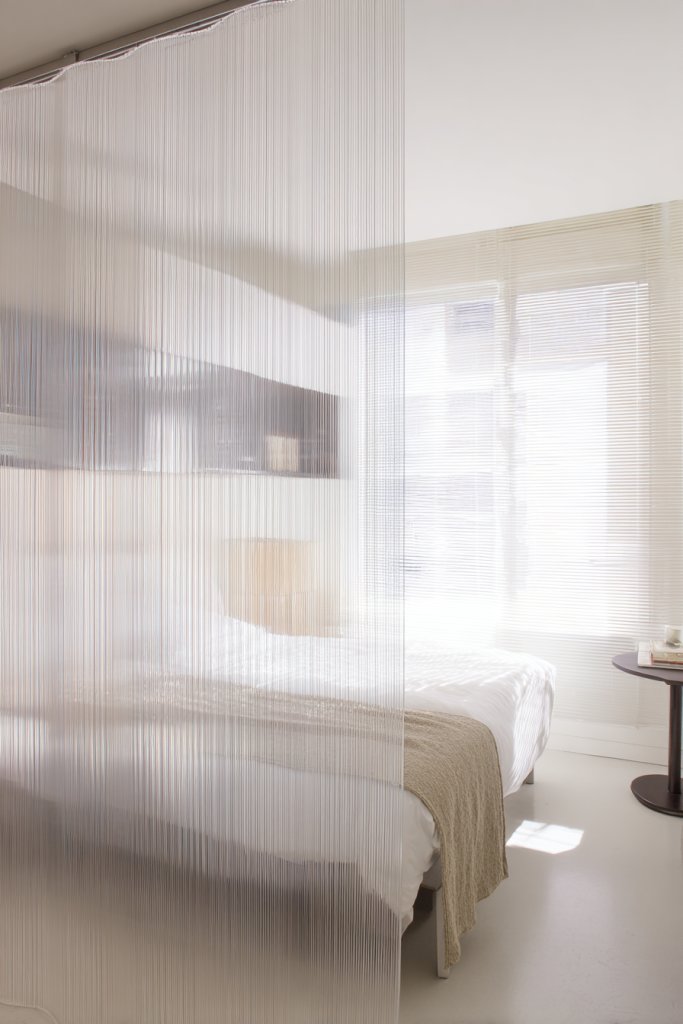
Visualize a sleek glass partition with a subtle frosted pattern that gently diffuses light, creating a soft boundary between your bed and living area. The divider stands tall but doesn’t block the flow of natural light, making the entire space feel larger. Soft curtains or sheer drapes can be added for extra privacy when needed, adding texture without bulk. The overall effect is a modern, minimalist oasis that feels spacious yet defined.
Choose transparent materials like glass, acrylic, or polycarbonate for a sleek, contemporary look. For a warmer touch, opt for framed panels with wood or metal accents. You can also install sliding or folding panels for flexible zoning. To add personality, incorporate decorative film or tinting options for privacy or style. This solution works well in various layouts, from open-plan studios to multi-functional rooms.
Begin by selecting a divider that fits your space and aesthetic. Install tracks or mounting brackets securely into the ceiling or floor for stability. Ensure the divider is lightweight enough to move if needed but sturdy enough to withstand daily use. Use furniture or decorative screens to anchor the divider and prevent wobbling. Cleaning is easy—just wipe with a damp cloth, and you’re done. This simple addition instantly adds privacy without sacrificing openness.
Personalize your divider with decorative films, geometric patterns, or even custom decals. Pair it with soft textiles like a plush rug or textured throw pillows to soften the look. Use lighting, such as LED strips or sconce lights, to highlight the divider and create ambiance. You can also add small shelves or hooks on the divider for hanging accessories or keys, making it both functional and decorative.
Transparent room dividers redefine how you organize your space, blending privacy with openness. They allow you to create distinct zones without sacrificing the feeling of roominess. Once installed, you’ll enjoy a more functional, stylish layout that adapts to your needs. Ready to separate your space with a touch of modern elegance? This idea makes it simple and chic.
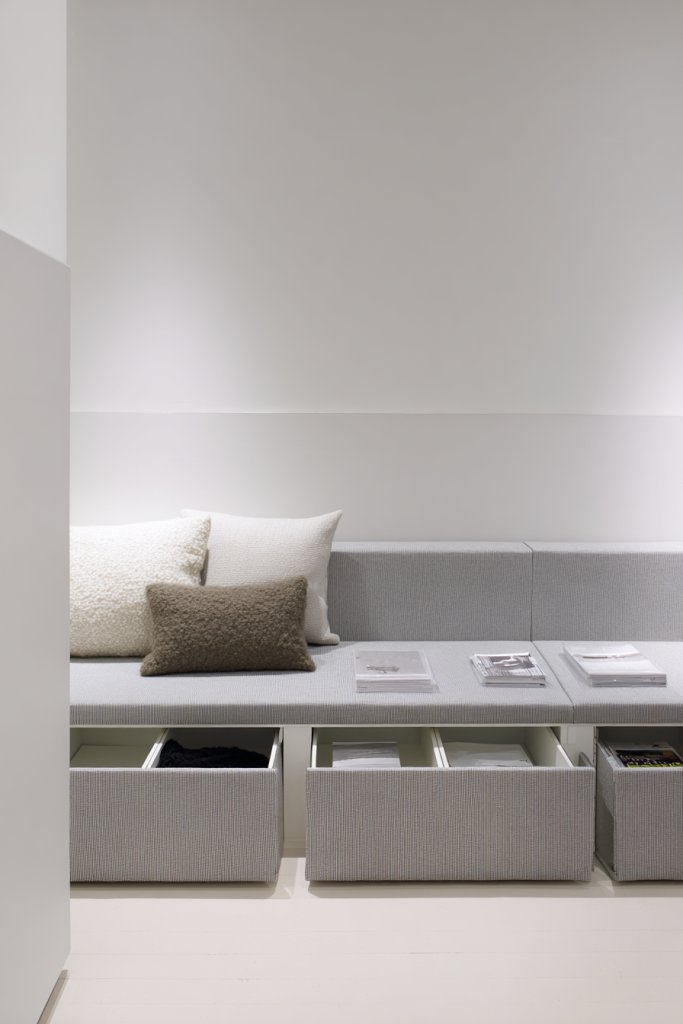
7. Under-Bed Storage Drawers for Clutter-Free Living
Clutter underneath the bed is like that uninvited guest who overstays their welcome. It’s the perfect spot for storing seasonal clothes, shoes, or extra bedding, but it often becomes a dumping ground. You want a smarter way to keep this space organized and out of sight. The solution? Under-bed storage drawers that hide the mess while providing easy access.
Recommended Products to replicate this idea
| # | Preview | Product | |
|---|---|---|---|
| 1 |

|
Yecaye Under Bed Storage with Wheels, 2Pack Under Bed Storage Containers, Underbed Shoe Storage... | Check Latest Price |
| # | Preview | Product | |
|---|---|---|---|
| 1 |

|
Budding Joy 90L Under Bed Storage Containers, Closet Organizers and Storage Bins, Foldable Underbed... | Check Latest Price |
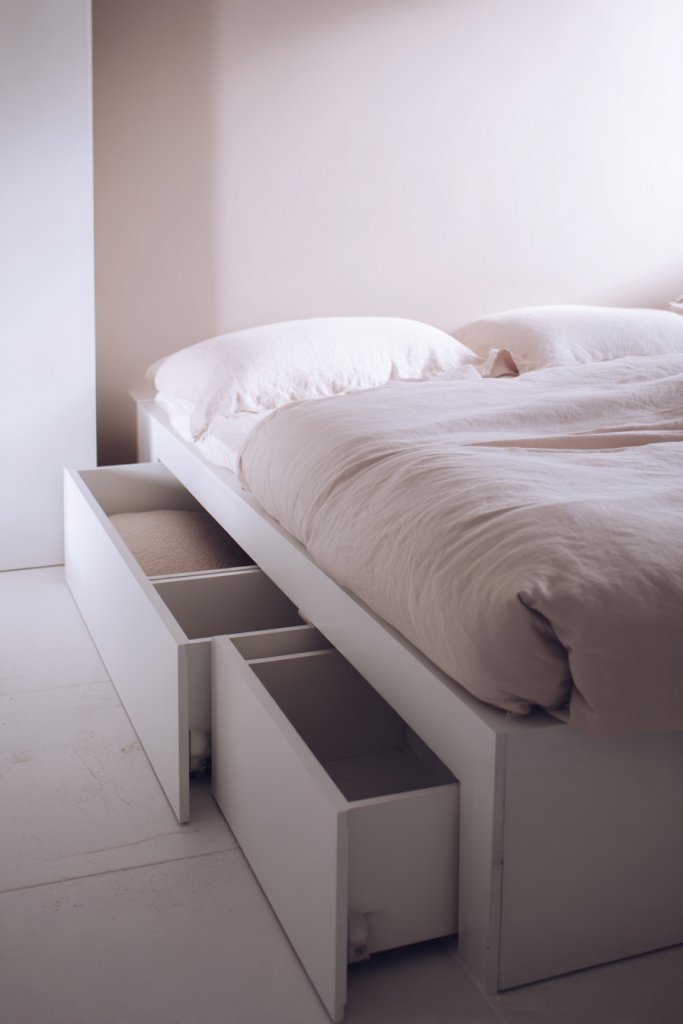
Envision a sleek platform bed with deep, smooth-running drawers built into the base. The drawers are on casters or glides, making them effortless to open and close. When pulled out, they reveal neatly folded clothes, shoes, or linens stored in labeled bins. The bed itself is upholstered in a soft fabric, with clean lines that blend seamlessly into your decor. The overall look is tidy, functional, and minimal.
Choose drawers with a wood finish for a warm, natural vibe or a lacquered look for a contemporary feel. Some models feature soft-close mechanisms and integrated handles for a sleek appearance. If space allows, add a matching headboard or side tables to complete the look. For a more budget-friendly option, use storage bins or stackable boxes that slide under your existing bed frame. This idea suits various styles, from rustic to ultra-modern.
Start by measuring the space underneath your current bed to determine drawer size. Select a platform bed with built-in storage or retrofit your existing frame with custom drawers. Use durable materials like plywood or MDF with a laminate or paint finish. Assemble the drawers following manufacturer instructions, ensuring smooth glides. Organize your stored items in labeled containers or fabric bins for quick retrieval. Regularly clean and tidy to keep the space looking fresh.
Add a soft mattress topper or decorative pillows to make your bed inviting. Use colorful bins or patterned fabric liners inside the drawers for a personal touch. Incorporate LED strip lighting underneath for easy nighttime access. You could even paint or wallpaper the drawer fronts for a pop of personality. This setup keeps your essentials close while maintaining a clutter-free room.
Under-bed storage is a game-changer for small spaces, offering hidden solutions for everyday clutter. It transforms your sleeping area into a clean, organized retreat. Once you experience the ease of access and neatness, you’ll wonder why you waited so long to upgrade. Ready to reclaim your floor and enjoy a tidy, stylish bedroom? Storage made simple and smart!
8. Minimalist Floating Nightstands for a Clean Look
Nightstands cluttering up your small space often make the room feel busier than it needs to be. You want a clean, uncluttered look that still provides a spot for your essentials. The idea of floating nightstands offers a minimalist solution that keeps surfaces clear and floors open. Who says you need bulky furniture to get the job done?
Recommended Products to replicate this idea
| # | Preview | Product | |
|---|---|---|---|
| 1 |

|
WDSHIYI Floating Nightstand, Wall Mounted Bedside Shelf, Handmade Bedroom Furniture,Pine Wood... | Check Latest Price |
| # | Preview | Product | |
|---|---|---|---|
| 1 |

|
Homaterial Floating Nightstand with Charging Station and LED Lights, Floating Bedside Table with... | Check Latest Price |
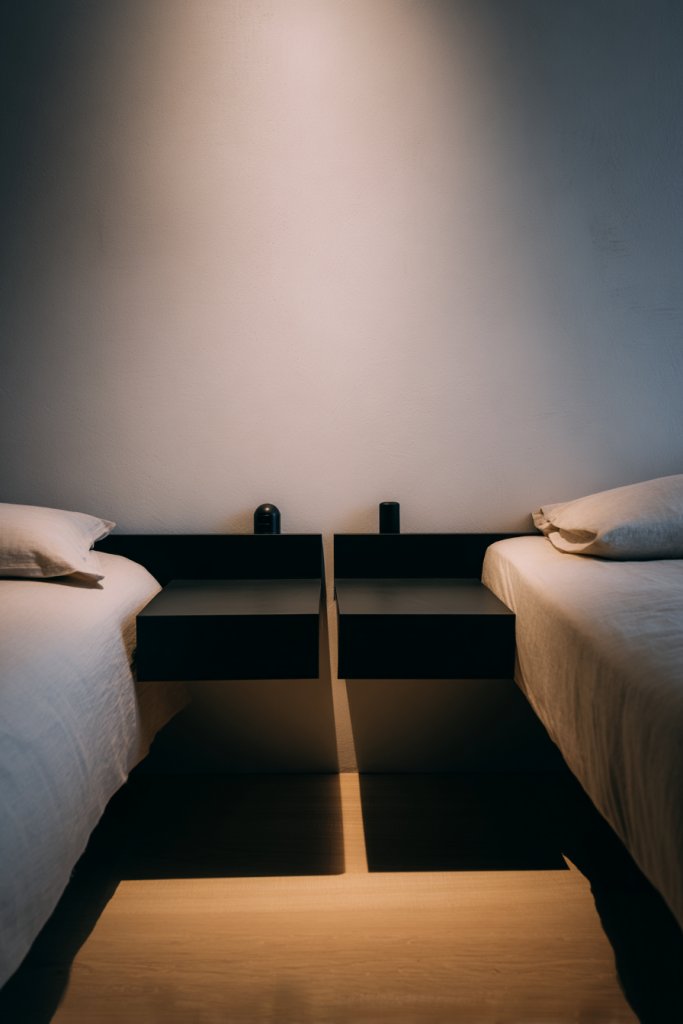
Imagine a sleek, wall-mounted shelf in a matte black or soft wood finish, positioned beside your bed. On it, you place a small lamp, a book, or a cup of water—nothing more. The floating design creates the illusion of more space, with no bulky legs or frames to block the view. Soft ambient lighting highlights the edges, giving your bedroom a modern, airy vibe that feels both functional and stylish.
Opt for a simple floating shelf with a lip to prevent items from falling off, or choose a unit with built-in drawers for hidden storage. You can add decorative elements like textured trays or small sculptures to personalize the space. Match the finish to your bed frame or wall color for a cohesive look. For a more industrial feel, opt for metal brackets and reclaimed wood, or go sleek with a glossy lacquer. This versatile idea suits various bedroom styles.
Start by measuring the space beside your bed to determine the ideal size. Install sturdy wall anchors and brackets designed to support weight, ensuring safety. Use a level to keep your shelf perfectly horizontal. Keep cords and wires hidden behind the wall or under the bed for a tidy appearance. Add small adhesive pads or non-slip mats to prevent items from sliding. Regularly wipe down to keep the surface looking fresh and clean.
Decorate your floating nightstand with a decorative tray, a small plant (if permissible), or a favorite photo in a sleek frame. Use textured or patterned textiles on the wall behind for visual interest. Incorporate a dimmable LED strip for adjustable lighting. For a cozy vibe, add a soft throw or a plush pillow nearby. This setup combines style and practicality effortlessly.
Floating nightstands offer a no-fuss, clutter-free solution that enhances your bedroom’s aesthetic. They create a sense of openness and calm, perfect for relaxation. Once installed, you’ll love the clean lines and extra floor space. Ready to upgrade your bedside setup with minimal effort and maximum style? This simple change makes a big impact.
9. Clever Use of Corner Nooks with Custom Shelving
Corners in a small studio often become forgotten or cluttered dead zones. You need a way to utilize these awkward spaces efficiently. Custom corner shelving offers a clever way to add storage or seating without invading the main area. Who wouldn’t want to turn every inch into a functional spot?
Recommended Products to replicate this idea
| # | Preview | Product | |
|---|---|---|---|
| 1 |

|
Homode Corner Shelf Wall Mount, Set of 4 Floating Corner Shelves with Cord Hole for Cable Box, Wood... | Check Latest Price |
| # | Preview | Product | |
|---|---|---|---|
| 1 |
|
YUUIJOAA L Shaped Bench with Storage, 63" Breakfast Nook Benches, Kitchen Corner Dining Bench... | Check Latest Price |
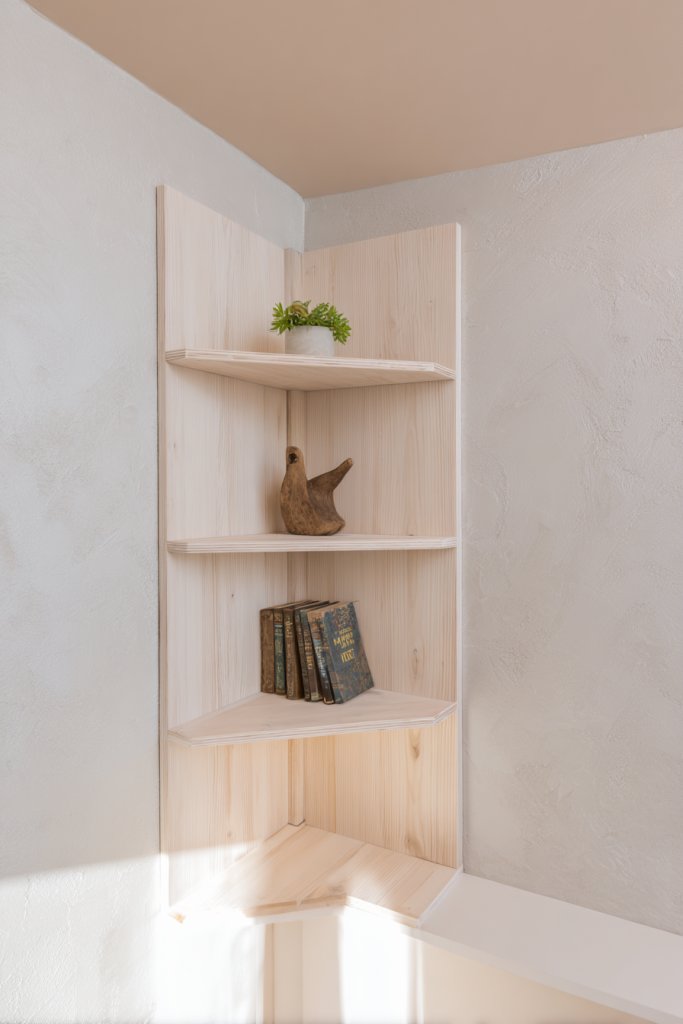
Picture a built-in corner nook with floating shelves and a cushioned bench underneath. The shelves display your books, decorative boxes, or plants, while the cushioned seat invites you to cozy up with a book or a cup of coffee. The shelves are painted in a contrasting color or textured finish to add visual interest. The space feels intentional, warm, and inviting, turning an overlooked corner into a feature.
Choose a custom-built unit with open shelves, closed cabinets, or a mix of both. Use soft upholstery for the bench, with removable covers for easy cleaning. Incorporate decorative baskets or storage boxes on the shelves to keep clutter out of sight. You can also add small LED puck lights or sconces for ambient lighting. Adapt the size and style to match your overall decor, from minimalist to eclectic.
Measure the corner carefully to determine the best size for shelves and seating. Use durable materials like MDF, plywood, or reclaimed wood for the shelves, and high-density foam for the cushion. Install brackets or anchors into studs for stability, especially if you plan to store heavier items. Finish with paint, stain, or a protective sealant to match your decor. Keep the seating area tidy with a removable cushion cover and a small side table if space allows.
Add decorative pillows, textured throws, or a small rug at the base to make the nook inviting. Personalize the shelves with your favorite objects—vintage finds, framed photos, or handcrafted decor. Use a small tray or decorative box to hold keys or other daily essentials. Incorporate a small plant or a candle (if safe) for ambiance. This corner becomes a charming retreat that maximizes your space.
Clever corner shelving turns an underused space into a stylish, functional feature. It adds character and maximizes every inch of your studio. Once you see how much additional storage or comfort it provides, you’ll wonder why you didn’t do it sooner. Ready to optimize your corners and craft a cozy nook? This idea is both practical and charming.
10. Over-the-Door Hooks and Racks for Additional Hanging Space
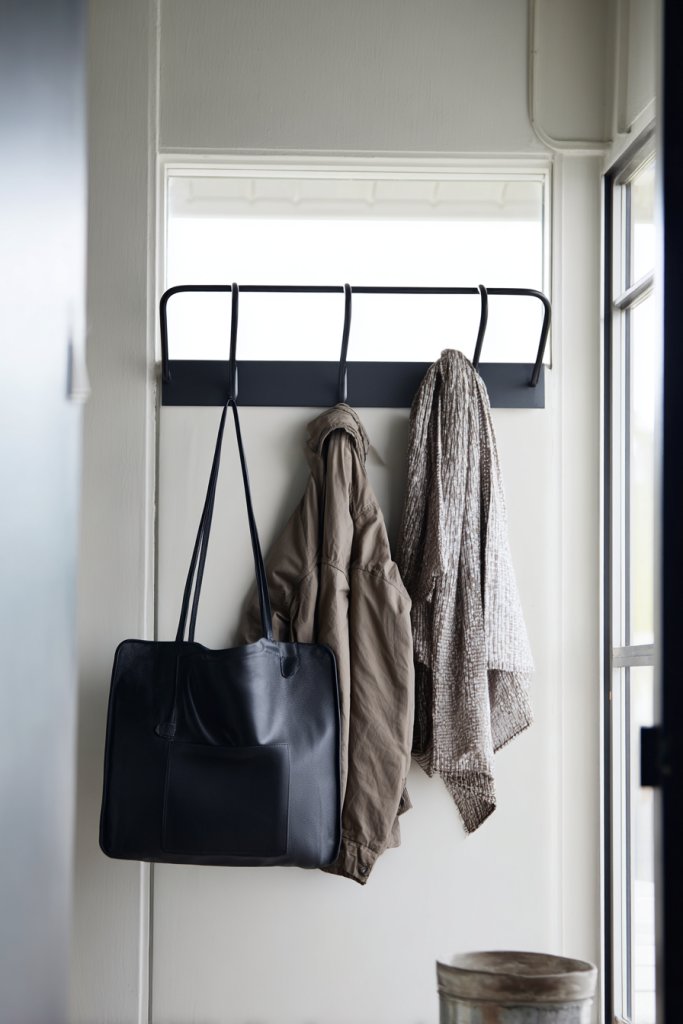
Clothing, bags, and accessories often clutter small entryways or closet floors, making your space look messy and disorganized. You need extra hanging space without sacrificing precious room. Over-the-door hooks and racks are the simple, affordable solution that instantly adds storage and keeps your essentials within reach. Isn’t it time to reclaim that lost space?
Recommended Products to replicate this idea
| # | Preview | Product | |
|---|---|---|---|
| 1 |

|
Optish Over The Door Hooks, Door Hanger Hooks for Hanging, Over The Doors Towel Racks for Bathroom... | Check Latest Price |
| # | Preview | Product | |
|---|---|---|---|
| 1 |
|
Optish Over The Door Hooks, Door Hanger Hooks for Hanging, Over The Doors Towel Racks for Bathroom... | Check Latest Price |
Visualize a sturdy metal rack hanging over your door, with multiple hooks for coats, hats, or bags. It’s sleek, simple, and takes up no floor space. The hooks are lined with colorful scarves, bags, or jackets, creating a functional display. When the door closes, it’s almost invisible, yet your space feels more organized and tidy. The setup offers quick access to your daily essentials while keeping clutter off the floor.
Choose from over-the-door hooks with multiple tiers or racks with adjustable hooks for different sizes. Some models include pockets or fabric compartments for small items like keys or jewelry. Use coordinating hardware for a cohesive look or add decorative touches like paint or washi tape to match your decor. You can also install a tension rod inside a closet door for hanging longer items or layered accessories.
Start by measuring your door’s thickness and width to select the right hooks or racks. Install hooks with screws or tension mechanisms, ensuring they are secure and won’t slip. Use wall-mounted hooks inside closets for heavier items or to organize belts, ties, and scarves. Keep the hooks clean with regular wiping to prevent dust buildup. This quick upgrade takes minutes and makes a big difference in organization.
Decorate the hooks with colorful ribbons or fabric wraps for a personalized touch. Organize items by color or style to create a visual flow. Use small decorative hooks for jewelry or lightweight accessories. You can also add a small mirror nearby to complete the functional zone. These small changes make everyday routines easier and more stylish.
Over-the-door hooks are a simple, effective way to add hanging space and reduce clutter. They’re perfect for small spaces where every inch counts. Once you see how much neater your space becomes, you’ll appreciate their practicality. Ready to hang up your clutter and boost your organization? This tiny upgrade makes a big impact.
11. Compact Dining Solutions with Extendable Tables
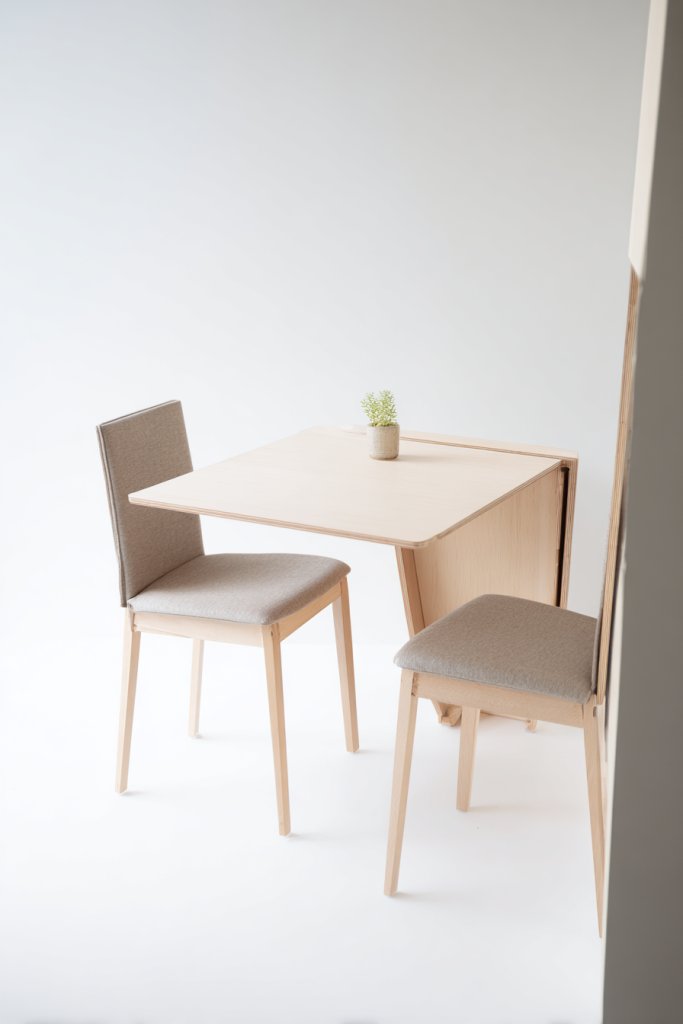
Having a dedicated dining area in a small studio can feel impossible—either you sacrifice space or settle for cramped meals. You crave a flexible solution that adapts to both solo dinners and gatherings. An extendable table is the perfect answer, providing versatility without sacrificing style. Who wouldn’t want a table that grows with their needs?
Recommended Products to replicate this idea
| # | Preview | Product | |
|---|---|---|---|
| 1 |

|
COMUHOME Extendable Drop Leaf Foldable Dining Table with 2 Drawers and 4 Wheels for Living Room... | Check Latest Price |
| # | Preview | Product | |
|---|---|---|---|
| 1 |

|
Nazhura 4 Pack Folding Chairs, Fabric Dining Chair Set with Padded Cushion and Back, Indoor Outdoo... | Check Latest Price |
Picture a sleek, minimalist table with a smooth surface in a neutral tone. When you entertain, you extend the leaf to seat four or six guests comfortably. When not in use, it folds back into a compact shape, tucked against the wall or placed against a corner. The table’s clean lines and simple design blend seamlessly into your decor, making it both functional and stylish. Ambient lighting above highlights its versatility.
Choose a table with a slim profile and a durable surface like tempered glass, wood veneer, or laminate. Opt for a design with concealed extension mechanisms for a sleek look. Add stackable chairs or foldable stools that can be tucked away when not needed. For a more casual vibe, consider a rustic wood finish or a modern metal base. This setup is perfect for both everyday meals and special occasions.
Measure your available space to select a table that fits comfortably when extended and collapsed. Install the table on a flat, sturdy surface, ensuring the extension mechanism operates smoothly. Keep extension parts clean and lubricated if necessary. Store extra chairs nearby or hang them on wall-mounted racks for space efficiency. Regularly wipe down the surface to keep it looking new and inviting. This practical upgrade adds flexibility to your living space.
Decorate the table with a runner or placemats that reflect your style—think bold patterns or subtle textures. Add a centerpiece like a candle or a decorative bowl for a welcoming touch. Use colorful or patterned chairs to inject personality and contrast. When folded, the table can serve as a side surface for additional workspace or display. Personal touches make your dining area uniquely yours.
An extendable table transforms your small studio into a versatile entertaining space. It adapts effortlessly to your lifestyle, whether dining solo or hosting friends. Once you experience the convenience and style it offers, you’ll wonder how you ever managed without it. Ready to make your dining area as adaptable as your life? This simple piece elevates your space instantly.
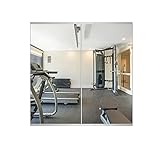
12. Mirrored Walls and Sliding Doors to Create an Illusion of Space
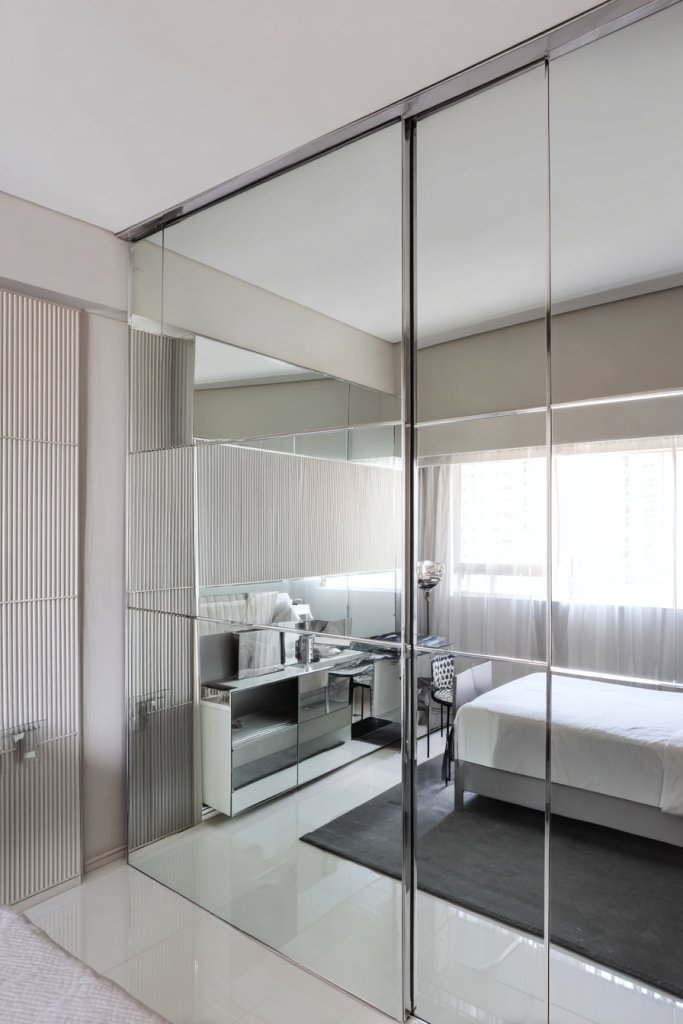
A small studio can often feel like a maze of furniture and walls that close in on you. You want to maximize light and create an illusion of spaciousness without remodeling. Mirrored walls and sliding doors are the magic tricks that visually expand your space instantly. Who wouldn’t want their tiny apartment to feel twice as big?
Recommended Products to replicate this idea
| # | Preview | Product | |
|---|---|---|---|
| 1 |
|
Delma Home Gym Mirror,48''x24''x2PCS Silver,Large Full Body Tempered Glass Frameless, Wall-Mounted... | Check Latest Price |
| # | Preview | Product | |
|---|---|---|---|
| 1 |

|
BARNSMITH 72 x 80 Inches Mirrored Closet Door, One Side Mirror with Top & Bottom Track Kits,... | Check Latest Price |
Imagine a large mirror covering an entire wall, reflecting your room and bouncing sunlight around. Next to it, a sleek sliding door made of frosted or mirrored glass separates your sleeping area from the living space. The mirror reflects the room’s decor, making it appear larger and brighter. The sliding door glides smoothly, saving space compared to traditional swinging doors. The overall effect is a bright, open, and cohesive environment.
Choose full-length mirrors for a dramatic effect or mirrored panels for a subtler touch. Opt for sliding doors with sleek frames or minimal hardware to keep the look modern. You can also incorporate a mirrored closet door or a decorative mirrored wall for a versatile upgrade. For a softer aesthetic, combine mirror finishes with textured wall coverings or subtle lighting.
Measure your wall and door space carefully to select the right mirror size and sliding track system. Install the tracks securely into studs or a solid wall, following manufacturer instructions. Attach the mirror panels or doors, ensuring smooth operation. Keep the mirror clean with a glass cleaner and a soft cloth to maintain clarity. Regularly check the hardware for stability, especially in high-traffic areas. This upgrade is straightforward but highly impactful.
Frame your mirror with decorative molding or paint the edges to match your decor. Use lighting around the mirror to enhance brightness and add ambiance. Incorporate a small decorative tray or a set of stylish hooks nearby for accessories. Personalize the space further with subtle decals or etching for a unique touch. This transformation elevates your entire apartment’s aesthetic.
Mirrored walls and sliding doors turn a tiny space into a bright, expansive environment. They reflect light and create the illusion of more room, making your studio feel larger and more inviting. Once installed, you’ll love how much more open and airy your space appears. Ready to upgrade your walls and doors for a smarter, brighter home? This simple change has a powerful impact.
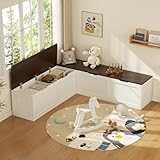
13. Under-Window Seat with Built-In Storage for Cozy Comfort

Under-utilized window areas are perfect for creating a cozy nook, but they often become cluttered or overlooked. You want a functional, comfortable space to relax or read without sacrificing storage. An under-window seat with built-in storage combines both, turning a plain window into your favorite spot in the apartment. Who doesn’t love a little cozy corner?
Recommended Products to replicate this idea
| # | Preview | Product | |
|---|---|---|---|
| 1 |

|
HOMSHO 2-Tier Storage Bench, 47.2" Wide Shoe Bench with Padded Seat Cushion, Entryway Bench with 4... | Check Latest Price |
| # | Preview | Product | |
|---|---|---|---|
| 1 |

|
FlyGulls Bench Cushion for Indoor Furniture 48x19 inch Rectangle Bench Seat Cushion for Bay Window... | Check Latest Price |
Picture a cushioned bench fitted snugly beneath a large window, upholstered in a soft, neutral fabric. The seat lifts to reveal hidden compartments where you store blankets, books, or seasonal decor. The top of the seat is layered with textured throws and plump pillows, inviting you to sit and unwind. The window frame is painted in a contrasting color or decorated with simple curtains, adding charm and personality. It’s your personal retreat, right at home.
Choose a custom-built bench with hinged lids or drawers for easy access. Use a soft cushion or a textured throw blanket to enhance comfort. Decorate with a few decorative pillows or a cozy blanket for added warmth. Paint or wallpaper the inside of the storage compartments to add a splash of personality. This idea adapts well to different window sizes and styles, from rustic to modern.
Start by measuring your window opening and selecting suitable furniture or building a custom piece. Use durable materials like plywood or MDF, finished with paint or fabric upholstery. Attach hinges or handles for easy access to storage compartments. Secure the seat to the window frame or wall for safety, especially if you have kids or pets. Add a plush cushion and decorative pillows to complete the look. Regularly vacuum and organize the storage for neatness.
Personalize your window seat with a variety of textiles—think patterned or textured fabrics. Incorporate decorative trims or piping for a polished look. Use the storage space to hide away seasonal items or clutter, keeping the living area tidy. Add a small side table or a decorative tray on the seat for drinks or books. This creates a comfortable, functional focal point in your studio.
An under-window seat maximizes space and adds a charming, functional feature to your apartment. It invites relaxation and makes the most of overlooked areas. Once you see how it transforms your room, you’ll appreciate the blend of comfort and practicality. Ready to create a cozy corner that’s perfect for unwinding? This idea turns windows into your favorite spot.
14. Minimalist Pendant Lighting to Enhance Modern Aesthetics
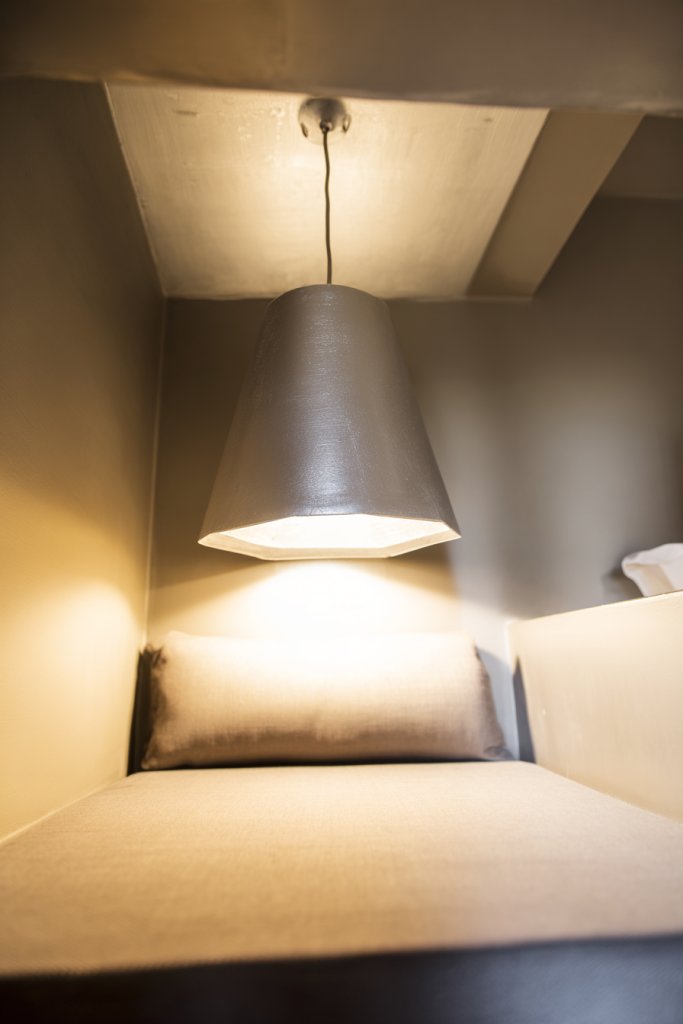
Poor lighting can make even the nicest studio feel dull and uninviting. You want a lighting solution that brightens your space without cluttering or overwhelming the decor. Minimalist pendant lighting offers a sleek, modern touch that adds both function and style. Who wouldn’t want to illuminate their space with simplicity?
Recommended Products to replicate this idea
| # | Preview | Product | |
|---|---|---|---|
| 1 |

|
DUHU Black and Wood Pendant Light,Modern Kitchen Pendant Light Over Island,Industrial Metal... | Check Latest Price |
| # | Preview | Product | |
|---|---|---|---|
| 1 |

|
Modern Led Pendant Light Fixture, 15W Chrome Spiral Led Chandelier Hanging Lamp, 4500K Daylight... | Check Latest Price |
Imagine a set of slim, geometric pendant lights hanging in a row over your dining or work area. Their matte finishes and simple shapes create a clean, contemporary look. Soft light diffuses through frosted or clear glass shades, casting a warm glow. The fixtures are suspended at varying heights, adding visual interest without cluttering the ceiling. The overall ambiance is modern, warm, and inviting, perfect for any time of day.
Opt for materials like brushed metal, matte black, or colored finishes to match your decor. Choose minimalist shapes like spheres, cylinders, or cones for a cohesive look. Install dimmable bulbs to adjust the mood, from bright and energizing to soft and relaxing. Layer multiple fixtures for a dramatic effect or keep it simple with a single pendant. This lighting style suits everything from Scandinavian minimalism to industrial chic.
Start by measuring the height above your table or workspace, ensuring enough clearance for comfort. Use a sturdy ceiling hook or mounting bracket to support the weight of the fixture. Connect the wiring according to safety standards, preferably with professional help if unfamiliar. Choose energy-efficient bulbs like LEDs to save on electricity. Adjust the height and angle of the pendants for optimal light distribution and aesthetic balance. Regular cleaning of the shades keeps the look fresh.
Add decorative filament or Edison bulbs for a vintage touch. Use a coordinated color palette for the fixtures to tie in with your overall decor scheme. Incorporate a statement fixture as a focal point or cluster several for a layered look. Play with different shapes and sizes for visual variety. This lighting can elevate your entire space, making it feel thoughtfully designed and modern.
Minimalist pendant lighting is a simple upgrade with a big impact, adding a touch of sophistication and modern elegance. It provides effective illumination while enhancing your space’s aesthetic. Once installed, you’ll appreciate how it sets the tone for your entire apartment. Ready to brighten your studio with sleek, stylish lighting? This easy change makes your space feel more polished and inviting.
15. Portable Room Partitions for Flexible Space Definition
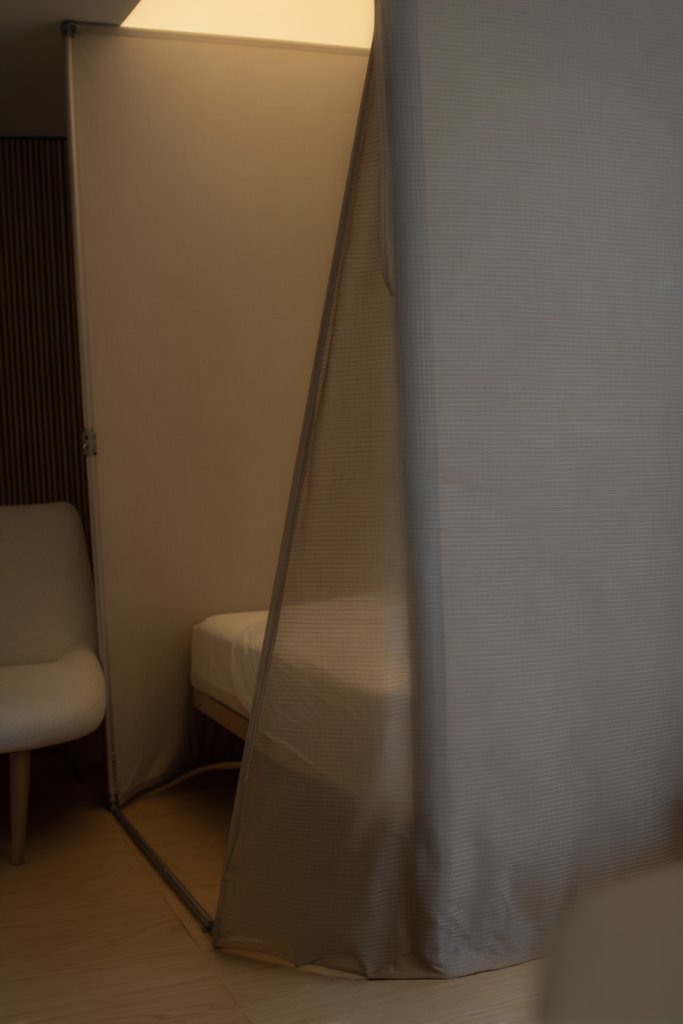
In a tiny studio, defining different zones can feel impossible without permanent walls. You want flexibility—something that can create privacy or separate spaces when needed, and disappear when not. Portable room partitions are the answer, allowing you to customize your layout on the fly. Who says your space has to be static?
Recommended Products to replicate this idea
| # | Preview | Product | |
|---|---|---|---|
| 1 |

|
Room Divider 6FT Portable Room Dividers and Folding Privacy Screens, 88'' W Fabric Divider for Room... | Check Latest Price |
| # | Preview | Product | |
|---|---|---|---|
| 1 |

|
SUNALLY Room Divider 6FT Folding Privacy Screens with Lockable Wheels, 4 Panel Room Partition for... | Check Latest Price |
Imagine a lightweight folding screen made of bamboo, fabric, or sleek metal, standing easily in the corner. When needed, it creates a cozy sleeping nook or a private workspace. When not in use, it folds flat, taking up minimal space. The neutral tones and simple design blend into your decor, adding a touch of elegance. The partition acts as a flexible boundary that adapts to your lifestyle.
Choose from various materials—wood, fabric, metal, or even acrylic—to match your aesthetic. Use decorative patterns or textures to add visual interest. Select lightweight, foldable options for easy storage or moveability. Combine multiple panels or screens to create larger partitions or decorative room dividers. This solution is perfect for changing needs, from guest rooms to workspace zones.
Start by selecting a partition that fits your space and style. Set it up in key areas where privacy or separation is needed, such as behind your bed or in front of a workspace. Ensure the panels are stable and won’t tip over easily, especially if children or pets are around. Position it to maximize natural light and airflow. When not in use, fold and store it compactly—most models are designed for portability. Regularly check stability and clean surfaces to maintain appearance.
Decorate the panels with fabric wraps, decals, or textured finishes to match your decor. Use it to hide clutter or create a visual backdrop for photos or art. Personalize with small accessories or decorative trims. Incorporate storage pockets or hooks on the panels for extra utility. This adaptable partition turns your space into a dynamic, multifunctional environment.
A portable room partition offers unmatched flexibility, making your small space feel larger and more organized. It allows you to redefine your environment effortlessly, whether for work, rest, or play. Once you see how easily it transforms your layout, you’ll appreciate its convenience. Ready to create adaptable zones and enjoy a versatile studio? This simple solution is your new best friend.
16. Stackable Furniture Pieces for Easy Reconfiguration
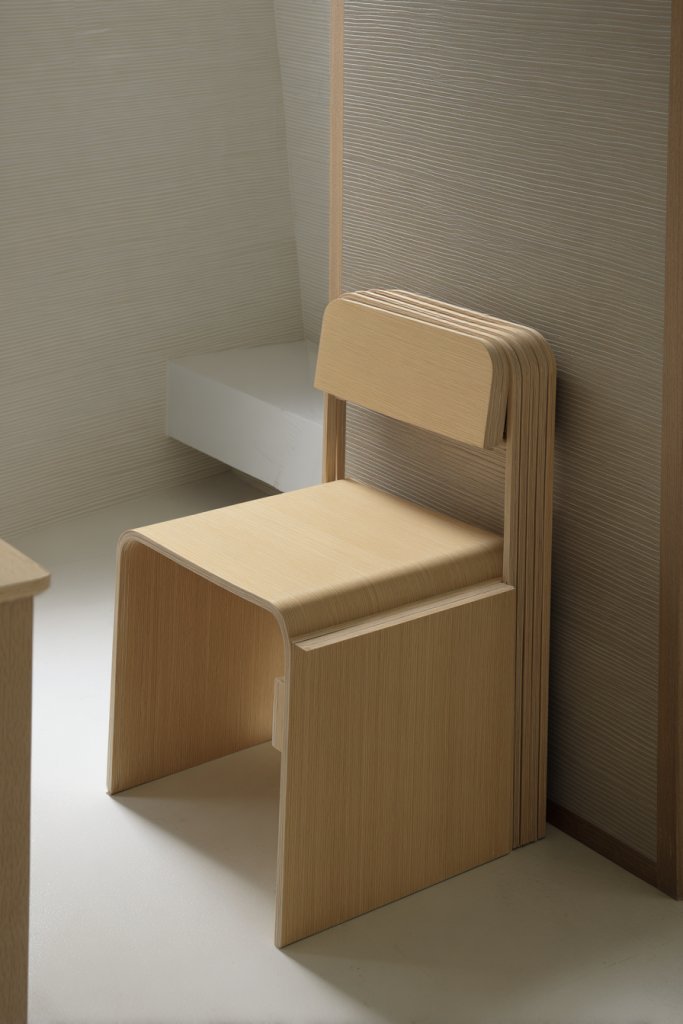
A small studio needs furniture that adapts to your changing needs—whether you’re hosting friends, working from home, or relaxing solo. Fixed furniture often feels limiting and cluttered. Stackable pieces offer a flexible, space-efficient solution that transforms your environment in seconds. Who wouldn’t love furniture that grows and shrinks with your lifestyle?
Recommended Products to replicate this idea
| # | Preview | Product | |
|---|---|---|---|
| 1 |
|
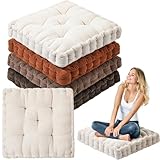
Jerify Floor Pillow Cushions 22 x 22 Inch Round Square Large Meditation Floor Pillow for Classroom... | Check Latest Price |
| # | Preview | Product | |
|---|---|---|---|
| 1 |

|
ECR4Kids SoftZone Toddler Modular Stool Set, Flexible Seating, Earthtone, 6-Piece | Check Latest Price |
Visualize a set of sleek, modular stools and side tables that stack into a compact cube when not in use. During the day, they serve as extra seating or side tables; at night, they stack away neatly, freeing up space. The pieces are made of lightweight, durable materials like molded plastic or wood, with clean lines and neutral finishes. The versatility creates a clutter-free, modern look that adapts effortlessly.
Choose stackable furniture with multiple functions—like ottomans with storage inside or tables that convert into seating. Mix and match sizes, shapes, and finishes to suit your decor style. For a playful vibe, incorporate bright colors or patterns. For a more sophisticated look, opt for sleek monochrome pieces. This flexibility is ideal for small spaces that need to adapt day-to-day.
Start by selecting lightweight, durable pieces that can be easily moved and stacked. Arrange stacking options near your main living or sleeping area for quick reconfiguration. Use furniture with locking mechanisms or non-slip bases for safety during use. When not needed, stack or store the pieces out of sight—under the bed, behind a door, or in a closet. Regularly wipe down surfaces to keep them looking fresh.
Decorate with colorful cushions, textured fabrics, or patterned tops to add personality. Use stacking furniture to create a makeshift workspace or extra bed for guests. Incorporate decorative trays or bowls on top for organization. Personal touches like custom paint or decals can make these pieces uniquely yours. They turn practical furniture into a stylish statement.
Stackable furniture is a smart, adaptable choice for small studios that need to maximize every inch. It offers endless reconfiguration options, making your space more functional and fun. Once you experience the ease of transforming your environment, you’ll see how much more your space can do. Ready to embrace versatile living? These pieces are a game-changer.
17. Minimalist Wall-Mounted Shelves for Decorative and Practical Items
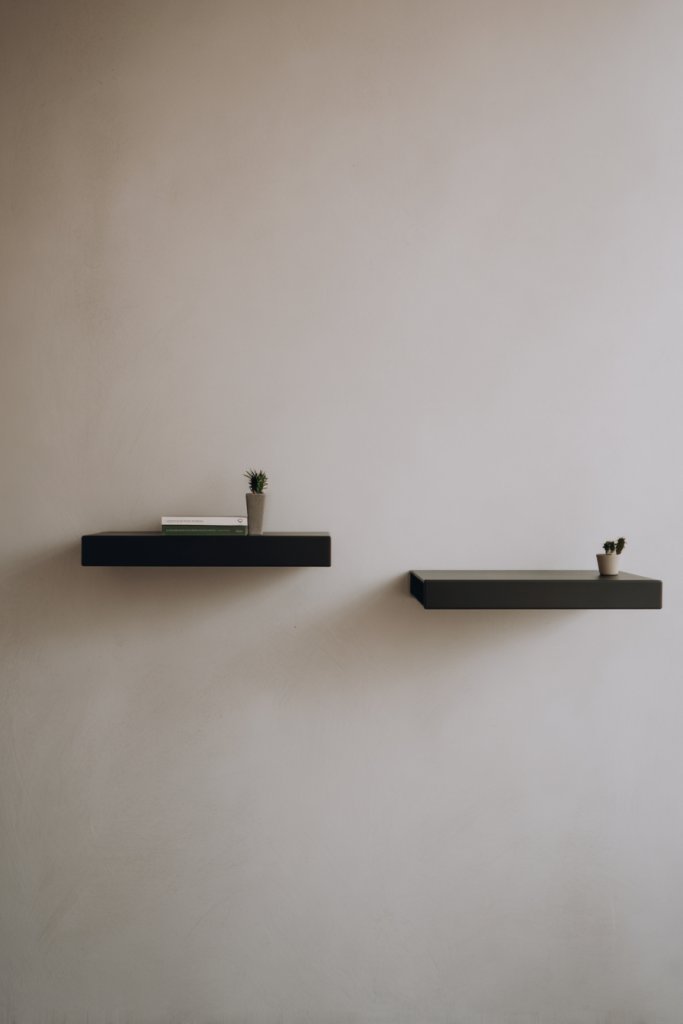
Cluttering surfaces and floors makes a small studio feel chaotic and cramped. You want a way to display your essentials and decor without sacrificing space. Minimalist wall-mounted shelves are the perfect solution—they keep your space tidy while adding a stylish touch. Who says you need bulky furniture to be functional?
Recommended Products to replicate this idea
| # | Preview | Product | |
|---|---|---|---|
| 1 |

|
Boswillon Floating Shelves Wall Mounted Set of 2, Modern Black Wall Shelves for Storage with Lip,... | Check Latest Price |
| # | Preview | Product | |
|---|---|---|---|
| 1 |

|
Floating Shelves with Black Metal Brackets Set of 3, Light Wood Wall Bookshelf for Bedroom Over Desk... | Check Latest Price |
Imagine a set of slim, floating shelves in matte black or warm wood, arranged in an asymmetrical pattern on your wall. They hold a curated selection of books, small decorative objects, or everyday essentials. The open design keeps your surfaces clear, and the floating effect creates a clean, modern aesthetic. Soft lighting beneath or above the shelves highlights your favorite items, adding warmth and depth.
Choose simple, narrow shelves for a sleek look or wider, deeper ones for more storage. Mix materials like wood, metal, or acrylic for visual interest. Install them at varying heights to create a layered, gallery-style display. Incorporate brackets or hidden mounts for a seamless appearance. This idea works well in bedrooms, kitchens, or living areas, adapting easily to your decor style.
Start by measuring your wall space and selecting a shelf style that complements your room. Install sturdy anchors or brackets into wall studs for safety, especially if holding heavier items. Arrange your items thoughtfully, balancing size and color for visual harmony. Regularly dust and reorganize to keep the display fresh and intentional. Use a level during installation to ensure perfect alignment. This simple upgrade elevates your space instantly.
Decorate with a mix of functional and decorative objects—think framed photos, small plants, or curated collectibles. Use decorative boxes or baskets on wider shelves to hide clutter. Personalize the arrangement to reflect your personality, changing items seasonally or for special occasions. Incorporate LED lighting or backlighting for added flair. These shelves turn ordinary walls into a curated showcase.
Wall-mounted shelves create a sleek, organized look that makes your small space feel larger. They allow you to showcase your favorite items while keeping clutter off surfaces. Once you see how much more spacious and styled your apartment becomes, you’ll wonder why you didn’t do it sooner. Ready to elevate your decor with simple, elegant shelving? This idea is both practical and stylish.
18. Hidden Appliances and Compact Electronics for a Streamlined Look

Counter space is gold in a small studio, but bulky appliances and electronics eat up everything. You want a clutter-free kitchen and living area that still offers all the tech you need. Hidden appliances and compact electronics keep your space sleek and functional. Who wouldn’t love a kitchen that looks tidy but is fully equipped?
Recommended Products to replicate this idea
| # | Preview | Product | |
|---|---|---|---|
| 1 |

|
BLACK+DECKER Over the Range Microwave Oven with Vent and One-Touch Auto Cooking, 1.7 cu. ft. OTR... | Check Latest Price |
| # | Preview | Product | |
|---|---|---|---|
| 1 |

|
OVENTE Countertop Infrared Single Burner, 1000W Electric Hot Plate with 7” Ceramic Glass Cooktop,... | Check Latest Price |
Visualize a minimalist kitchen with built-in appliances like a concealed microwave in a cabinet, a flush-mounted cooktop, and a slim fridge integrated into cabinetry. In your living space, a compact smart TV is mounted on the wall, with cables hidden behind a sleek conduit. The overall aesthetic is clean, with surfaces free of clutter, and a streamlined look that makes the entire space feel larger. Ambient lighting highlights the modern, clutter-free environment.
Opt for built-in or integrated appliances for a seamless look. Use furniture with concealed compartments for electronics, such as ottomans with hidden charging stations or side tables with built-in outlets. Choose compact, multi-functional gadgets like a small robot vacuum or a wall-mounted fold-out desk. This approach works with various decor styles, from ultra-modern to subtle Scandinavian.
Start by measuring available cabinet and wall space for built-in appliances. Select models compatible with your existing setup and ensure proper ventilation and access. Use cable management systems to hide wires and keep everything neat. Install wall-mounted electronics at eye level for easy use, and consider a universal charging station for multiple devices. Regularly clean and update your electronics to keep the space functional and clutter-free. This setup requires some planning but pays off immediately.
Personalize your tech setup with stylish covers, skins, or custom mounts. Use decorative trays or organizers to keep remotes and chargers tidy. Incorporate smart home devices that blend into your decor, like voice assistants with sleek designs. Keep the aesthetic consistent by choosing matching finishes or colors. These touches make your space look polished and thoughtfully designed.
Hiding appliances and electronics creates a sleek, modern environment that maximizes your space. It reduces visual clutter and makes your studio feel more open and organized. Once you see how much more spacious and stylish your home becomes, you’ll love the minimalist lifestyle. Ready to streamline your tech and appliances? This smart approach elevates your entire space.
19. Foldable and Collapsible Laundry Hampers and Baskets
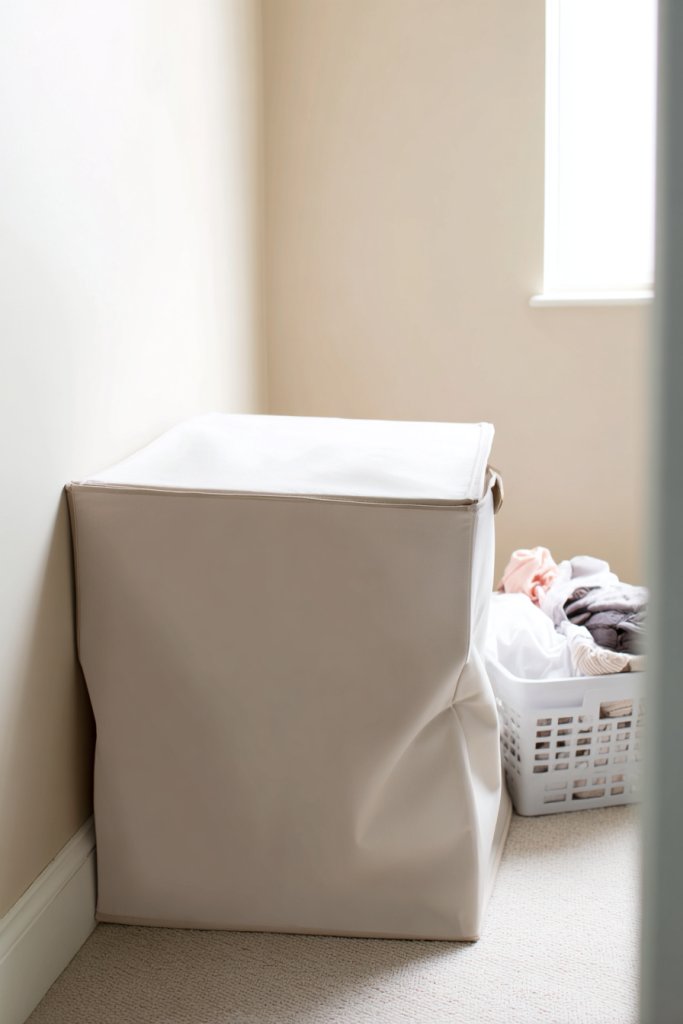
Laundry day in a small studio often turns into a cluttered mess, with hampers taking up valuable space. You want an easy, tidy way to store dirty clothes without sacrificing aesthetic. Foldable and collapsible laundry hampers are the perfect practical yet unobtrusive solution. Who says laundry has to be a chaos-inducing chore?
Recommended Products to replicate this idea
| # | Preview | Product | |
|---|---|---|---|
| 1 |
|
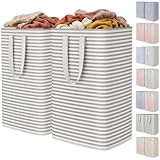
Lifewit 2 Pack Laundry Hamper Large Collapsible Laundry Baskets, Freestanding Waterproof Clothes... | Check Latest Price |
| # | Preview | Product | |
|---|---|---|---|
| 1 |
|
SAMMART 42L (11 gallon) Collapsible Plastic Laundry Basket - Foldable Pop Up Storage... | Check Latest Price |
Imagine a sleek fabric hamper with a collapsible frame that folds flat when not in use. It’s tucked discreetly into a closet or behind a door, ready to be unfolded when laundry piles up. When in use, it holds your clothes in a stylish, neutral-toned container that complements your decor. The hamper’s simple design makes laundry day less of a hassle and more of a tidy, organized process.
Choose hampers in natural fibers like cotton or linen, or opt for waterproof, stain-resistant materials for durability. Use colors or patterns that match your decor, from minimalist white to vibrant prints. Some models include handles for easy carrying or a lid to hide dirty laundry completely. They can also double as storage for other items, like towels or linens, when folded away. This idea adapts to various needs and styles.
Start by measuring your available closet or corner space. Select a foldable hamper with a sturdy frame and a lightweight fabric bag. Use hooks or a small storage bin to keep it accessible. When not in use, fold it flat and tuck it out of sight to save space. Regularly wash and maintain the fabric for hygiene and appearance. This simple upgrade makes laundry more manageable and less of an eyesore.
Decorate the hamper with fabric covers, patches, or painted designs to reflect your personality. Use matching laundry bags or baskets for a cohesive look. Incorporate a small, portable laundry station with a foldable rack or a compact drying rack nearby. Personal touches like labels or decorative trims add charm. This functional piece becomes part of your decor, not an afterthought.
A foldable laundry hamper keeps your space neat and makes laundry day less stressful. It’s a practical, stylish upgrade that fits easily into any small space. Once you see how organized and clutter-free your studio feels, you’ll wonder why you didn’t do it sooner. Ready to streamline your laundry routine? This simple change makes a big difference.
20. Layered Rugs and Textured Area Mats for Visual Depth
A small studio can feel flat and monotonous without visual interest. You want to add warmth, depth, and personality without overwhelming the space. Layered rugs and textured mats are perfect for creating a cozy, inviting atmosphere. Who says small spaces can’t have big style?
Recommended Products to replicate this idea
| # | Preview | Product | |
|---|---|---|---|
| 1 |

|
HOMEMONDE Solid Braided 8'x10' Jute Area Rug Natural - Eco Friendly Premium Fiber - Durable and... | Check Latest Price |
| # | Preview | Product | |
|---|---|---|---|
| 1 |

|
duduta White Faux Sheepskin Throw Rug 2x3 ft, Fluffy Shag Fur Chair Cover Small Bedside Dorm Rug Non... | Check Latest Price |
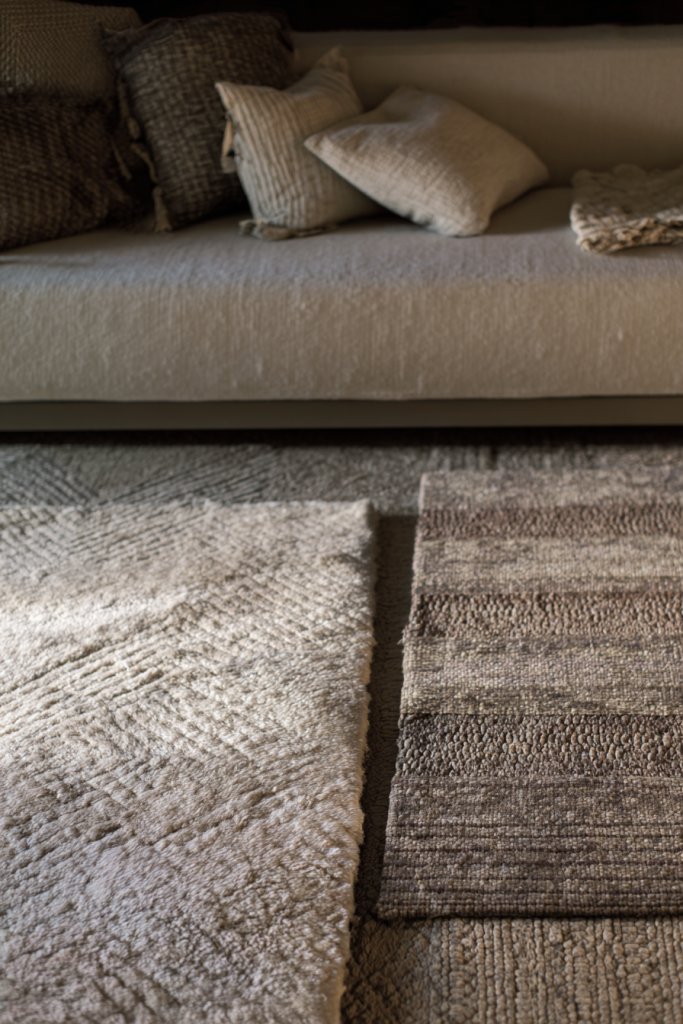
Picture a soft, neutral-toned rug layered with a smaller, patterned or textured rug on top. The combination adds depth and dimension, defining different zones like the living area or sleeping space. The textures contrast beautifully—think a plush shag over a flatweave or a patterned kilim layered with a neutral wool rug. The layered look invites you to step in and relax, making your studio feel warm and curated.
Use rugs in complementary colors or patterns to reflect your style—boho, modern, or Scandinavian. Layer different textures like wool, jute, or synthetic fibers for tactile interest. Place rugs strategically under furniture to anchor zones or use smaller mats to highlight entryways or reading nooks. You can also switch out rugs seasonally for a fresh vibe. This approach suits various aesthetics and enhances your space’s personality.
Start by measuring your floor areas to choose appropriately sized rugs. Layer a larger, neutral rug with a smaller, patterned or textured piece on top. Use non-slip rug pads underneath to keep everything in place. Position the rugs to define different zones—like a seating area or bed. Regularly vacuum and rotate rugs to maintain their appearance. This easy update adds warmth and visual interest instantly.
Decorate with coordinating textiles—think plush cushions or textured throws—to complement your rugs. Incorporate seasonal colors or patterns for variety. Use rugs to add a pop of color or pattern in an otherwise neutral space. Personal touches like a vintage kilim or a handmade rug can add authenticity and character. This layered approach makes your studio feel layered with personality.
Layered rugs and textured mats transform a flat space into a warm, inviting retreat. They add depth and personality while defining specific areas. Once you see how they elevate your decor, you’ll be inspired to experiment further. Ready to add warmth, texture, and style to your studio? These simple layers make a big impact.
21. Personal Touches with Colorful Accents and Minimalist Art
A blank canvas of a studio can feel cold and impersonal. You want to infuse personality and warmth without cluttering your space. Colorful accents and minimalist art are the perfect way to showcase your style subtly and effectively. Who says small spaces can’t be bold and beautiful?
Recommended Products to replicate this idea
| # | Preview | Product | |
|---|---|---|---|
| 1 |

|
decorUhome Spring Chenille Soft Cozy Throw Pillow Covers 18x18 Set of 2, Modern Farmhouse Boho... | Check Latest Price |
| # | Preview | Product | |
|---|---|---|---|
| 1 |

|
Large Framed Black and White Neutral Abstract Wall Art for Living Room, 3 Piece Boho Canvas Prints... | Check Latest Price |
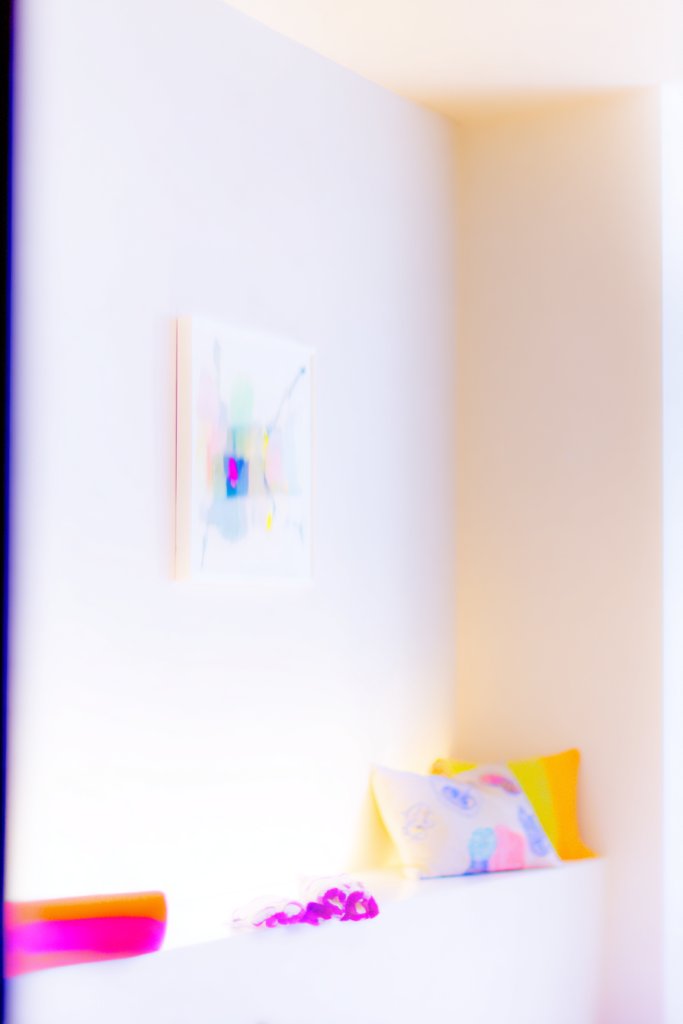
Imagine a soft, monochrome sofa accented with a few vibrant throw pillows or a bold, geometric wall art piece. A splash of color on a throw blanket or a statement piece of wall decor instantly lifts the room. The art is simple, with clean lines or abstract shapes, adding a modern touch. Bright accessories like a colorful mug or a patterned rug complete the look, creating a lively, personalized vibe.
Choose artwork with minimalist designs—think line drawings, abstract shapes, or subtle color blocks—that match your decor palette. Use a few statement pillows or a colorful throw to add visual interest without overwhelming the space. Incorporate colorful accessories like vases, trays, or small decorative objects to complement your art. For seasonal updates, swap out pillows or art prints for a fresh look, keeping your space dynamic and engaging.
Start by selecting a few key pieces—like a large print or a set of small framed photos—and arrange them in a gallery wall or on a single focal point. Use a neutral background wall to make colors pop or match the art with accent furniture. Incorporate colorful textiles or small decor items to tie the look together. Keep the overall aesthetic clean and uncluttered by limiting the number of pieces. Regularly update or rotate items to keep the space fresh.
Personalize your space with DIY art, such as painted canvases or framed quotes. Use bold, colorful textiles or a patterned wallpaper accent wall for extra personality. Incorporate your favorite colors into small accessories or decorative objects. Mix textures and materials to add depth and interest. This approach makes your studio uniquely yours, full of personality and style.
Adding colorful accents and minimalist art transforms your space into a reflection of your personality. It injects energy and warmth while maintaining a clean, modern look. Once you see how simple touches can elevate your decor, you’ll be motivated to keep experimenting. Ready to personalize and brighten your studio? Your perfect, stylish space awaits!
Conclusion
Exploring these innovative studio apartment ideas opens up endless possibilities to enhance your living experience. From smart storage solutions to stylish decor, each idea is designed to make your space more functional and inviting. Don’t hesitate to try these tips and watch your small apartment become a beautiful, efficient sanctuary that truly reflects your personality and lifestyle!