I have been, or can be if you click on a link and make a purchase, compensated via a cash payment, gift, or something else of value for writing this post. As an Amazon Associate, I earn from qualifying purchases. Please read my full Affiliate Disclosure for more information.
Have you ever stepped into a room and instantly felt a wave of comfort and inspiration? That’s the magic of a well-curated room aesthetic—it’s all about creating a space that reflects your personality and sparks joy every time you enter. These ideas have gained immense popularity because they turn ordinary rooms into personalized sanctuaries, blending style with your unique vibe.
In this article, you’ll find a variety of creative and inspiring room aesthetic ideas that cater to different tastes and preferences. Whether you love cozy boho vibes, sleek modern looks, or vibrant eclectic styles, there’s something here to help you transform your space into your dream haven. Get ready to discover fresh ways to express yourself through your home decor!
1. Creative Gallery Wall with Mix-and-Match Frames
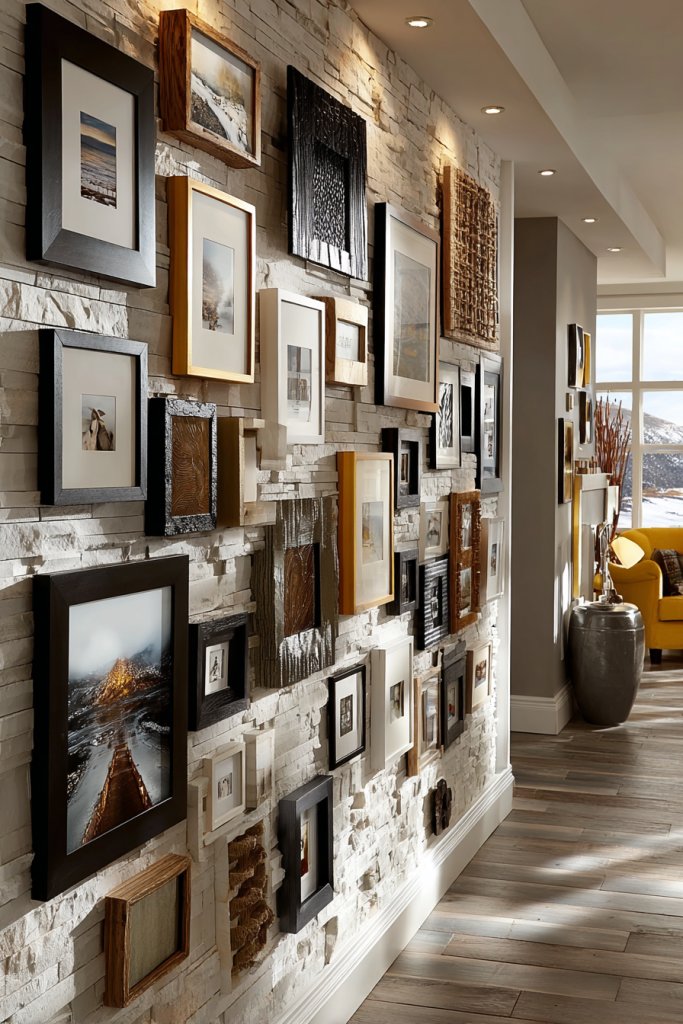
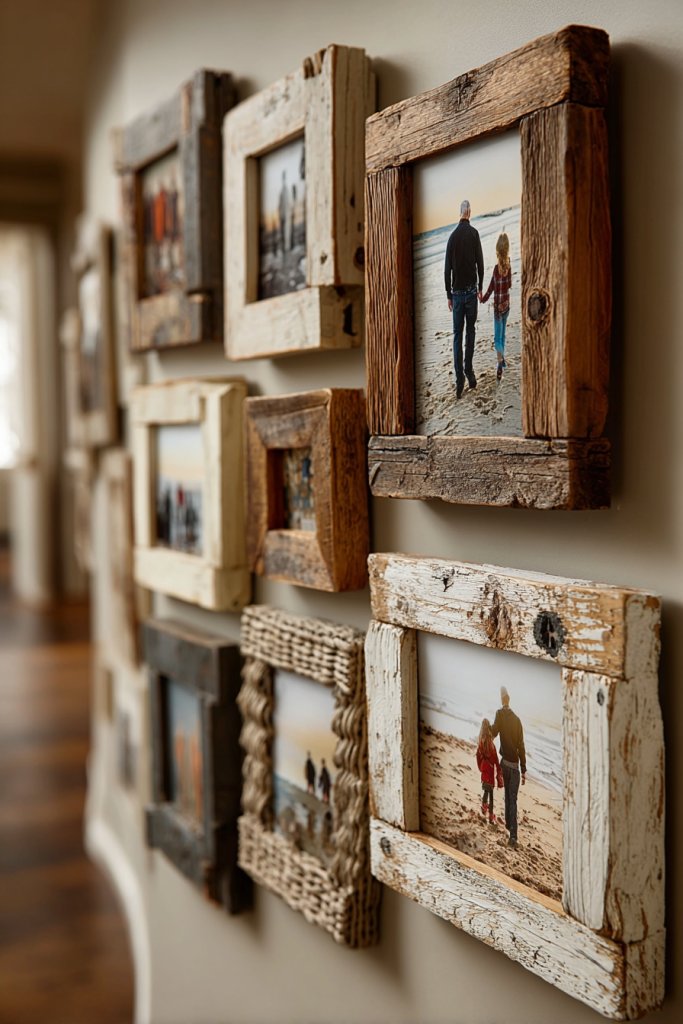
Ever stared at a blank wall and wondered how to make it pop without turning your space into a cluttered mess? A creative gallery wall with mix-and-match frames offers a way to inject personality and style effortlessly. It transforms dull walls into visual stories that showcase your memories, interests, or artistic flair. Plus, it’s a perfect solution for those who crave a personalized touch but dislike uniformity.
Recommended Products to replicate this idea
| # | Preview | Product | |
|---|---|---|---|
| 1 |
|
LUCKYLIFE Picture Frames Collage Wall Decor 10-Pack, Gallery Wall Frame Set with 8x10 5x7 4x6 Frames... | Check Latest Price |
| # | Preview | Product | |
|---|---|---|---|
| 1 |

|
upsimples 11x14 Picture Frame Set of 5, Display Pictures 8x10 with Mat or 11x14 Without Mat, Wall... | Check Latest Price |
Picture an eclectic arrangement of frames in various sizes, shapes, and finishes—gold, matte black, rustic wood—all housing photos, quotes, or abstract prints. The textures of the frames contrast beautifully against a neutral wall, creating depth and visual interest. Soft lighting casts gentle shadows, emphasizing the layered effect. The overall vibe feels curated yet relaxed, making visitors want to linger and explore.
You can customize your gallery by choosing a color theme, like monochrome or pastel, or go for a more chaotic, boho look. For smaller spaces, opt for a tight cluster of frames; larger walls can accommodate sprawling arrangements. Seasonal swaps of images or adding new frames keep the display fresh. If you prefer a minimalist style, stick to sleek frames and a single-color palette, or go bold with ornate vintage styles for a more dramatic effect.
Start by selecting your wall and laying out your frames on the floor to plan the arrangement. Mix different frame styles for visual interest but keep some consistency in color or theme. Use painter’s tape to mark the layout on the wall, then hang with appropriate hooks or nails. Measure carefully to maintain balance, especially with irregular shapes. For a polished look, align the frames considering the spacing between them—about 2-3 inches works well. Update regularly by swapping out content or rearranging for a fresh feel.
Add personal touches like handwritten quotes, pressed flowers, or miniature mementos inside frames or as part of the arrangement. Incorporate some 3D elements like small shelves for tiny collectibles or decorative objects. To create a theme, select frames and content that reflect your interests—travel, art, family, or hobbies. Use different textures like fabric-backed prints or metallic accents to add richness.
A gallery wall proves that you don’t need a gallery budget to create a stunning visual statement. It’s a flexible project that grows with you, so start small and expand over time. Your wall becomes a display of your personality, making your space uniquely yours. Ready to turn that boring wall into a conversation starter?
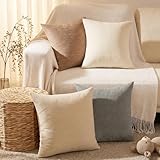
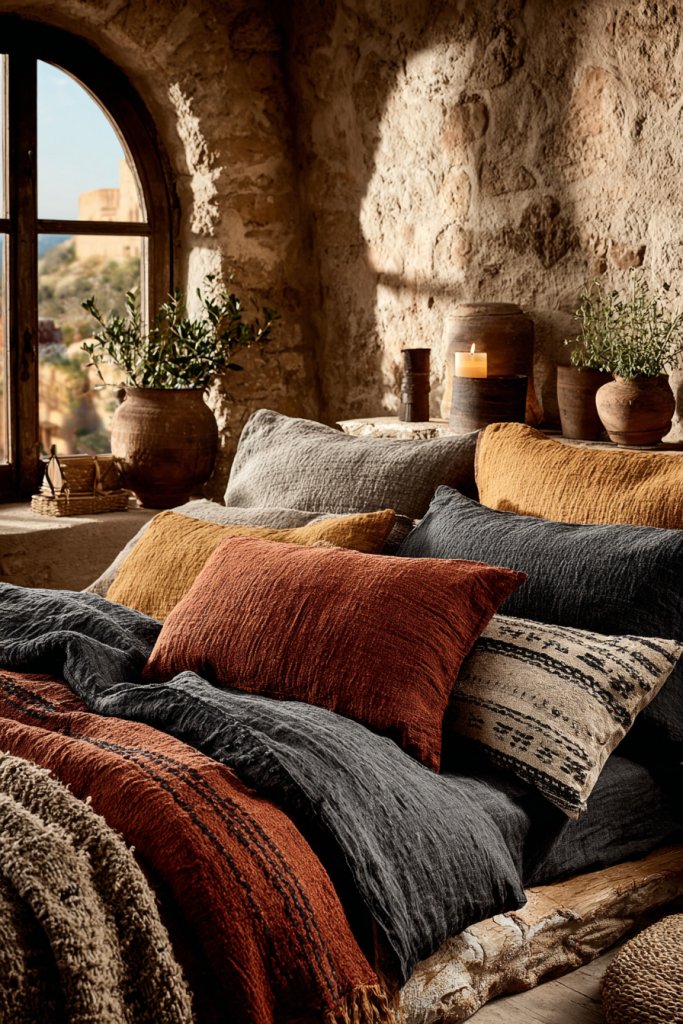
2. Cozy Nook with Custom Cushions and Textiles
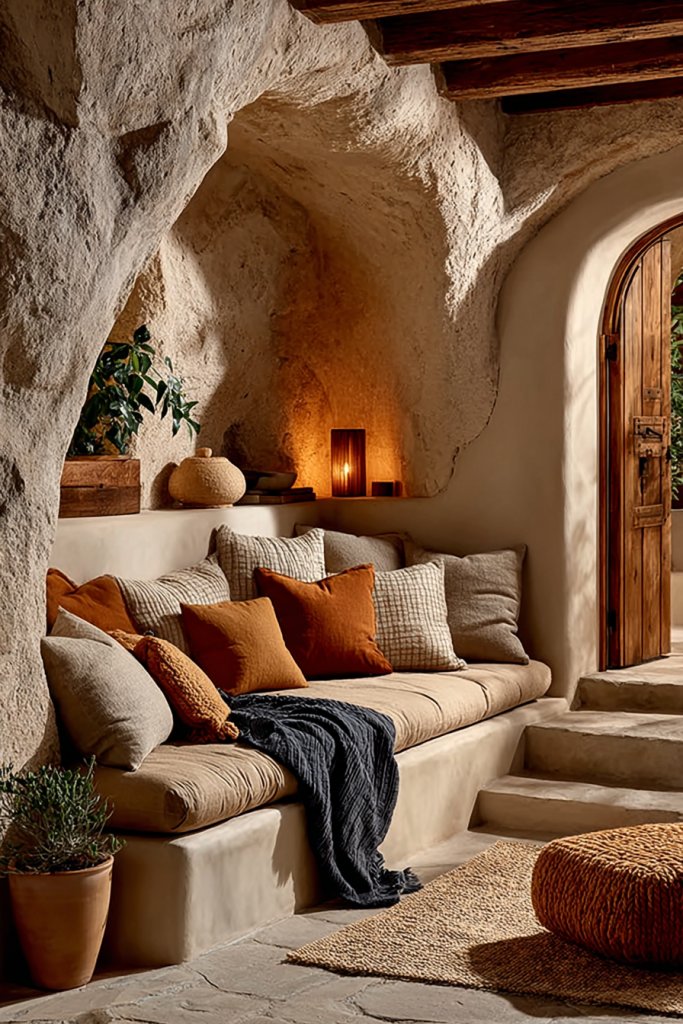
Ever find yourself longing for a peaceful corner to unwind, read, or just escape the chaos? Creating a cozy nook with custom cushions and textiles turns an ordinary corner into your personal sanctuary. It’s a simple way to add warmth, comfort, and personality to any room. Plus, it’s a space where you can truly relax and recharge.
Recommended Products to replicate this idea
| # | Preview | Product | |
|---|---|---|---|
| 1 |

|
ROFIELTY Custom Size Bench Cushion for Indoor/Outdoor Patio Furniture/Window Seat 90+ Colors to... | Check Latest Price |
| # | Preview | Product | |
|---|---|---|---|
| 1 |

|
L'AGRATY Chunky Knit Blanket Throw,Soft Chenille Yarn Throw Blanket 50x60,Handmade Cable Knit... | Check Latest Price |
Imagine a snug corner with a plush armchair or window seat, layered with an array of cushions in different sizes, fabrics, and patterns. Soft throws drape over the back, inviting you to sink in. The textures range from velvety to chunky knits, creating a tactile paradise. Warm lighting, like a small table lamp or fairy lights, enhances the inviting atmosphere. The colors complement your room’s palette, making the space feel cohesive yet vibrant.
You can tailor the nook for any season—warm wool blankets and deep jewel tones for winter, linen sheets and pastel cushions for summer. For small spaces, squeeze in a corner with a comfy chair and a small side table. If you have a larger room, add a small bookshelf or a side table for extra functionality. Mix patterns and textures for a boho vibe or keep it sleek with monochrome cushions and smooth textiles for modern minimalism.
Choose a corner that gets good natural light or has a view you love. Pick cushions and throws in your favorite fabrics—think velvet, linen, or chunky knits—based on your comfort style. Layer the cushions for a rich, inviting look, balancing colors and patterns for harmony. Add a small rug if you want a soft surface underfoot. Use a variety of sizes and shapes to keep it interesting. Incorporate personal items like a favorite book or a decorative tray for drinks.
Customize your nook with embroidered initials on cushions or handmade patchwork covers. Incorporate different textiles—like a faux fur throw or a quilted blanket—to add depth. Use decorative trims or tassels for a playful touch. Keep the space evolving by swapping out cushions seasonally or when your style changes. This nook isn’t just for aesthetics; it’s your daily dose of comfort.
A cozy nook proves that small efforts can make a big difference. It’s your personal retreat, perfect for unwinding after a busy day. The best part? It’s easy to update as your tastes evolve. Now, go ahead—create that perfect spot to relax and feel at home.
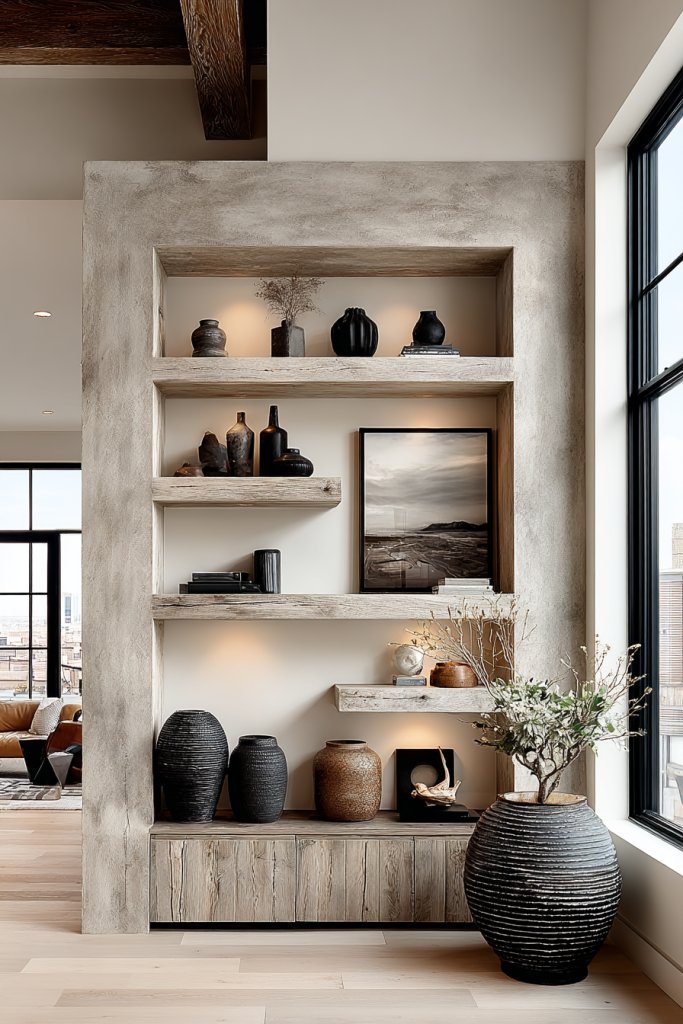
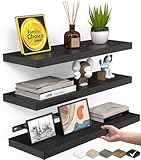
3. Minimalist Floating Shelves with Personal Collections
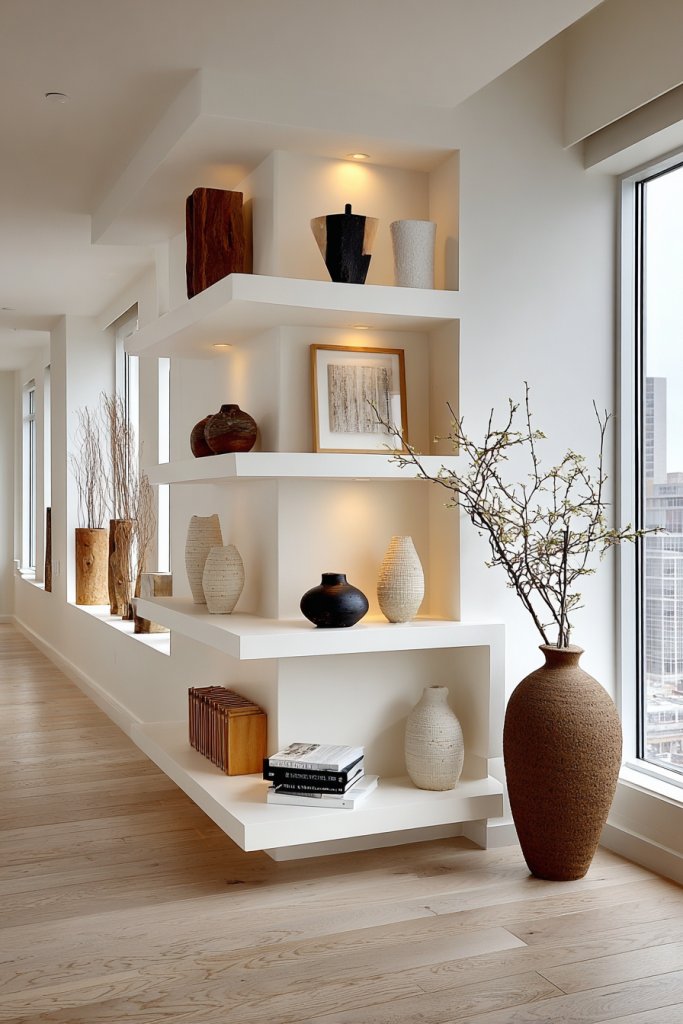
Do you ever feel overwhelmed by clutter but still want your space to look stylish? Minimalist floating shelves offer a sleek solution to showcase your favorite items without sacrificing clean lines. They add a modern touch while organizing your essentials or collectibles. It’s a way to keep your space functional and clutter-free at the same time.
Recommended Products to replicate this idea
| # | Preview | Product | |
|---|---|---|---|
| 1 |

|
Boswillon Floating Shelves Wall Mounted Set of 2, Modern Black Wall Shelves for Storage with Lip,... | Check Latest Price |
| # | Preview | Product | |
|---|---|---|---|
| 1 |

|
Solrot White Floating Shelves for Wall Decor, Wall Mounted Wood Storage Shelf for Bedroom, Living... | Check Latest Price |
Imagine slim, matte-finished shelves installed against a crisp wall, holding a curated mix of decorative objects, books, or personal mementos. The simplicity of the shelves highlights each item, allowing textures and colors to shine. Soft lighting from nearby fixtures accentuates the layered display, creating depth. The open design invites the eye to travel along the shelves, making the room feel more spacious and organized.
Adjust shelf length and placement to suit your space—higher for a gallery feel or low for easy access. Use different materials like wood, metal, or glass to match your decor style. For a more vibrant look, alternate between open shelves and closed cabinets. Incorporate seasonal or themed collections, swapping items out to keep the display fresh. Keep clutter minimal by only displaying what truly matters.
Start by measuring your wall and choosing the right length and weight capacity for your shelves. Use a level to ensure perfect alignment during installation. Decorate with a mix of items—vintage cameras, small sculptures, or framed photos—avoiding overcrowding. Secure the shelves firmly using appropriate anchors for your wall type. Maintain balance by spacing items thoughtfully, leaving some empty space for breathing room. Clean and dust regularly to keep the display looking sharp.
Add personality with unique items like handcrafted ceramics (without plants or artwork), decorative boxes, or meaningful souvenirs. Mix different textures such as matte, glossy, or matte finishes for visual interest. Incorporate lighting strips or small spotlights underneath shelves for an artistic glow. Change out displayed items seasonally or as your collection grows for an ever-evolving look. It’s your mini museum, curated by you.
Minimalist floating shelves show that less is often more, making your space feel open and intentional. They’re versatile, fitting into almost any room or decor style. Owning a curated collection of personal favorites makes your home uniquely yours. Ready to elevate your organization game?
4. Functional Yet Stylish Storage with Decorative Baskets
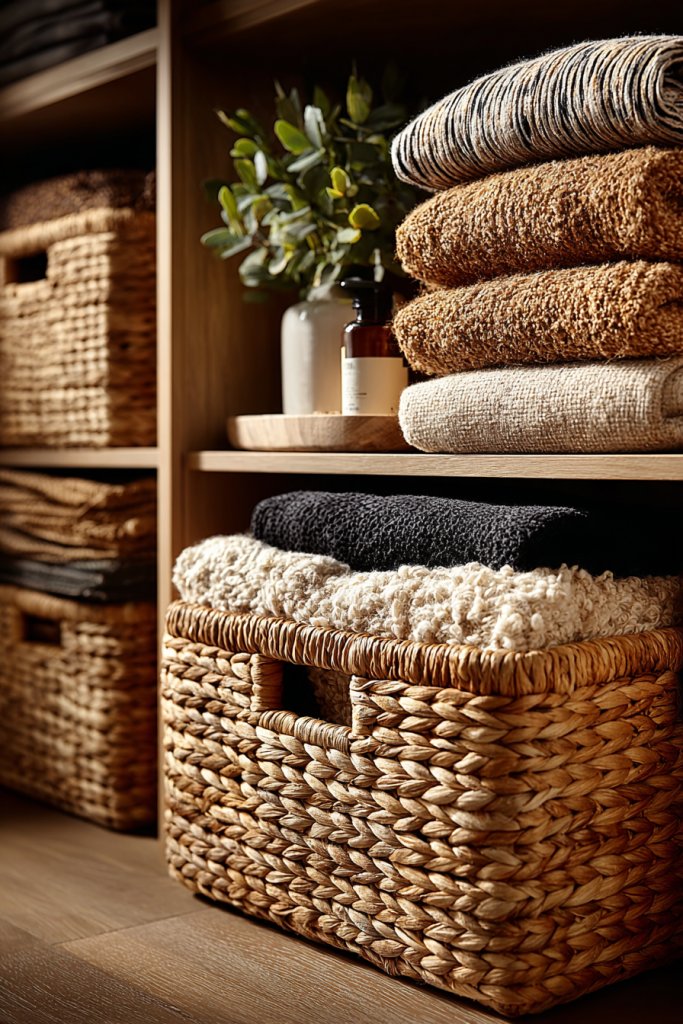
Clutter seems to have a mind of its own, cluttering your space and killing your vibe. Finding storage solutions that are both practical and stylish can feel like hunting for a needle in a haystack. Enter decorative baskets—your new best friends for hiding clutter without sacrificing aesthetics. They add warmth and texture while keeping your essentials within reach.
Recommended Products to replicate this idea
| # | Preview | Product | |
|---|---|---|---|
| 1 |

|
StorageWorks Large Seagrass Tray for Bathroom, Seagrass Storage Baskets for Shelves, Handwoven... | Check Latest Price |
| # | Preview | Product | |
|---|---|---|---|
| 1 |

|
YBM HOME Kitchen Pantry Organizer Wire Basket for Shelves, Cabinets, Pantry, Countertop, Mesh Open... | Check Latest Price |
Picture woven or fabric baskets in neutral tones or bold patterns placed neatly on shelves or under tables. They hold everything from throw blankets to magazines, with the contents concealed yet easily accessible. The textures of wicker, seagrass, or quilted fabric introduce tactile richness. When grouped, these baskets create a cohesive, layered look that’s both functional and beautiful. Ambient lighting highlights their natural textures, elevating the entire room.
Use different basket styles—round, rectangular, open-topped, or with lids—to suit your needs and style. Match or contrast colors to your decor palette—think earth tones for boho or monochrome for modern. Place baskets in open shelving, under coffee tables, or inside closets. For seasonal flair, swap out baskets with different patterns or textures. They’re versatile enough to fit into any room—living room, bedroom, or bathroom.
Select baskets based on size and storage needs—larger ones for bulky items, smaller for accessories. Securely place them on shelves or in corners where they won’t tip over. Use labels or decorative tags to organize contents if necessary. Mix and match textures—rattan, woven seagrass, or soft fabric—to add visual interest. Regularly declutter and reorganize to maintain a tidy, stylish look. Consider adding a liner or plush insert inside for delicate items.
Personalize baskets with fabric liners, embroidered initials, or painted designs. Incorporate decorative elements like tassels, pom-poms, or leather handles for extra flair. Use the baskets to display seasonal decor or favorite items—like cozy slippers or craft supplies. They can also serve as gift baskets for special occasions, making them both practical and personal. Keep the arrangement dynamic by changing contents with your mood or season.
Decorative baskets show that organization can be stylish and effortless. They help you reclaim your space and keep clutter out of sight. With a bit of creativity, your storage solutions become part of your decor story. Ready to hide the chaos and boost your room’s charm?
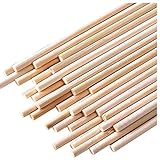
5. DIY Macramé Wall Hangings for Boho Vibe
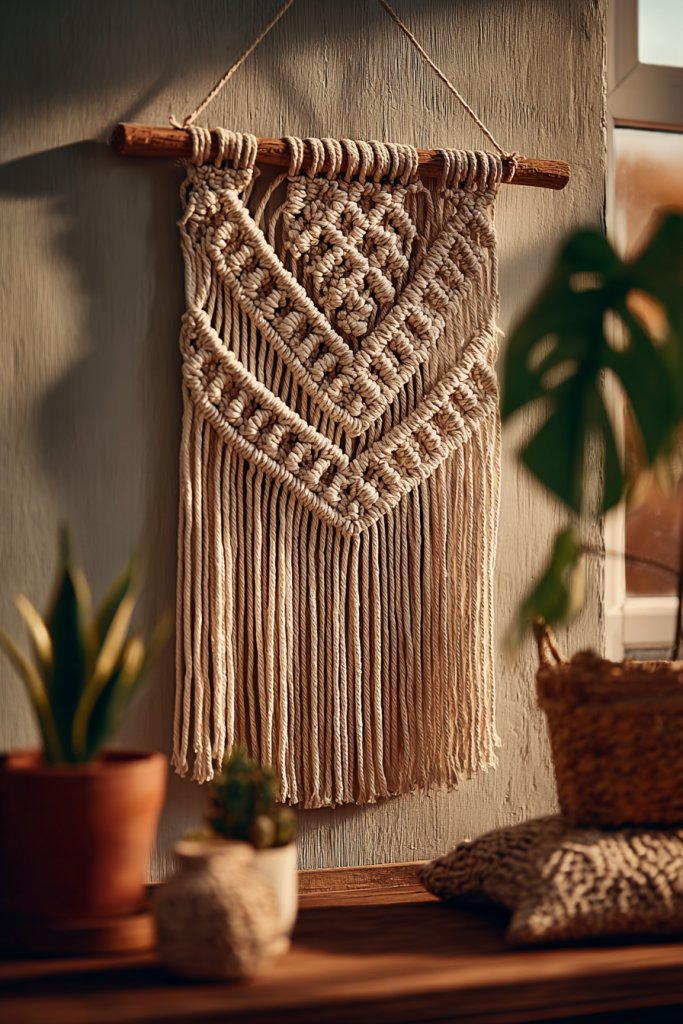
Hanging art can be pricey, and finding pieces that match your boho aesthetic isn’t always easy. Why not craft your own? DIY macramé wall hangings add texture and a laid-back vibe to any space without breaking the bank. They bring a handcrafted warmth that instantly elevates your decor. Plus, they’re surprisingly easy to make—if you have some patience and a few basic supplies.
Recommended Products to replicate this idea
| # | Preview | Product | |
|---|---|---|---|
| 1 |

|
NOANTA Natural Macrame Cord 3mm x 109Yards, Beige Macrame Rope, Cotton Cord for Wall Hanging, Plant... | Check Latest Price |
| # | Preview | Product | |
|---|---|---|---|
| 1 |
|
HOPELF 25PCS Wooden Dowel Rods - 1/4 x 12 Inch Bamboo Sticks - for Crafts, Cake Dowels and DIY... | Check Latest Price |
Picture a large, intricate knot pattern cascading from a wooden dowel, with fringes and beads adding details. The natural fibers in neutral tones, like cream or taupe, create a soft backdrop that complements various styles. The tactile texture invites touch and adds depth to your wall. When hung over a plain wall, it becomes a focal point that exudes relaxed elegance. The layered textures and organic shapes evoke a free-spirited, artistic atmosphere.
Experiment with different designs—from simple single-string hangings to complex geometric patterns. Use natural fibers such as jute, cotton, or hemp, or mix in metallic threads for contrast. Adjust the size of your piece to fit your wall—smaller for subtle accents, larger for statement pieces. Incorporate beads or shells for a personalized touch. Hang multiple smaller pieces together for a gallery wall effect or solo for a bold statement.
Gather your materials: sturdy dowels, various cords, scissors, and optional embellishments. Follow online tutorials or create your own designs, starting with basic knots like square or spiral knots. Measure and cut cords to your desired length, then practice tying knots to ensure neatness. Attach the cords to the dowel securely, then trim fringes evenly. Mount your finished piece with nails or hooks, ensuring it hangs flat and centered. It’s a fun, calming project that results in a beautiful home accessory.
Add charms, feathers, or colored threads to customize your wall hanging. Incorporate personal symbols or initials for a truly unique piece. Mix textures and thicknesses of cords to create visual interest. Change out the hanging periodically or add new designs to match your evolving style. It’s a creative way to express your personality and bring a cozy, artistic touch into your space.
Making your own macramé wall hanging boosts your creativity and adds a personal touch to your decor. It’s an affordable way to craft art that’s both stylish and meaningful. Every time you look at it, you’ll remember the relaxing process of creating something beautiful. Ready to knot your way to a boho-inspired home?
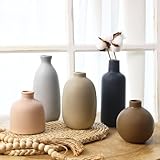
6. Color-Coordinated Decor for a Cohesive Look
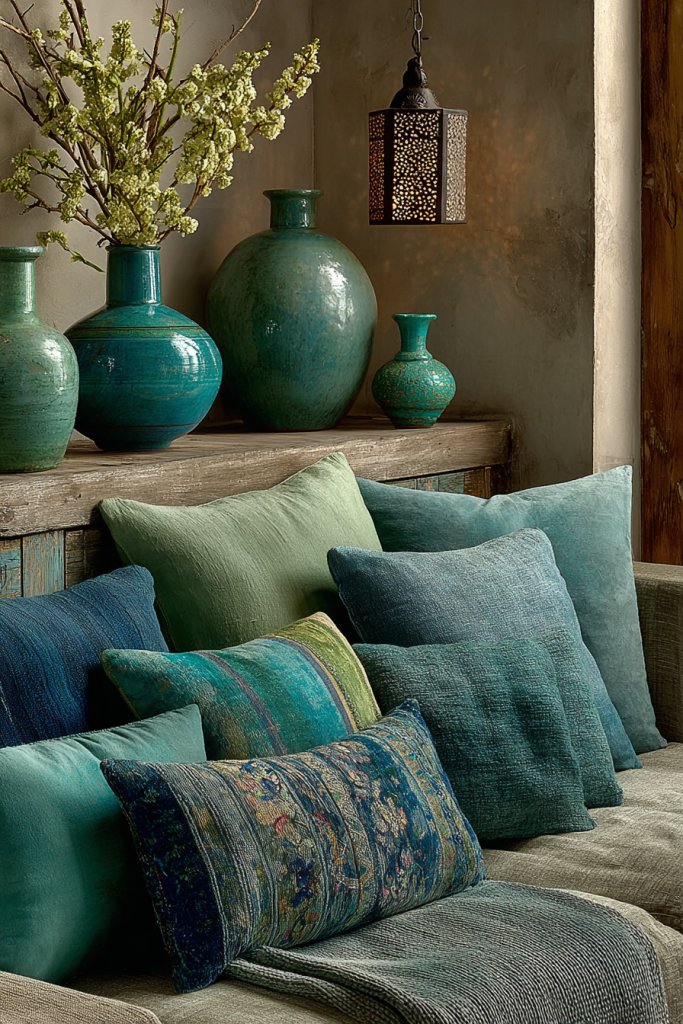
Feeling overwhelmed by a jumble of decor items that don’t quite match? Achieving a cohesive look can make your space feel intentional and calming. Color-coordinated decor is an easy way to unify your room’s aesthetic without overhauling everything. It’s like giving your space a visual personality, making it appear polished and put-together.
Recommended Products to replicate this idea
| # | Preview | Product | |
|---|---|---|---|
| 1 |
|
Set of 4 Neutral Throw Pillow Covers 18x18 Inch, Neutral Boho Farmhouse Aesthetic Decorative Pillow... | Check Latest Price |
| # | Preview | Product | |
|---|---|---|---|
| 1 |
|
CUCUMI Ceramic Vase Set of 5, Home Decor Farmhouse Décor Handmade Pottery Vases for Pampas Grass,... | Check Latest Price |
Imagine selecting decor items—pillows, throws, vases, and art—in shades that complement each other. Soft pastels create a serene vibe, while bold hues evoke energy and excitement. Layering different textures within the same color palette adds depth—think velvet cushions paired with cotton throws. The overall effect is harmonious, creating a space that’s both lively and balanced. When natural light hits, the color scheme glows, inviting you to relax.
Choose a dominant color and build your palette around it, or pick a few key shades for a more dynamic look. Seasonal updates can involve swapping accessories in your chosen hues—think coral accents for summer or deep reds for fall. For small rooms, stick to a monochrome scheme for a spacious feel; larger spaces can handle more contrast. Use color-coordinated storage bins or trays to reinforce the theme and keep clutter in check.
Start by choosing a base color that reflects your personality or mood. Collect decor items—pillows, rugs, wall art—in shades that match or complement this hue. Arrange your items thoughtfully, balancing lighter and darker shades for visual interest. Use color theory principles, like complementary or analogous colors, for harmony. Incorporate accent pieces like lamps or small accessories that reinforce the palette. Regularly assess your setup, adjusting items to maintain balance and cohesion.
Create custom pillows or throws in your color scheme, adding embroidery or decorative trims. Mix textures—smooth silk with rough linen—for added richness. Incorporate your favorite patterns subtly within the color framework. Personalize with small, meaningful objects that fit the color scheme, like family heirlooms or travel souvenirs. This approach ensures your space feels both curated and uniquely yours.
A cohesive color palette simplifies decorating, making your space feel more intentional. It’s a subtle yet powerful way to showcase your style and personality. When everything works together, your room becomes a visual sanctuary that’s easy to update over time. Time to embrace color coordination and elevate your decor game?
7. Upcycled Furniture with a Fresh Coat of Paint
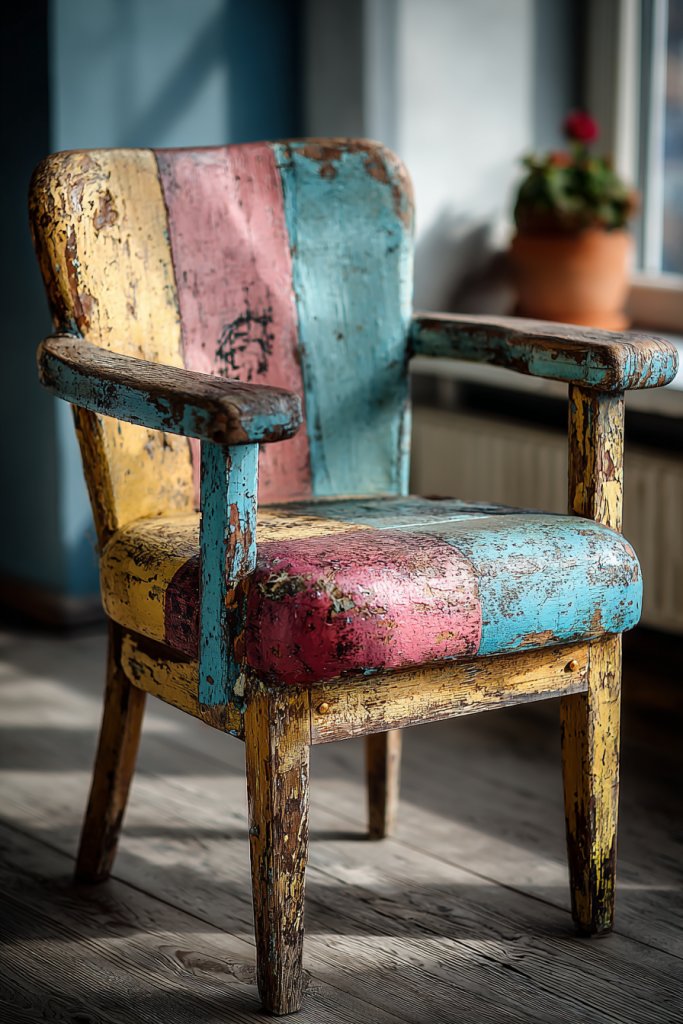
Found a piece of vintage furniture that’s fallen out of style or just looks tired? Upcycling with a fresh coat of paint can breathe new life into old furniture, turning it into a statement piece. It’s an affordable way to add personality and sustainability to your decor. Plus, it’s a fun DIY project that lets you customize your space exactly how you want.
Recommended Products to replicate this idea
| # | Preview | Product | |
|---|---|---|---|
| 1 |

|
Rust-Oleum Linen White Chalked All-in-One Ultra Matte Paint | One Coat Coverage | No Primer,... | Check Latest Price |
| # | Preview | Product | |
|---|---|---|---|
| 1 |

|
Rhibak Paint Roller Kit, Paint Brushes and 4 Inch Foam Small Paint Roller Set, All in One Paint... | Check Latest Price |
Visualize a worn-out wooden dresser painted in a bold, modern hue—like matte black or pastel pink—standing proudly in your room. The paint enhances the grain or smooths out imperfections, giving it a fresh look. Handles and knobs can be replaced with sleek hardware or painted to match the new color. The result is a unique, eye-catching piece that blends vintage charm with contemporary style. Its presence elevates the entire room’s aesthetic.
Choose furniture pieces that fit your space and style—dressers, side tables, or chairs—and experiment with colors and finishes. Matte, gloss, or chalk paint can create different effects, from sleek to shabby chic. Add decorative stencils or patterns for extra flair. For a more subtle update, use neutral shades like cream or gray; for a statement, go for unexpected colors like emerald or navy. Mix and match with existing decor for a cohesive look.
Start by cleaning and sanding the furniture to ensure smooth paint application. Use primer if necessary, then apply multiple thin coats of your chosen paint, allowing drying time between layers. Use high-quality brushes or rollers for even coverage. Replace or paint hardware for added detail. Seal with a clear topcoat to protect your work and add durability. Let everything cure fully before use to prevent chipping.
Add stenciled patterns, metallic accents, or personalized handles to make your piece truly unique. Use contrasting paint colors for decorative panels or edges. Incorporate fabric or textured inserts for a custom feel. Personal touches like a monogram or painted design give it sentimental value. Regularly update accessories placed on or around the furniture to keep the look fresh.
Upcycled furniture shows that creativity and sustainability go hand in hand. Each piece becomes a reflection of your personality and style, making your home more meaningful. It’s rewarding to transform something old into something new and stylish. Ready to give your furniture a second chance?
8. Layered Rugs for Depth and Comfort
Does your room feel flat or uninspired despite your best decorating efforts? Layering rugs can add instant depth, texture, and comfort. It’s a simple trick that creates a cozy, inviting atmosphere and defines different areas within a space. Plus, it allows you to showcase multiple patterns or textures without committing to one bold piece.
Recommended Products to replicate this idea
| # | Preview | Product | |
|---|---|---|---|
| 1 |

|
HOMEMONDE Solid Braided 8'x10' Jute Area Rug Natural - Eco Friendly Premium Fiber - Durable and... | Check Latest Price |
| # | Preview | Product | |
|---|---|---|---|
| 1 |

|
RELEANY Area Rugs 8'x10' Washable Non-Slip, Floral Vintage Distress Print Pattern Medallion Carpet... | Check Latest Price |
Imagine a large neutral-toned jute rug layered with a smaller, vibrant patterned rug on top. The contrast in textures—rough jute against soft pile—adds tactile richness underfoot. The layered effect creates visual interest and anchors furniture arrangements. When light hits the different layers, it produces subtle shadows, enhancing the room’s depth. The overall look feels curated and cozy, perfect for lounging.
Mix different sizes, shapes, and textures—for example, a round shag rug over a rectangular flatweave. Use contrasting patterns and colors to create a lively, eclectic vibe or stick to similar tones for a harmonious look. Layer rugs in different materials—wool, silk, synthetic—to add variety. In small spaces, one layered rug can define a seating area; in larger rooms, multiple layers can delineate zones. Change the top layer seasonally for a fresh update.
Start with a large base rug that covers your main seating area. Add a smaller, contrasting rug on top, positioning it to anchor your furniture. Use rug pads underneath to prevent slipping and protect floors. Be mindful of the size and placement to ensure the layered look feels intentional, not cluttered. Mix textures and patterns thoughtfully, balancing busy designs with calmer backgrounds. Regular cleaning and rotation keep the rugs looking their best.
Incorporate rugs with different textures—shaggy, flatweave, braided—for tactile richness. Add fringes or decorative trims to the edges for a personalized touch. Use seasonal or themed rugs to reflect your mood or decor updates. Layered rugs can also serve functional purposes, like adding extra insulation or reducing noise in shared spaces. Play with asymmetry or symmetry to match your personal aesthetic.
Layered rugs transform any room into a plush retreat, making your space feel more curated and welcoming. They’re a versatile styling tool that adapts to your evolving tastes. Plus, they provide a great opportunity to experiment with patterns and textures without a big investment. Ready to make your floors the highlight of your decor?
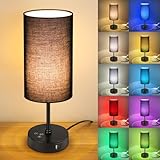
9. Personalized Lighting with String Lights and Lamps
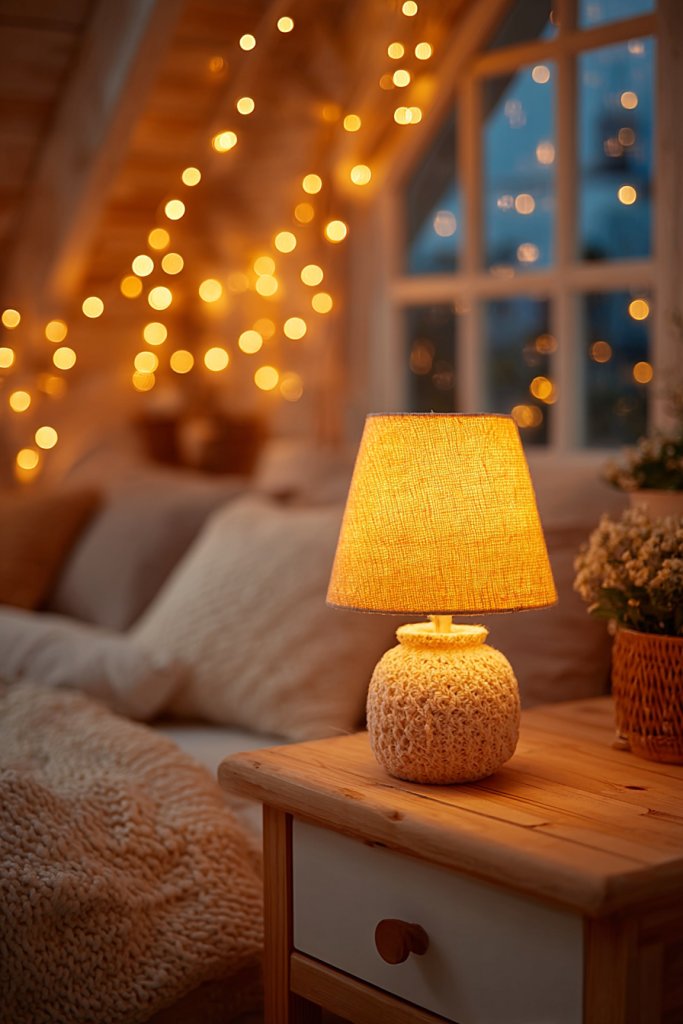
Is your room feeling a little dull or overly harsh? Lighting is often overlooked but can totally change the mood and vibe of your space. Personalized lighting with string lights and unique lamps creates a warm, inviting glow that’s perfect for relaxing or entertaining. It’s an easy, affordable way to add personality and ambiance effortlessly.
Recommended Products to replicate this idea
| # | Preview | Product | |
|---|---|---|---|
| 1 |

|
DAYBETTER LED Strip Lights 130ft Lights Strip for Bedroom, Desk, Indoor Room Bedroom Brithday Gifts... | Check Latest Price |
| # | Preview | Product | |
|---|---|---|---|
| 1 |

|
Fenmzee Bedside Table Lamp for Bedroom - 3 Way Dimmable Touch Lamp USB C Charging Ports and AC... | Check Latest Price |
Imagine soft string lights draped along a wall or ceiling, casting a gentle, twinkling glow. A vintage-inspired table lamp with a textured lampshade adds a cozy focal point on your side table. The mix of warm lights and shaded fixtures creates layers of illumination that soften shadows and highlight your decor. The overall effect is a dreamy, welcoming environment that encourages relaxation and conversation.
Use fairy or globe string lights for a whimsical vibe, or opt for Edison bulbs for a vintage touch. Combine different lamp styles—table, floor, or wall-mounted—to suit your room’s layout. For a minimalist look, choose sleek, modern fixtures; for a boho feel, go for woven or ceramic lamps. Adjust brightness with dimmers to match different moods and occasions. Seasonal decor can include colored bulbs or themed shades.
Position string lights along headboards, mirrors, or shelves, securing with clips or hooks. Select lamps that complement your decor style—metal, ceramic, or wood bases with fabric or textured shades. Use smart bulbs or dimmers for adjustable lighting. Group multiple sources strategically to create a layered effect that enhances the room’s ambiance. Regularly dust fixtures and switch up shades or bulbs for variety.
Add decorative elements like tassels or fabric covers to lampshades for a personal touch. Use string lights to highlight artwork, architectural details, or create a canopy effect. Incorporate color-changing bulbs for seasonal or mood-specific lighting. Personalize with themed lanterns or vintage fixtures that reflect your style. The goal is to craft a space that feels relaxed, stylish, and uniquely yours.
Thoughtful lighting transforms your home from basic to beautiful, creating a space you’ll love to unwind in. It’s an easy project that pays off instantly—no major renovations needed. Your space becomes more inviting, cozy, and expressive. Ready to light up your life?
10. Customized Wall Decals or Vinyl Art
Looking to personalize your space without committing to permanent art? Customized wall decals or vinyl art offer a flexible, fun way to add personality. They’re perfect for renters or anyone who loves changing up their decor frequently. Plus, they’re easy to install and remove, making your walls a canvas for your creativity.
Recommended Products to replicate this idea
| # | Preview | Product | |
|---|---|---|---|
| 1 |

|
Name Wall Decal Sticker - Multiple Font Custom Baby Name - Nursery Wall Sticker - Baby Girl Baby Boy... | Check Latest Price |
| # | Preview | Product | |
|---|---|---|---|
| 1 |

|
Decor Designs Decals Boys Adorable Custom Name, Personalized Vinyl Wall Art Decal Sticker, Babies... | Check Latest Price |
Visualize a wall adorned with clever quotes, geometric shapes, or abstract designs in bold colors or subtle neutrals. The decals cling smoothly without damaging paint, creating crisp, clean lines. They can be arranged in patterns or scattered for a more eclectic look. When lit with soft lighting, they add a graphic, modern touch that elevates the entire room’s vibe. It’s like having a custom mural with none of the permanence.
Choose decals that match your aesthetic—minimalist lines for modern decor, playful motifs for kids’ rooms, or intricate patterns for boho-chic. Layer decals over painted walls or textured surfaces for added impact. Mix and match different designs or create a collage of quotes and symbols. Seasonal or theme-based decals keep your decor fresh and relevant. They’re also great for highlighting a specific area or feature wall.
Start by cleaning the wall thoroughly to ensure adhesion. Measure and plan your decal placement beforehand—use painter’s tape to visualize the layout. Peel and stick carefully, smoothing out bubbles with a credit card or squeegee. For complex designs, follow manufacturer instructions for best results. Remove or reposition decals easily without residue when you want a change. Keep a small toolkit for touch-ups or adjustments.
Create your own decals with custom fonts, colors, and designs using online services. Incorporate your favorite quotes, initials, or symbols that hold personal meaning. Apply decals in layers or over textured surfaces for a unique effect. Use decals to frame photos or highlight architectural details. It’s a creative way to make your space truly yours without a big investment.
Custom wall decals turn blank walls into expressive statements with minimal effort. They’re a quick upgrade that feels high-end without the price tag. Your walls become a reflection of your personality, making your home more welcoming and inspiring. Who’s ready to personalize with style?
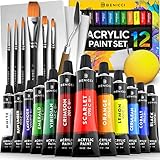
11. Artistic Corner with DIY Canvas Art or Prints
Tired of generic wall art that doesn’t speak to you? Creating your own DIY canvas art or prints lets you showcase your personality and artistic flair. It’s a budget-friendly way to fill empty walls with meaningful, one-of-a-kind pieces. Plus, it’s surprisingly easy to produce stunning artwork with just a few supplies.
Recommended Products to replicate this idea
| # | Preview | Product | |
|---|---|---|---|
| 1 |

|
Artlicious Canvases for Painting - Pack of 12, 9 x 12 Inch Blank White Canvas Boards - 100% Cotton... | Check Latest Price |
| # | Preview | Product | |
|---|---|---|---|
| 1 |
|
Complete Acrylic Paint Set – 12х Rich Pigment Colors & 6x Art Brushes - Includes 3 Paint... | Check Latest Price |
Imagine a wall decorated with vibrant abstract paintings, minimalist line drawings, or your own photography printed on canvas. The textures of the paint or the crispness of the print add visual depth. Layered or asymmetrical arrangements create a lively, dynamic gallery that draws the eye. When illuminated with soft lighting, these pieces become focal points that reflect your style.
Experiment with different art styles—modern, rustic, boho, or classic—depending on your decor. Use different mediums like acrylics, watercolors, or mixed media for variety. Create a cohesive look by sticking to a color palette or theme. Mix framed prints with unframed canvases for an eclectic vibe. Change the artwork periodically to keep your space fresh.
Start with canvases or high-quality prints of your favorite images or designs. Use acrylic paints or markers for original artwork—practice on scrap paper first. For prints, choose a reputable printing service and select the right size and paper type. Mount canvases on the wall with nails or hooks, or lean larger pieces for a casual look. Arrange your art in a grid, linear, or freeform layout for maximum impact. Display with lighting that highlights textures and colors.
Add personal touches like handwritten notes, decorative borders, or mixed media elements—like fabric or metallic accents. Incorporate your own photography, doodles, or inspirational quotes. Use stencils or masking tape for clean edges if painting. Coordinate your art with other decor elements—pillows, curtains, or rugs—to create a unified look. Rotate or update your artwork seasonally.
Making your own art boosts confidence and adds authenticity to your decor. It’s a fulfilling project that results in personalized pieces you’ll cherish. Your walls will tell a story that’s uniquely yours, fostering a sense of pride and creative expression. Ready to turn blank canvases into masterpieces?
12. Functional Desk Area with Personalized Accessories
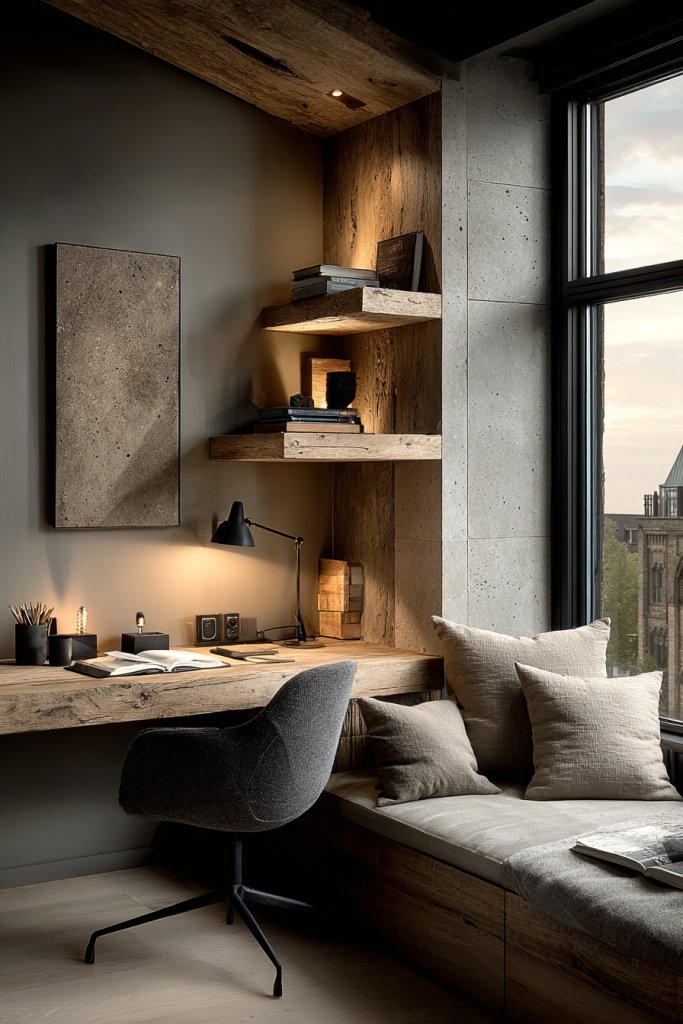
Working or studying from home can be chaotic, making it hard to focus and stay productive. A personalized desk area tailored to your needs can turn a cluttered corner into a motivating workspace. It’s not just about function—adding your personality makes the space inviting and inspiring. Who says workspaces can’t be stylish?
Recommended Products to replicate this idea
| # | Preview | Product | |
|---|---|---|---|
| 1 |
|
Amazon Basics Pen Holder and Desk Organizer, Office Supplies Storage Caddy, 9.1" x 5.9" x 5.5",... | Check Latest Price |
| # | Preview | Product | |
|---|---|---|---|
| 1 |

|
Providence Engraving Personalized Desk Name Plates - Custom Office Wall or Desk Name Plates With... | Check Latest Price |
Imagine a sleek desk with a colorful, patterned desk pad, a few inspiring quotes in stylish frames, and organizers in your favorite hues. A comfortable ergonomic chair with a textured cushion invites you to sit down. The desk area is decorated with personal items—like a vintage clock or a favorite mug—adding character. Soft lighting, such as a task lamp or LED strip, enhances focus and ambiance. The overall setup balances practicality with personality.
Choose accessories that match your workflow—colorful organizers for visual cues, minimalist containers for a clean look, or vintage items for a nostalgic vibe. Personalize your space with a mood board, a small plant-free decorative item, or a collection of favorite stationery. Adjust your setup seasonally or as your needs evolve. Small additions like a custom mouse pad or a decorative paperweight can make a big difference.
Start by decluttering and defining your workspace boundaries. Select organizers that suit your storage needs—think stackable trays, pen holders, or file bins. Personalize with accessories that motivate you—like motivational quotes or themed decor. Keep frequently used items within arm’s reach and store extras out of sight. Use cable organizers to keep cords tidy and prevent distractions. Regularly update your accessories to keep the space fresh.
Add custom decals or printed motivational quotes directly on your desk or wall. Incorporate a favorite color scheme or theme for cohesion. Use decorative magnets or pins to personalize your corkboard or magnetic surface. Incorporate small decorative objects that inspire creativity—like sculptures, or textured desk mats. Your workspace should energize you and reflect your style.
A personalized desk area boosts productivity and makes working enjoyable. It’s a space you’ll want to spend time in, which can reduce stress and increase focus. Every time you sit down, you’re reminded of your goals and personality. Ready to craft your ideal work nook?
13. Vertical Plant Wall Using Non-Greenery Elements

Plants add life to any space, but they require maintenance you might not have time for. Want the aesthetic without the fuss? A vertical wall using non-greenery elements offers a modern, stylish alternative. It brings visual interest and texture without watering or sunlight. Perfect for busy or forgetful plant lovers.
Recommended Products to replicate this idea
| # | Preview | Product | |
|---|---|---|---|
| 1 |

|
Giantex 2 Pack Hanging Artificial Plants Panels, 20" x 20" Square Framed 3D Greenery Wall Art Decor,... | Check Latest Price |
| # | Preview | Product | |
|---|---|---|---|
| 1 |

|
Bamworld Hanging Planters for Indoor Plants Wall Decor Living Room Plant Stand Indoor Wall Planters... | Check Latest Price |
Picture a wall covered in geometric metal or wooden panels arranged in a grid pattern. Some panels hold decorative objects like sculptural pieces, textured ceramics, or layered textiles. The mix of materials adds depth, shadow, and tactile richness. When illuminated, the wall looks like a curated art installation—dynamic and sophisticated. It’s a bold statement that combines art and design.
Use different materials—metal, wood, fabric, or mixed media—to create diverse textures. Incorporate shelves or hooks for hanging accessories, or embed small decorative objects directly into panels. For a more luxurious look, add faux materials like faux fur or leather accents. Change the arrangement or objects seasonally to keep the display fresh. It can work in any room, from living rooms to entries.
Select a sturdy wall and plan your layout—symmetrical or asymmetrical. Mount panels securely, ensuring they’re level and stable. Fill panels with your chosen decorative items—sculptures, ceramics, or textiles—using adhesives or hooks. For added visual impact, play with different shapes and sizes. Keep the wall free of dust and handle objects carefully during setup. Regularly update the decor to maintain interest.
Create a theme—industrial, minimalist, eclectic—and choose objects that reinforce it. Incorporate personal items like vintage finds or handmade crafts for uniqueness. Use lighting—like small spotlights or LED strips—to highlight key pieces. Mix textures and finishes for a layered, curated look. This wall becomes a reflection of your style and creativity.
A non-greenery wall proves that bold, artistic displays can be both stylish and low-maintenance. It elevates your decor while saving time and effort. Every glance reminds you of your creativity and taste. Ready to craft a wall that’s both artful and fuss-free?
14. Vintage-Inspired Decor with Modern Twists

Love the charm of vintage pieces but worry they might look outdated? Incorporating vintage-inspired decor with modern twists creates a timeless yet fresh aesthetic. It’s a clever way to blend old-world charm with contemporary style. This approach keeps your space feeling cozy and current—no nostalgia overload needed.
Recommended Products to replicate this idea
| # | Preview | Product | |
|---|---|---|---|
| 1 |

|
OIGUMR Oval Smallest Wall Mirror Resin Frame Size:12 x 8.3 inch Mirror Vintage Hanging Mirrors for... | Check Latest Price |
| # | Preview | Product | |
|---|---|---|---|
| 1 |

|
EDISHINE Tripod Table Lamp, Small Cute Bedside Lamp with Linen Beige Lampshade, Nightstand Lamp for... | Check Latest Price |
Imagine a rustic wooden sideboard with sleek, minimalist hardware, paired with a modern glass lamp and geometric vases. Or a vintage mirror with an ornate frame, reimagined with a matte black finish. The mix of distressed and polished surfaces adds layers of texture and interest. Soft, neutral textiles and subtle metallic accents complete the look, creating a balanced, curated vibe. It’s a perfect blend of past and present.
Choose vintage furniture or accessories—like an antique trunk or retro clock—and update them with fresh paint or new hardware. Mix old and new furniture, keeping a consistent color palette for cohesion. Incorporate modern art or minimalistic decor to balance the vintage elements. Seasonal changes could include swapping textiles or adding contemporary accents. This style adapts well to both small and large spaces.
Start by sourcing vintage or vintage-inspired pieces—thrift stores or online marketplaces are goldmines. Clean and restore items if needed—sand, paint, or reupholster for a fresh look. Pair vintage with sleek, modern elements like a glass table or metal light fixtures. Keep the color scheme neutral or monochrome to tie everything together. Balance the mix with symmetry or intentional asymmetry, depending on your taste. Regularly update accessories for freshness.
Add personal touches like family heirlooms or custom artwork that echoes vintage themes. Incorporate textiles like embroidered cushions or textured throws to soften the look. Use modern lighting—sleek sconces or LED strips—to highlight key pieces. Mix textures intentionally—matte, gloss, rough, smooth—for visual depth. Your space becomes a storybook of eras and styles, uniquely yours.
Vintage decor with modern twists shows your ability to blend styles thoughtfully. It creates a warm, inviting environment that feels both nostalgic and fresh. Your home becomes a reflection of your personality—timeless yet current. Ready to give your space a stylish, vintage-inspired upgrade?
15. Textured Wall Panels or 3D Art Pieces

Flat walls can make a room feel dull or uninspired, especially when everything else is styled to a T. Want to add instant dimension and visual interest? Textured wall panels or 3D art pieces are your answer. They bring depth and a tactile element that transforms plain surfaces into focal points. Plus, they’re a surprisingly simple upgrade that makes your decor pop.
Recommended Products to replicate this idea
| # | Preview | Product | |
|---|---|---|---|
| 1 |
|
Art3dwallpanels 33 Pack 3D Wall Panel Diamond for Interior Wall Décor, PVC Flower Textured Wall... | Check Latest Price |
| # | Preview | Product | |
|---|---|---|---|
| 1 |
|
3D Textured Framed Abstract Wall Art, 3 Piece Modern Paintings Artwork for Walls, Black White Brown... | Check Latest Price |
Picture geometric or organic-shaped panels in materials like wood, foam, or resin, arranged to create shadows and highlights. The textures range from smooth and glossy to rough and layered, adding richness to your walls. When lit from different angles, they cast shadows that change throughout the day, giving your room a dynamic feel. A neutral palette keeps it sophisticated; bold colors add drama. The overall look is modern, artistic, and full of depth.
Choose panels with patterns—hexagons, waves, or abstract shapes—to suit your aesthetic. Mix materials for contrast, like wood with metal or resin with fabric. Install them in a single feature wall or across multiple surfaces for a more immersive effect. Integrate lighting fixtures to highlight textures or create ambiance. They work well in living rooms, bedrooms, or even hallways.
Start by measuring your wall and selecting panels that fit your space. Prepare the wall by cleaning and, if needed, applying a primer. Mount panels securely using appropriate adhesives or hardware—follow manufacturer instructions closely. Play with layout options before fixing everything permanently. Use lighting to emphasize depth and texture, and ensure all panels are aligned for a seamless appearance. Regular care involves dusting and occasional touch-ups.
Add lighting accents like LED strips or spotlights to cast shadows and enhance textures. Incorporate your favorite colors or finishes—metallic, matte, or glossy—to match your decor. Mix panel shapes and sizes for a more organic, artistic feel. Personalize with embedded objects like small sculptures or textured inserts. This feature wall becomes an ever-evolving centerpiece.
Textured panels elevate your decor with minimal effort, proving that architectural details can be both modern and personal. They’re a statement of style and creativity, making your space memorable. Every glance at your wall reminds you of your design savvy. Ready to add dimension and depth?
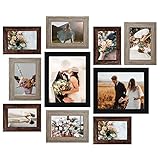
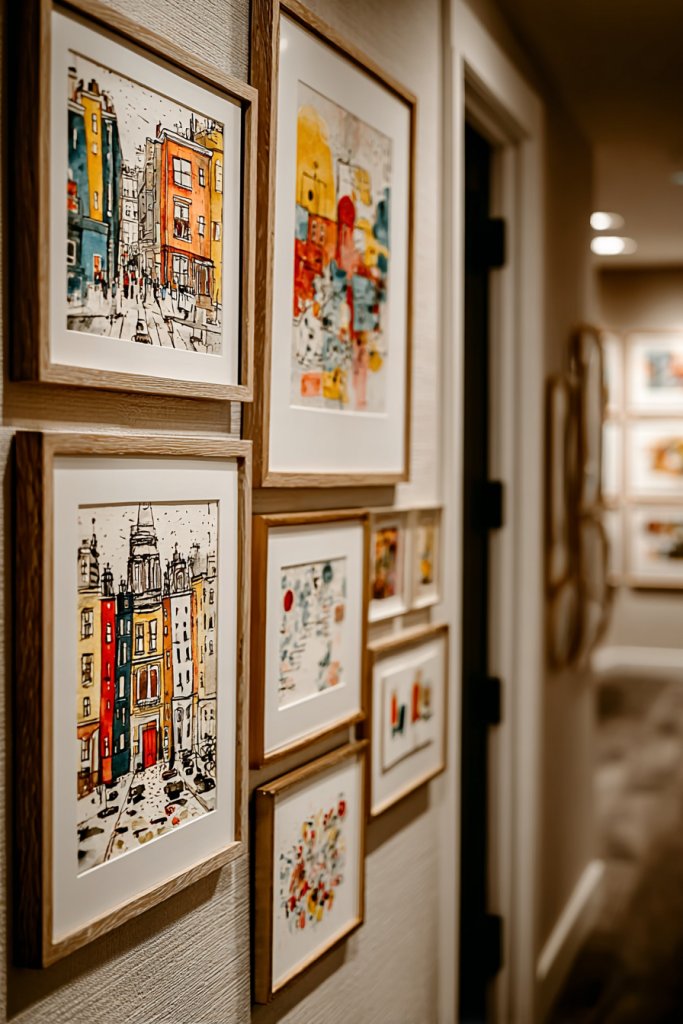
16. Personal Photo Collage with Unique Frames
Photos are memory keepers, but often end up in digital albums or cluttered frames. Want to display your favorite moments in a way that adds personality and warmth? A personal photo collage with unique frames turns your memories into a curated art display. It’s a heartfelt way to decorate and celebrate your life.
Recommended Products to replicate this idea
| # | Preview | Product | |
|---|---|---|---|
| 1 |
|
LUCKYLIFE Picture Frames Collage Wall Decor 10-Pack, Gallery Wall Frame Set with 8x10 5x7 4x6 Frames... | Check Latest Price |
| # | Preview | Product | |
|---|---|---|---|
| 1 |

|
Vittanly 15 Pack Picture Frames Collage Wall Decor for Mounting or Tabletop Display, Gallery Frame... | Check Latest Price |
Imagine a wall filled with a variety of frames—vintage, modern, ornate, minimalist—arranged in a creative pattern. The photos inside range from candid family shots to travel adventures, all adding a personal touch. The diverse frames create a layered, dynamic feel, drawing the eye across the display. Soft lighting and thoughtful spacing make the collection look intentional, not cluttered. It’s a visual journey of your life’s highlights.
Mix frame styles and sizes—square, round, antique, contemporary—to suit your aesthetic. Use themed collections, like black-and-white or sepia, for cohesion. Arrange in a grid, a cluster, or a freeform layout for visual interest. Incorporate some negative space for breathing room or fill every inch for maximum impact. Swap out photos seasonally or for special occasions to keep things fresh.
Gather your favorite photos and choose frames that match your style—think metallic, wood, or acrylic. Lay out your arrangement on the floor first, then transfer it to the wall using painter’s tape. Mount frames securely, ensuring even spacing. Use different shapes to add visual variety but keep a consistent theme for harmony. Light the display with soft, ambient lighting for a gallery-like effect. Rotate photos periodically for fresh energy.
Decorate frames with embellishments like washi tape borders, painted accents, or meaningful charms. Incorporate mementos like ticket stubs or handwritten notes behind glass. Create themed collages—vacation, family, milestones—that tell a story. Add a small shelf or ledge for seasonal or rotating displays. Keep the layout evolving to reflect your changing memories and tastes.
A personal photo collage turns your walls into a storybook and your home into a reflection of your life. It’s a project that combines creativity with sentimentality, making your space truly yours. Every glance brings a smile or a memory, fostering a sense of pride. Ready to create your own visual biography?
17. Statement Headboard with Fabric or Upholstery
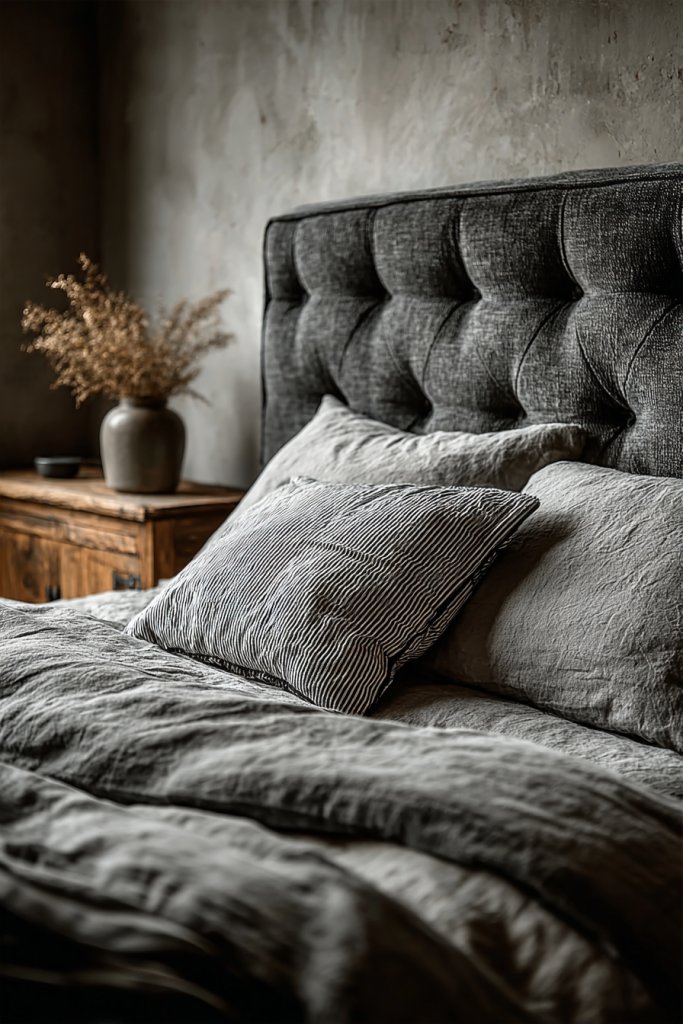
A plain bed can leave your bedroom feeling uninspired, even dull. Want to turn your sleeping area into a focal point? A statement headboard made from fabric or upholstery instantly elevates your decor. It adds texture, color, and personality, transforming your bedroom into a stylish retreat. Plus, it’s a DIY-friendly project that can be customized to your taste.
Recommended Products to replicate this idea
| # | Preview | Product | |
|---|---|---|---|
| 1 |

|
Huatean Home Tufted Upholstered Headboard Queen Size, Sturdy and Durable Solid Wood Bed headboard,... | Check Latest Price |
| # | Preview | Product | |
|---|---|---|---|
| 1 |
|
58" x 80" Chenille Fabric | Soft Luxury for Home Decor & Fashion | Crafting Cozy Comfort & Timeless... | Check Latest Price |
Picture a plush, tufted headboard upholstered in a luxurious velvet fabric in deep emerald or blush pink. Or imagine a bold geometric pattern in contrasting fabrics for a modern look. The headboard’s height and design anchor the bed, creating a cozy and inviting atmosphere. Soft lighting or bedside lamps highlight the texture and detail. The overall effect is a blend of comfort and sophistication, making your sleeping space a true sanctuary.
Choose fabrics that match your style—rich velvets, textured linens, or patterned textiles. For a minimalist vibe, opt for sleek, padded designs in neutral shades; for a boho look, combine different fabrics and patterns. Experiment with shapes—rectangular, rounded, or custom silhouettes. Add decorative buttons or piping for extra detail. Change the fabric seasonally or when updating your decor.
Start with a sturdy wooden frame or a pre-made headboard base. Cut foam padding to fit and wrap in batting for softness. Cover with your chosen fabric, pulling taut and securing with a staple gun or upholstery tacks. Add decorative elements like buttons or trims if desired. Mount the headboard securely to your bed frame or wall. Finish with a protective spray or wash the fabric as needed. It’s a rewarding DIY project that makes a big impact.
Add personal touches like monogrammed initials or embroidered motifs. Use contrasting fabrics or piping to create a tailored look. Incorporate subtle metallic accents or tassels for a luxe vibe. Change covers periodically to match seasons or moods. Your statement headboard becomes a signature element that defines your bedroom’s style and comfort.
A bold headboard elevates your entire bedroom decor, making it feel more finished and intentional. It’s a statement piece that showcases your creativity and style. Every night, you’ll enjoy the comfort and beauty it brings. Ready to craft a headboard that’s both functional and fabulous?
18. Open Shelving with Curated Decor Items
Cluttered surfaces can make your room feel chaotic and uninviting. Want a way to display your favorite decor items without clutter? Open shelving offers a stylish solution to showcase curated pieces that reflect your personality. It’s a functional and aesthetic upgrade that makes your space look intentional and polished.
Recommended Products to replicate this idea
| # | Preview | Product | |
|---|---|---|---|
| 1 |
|
BAYKA Floating Shelves for Wall, Wall Mounted Rustic Wood Shelves for Bathroom, Bedroom, Living... | Check Latest Price |
| # | Preview | Product | |
|---|---|---|---|
| 1 |

|
Modern Ceramic Vase Set of 5, Vases Home Decor Rustic Farmhouse Decorative Vase Pottery Vases for... | Check Latest Price |
Imagine sleek, floating shelves in a warm wood or matte black finish installed against a wall. Decorate them with a mix of books, textured objects, or unique collectibles—without overloading. Layer items at different heights to create depth and visual interest. Use lighting, like small LED strips, to highlight your favorite pieces. The result is a balanced, curated display that invites exploration.
Arrange shelves in symmetrical or asymmetrical patterns, depending on your style. Incorporate different materials—wood, metal, glass—for contrast. Space items thoughtfully, leaving some blank space to prevent clutter. Mix decorative objects, functional items, and personal collectibles for a personalized touch. Adjust the arrangement seasonally or as your collection grows to keep things fresh.
Start by measuring your wall space and selecting appropriate shelf lengths and mounting hardware. Use a level during installation to ensure perfect alignment. Curate a collection of items—think textured ceramics, vintage finds, or meaningful souvenirs. Arrange pieces before fixing to find the best layout. Mount shelves securely, then style with your curated objects, balancing visual weight and spacing. Maintain by dusting regularly and swapping items to refresh the look.
Personalize with small decorative objects—like framed photos, handcrafted ceramics, or travel souvenirs—that reflect your story. Use decorative brackets or supports that match your decor theme. Incorporate lighting or LED strips to highlight key items. Change the display periodically to showcase new finds or seasonal themes. The shelves become a visual diary of your interests and style.
Open shelving proves that curated displays can be both practical and beautiful. They make your home feel collected and intentional, showcasing your personality. Every item tells a story, making your space more inviting. Ready to elevate your decor with stylish, curated shelves?
19. Monochrome Theme with Accent Colors
Feeling overwhelmed by a room full of mixed colors and patterns? A monochrome theme with accent colors creates a sleek, harmonious space that feels both modern and calming. It simplifies decorating decisions and makes your space look intentionally designed. Plus, it’s easy to update with small pops of your favorite hues.
Recommended Products to replicate this idea
| # | Preview | Product | |
|---|---|---|---|
| 1 |

|
MIULEE Pack of 2 Corduroy Decorative Throw Pillow Covers 18x18 Inch Soft Boho Striped Pillow Covers... | Check Latest Price |
| # | Preview | Product | |
|---|---|---|---|
| 1 |
|
Unicozin Table Lamp for Bedroom, 3 Color Temperatures, 7 RGB Colors, Adjustable Brightness, Dual USB... | Check Latest Price |
Imagine a room dominated by shades of gray or beige, with pops of bright turquoise or mustard yellow through cushions, artwork, or accessories. The monochrome base provides a sophisticated backdrop, allowing accent colors to stand out. Textures like velvets, knits, or matte finishes add depth and richness. When natural light hits, the subtle color variations shimmer and glow, creating a layered, refined look.
Choose a single color family—blues, earth tones, or pastels—and incorporate varying shades for visual depth. Use small accents like throw pillows, decorative trays, or small furniture pieces to introduce pops of color. Seasonal updates can involve swapping out accessories or textiles in different shades. Keep larger furniture neutral to maintain the theme’s integrity. It’s versatile enough for any room.
Start by selecting your base color and painting walls or large furniture accordingly. Gather accessories—pillows, throws, decorative objects—in your chosen accent color. Arrange these items thoughtfully, balancing light and dark shades. Use contrasting textures to add richness—think plush cushions against smooth upholstery. Incorporate metallic or matte finishes for extra sophistication. Regularly swap small items to keep the look fresh and engaging.
Personalize with custom textiles—embroidered pillows or dyed throws. Incorporate your favorite shades as accents in art or decorative objects. Use metallic or glass elements to add a touch of luxury. Experiment with different textures and finishes to elevate the monochrome palette. This style allows your personality to shine through subtle details, making the space uniquely yours.
A monochrome theme with accent colors demonstrates that simplicity can be stunning. It’s a timeless style that adapts to any decor update or trend. Your space becomes a calm, cohesive retreat that reflects your taste. Ready to embrace minimalism with a colorful twist?
20. Artistic Mirrors with Unique Frames
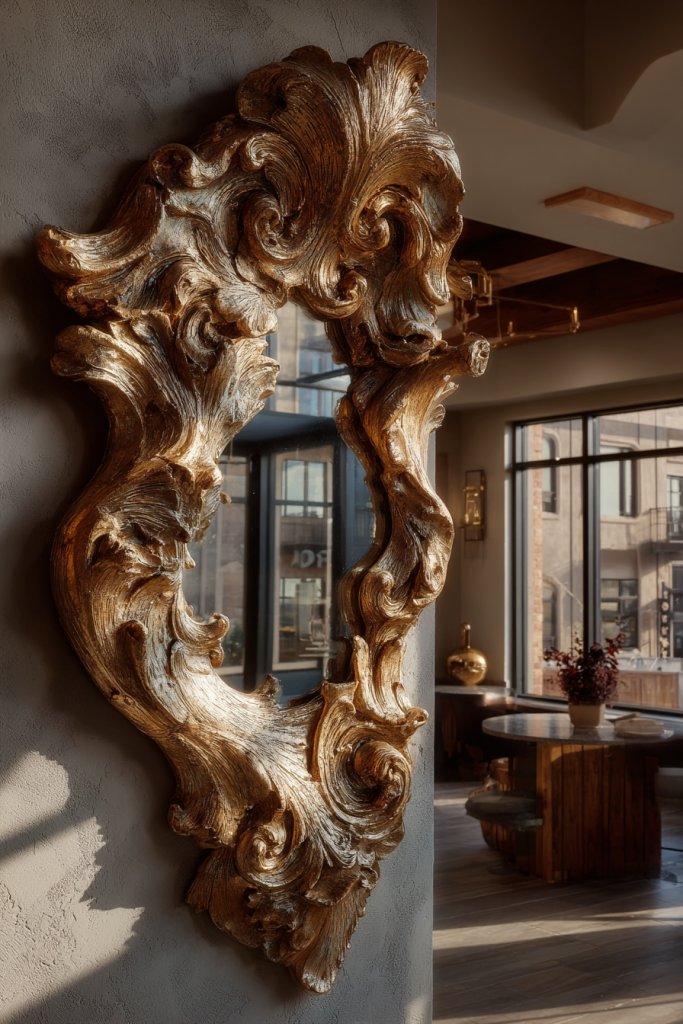
Mirrors are often just functional, but they can also be statements of style. Want to add a touch of art and elegance to your space? Artistic mirrors with unique frames turn a simple reflective surface into a focal point. They brighten your room, create illusions of space, and showcase your personality—all at once.
Recommended Products to replicate this idea
| # | Preview | Product | |
|---|---|---|---|
| 1 |

|
ROLOVE 34x24 Antique Gold Mirror for Wall, Ornate Vintage Wall Decor, Gold Framed Baroque Mirror for... | Check Latest Price |
| # | Preview | Product | |
|---|---|---|---|
| 1 |

|
Creative Co-Op Gold Sunburst Mirror | Check Latest Price |
Picture a large, vintage-inspired mirror with an ornate gold frame, or a modern, asymmetrical mirror with a sleek black border. When positioned strategically, they reflect light and create a sense of openness. Decorative frames with intricate carvings or geometric patterns add layers of visual interest. The mirror’s reflection, combined with its frame, adds depth and personality to your decor. It becomes both a functional and artistic element.
Choose frames that match your decor—boho, modern, rustic, or glam—for a cohesive look. Mix different shapes and sizes—round, oval, square—for variety. Hang mirrors over a fireplace, in hallways, or as a statement piece in the bedroom. Use multiple smaller mirrors to create a gallery wall or a dynamic focal point. Incorporate lighting around or above for extra impact.
Select a mirror that suits your space and style—consider size and frame details. Mount securely with appropriate hardware, ensuring it’s level. Position it to reflect natural light or highlight a specific area. Clean the mirror regularly with glass cleaner to keep reflections crisp. Add decorative elements like a frame or surround that enhances its artistic appeal. Balance it with other decor elements for harmony.
Customize your mirror with painted or gilded frames, or add decorative trims. Incorporate LED backlighting or sconces for a luminous effect. Pair with other metallic accents or textured wall finishes for a layered look. Use it to reflect artwork, architectural features, or cozy corners. Regularly update the surrounding decor to keep the space fresh and stylish.
An artistic mirror elevates your decor, demonstrating that utility and style go hand in hand. It adds brightness and a sense of space, making your room feel larger and more inviting. Your choice of frame reflects your taste and personality, turning a simple mirror into a work of art. Ready to reflect your style?
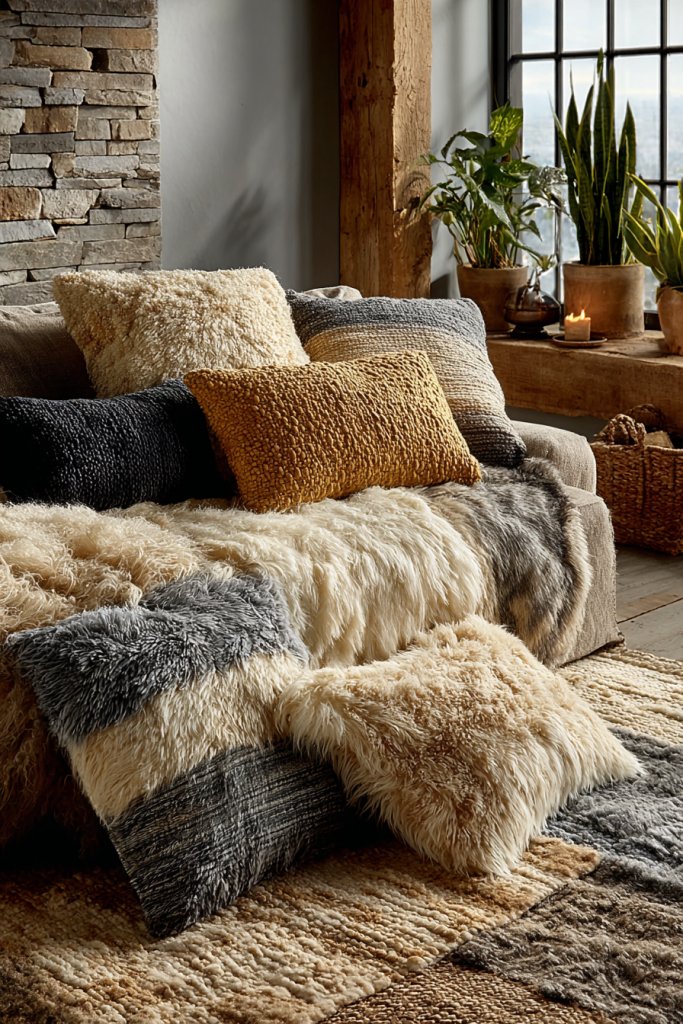
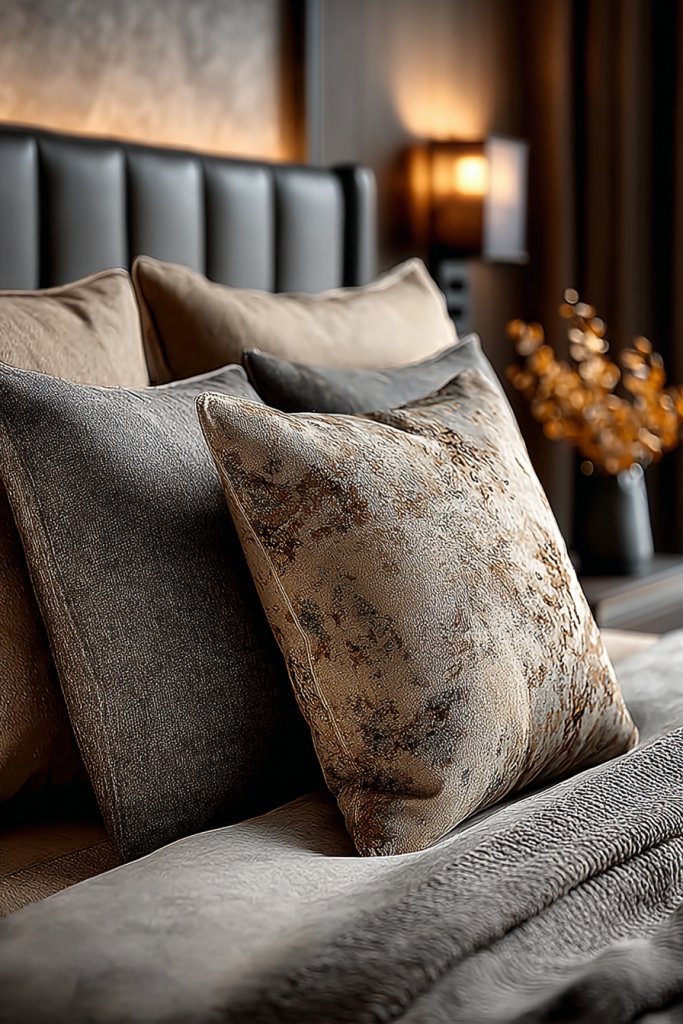
21. Boho-Chic Textile Layers with Throws and Pillows
Feeling like your room lacks personality or coziness? Boho-chic textile layers with throws and pillows instantly add warmth and texture. They create a relaxed, eclectic vibe that invites you to unwind. Plus, layering textiles is one of the easiest ways to update your decor without a full overhaul. Who doesn’t love a cozy, layered look?
Recommended Products to replicate this idea
| # | Preview | Product | |
|---|---|---|---|
| 1 |

|
Aganear Fleece Throw Blanket - Cozy Soft Lightweight Fuzzy Throw Blanket for Women Portable Throw... | Check Latest Price |
| # | Preview | Product | |
|---|---|---|---|
| 1 |

|
Aeckself Boho Throw Pillow Covers 18x18 Inch Set of 2, Farmhouse Decorative Striped Square Pillow... | Check Latest Price |
Imagine a sofa draped with a mix of chunky knits, embroidered throws, and printed fabrics in earthy tones. Layered cushions in different shapes and textures—velvet, linen, woven—add depth and comfort. The textures catch the light differently, creating a tactile, inviting surface. The overall look is casual yet curated, with a rich mix of patterns and textures that reflect a bohemian spirit. It’s a visual hug.
Mix and match textures—think faux fur, woven, and embroidered—to create a tactile feast. Use a neutral base with pops of color or pattern to keep it balanced. Layer multiple throws on chairs, beds, or sofas, changing them seasonally or when your mood shifts. Incorporate decorative cushions with tassels, pom-poms, or embroidery for extra personality. Keep the arrangement relaxed and slightly asymmetrical for an authentic boho feel.
Choose throws and pillows that reflect your style—think earthy palettes or vibrant jewel tones. Layer them in a way that looks effortless, balancing textures and colors. Use different sizes and shapes for visual interest—square, rectangular, or round cushions. Incorporate some textured fabrics like boucle or velvet. Regularly rotate or update the textiles to keep your space lively and fresh. Mix in some personal favorites or handmade pieces for authenticity.
Add decorative trims, tassels, or embroidery to your cushions for a bespoke touch. Incorporate textiles that have personal meaning—like a souvenir blanket or heirloom pillow. Use a variety of textures to create depth and richness. Change the arrangement seasonally, layering in new patterns and colors. Your textile layers become a tactile representation of your personality and style.
Boho-chic textile layering is a simple, affordable way to make your home more inviting. It showcases your eclectic tastes and love for comfort. Every throw or pillow is an opportunity to express your personality. Ready to pile on the cozy layers?
22. Customized Window Treatments in Your Style
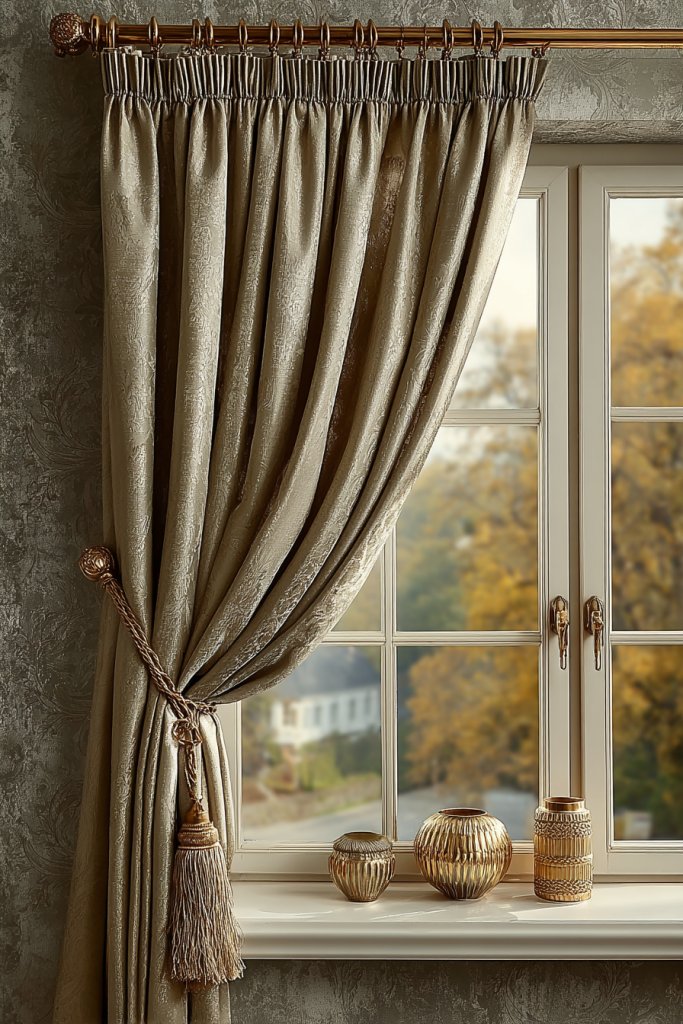
Standard curtains or blinds can feel uninspired or clash with your decor. Want window treatments that truly reflect your style? Customized window treatments allow you to control light, privacy, and ambiance while adding a personal touch. They’re the finishing touch that ties a room together.
Recommended Products to replicate this idea
| # | Preview | Product | |
|---|---|---|---|
| 1 |
|
100% Blackout Blind Magnetic Window Cover 118 x 57Inch,No Drill,Cut Any Size/Shape,Portable Black... | Check Latest Price |
| # | Preview | Product | |
|---|---|---|---|
| 1 |

|
MYshade Custom Cordless Blackout Cellular Shades for Windows, Honeycomb Window Shades with Thermal... | Check Latest Price |
Imagine flowing, patterned curtains in a boho-inspired fabric that adds softness and movement. Or sleek, tailored blinds in a neutral tone that complement a modern aesthetic. Textured fabrics like linen, velvet, or embroidered textiles create visual interest and tactile richness. When drawn, they frame your view beautifully; when open, they flood the room with natural light. The right treatment enhances both function and style.
Choose fabrics, colors, and styles that match your decor—think lightweight sheers for airy spaces or heavy blackout curtains for a cozy vibe. Experiment with layered treatments, combining blinds with curtains for versatility. Use custom shapes or lengths to fit unusual window sizes or architectural details. Seasonal fabrics or patterns keep your decor fresh and aligned with current trends. These treatments adapt perfectly to any room.
Measure your windows carefully, noting width, height, and hardware options. Select fabrics and styles that suit your needs—privacy, light control, or aesthetics. Install rods, tracks, or hooks securely, following manufacturer instructions. Hang your curtains or blinds, adjusting for perfect fit and movement. Add decorative finials or holdbacks that match your decor theme. Regular cleaning and maintenance keep your treatments looking pristine and functional.
Add decorative trims, tiebacks, or embroidery to customize your window treatments further. Choose fabrics that complement your room’s color palette or add patterns for visual interest. Use layered treatments to create a sense of luxury or privacy. Incorporate seasonal fabrics or motifs for variety. They become a signature element that reflects your taste and elevates your decor.
Customized window treatments demonstrate your attention to detail and style. They frame your windows beautifully, making your entire room look more polished. Every time you open or close them, you experience a small act of design confidence. Ready to craft window coverings that are both functional and fabulous?
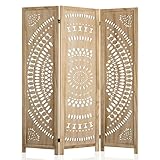
23. Functional yet Decorative Room Dividers
Open floor plans are great, but sometimes you need to define spaces or create privacy without sacrificing style. Room dividers that are both functional and decorative can solve this dilemma beautifully. They add visual interest while helping organize your space. It’s a win-win for style and practicality.
Recommended Products to replicate this idea
| # | Preview | Product | |
|---|---|---|---|
| 1 |

|
Furnnylane 6 Panel Bamboo Room Divider and Folding Panel Screen,Bamboo Panel Divider for Room... | Check Latest Price |
| # | Preview | Product | |
|---|---|---|---|
| 1 |
|
WelFurGeer Handcrafted Carved Wooden Room Divider Screen, Folding Privacy Screen for Room... | Check Latest Price |
Visualize a wooden screen with intricate cut-out patterns, or a fabric curtain in a bold print that separates a workspace from a lounging area. Metal or acrylic partitions with geometric designs can also serve as striking focal points. When positioned strategically, they create a sense of intimacy and structure, making large rooms feel cozier. Lighting behind or around the divider enhances its visual impact, adding layers of depth and ambiance.
Choose from materials like wood, metal, fabric, or acrylic—matching your decor style. Use sliding panels for flexibility or fixed screens for permanence. Decorate with patterns, textures, or colors that complement your overall aesthetic. For seasonal updates, swap fabrics or paint the dividers to keep the look fresh. These dividers work well in living rooms, studios, or bedrooms.
Measure your space and select a divider that fits your needs—height, width, and style. Securely install or position the divider, ensuring stability. Decorate with paint, fabric, or decorative overlays if desired. Use brackets, hooks, or free-standing bases for easy setup and removal. Consider adding storage or shelves to multifunctional dividers. Regular maintenance involves cleaning and adjusting for stability.
Personalize with painted patterns, fabric covers, or decorative trims. Incorporate your favorite colors or textures to match your decor. Use lighting or backdrops to enhance the divider’s visual appeal. Change fabrics seasonally or when updating your decor scheme. Your room divider becomes a statement piece that combines form and function.
A stylish room divider transforms open spaces into personalized zones, making your home more functional and beautiful. It’s a creative way to organize without walls, showcasing your design taste. Every time you use it, you reinforce your ability to craft beautiful, practical spaces. Ready to define your space with style?
24. Personal Touch with Handcrafted Accessories
Generic decor can make a space feel impersonal. Want your home to radiate warmth and personality? Handcrafted accessories like painted ceramics, woven accents, or DIY art add that special touch. They’re authentic, unique, and often more meaningful than store-bought items. Plus, making your own can be a fun, rewarding experience.
Recommended Products to replicate this idea
| # | Preview | Product | |
|---|---|---|---|
| 1 |

|
Ronasip Vintage Blue and White Chinoiserie Ceramic Vase, 6.9” Hand-Painted Peony Floral Design,... | Check Latest Price |
| # | Preview | Product | |
|---|---|---|---|
| 1 |

|
KHOYIME Large Macrame Wall Hanging Boho Woven Tapestry, Chic Home Decor Modern Bohemian Handmade... | Check Latest Price |
Imagine a collection of hand-painted vases, woven wall hangings, or embroidered cushions—all reflecting your personal style. These pieces introduce texture, color, and craftsmanship into your decor. They tell a story of creativity and effort, making your space feel warm and lived-in. When arranged thoughtfully, they become focal points that showcase your personality and artistic flair.
Create a cohesive look by choosing accessories in a unifying color palette or style—boho, rustic, modern. Mix different materials and techniques for variety: painted ceramics, woven baskets, embroidered textiles. Incorporate your own DIY crafts or heirlooms for added meaning. Display them on shelves, side tables, or as centerpieces. Rotate and update periodically to keep your decor fresh.
Gather your materials—ceramics, fabrics, paints, or weaving supplies. Experiment with designs and techniques, practicing on scrap before creating the final piece. Personalize with painted initials, custom patterns, or meaningful symbols. Arrange your accessories in a way that balances visual weight and harmony. Use adhesive or mounting hardware where needed. Regularly care for and refresh your accessories.
Add personal touches like hand-lettered quotes, monograms, or embedded meaningful objects. Use colors and textures that match or complement your existing decor. Incorporate seasonal or thematic accessories for variety. Combine different crafts—like weaving and painting—for a layered, eclectic look. Your handcrafted accessories become a reflection of your creativity and personality.
Personalized, handcrafted accessories make your home truly yours, showcasing your talents and style. They add warmth and authenticity that store-bought items often lack. Every piece you create or select becomes a conversation starter. Ready to infuse your space with handmade charm?
Conclusion
Exploring these diverse room aesthetic ideas opens up endless possibilities for personalizing your space. From calming minimalism to bold, eclectic statements, each concept invites you to experiment and make your home truly yours. Don’t hesitate to try out new styles and mix elements to craft a space that energizes and comforts you. Your perfect personalized room is just a creative step away—start transforming today!