I have been, or can be if you click on a link and make a purchase, compensated via a cash payment, gift, or something else of value for writing this post. As an Amazon Associate, I earn from qualifying purchases. Please read my full Affiliate Disclosure for more information.
There’s something truly delightful about transforming ordinary pots into eye-catching displays that elevate any space. Pot decorating ideas have surged in popularity because they allow for personal expression and add a touch of creativity to everyday decor, making your plant arrangements stand out.
In this article, you’ll find an exciting variety of decorating tips and tricks that cater to every style — from rustic charm to sleek modern aesthetics. Whether you’re a beginner or a seasoned plant lover, these ideas will inspire you to give your pots a fresh, stylish makeover and turn simple plant displays into true conversation starters.
1. Painted Terra Cotta Pots with Geometric Patterns
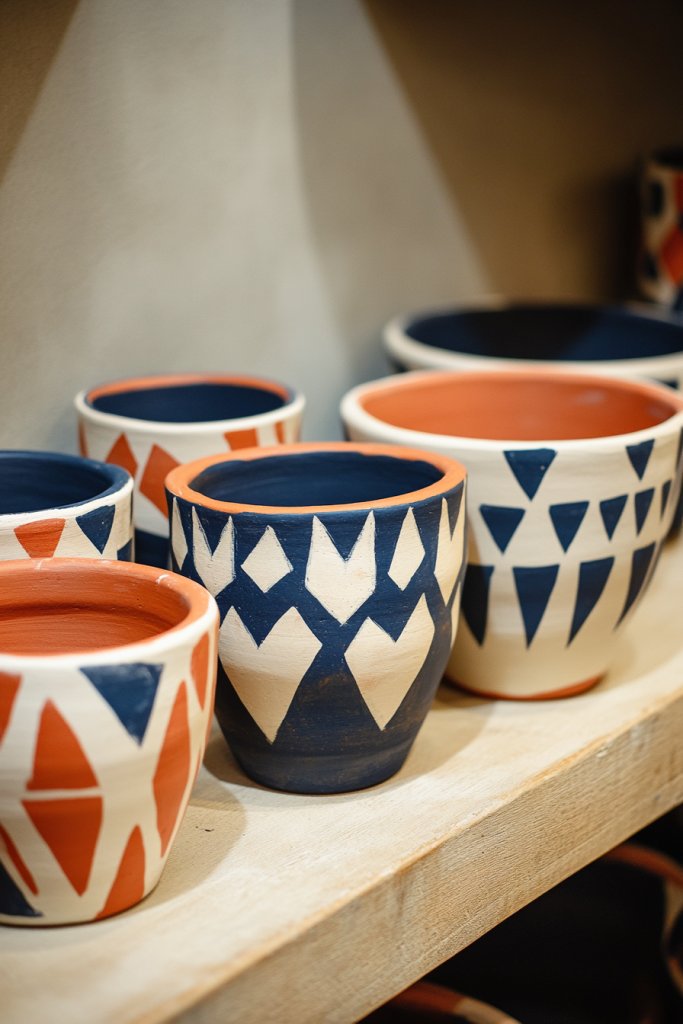
Ever tired of dull, uninspired plant containers that blend into the background? Want to boost your space’s style without breaking the bank? Painting terra cotta pots with eye-catching patterns is an easy way to add personality and modern flair. It transforms simple planters into focal points that make your greenery pop.
Recommended Products to replicate this idea
| # | Preview | Product | |
|---|---|---|---|
| 1 |

|
Orceler 6 inch Terracotta & Clay Pots for Plants with Saucer, Medium Terra Cotta Plant Pots with... | Check Latest Price |
| # | Preview | Product | |
|---|---|---|---|
| 1 |
|
Betem 24 Colors Dual Tip Acrylic Paint Pens Markers, Premium Water-Based Acrylic Paint Markers for... | Check Latest Price |
Imagine a row of terra cotta pots decorated with bold triangles, stripes, or chevrons in vibrant colors. The matte finish contrasts beautifully with glossy leaves, creating a fresh, contemporary vibe. The geometric patterns catch the light and draw attention, turning your windowsill into an artful display. The texture of the painted surface adds depth, making even plain plants look gallery-worthy.
You can customize patterns to match seasonal themes, like snowflakes for winter or florals for spring. For a boho look, combine muted earth tones with intricate designs, or go bright and bold for a playful backyard garden. Smaller pots suit delicate patterns, while large garden planters benefit from large, graphic motifs. Experiment with metallic accents for a chic touch or keep it simple for a minimalist style.
Start with clean, dry terra cotta pots. Use painter’s tape to create precise geometric shapes—triangles, squares, or abstract designs. Choose acrylic paints in your favorite shades, applying multiple coats for opacity. Sealing with a clear outdoor varnish protects your artwork from weather and watering. For best results, let each layer dry thoroughly before adding details or additional coats. Use stencils for complex patterns and fine brushes for details.
Add personalized touches by incorporating monograms or initials within your patterns. Mix different colors or finishes, like matte with gloss, for visual interest. You could also embed small decorative elements like metallic dots or textured accents. Consider layering different patterns or creating a mosaic effect for a truly unique look. Personal touches make your pots reflect your personality and style.
Painting geometric patterns on pots is a simple, budget-friendly way to elevate your plant display. It encourages creativity and can be as subtle or bold as you like. With a little practice, you’ll have a collection of customized planters that wow visitors and boost your space’s style. Ready to turn boring pots into miniature works of art?
2. Macramé Plant Hangings for Floating Greenery
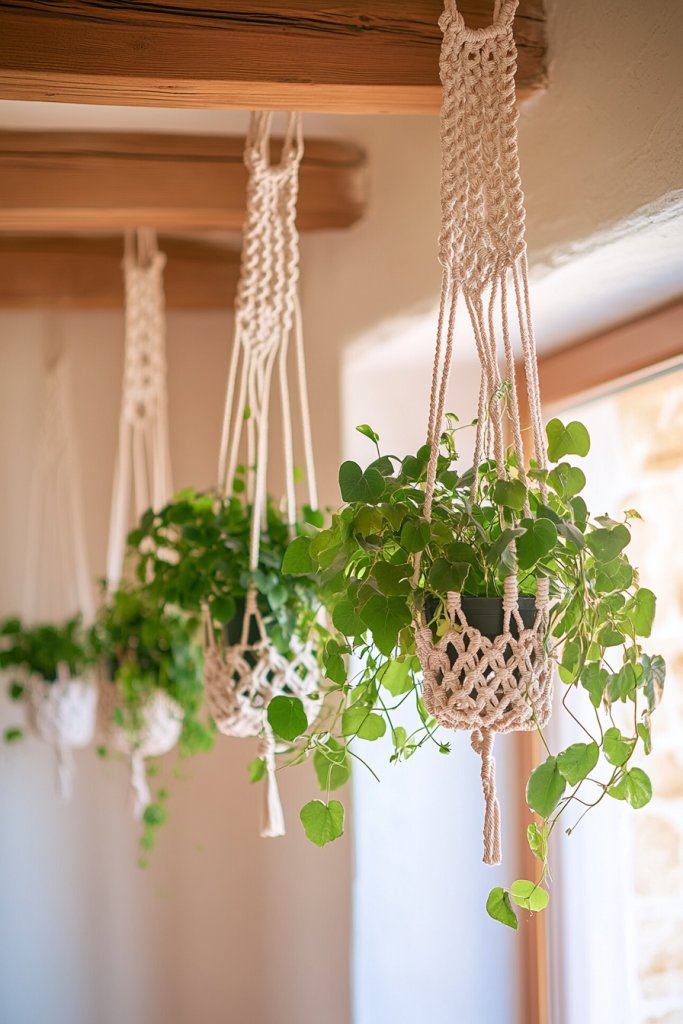
Feeling like your indoor garden could use a little extra wow factor? Tired of limited surface space for your beloved plants? Macramé plant hangings offer a stylish solution that adds boho charm and frees up precious tabletop real estate. They turn plain walls or ceilings into lush, textured art installations.
Recommended Products to replicate this idea
| # | Preview | Product | |
|---|---|---|---|
| 1 |

|
SFENNGPET Macrame Plant Hangers, 6Pack Hanging Planters for Indoor Plants w/ 6 Set Hangers Kit... | Check Latest Price |
| # | Preview | Product | |
|---|---|---|---|
| 1 |
|
Romeda 90 Pcs White Ceiling Hooks kit, 6 Sizes Vinyl Coated Screw-in Plant, Kitchen, Cup, Ceiling... | Check Latest Price |
Picture intricate knotted cords forming geometric patterns, supporting a pot or basket filled with trailing greenery. The soft, natural fibers contrast beautifully with smooth walls or rustic ceilings. As the fabric sways gently, it creates a calming, almost hypnotic effect. Combining different knot styles adds visual interest, making your space feel cozy yet curated.
Use thicker cords and chunky knots for a bold, modern look, or opt for delicate, thin fibers for a subtle, airy feel. Colorful yarns can add vibrancy, matching your decor palette. Shorter hangings suit small spaces, while long, layered pieces create a dramatic effect in larger rooms. Mix and match different knot styles for a personalized, eclectic vibe.
Start with high-quality, sturdy cords—preferably natural fibers like cotton or jute. Measure and cut cords to your desired length, adding extra for knotting. Use simple knots like square or half hitch to craft the main structure, then add decorative knots for flair. Attach the hangers to hooks or ceiling anchors, ensuring they’re secure. Drop your chosen container into the holder, making sure it’s balanced. Keep in mind weight limits to prevent accidents.
Personalize with colored cords, beads, or charms woven into the design. Change up the knot patterns or add tassels for a playful touch. You can also create layered hangings at different heights for visual depth. Combine various fiber types or textures for a unique, handcrafted appearance. Incorporate hooks or decorative hardware to complement your decor style.
Macramé hangings are a perfect way to add texture and personality while practicing a fun craft. They make a statement without overwhelming your space, and the DIY aspect means you can customize endlessly. Ready to elevate your plant game with some knot magic?
3. Rustic Wooden Crate Plant Stands
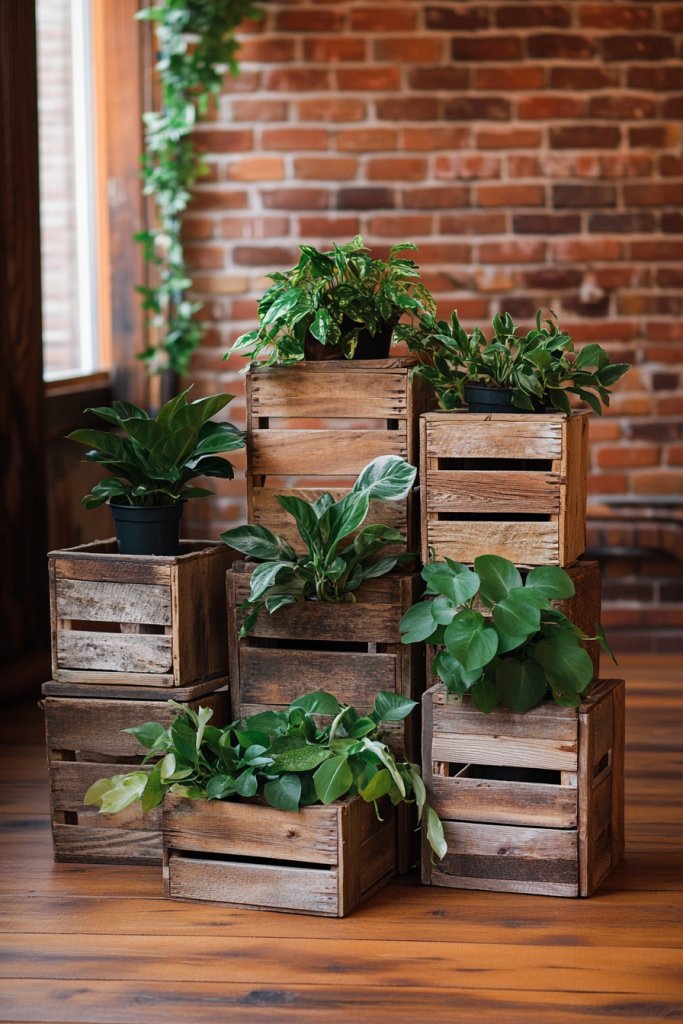
Looking for a charming way to display your plants that adds warmth and character? Tired of sterile, commercial plant stands that lack personality? Rustic wooden crates offer a versatile, budget-friendly solution to elevate your greenery. They bring a cozy, farmhouse vibe that feels inviting and authentic.
Recommended Products to replicate this idea
| # | Preview | Product | |
|---|---|---|---|
| 1 |

|
TIMRIS Set of 3 Rustic Distressed Wood Nesting Crates, Farmhouse Decorative Wooden Storage Boxes,... | Check Latest Price |
| # | Preview | Product | |
|---|---|---|---|
| 1 |
|
Luna Crates Indoor Metal Plant Stands with Wooden Tops, Holds Pots up to 12" Diameter, 120 lb... | Check Latest Price |
Envision stacked crates with weathered paint or natural wood grain, filled with thriving plants. The layered setup creates visual interest, allowing you to play with height and depth. The rough textures and imperfect finishes evoke a sense of nostalgia and craftsmanship. They can be placed indoors on a corner or outdoors in your garden, blending seamlessly with natural surroundings.
Choose vintage crates for a distressed look or newer ones with a smoother finish for a cleaner aesthetic. Paint or stain the crates in neutral tones or bold colors to match your decor. Use different sizes and shapes for an eclectic display, or keep it uniform for a more streamlined appearance. Incorporate wheels for mobility or add hooks for hanging tools or decorations.
Start by sourcing sturdy wooden crates—reclaimed pallets work great. Sand rough edges and apply a protective finish if desired. Stack or arrange the crates to your preferred height, securing them with nails or brackets for stability. Place your plants in pots or directly in the crates if waterproof. For outdoor setups, consider weatherproofing with sealants. Use cushions or cloth liners inside for added style and protection.
Decorate crates with stencils, decals, or chalkboard paint for labels. Incorporate small decorative items like lanterns, figurines, or fairy lights. Mix materials like metal or rope for a layered look. Personalize with your favorite colors or vintage signage to give each crate a unique identity. This DIY approach lets you adapt the style to your space and taste.
Wooden crates are a timeless, flexible solution that can grow with your gardening skills. They add rustic charm and are easy to customize, making your plant display truly one-of-a-kind. Ready to craft your own vintage-inspired plant stands?
4. Mirrored and Metallic Accents for a Luxe Touch
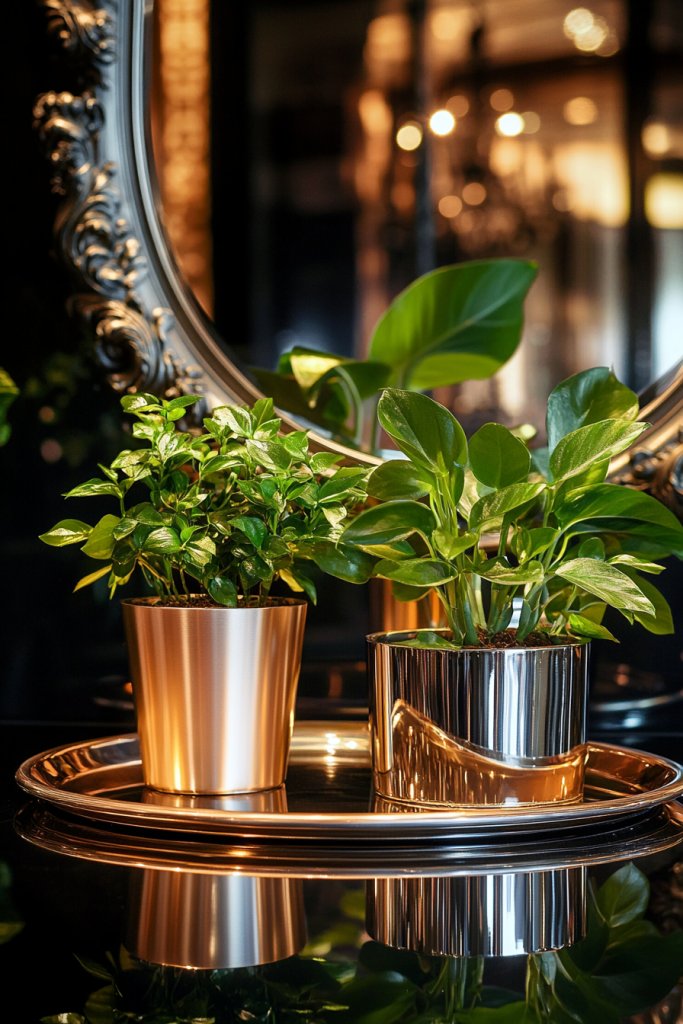
Ever wish your plant display could feel more upscale without a complete redesign? Metallic and mirrored accents instantly elevate the aesthetic, adding a touch of luxury and glamour. They can turn a simple pot or stand into a statement piece that catches the eye and reflects light beautifully.
Recommended Products to replicate this idea
| # | Preview | Product | |
|---|---|---|---|
| 1 |

|
H HOMEXIN Plant Stand Indoor- 2 Tier Metal Tall Plant Stand 26.5" Flower Stand Holder Heavy Duty... | Check Latest Price |
| # | Preview | Product | |
|---|---|---|---|
| 1 |

|
CosmoLiving by Cosmopolitan Metal Indoor Outdoor Planter Dome Large Planter Pot with Removable... | Check Latest Price |
Picture a sleek ceramic pot with a shimmering gold or silver finish, placed on a mirrored tray that reflects lush greenery. The metallic sheen adds depth and sophistication, making even modest plants look high-end. The reflective surfaces bounce light around, brightening darker corners and creating a sense of space. When paired with textured foliage, the contrast becomes visually stunning.
Choose metallic paints in matte, satin, or glossy finishes for different effects. Use mirrored trays or stands with decorative edges for a more dramatic look. For a modern aesthetic, combine sleek, monochrome metallics with minimalist shapes. You can also incorporate metallic accents into decorative hardware or trim for a cohesive style. Seasonal color shifts, like rose gold or copper, add trendy appeal.
Select your pots or containers and prep their surfaces with primer if needed. Apply metallic spray paint or special metallic finish paints, following manufacturer instructions for best adhesion. For added durability, coat with a clear sealant designed for metallic paints. Pair with a mirrored tray or stand, ensuring they’re stable and level. When arranging, consider mixing textures—matte, shiny, and reflective—to add visual complexity. Incorporate metallic accessories carefully to avoid overwhelming the overall look.
Create custom labels or tags with metallic finishes for a personalized touch. Mix metallics with other luxe materials like velvet or satin ribbons. Use metallic foils or leafing to add accents to your containers or stands. Incorporate small decorative elements like metallic charms or clips that complement your overall theme. These details transform your display into curated art.
Adding metallic and mirrored elements is a simple way to instantly upscale your plant display. They work well with minimalist or maximalist styles alike, giving your space a sophisticated edge. With a little effort, your plants will look like they belong in a designer magazine. Ready to add some glitz?
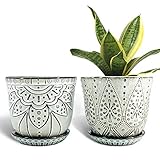
5. Minimalist Concrete Planters with Clean Lines
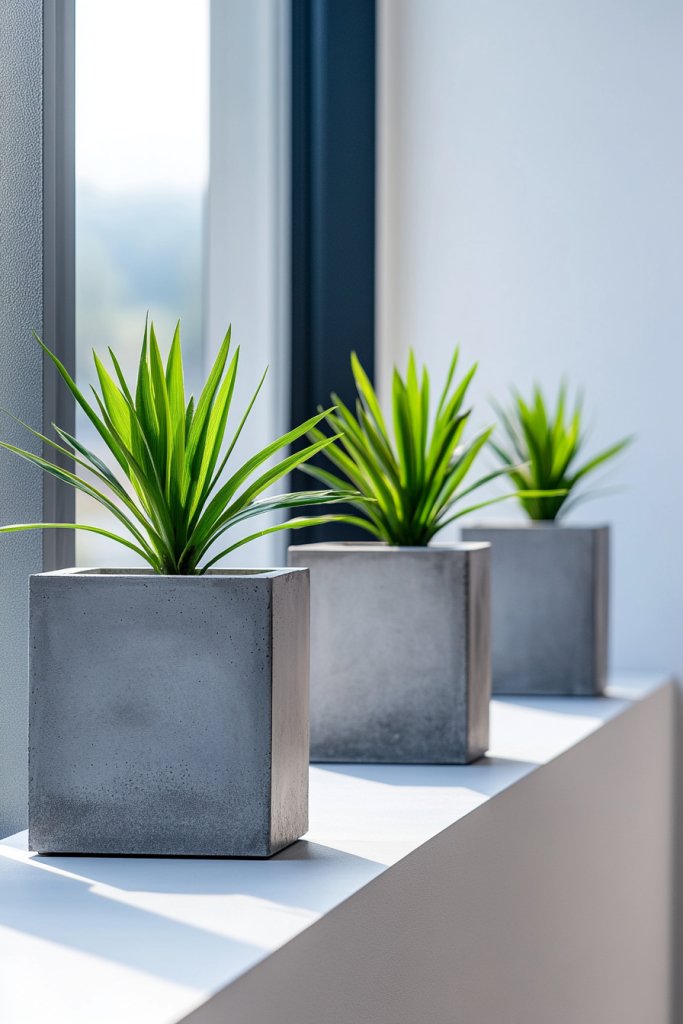
Craving a sleek, modern look that complements any decor style? Minimalist concrete planters bring a clean, sculptural vibe that emphasizes form and function. They’re perfect for those who prefer understated elegance over ornate designs. Plus, they pair effortlessly with various color schemes and materials.
Recommended Products to replicate this idea
| # | Preview | Product | |
|---|---|---|---|
| 1 |

|
Ekirlin 6 Inch Flower Plant Pot Indoor - Grey Cement Garden Planter Concrete Planter with Drain Hole... | Check Latest Price |
| # | Preview | Product | |
|---|---|---|---|
| 1 |

|
Kante 20.3" H Tall Rectangular Concrete Planter, Modern Square Diameter Plant Pot with Drainage Hole... | Check Latest Price |
Imagine smooth, matte concrete containers with sharp, geometric edges resting on a polished wooden surface. Their neutral gray tone creates a calming backdrop, letting lush foliage or colorful accents stand out. The minimalist shape offers a contemporary aesthetic that feels both sturdy and refined. Whether placed on a shelf, table, or floor, these planters provide a subtle yet striking presence.
Opt for cylindrical, rectangular, or angular shapes to match your space. Customize with different heights or stacking arrangements for visual interest. Choose matte finishes for a modern look, or add subtle textures for more character. They work well with monochrome palettes or paired with vibrant plants for contrast. Seasonal accessories like small stones or decorative sand can enhance their appeal.
Start with high-quality concrete mix or pre-made molds. For DIY projects, pour the mixture into molds and let cure fully before handling. Sand surfaces smooth or add textured finishes using specialized tools. Seal with a concrete protector to prevent stains and weather damage. Place your plants in durable pots or directly in the concrete if waterproofing is applied. Position carefully to highlight their architectural lines.
Create visual interest by incorporating embedded objects like pebbles or metallic flakes during casting. Paint or stain parts of the surface for a two-tone effect. Use minimalist labels or tags to identify plants subtly. Mix concrete with recycled materials for eco-friendly options. These options allow you to customize the concrete planters to suit your style.
Minimalist concrete planters offer a timeless aesthetic that suits modern, industrial, or Scandinavian interiors. They’re durable, versatile, and easy to incorporate into any setting. With minimal effort, you can achieve a polished, professional look that elevates your entire space. Ready for a sleek upgrade?
6. Upcycled Tin Cans with Twine and Chalkboard Labels
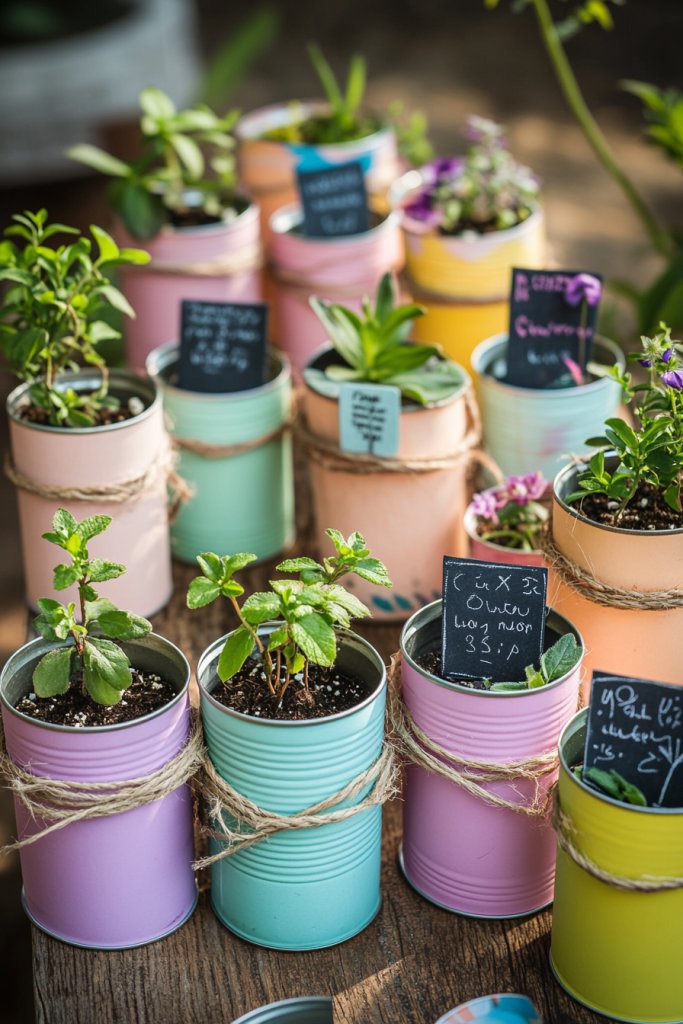
Looking for an inexpensive way to add charm and personality to your plant display? Upcycling tin cans is a fun, eco-friendly option that transforms trash into treasure. Paired with twine and chalkboard labels, these cans become customizable, rustic planters perfect for any space.
Recommended Products to replicate this idea
| # | Preview | Product | |
|---|---|---|---|
| 1 |
|
Homrelaxy 360Pcs Chalkboard Labels – 2.1x1.4 Inch Reusable Blackboard Stickers with 2 White... | Check Latest Price |
| # | Preview | Product | |
|---|---|---|---|
| 1 |

|
PerkHomy Natural Jute Twine 600 Feet Long Twine String for Crafts Gift Wrapping Packing Gardening... | Check Latest Price |
Visualize a row of cans wrapped in natural twine, each adorned with a small chalkboard label indicating the plant name. The slightly weathered look of the cans adds vintage appeal, while the twine provides texture and warmth. The chalkboard labels are perfect for quick updates and add a handmade touch. This simple display is charming on a windowsill or outdoor patio, blending utility with style.
Use different can sizes and shapes to create a playful or eclectic arrangement. Customize with colored twine, painted cans, or patterned labels for seasonal themes. For a more refined look, opt for sleek black chalkboard tags or metallic accents. Arrange cans on a tiered stand, inside a wooden crate, or hung from a wire for variety. Personalize labels with doodles, quotes, or your handwriting.
Start by cleaning and removing labels from cans, then rinse thoroughly. Wrap twine around the can’s midsection, securing with hot glue or tying knots at intervals. Attach a small chalkboard label with twine or glue, leaving space for writing. Fill with soil and your chosen plants, ensuring drainage if needed. For outdoor use, consider sealing the cans or applying a weatherproof coating. Hang or arrange your cans for maximum visual impact.
Get creative by painting cans in colors or patterns, or adding decorative elements like buttons or stickers. Use different colored chalk for variety, or write inspiring quotes on the labels. Incorporate small charms or beads into the twine for extra detail. Switch out labels seasonally or for special occasions to keep the display fresh and engaging. These touches make each can uniquely yours.
Upcycled tin cans are a zero-cost, zero-waste way to style your plants with personality. They’re easy to make and endlessly customizable, perfect for DIY enthusiasts or busy plant lovers. With a little effort, you’ll have a charming, eco-conscious display that sparks conversation and admiration. Why not give it a shot?
7. Hanging Basket Planters with Rattan Frames
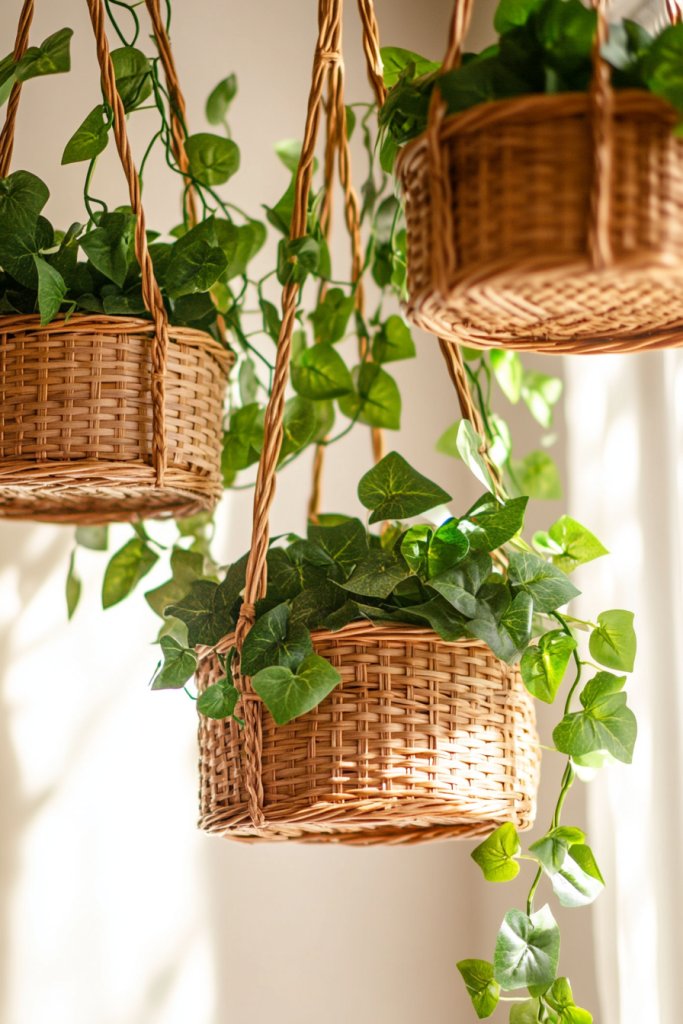
Want to bring a cozy, textured vibe to your space while saving floor or shelf space? Hanging basket planters with rattan frames combine functionality with natural beauty. They add warmth and tactile interest, perfect for creating a relaxed, inviting atmosphere. Plus, they’re easy to incorporate into any decor style.
Recommended Products to replicate this idea
| # | Preview | Product | |
|---|---|---|---|
| 1 |

|
HAOHIZE Hanging Planters for Indoor Plants, Hanging Planter with Jute Rope Woven Hanging Flower Pots... | Check Latest Price |
| # | Preview | Product | |
|---|---|---|---|
| 1 |

|
Mkono Macrame Plant Hanger Indoor Hanging Planter Basket with Wood Beads Decorative Flower Pot... | Check Latest Price |
Picture woven rattan baskets suspended from ceiling hooks, cradling lush, trailing plants. The natural fibers and intricate weave patterns create a soft, boho charm that complements hardwood floors or neutral walls. The gentle sway of the baskets adds movement and a calming rhythm. When paired with pendant lighting or string lights, the effect becomes even more enchanting.
Select baskets in different sizes and weave styles for visual diversity. Use neutral tones for a minimalist look, or opt for darker stains or painted finishes for a modern twist. Shorter or wider baskets work well for small spaces, while elongated versions suit larger areas. You can also hang multiple baskets at different heights for a layered, lush display.
Start by choosing sturdy rattan baskets with drainage holes or add holes yourself. Line them with biodegradable or plastic liners if needed. Attach durable ropes or chains to the baskets’ handles or rims, then secure to ceiling hooks or wall anchors. Fill with lightweight soil or moss, then plant your preferred greenery—avoid heavy plants that could strain the frame. Adjust heights for balance and visual appeal.
Decorate the baskets with painted patterns, tassels, or beads for a personalized touch. Mix natural fibers with colorful cords or ribbons for contrast. Use decorative hooks or metal accents that match your decor theme. Seasonal touches like faux berries or fabric wraps can refresh the look. These baskets are adaptable and easy to modify over time.
Rattan hanging planters add a handcrafted, warm touch to any space, blending rustic charm with modern sensibilities. They’re simple to install and customize, making your greenery feel like part of a curated interior design. Ready to hang your way to a more inviting home?
8. Colorful Ceramic Pots with Hand-Painted Motifs
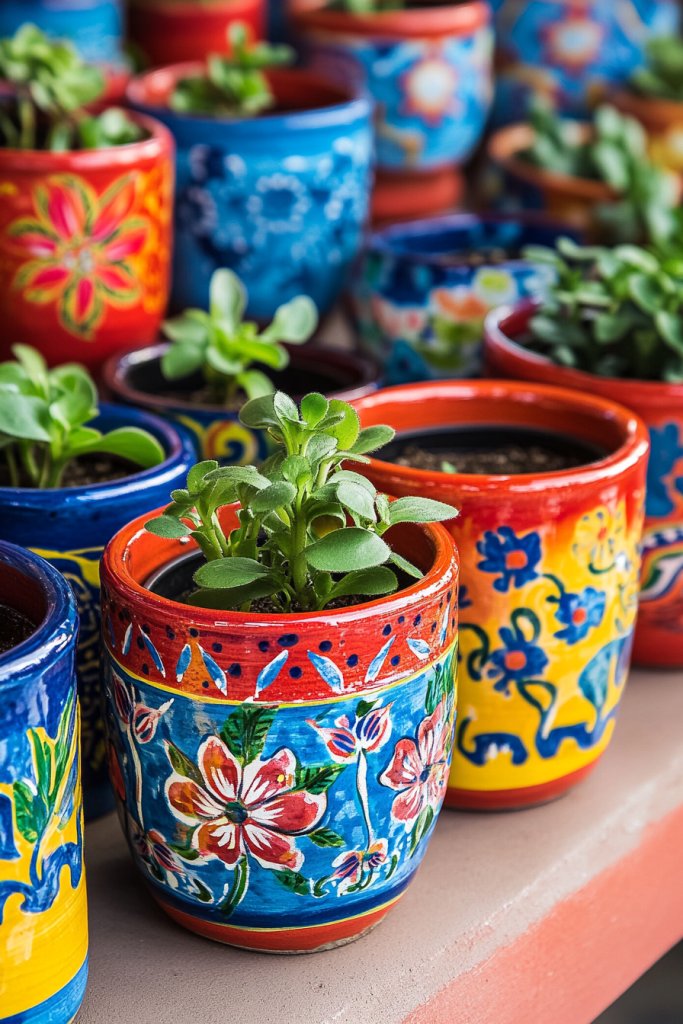
Craving a pop of personality in your plant display? Colorful ceramic pots with hand-painted motifs inject fun and vibrancy into any space. They’re perfect for showcasing your style and making even simple plants stand out. Plus, they add an artisanal touch that feels personal and unique.
Recommended Products to replicate this idea
| # | Preview | Product | |
|---|---|---|---|
| 1 |

|
MEXTEQUIL - Talavera Mexican Pottery Planters with Saucer 4" Rancherito - Cactus - Sun Pot Hand... | Check Latest Price |
| # | Preview | Product | |
|---|---|---|---|
| 1 |

|
Metahom Ceramic Plant Pots, 4.9 Inch Flower Pots with Drainage Hole & Saucer, Colorful Planter Pots... | Check Latest Price |
Visualize bright, cheerful pots decorated with playful patterns, floral designs, or abstract art. The glossy surface enhances the vivid colors, making each pot a miniature canvas. When paired with lush greenery, the contrast creates a lively, inviting atmosphere. These pots turn ordinary plants into eye-catching focal points that brighten your room.
Choose pots in bold colors like turquoise, coral, or yellow for maximum impact, or use pastel shades for a softer look. Mix and match different motifs and sizes for a lively, eclectic arrangement. Seasonal themes—like snowflakes or suns—can add extra charm. Pair with simple, neutral stands or place directly on shelves for a casual vibe. Personalize with your own sketches or doodles for a truly one-of-a-kind piece.
Select quality ceramic pots with a smooth surface suitable for painting. Use ceramic-specific paints or enamel markers, applying thin, even layers. Allow drying time between coats and seal with a clear waterproof varnish for durability. Sketch your motifs lightly with pencil before painting for precision. Fill with your preferred soil and plants, ensuring drainage is managed. Keep in mind that glazed ceramics are easiest to decorate but can chip if handled roughly.
Customize with initials, quotes, or your favorite symbols. Incorporate metallic accents or glitter for extra sparkle. Use stencils or freehand techniques to create your designs. Change motifs seasonally or for special occasions to keep your collection fresh. You can also paint coordinating saucers or trays to complete the look. The key is expressing your personality through color and design.
Hand-painted ceramic pots showcase your creativity and make your plant display truly distinctive. They combine artistry with practicality, and each piece becomes a conversation starter. With patience and a steady hand, you’ll craft decorative containers that reflect your style perfectly. Ready to get colorful?
9. Tiered Plant Stands with Vintage Charm
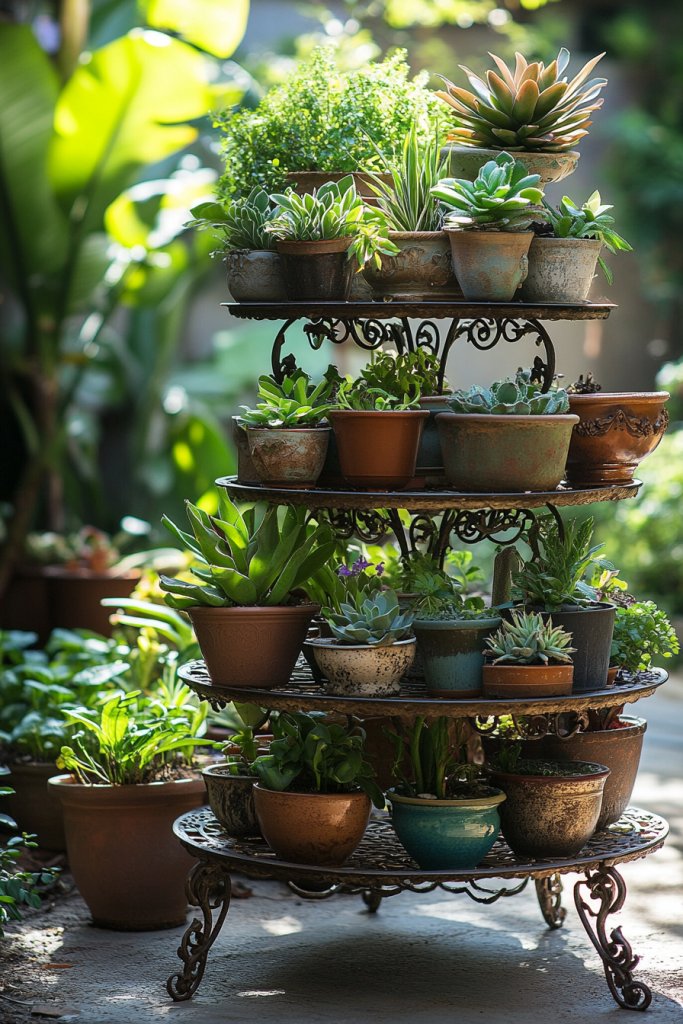
Ever wish you could display more plants without cluttering your space? Tiered plant stands with vintage charm offer a stylish, space-saving solution. They create a lush, layered look that feels both organized and inviting. Plus, they add a nostalgic touch that complements many decor styles.
Recommended Products to replicate this idea
| # | Preview | Product | |
|---|---|---|---|
| 1 |

|
GEEBOBO 5 Tiered Tall Plant Stand for Indoor, Wood Plant Shelf Corner Display Rack, Multi-tier... | Check Latest Price |
| # | Preview | Product | |
|---|---|---|---|
| 1 |
|
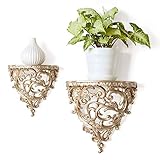
HAOHIZE Vintage Wall Shelf, Gold Antique Wall Shelf European Ornate Shelf Plant Wall Shelf Small... | Check Latest Price |
Picture a distressed metal or wood stand with multiple levels, each holding different-sized pots filled with thriving greenery. The tiers cascade upward, drawing the eye and adding depth to your display. The vintage finish—think peeling paint or wrought iron details—adds character and warmth. When placed on a porch or in a sun-filled corner, it transforms your space into a botanical showcase.
Choose between wood, metal, or a combination of both for different aesthetics. Stands with decorative scrollwork or ornate legs evoke Victorian elegance, while simpler designs lean modern or rustic. Adjust the number of tiers to fit your space, or customize with paint or decals. Use different pot styles—ceramic, terracotta, or woven baskets—for variety. These stands can be indoor or outdoor, depending on materials.
Start by selecting a sturdy, weather-resistant frame if outdoor use is intended. Clean and treat the surface with paint or sealant to match your decor. Arrange your pots to balance height and visual weight, placing larger or taller plants on the bottom tiers. Secure pots with brackets or liners to prevent slipping. For added stability, anchor the stand to the wall or floor, especially in windy outdoor areas. Regular maintenance involves cleaning and touch-up paint.
Decorate the stand with vintage-inspired decals, stencils, or distressed paint effects. Incorporate fairy lights or hanging ornaments for a whimsical touch. Mix different plant containers on each level for a curated look. Personalize with name plaques, painted motifs, or seasonal decorations. The stand becomes a focal point that reflects your personality and style.
Tiered plant stands are a versatile, eye-catching way to showcase multiple plants elegantly. They fit well in small spaces and add visual interest with minimal effort. With a bit of DIY spirit, you can craft a vintage piece that becomes a cherished part of your decor. Ready to elevate your plant game?
10. Floating Shelves with Mixed Plant Pots
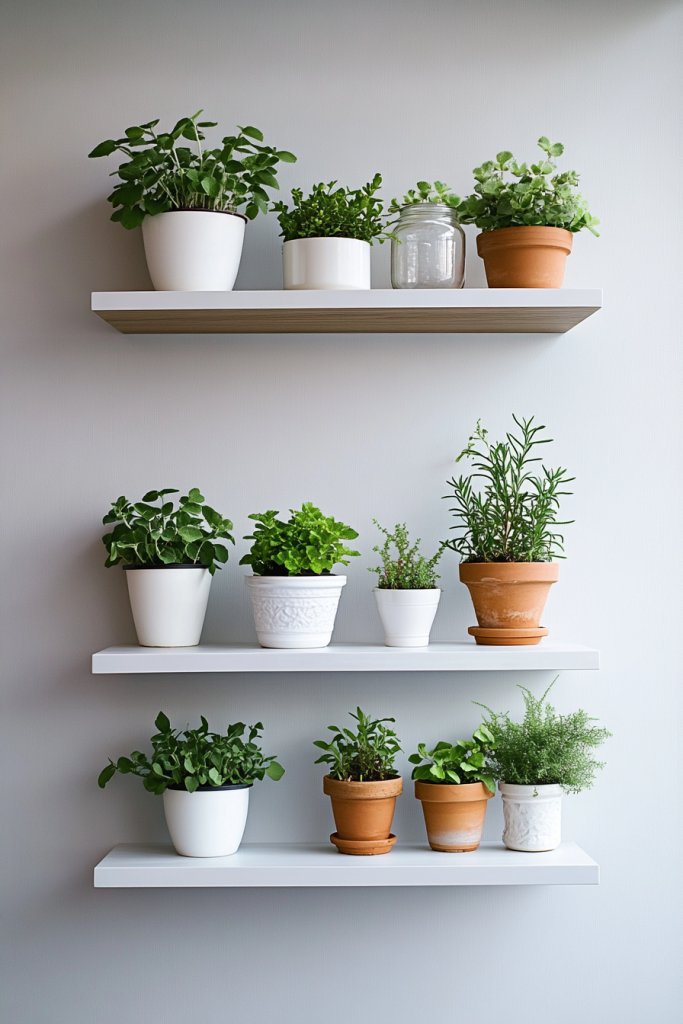
Looking to maximize vertical space while adding a touch of greenery? Floating shelves provide a sleek, minimalist way to display your plants without cluttering surfaces. They create a modern, organized look that can adapt to any room. Plus, they make your plants feel like part of the decor rather than just accessories.
Recommended Products to replicate this idea
| # | Preview | Product | |
|---|---|---|---|
| 1 |
|
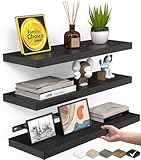
BAYKA Floating Shelves for Wall, Wall Mounted Rustic Wood Shelves for Bathroom, Bedroom, Living... | Check Latest Price |
| # | Preview | Product | |
|---|---|---|---|
| 1 |
|
Gepege 6 Inch Beaded Ceramic Planter Set of 2 with Drainage Hole and Saucer for Plants,... | Check Latest Price |
Imagine a row of narrow, white or natural wood shelves mounted flush to the wall. Each shelf holds a variety of pots with different shapes, sizes, and textures—some ceramic, some metallic, some woven. The staggered arrangement adds visual interest, while the greenery drapes or climbs over the edges, softening the architecture. When illuminated with subtle lighting, the shelves cast gentle shadows that enhance the space’s ambiance.
Use a mix of open and closed pots, or incorporate decorative containers like baskets or textured ceramics. Vary the heights and spacing for a dynamic, layered effect. Paint or stain the shelves to match your decor, from sleek white to rustic wood tones. Install multiple rows for a full, lush look or a single row for a more understated aesthetic. This approach works well in kitchens, living rooms, or even bathrooms.
Choose sturdy, wall-mounted floating shelves with appropriate weight capacity. Use a level to ensure precise installation, drilling into wall studs for stability. Arrange your pots before mounting, balancing sizes and visual weight. Secure each shelf with strong brackets or hidden hardware for a seamless look. Fill the pots with your favorite plants, ensuring drainage is handled properly—either with trays or liners. Keep safety in mind, especially around high-traffic areas.
Personalize with decorative labels, painted patterns, or small accents like stones or fairy lights. Create themed arrangements—succulents, herbs, or tropical plants—for different rooms. Use colors and textures that complement your overall decor. Change the arrangement seasonally or as your collection grows. These shelves become a flexible, ever-evolving focal point.
Floating shelves are a simple yet impactful way to showcase your green thumb. They make your space feel fresh, clean, and curated. Plus, they’re easy to update or move around, giving you endless styling options. Ready to create your own vertical garden?
11. Tiered Plant Ladder for Vertical Greenery
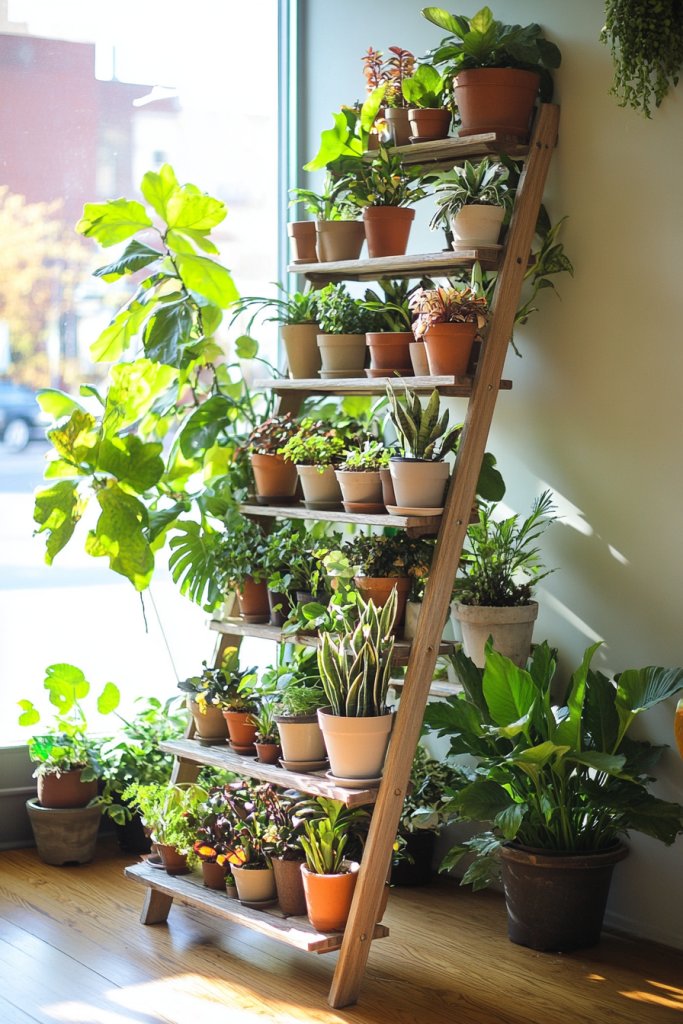
Want to maximize limited space while creating a lush, layered look? A tiered plant ladder offers a stylish way to display multiple plants vertically. It’s perfect for small patios, balconies, or corners where every inch counts. Plus, it adds a rustic or vintage touch that makes your space feel cozy and inviting.
Recommended Products to replicate this idea
| # | Preview | Product | |
|---|---|---|---|
| 1 |
|
GEEBOBO 5 Tiered Tall Plant Stand for Indoor, Wood Plant Shelf Corner Display Rack, Multi-tier... | Check Latest Price |
| # | Preview | Product | |
|---|---|---|---|
| 1 |

|
Simple Trending Plant Stand Indoor Outdoor, Metal 3 Tier Tall Hanging Plant Shelf for Multiple... | Check Latest Price |
Picture a wooden ladder with several rungs, each holding potted plants of varying heights. The arrangement creates a natural flow upward, adding depth and dimension. The natural wood grain and distressed finish evoke a vintage charm, making it a statement piece. When placed near a sunny window or outdoor corner, it transforms your environment into a mini botanical paradise.
Use different types of wood, from reclaimed pallets to painted or stained versions, for varied aesthetics. Adjust the number of rungs based on your space and plant collection. Incorporate decorative pots, baskets, or even hanging elements for more visual interest. For outdoor use, weatherproof the wood or choose metal alternatives. You can also paint or decorate the ladder to match your decor theme.
Start by selecting a sturdy, appropriately sized ladder—wood or metal. Sand and treat the wood if needed, or apply rust-resistant paint to metal. Securely place or anchor the ladder in your desired location, ensuring stability. Arrange your pots, balancing heights and colors to create harmony. Use lightweight containers to prevent strain on the ladder. Water your plants regularly and check stability periodically.
Add decorative elements like fairy lights, painted designs, or vintage tags to personalize your ladder. Mix plant types—succulents, herbs, flowering plants—for seasonal variety. Incorporate small garden ornaments or figurines for extra charm. Change the arrangement as your collection evolves or seasons change. It’s a flexible, charming display that grows with your plant collection.
A tiered plant ladder turns vertical space into a lush, eye-catching feature. It’s easy to build or repurpose from old furniture, making it accessible for DIY lovers. With its layered effect, it adds visual interest and depth to small or large areas alike. Ready to climb your way to a greener, more charming space?
12. Terrarium-Inspired Miniature Gardens in Glass Containers
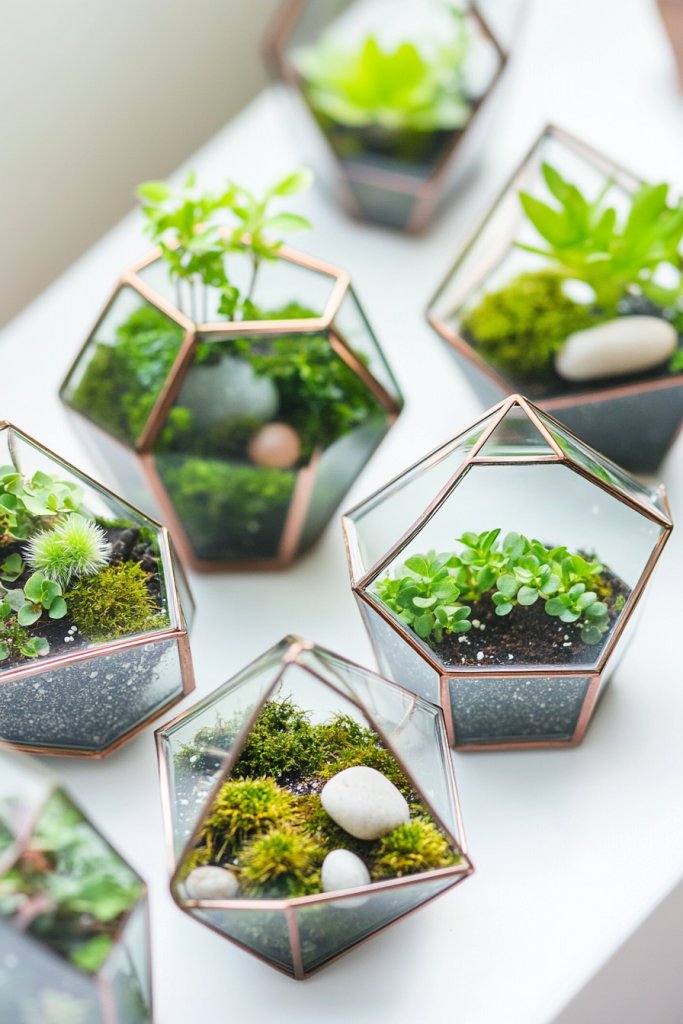
Craving a miniature, low-maintenance green oasis that doubles as decor? Terrarium-inspired gardens in glass containers offer a sleek, modern way to bring nature indoors. They’re perfect for tiny spaces or for adding a touch of freshness to your desk or coffee table. Plus, they make you look like a plant whisperer with minimal effort.
Recommended Products to replicate this idea
| # | Preview | Product | |
|---|---|---|---|
| 1 |

|
WGVI Clear Slant Cut Bowl Glass Vase, Glass Terrarium, Candy Dish, Glassware, Slant Open: 7".... | Check Latest Price |
| # | Preview | Product | |
|---|---|---|---|
| 1 |

|
TerraGreen Creations Succulent Planter Kit - Terrarium Kit with Succulent Soil, Gravel, Pebble,... | Check Latest Price |
Imagine a clear glass bowl filled with layers of soil, small stones, and tiny plants, all visible from the sides. The arrangement creates a miniature landscape that invites exploration and admiration. Tiny succulents, mosses, or air plants thrive in this enclosed environment, creating a lush, self-sustaining ecosystem. The glass showcases every detail, from roots to foliage, making it a captivating centerpiece.
Use different shapes—round bowls, geometric terrariums, or elongated vases—to suit your space. Incorporate decorative stones, sand, or miniature figurines for added personality. Change the plant types seasonally or mix textures for contrast. For a more dramatic effect, layer colored sand or pebbles. Personalize with themed elements like tiny fairy figurines or miniature furniture.
Start by selecting a clean glass container with an opening suitable for planting and maintenance. Layer the base with small stones or gravel for drainage, followed by activated charcoal to prevent odors. Add potting soil suitable for your chosen plants. Arrange tiny plants carefully, creating a balanced composition. Water sparingly—these environments tend to retain moisture—and place in indirect light. Regularly check for mold or overgrowth, trimming as needed.
Personalize your miniature garden with themed decorations or miniature accessories. Use colored sands or decorative gravel to create patterns or zones. Incorporate tiny fairy lights or LED candles for ambient glow. Change plants or decorations seasonally to keep the scene fresh. These tiny worlds reflect your creativity and add a calming, whimsical touch to your space.
Miniature glass gardens are a fun, rewarding project that beautifies your space with minimal fuss. They demonstrate how small details can make a big impact and foster your creative confidence. With simple materials and a little patience, you’ll craft enchanting ecosystems that impress and inspire. Ready to build your tiny paradise?
13. Clay Pot Decor with Natural Elements and Textures
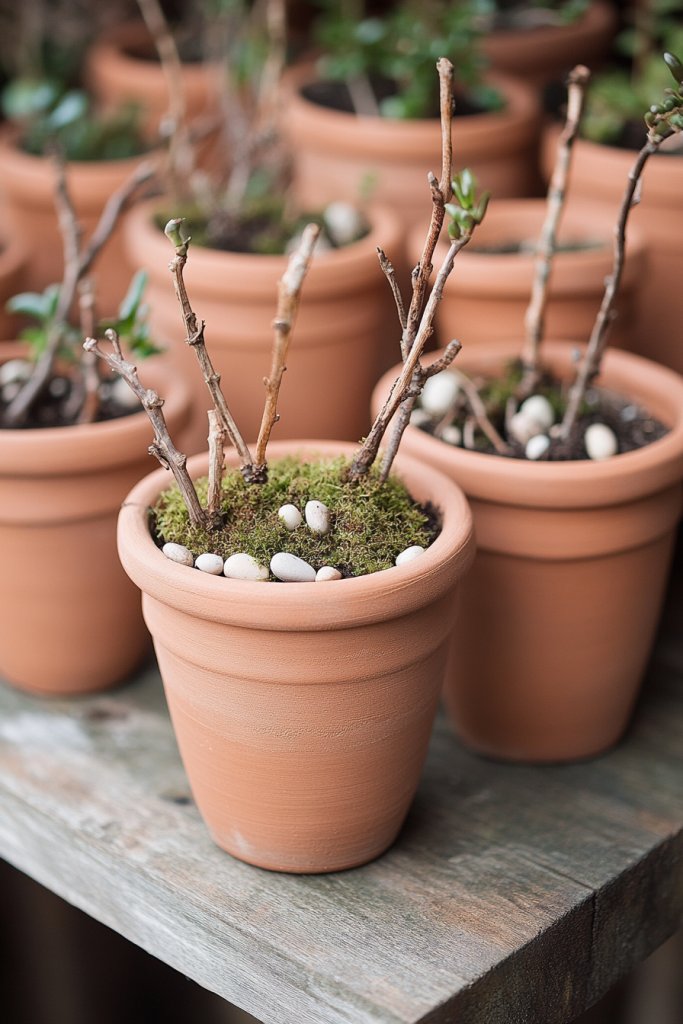
Want to add earthy charm to your plant display without spending a ton? Decorating plain clay pots with natural elements is a simple, budget-friendly way to create organic, textured looks. These pots blend seamlessly with outdoor gardens or rustic interiors, making every plant feel grounded and connected to nature.
Recommended Products to replicate this idea
| # | Preview | Product | |
|---|---|---|---|
| 1 |

|
Tuqaumu 6 Pack 6 Inch Terracotta & Clay Pots with Saucer for Plants, Large Terra Cotta Plant Pot... | Check Latest Price |
| # | Preview | Product | |
|---|---|---|---|
| 1 |
|
PerkHomy Natural Jute Twine 600 Feet Long Twine String for Crafts Gift Wrapping Packing Gardening... | Check Latest Price |
Picture a simple terracotta pot wrapped with twine, accented with small stones glued around the rim. The surface is textured with natural materials like bark, moss, or textured paint, giving it a tactile feel. The combination of rough textures and earthy tones creates a cozy, handcrafted vibe. When paired with lush greens, the overall look is warm, inviting, and full of life.
Use different natural materials—bark, moss, pebbles, shells—to suit your style. Wrap the pots in twine or burlap, or glue natural elements directly onto the surface. For a more polished look, create patterns or borders with contrasting textures. Keep it simple with a single element or layer multiple for a more elaborate effect. These decor ideas work well indoors, on patios, or in garden beds.
Start with clean, dry clay pots. Attach natural elements with outdoor-friendly glue or twine, ensuring secure adhesion. Experiment with placement before finalizing your design. Consider sealing textured areas with clear, weatherproof coatings to protect against moisture. Fill with your favorite plants, making sure drainage is effective. Adjust textures to avoid overly heavy decorations that could cause cracking or damage.
Add personalized touches like painted motifs or initials, then overlay with natural elements for a layered effect. Incorporate seasonal accents—like small pinecones in winter or dried flowers in summer. Mix textures for visual interest, such as combining moss with stones or wood slices. Personalize with labels or tags made from natural materials like wood or cork. These details make each pot uniquely yours.
Clay pot decor with natural textures connects your plants to the outdoors and adds a handmade, authentic feel. It’s easy to customize, affordable, and endlessly creative. These simple enhancements can transform plain pots into statement pieces that reflect your love for nature. Ready to give your pots a raw, organic makeover?
14. Brightly Colored Plastic Pots with Patterned Wraps
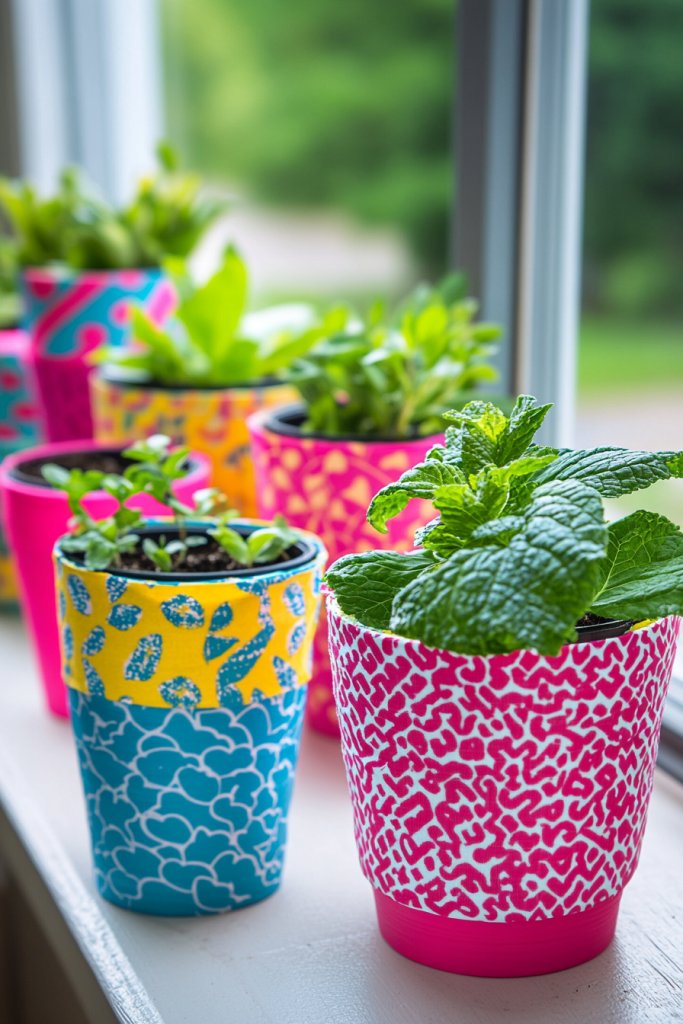
Need a cheerful, budget-friendly way to jazz up your plant collection? Brightly colored plastic pots wrapped in patterned tapes or fabrics instantly add fun and personality. They’re lightweight, versatile, and perfect for creating playful displays that catch the eye. Ideal for kids’ rooms, patios, or any space needing a splash of color.
Recommended Products to replicate this idea
| # | Preview | Product | |
|---|---|---|---|
| 1 |

|
Haawooky 24 Pack Colorful Flower Pots Square Plastic Plant Pots Succulent Planter Nursery Pots with... | Check Latest Price |
| # | Preview | Product | |
|---|---|---|---|
| 1 |

|
KUNMINGER 40 Rolls Washi Tape Set - 15 mm Wide Colored Decorative Tape for DIY Crafts, Junk Journal... | Check Latest Price |
Visualize vibrant plastic pots in neon or pastel shades, wrapped with decorative tapes featuring geometric, floral, or abstract patterns. The colorful wraps add visual interest and make each pot stand out. When arranged together, they create a lively, cohesive display that radiates joy. The smooth surfaces and bold designs catch the light, energizing your space.
Use patterned tapes, washi tapes, or fabric wraps in various colors and designs. Combine different patterns for an eclectic vibe or keep it uniform for a more streamlined look. Change out wraps seasonally or for occasions, such as holidays or birthdays. Pair with simple stands or place directly on surfaces—these pots are adaptable everywhere. Add embellishments like stickers or decals for extra flair.
Start with clean plastic pots. Cut patterned tape or fabric to size, then carefully wrap around the pots, smoothing out wrinkles or bubbles. Secure edges with clear adhesive or double-sided tape for a seamless look. For fabric wraps, use waterproof glue or sew edges for durability. Fill with soil and plants, ensuring drainage and stability. Switch wraps easily to refresh your display.
Customize with labels, tags, or paint accents on the wraps. Incorporate themed designs—like holiday motifs or favorite patterns—to match seasons or moods. Use glitter, metallic finishes, or small charms for added sparkle. Create a color story by selecting hues that complement your decor. These pots are a fun way to showcase your personality and creativity.
Brightly colored plastic pots with patterned wraps are a playful, affordable way to liven up your plant display. They encourage experimentation with colors and patterns while keeping things light and approachable. With a few simple steps, you can turn plain pots into eye-catching accents that spark joy. Ready to add some color?
15. Indoor Plant Wall Mounted Pots in Modular Systems
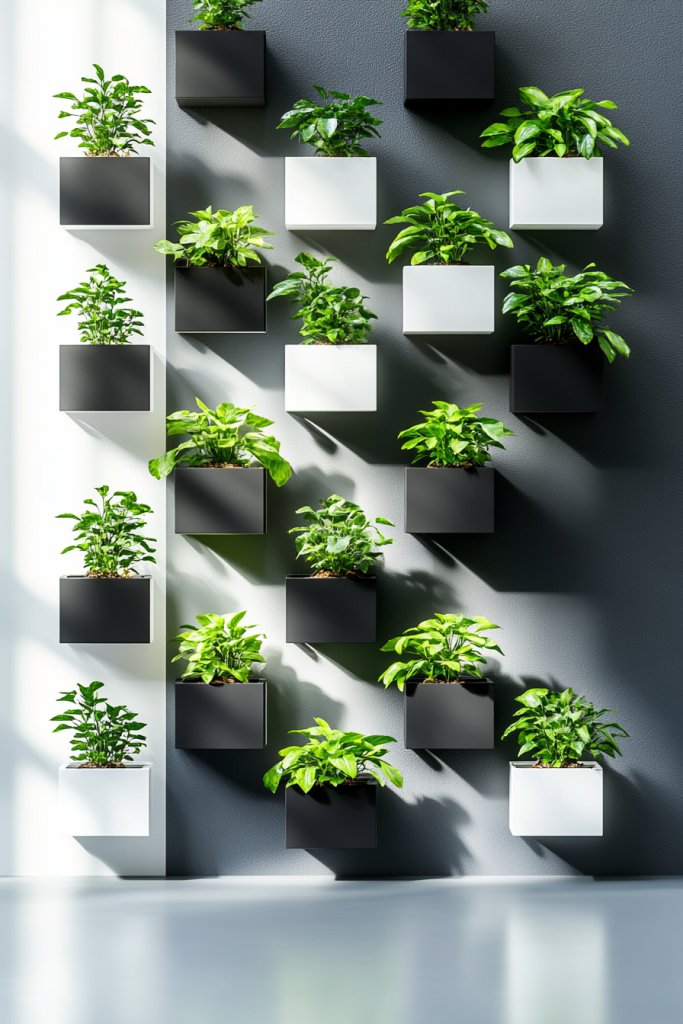
Want to create a lush green wall without sacrificing your floor space? Modular wall-mounted plant systems offer a sleek, contemporary solution. They turn your wall into a living art piece, perfect for urban apartments or modern interiors. Plus, they make caring for plants more accessible and organized.
Recommended Products to replicate this idea
| # | Preview | Product | |
|---|---|---|---|
| 1 |

|
DPROOTS Wall Planters for Indoor Plants with Grow Light & Self Watering System, 6-Pot Vertical... | Check Latest Price |
| # | Preview | Product | |
|---|---|---|---|
| 1 |

|
Make Good PlantPod Luxe - Self-Watering Wall Planters (Set of 6) - Easy to Water and Install -... | Check Latest Price |
Imagine a grid of small, geometric containers mounted flush to the wall, each holding a different plant or succulent. The modular design allows you to customize the layout, creating patterns or asymmetrical arrangements. The clean lines and uniform containers give a minimalist, organized look while providing a vibrant splash of greenery. When lit well, these systems transform blank walls into lively, textured murals.
Choose from various materials—metal, resin, or ceramic—to match your style. Use different sizes and shapes for visual variety or keep it uniform for a sleek appearance. Arrange the modules in patterns like honeycombs, grids, or freeform designs. Incorporate different plant types—vines, small shrubs, or succulents—for diversity. Easily expand or reconfigure as your collection grows.
Start by selecting a modular system compatible with your wall and weight capacity. Secure the modules to studs or anchors using appropriate hardware. Arrange your plants in individual pots or directly in the modules, ensuring proper drainage. Water and maintain plants regularly, avoiding overwatering that could damage the wall or system. Use LED grow lights if natural light is insufficient. Keep modules clean and check for stability periodically.
Paint or decorate the modules with patterns, decals, or metallic accents for a personalized touch. Incorporate small decorative elements like stones or figurines within the modules. Mix different plant types and textures for dynamic visual interest. Change the layout or add new modules over time. This system adapts to your style, space, and plant collection.
Wall-mounted modular systems make your indoor garden feel modern and intentional. They save space and can be a focal point in any room. As you grow your collection, the system scales effortlessly, giving you confidence in your green thumb. Ready to craft your living wall?
16. Repurposed Vintage Suitcases as Plant Caddies
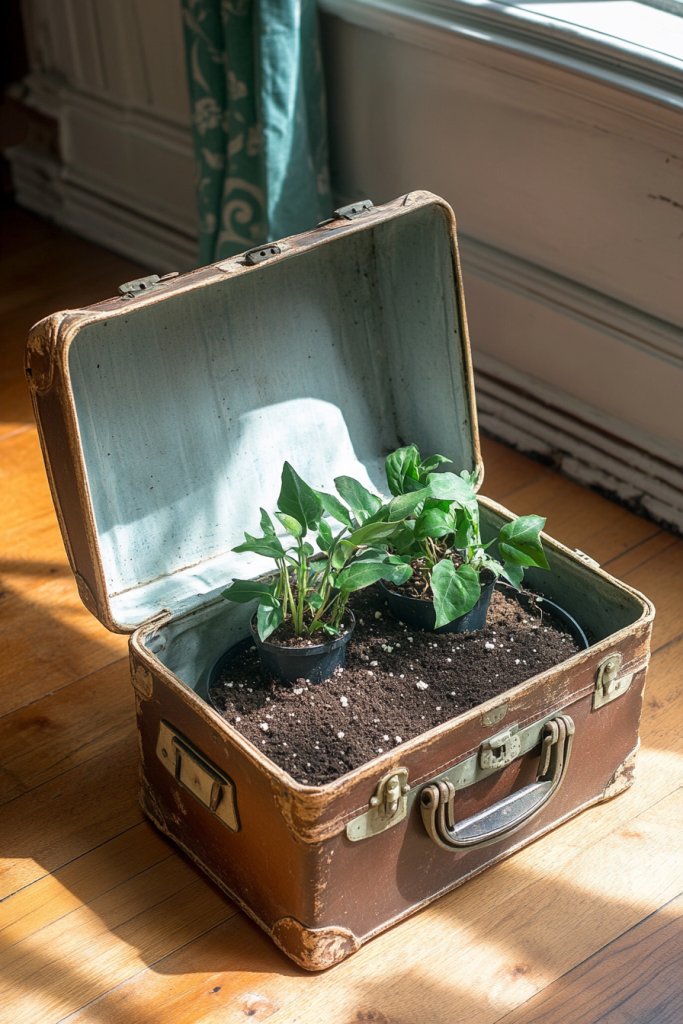
Looking for a charming, portable way to display your plants? Vintage suitcases offer a whimsical, nostalgic solution that doubles as a stylish plant caddy. They add personality and a touch of adventure to your space, whether indoors or out. Plus, they’re incredibly versatile—you can wheel them around or leave them as decorative focal points.
Recommended Products to replicate this idea
| # | Preview | Product | |
|---|---|---|---|
| 1 |

|
Merax Luggage Set 2 Piece Suitcase Set with Cosmetic Case Expandable Spinner Wheels Vintage Luggage... | Check Latest Price |
| # | Preview | Product | |
|---|---|---|---|
| 1 |

|
Bleuhome 6 Pack Plastic Plant Saucer Water Drip Tray, 4 5 6 7 8 9 10 11 12 13 15 17 19 inch, Heavy... | Check Latest Price |
Picture an old, distressed suitcase with its lid propped open, filled with soil and lush plants or flowering blooms. The suitcase’s vintage hardware and worn leather handle add character, while the wheels or stands make it mobile. The mix of rustic charm and practicality creates a conversational centerpiece. When placed on a patio or inside a sunlit corner, it feels both playful and sophisticated.
Use suitcases of different sizes, styles, or colors—think floral patterns, leather, or distressed wood—for variety. Decorate the exterior with stickers, paint, or fabric accents that match your theme. Add a stand or caster wheels for mobility, or leave it flat for a stationary display. Incorporate plant pots, baskets, or directly plant into the suitcase for a whimsical garden.
Start by cleaning and reinforcing the suitcase if necessary. Drill drainage holes into the bottom or line with a plastic liner to prevent water damage. Fill with soil and plants, ensuring stability and drainage. Attach wheels or stands if mobility is desired. Position in an area with suitable light and easy access for watering. Use decorative stones or mulch to hide the soil and add finishing touches.
Personalize with painted designs, decals, or vintage labels. Incorporate seasonal decorations—like faux flowers or holiday ornaments—to change the look. Add small garden tools or accessories inside for a functional twist. Mix and match suitcases with different themes or colors for a layered, eclectic display. These suitcases become a storytelling element in your decor.
Repurposing vintage suitcases as plant carriers combines nostalgia with creativity. They’re a fun, DIY project that adds uniqueness and mobility to your plant collection. As you experiment with styles, your confidence in decorating and upcycling grows. Ready to turn an old suitcase into a portable garden?
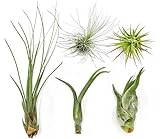
17. Suspended Glass Jars with Water and Air Plants
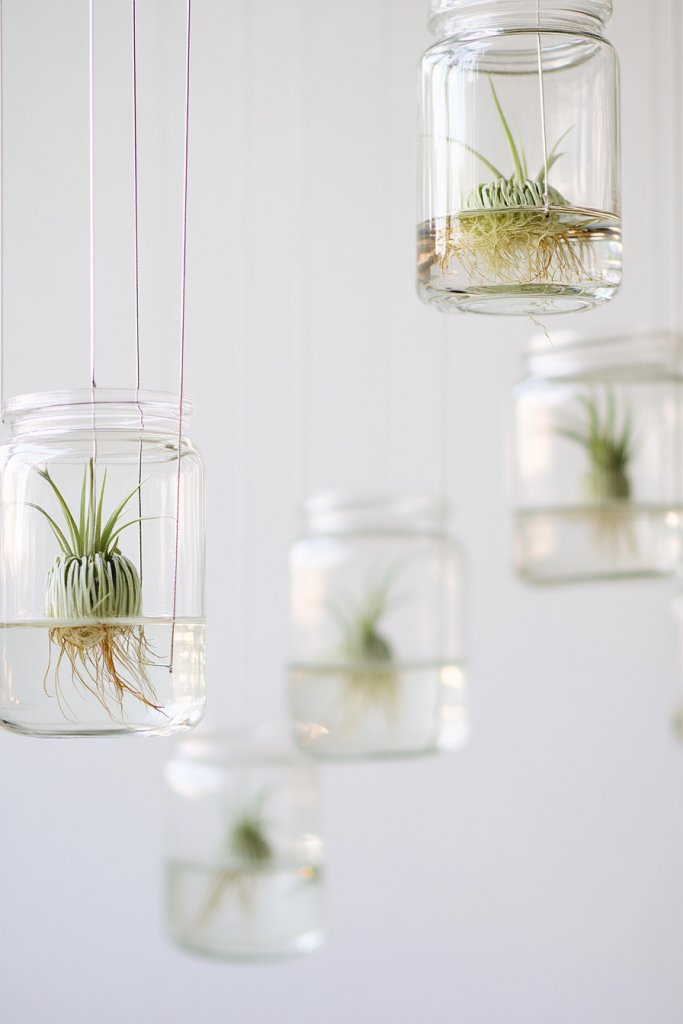
Looking for a sleek, minimalist way to display your plants that feels modern and light? Suspended glass jars with water and air plants offer a simple yet elegant solution. They create a floating garden effect that’s perfect for small spaces or to add a touch of sophistication. Plus, they require minimal maintenance and look incredibly clean.
Recommended Products to replicate this idea
| # | Preview | Product | |
|---|---|---|---|
| 1 |

|
XUNSAIL Terrarium Plants Glass Air Plant Hanging Terrarium Plants Glass Home Decor Vase Wall Hanging... | Check Latest Price |
| # | Preview | Product | |
|---|---|---|---|
| 1 |
|
Air Plants - Tillandsia Variety Pack, Regular 1-3" - 5ct - Live Arrival Guaranteed - House Plants... | Check Latest Price |
Picture small, clear glass jars hanging from delicate cords or wires, each containing a tiny air plant submerged in water. The transparency showcases the roots and water, emphasizing the plant’s natural beauty. The floating appearance adds a futuristic, almost magical feel. When grouped together, they form a delicate, shimmering curtain of greenery, perfect for a windowsill or a decorative wall.
Use different jar shapes—round, hexagonal, or cylindrical—for variety. Incorporate decorative elements like tiny pebbles, shells, or metallic beads in the water for added visual interest. Hang at different heights for a layered, dynamic look. Change the water regularly and ensure the jars are suspended securely. This setup works well in modern, coastal, or minimalist interiors.
Choose small, clear glass jars with lids or openings suitable for water and plants. Attach thin, sturdy cords or wires to the jar necks, then hang from hooks, ceiling mounts, or wall brackets. Fill with water, then place the air plants inside, making sure roots are submerged but leaves stay dry. Change water weekly and clean jars to prevent algae buildup. Position in indirect light for optimal health.
Decorate cords with beads, charms, or colored threads for a personalized touch. Use different jar sizes and shapes to create visual interest. Incorporate themed elements—like shells for a coastal look or metallic accents for a modern vibe. Add fairy lights or small decorative flags for extra charm. These floating gardens are versatile and easily adjustable.
Suspended glass jars with water and air plants are a contemporary, low-maintenance way to add greenery to your decor. They inspire creativity and lend a futuristic feel to your space. As you perfect your arrangements, your confidence in minimalist design and DIY projects will grow. Ready to make your own floating garden?
18. Large Statement Pots with Tall Foliage
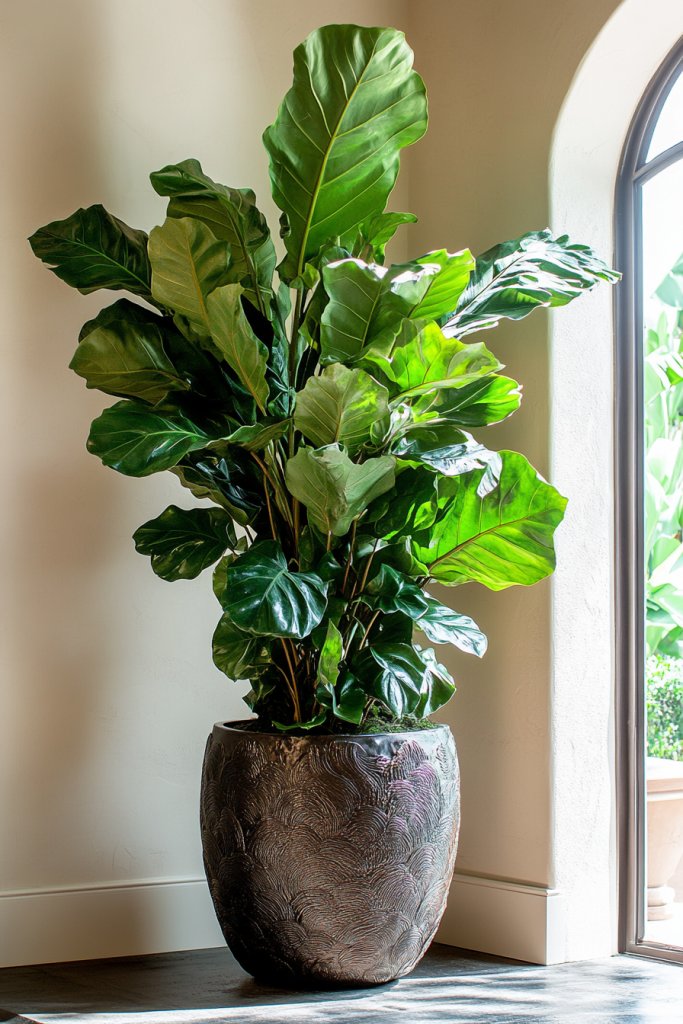
Ever wanted to make a bold statement in your space with minimal effort? Large, decorative pots filled with tall, dramatic foliage can instantly command attention. They anchor a corner or entryway, adding height, texture, and a touch of grandeur. Plus, they create a focal point that’s impossible to ignore.
Recommended Products to replicate this idea
| # | Preview | Product | |
|---|---|---|---|
| 1 |

|
Kante 21.7" H Weathered Concrete Tall Planter, Large Outdoor Indoor Decorative Pot with Drainage... | Check Latest Price |
| # | Preview | Product | |
|---|---|---|---|
| 1 |

|
Nearly Natural 4ft Golden Cane Palm, Double Stalk Artificial Tree With Lush Realistic Foliage... | Check Latest Price |
Imagine a oversized ceramic or concrete pot with a lush, towering plant like a fiddle leaf fig or a dracaena. The size of the pot emphasizes the scale, making the plant appear even more impressive. The rich textures of the container—glossy, matte, or textured—complement the bold foliage. When placed strategically, it transforms a plain corner into a statement space that exudes confidence.
Choose from materials like ceramic, concrete, or metal—each offering a different vibe. Use simple, sleek designs for a modern look or ornate, decorative pots for more traditional or eclectic spaces. Consider pairing with smaller plants in surrounding areas for contrast. Play with height by selecting taller or wider containers, and add decorative stones or mulch for finishing touches. These pots work indoors or outdoors.
Select a sturdy, weather-resistant large pot suitable for your climate. Ensure it has drainage holes and use a quality potting mix. Position your chosen tall foliage in the container, adjusting for balance and visual impact. Water regularly, especially in dry seasons, and fertilize as needed. Place in a spot with sufficient light—near windows or outside in direct sun. Consider adding a decorative stand or base for extra height.
Decorate the exterior with textured finishes, paint, or mosaic tiles. Add accents like decorative stones or small sculptures nearby. Change plant varieties seasonally for freshness or grow seasonal flowers in the tall pot for added color. Use matching or contrasting containers to create a curated look. Personal touches make your statement piece truly yours.
Large statement pots with tall foliage instantly elevate your decor and showcase your confidence in bold design choices. They’re versatile, durable, and impactful, making your space feel sophisticated and complete. With minimal effort, you can create a dramatic focal point that impresses anyone who visits. Ready to make a bold move?
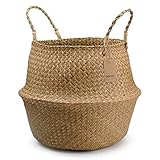
19. Woven Baskets with Lush Foliage for a Natural Look
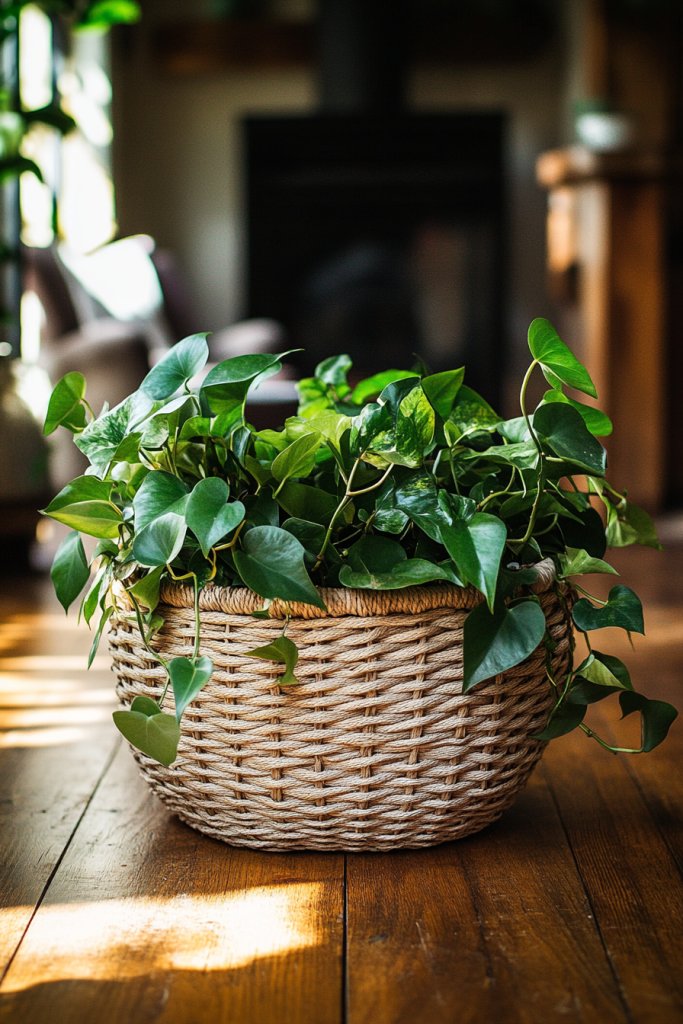
Looking to add a soft, organic touch to your plant display? Woven baskets filled with lush greenery create a cozy, natural aesthetic that feels warm and inviting. They’re perfect for casual, boho, or rustic decor styles and bring a handcrafted vibe to any space. Plus, they’re versatile and easy to move around.
Recommended Products to replicate this idea
| # | Preview | Product | |
|---|---|---|---|
| 1 |
|
Extra Large Seagrass Plant Basket with Handles, Wicker Woven Storage Basket (14.1“ Diameter x... | Check Latest Price |
| # | Preview | Product | |
|---|---|---|---|
| 1 |

|
BLEUM CADE Fake Hanging Plants, 2pcs Artificial Hanging Plant, Faux Pothos Vines Greenery for Wall... | Check Latest Price |
Picture a large, handwoven basket with open weave patterns, overflowing with trailing or bushy plants. The natural fibers add texture and warmth, contrasting beautifully with smooth leaves or blooms. The basket’s rounded shape and organic material soften the overall look, making your plants appear rooted in nature. When placed on a wooden stand or directly on the floor, it creates a relaxed, earthy atmosphere.
Choose baskets made from rattan, seagrass, or jute for different textures and colors. Use larger, open-weave baskets for trailing plants, and smaller, tighter weaves for upright varieties. Decorate with fabric liners, or leave raw for a more rustic look. Mix with other natural elements like wood or stone for a layered effect. These baskets work outdoors, on patios, or indoors.
Select a sturdy woven basket with drainage holes or add a waterproof liner. Arrange your plants in pots or directly in the basket, ensuring stability and drainage. For plants in pots, use a layer of moss or mulch to hide soil and provide extra aesthetic appeal. Position the basket where it gets appropriate light, and water regularly. Keep the fibers clean and dry to prevent mold or deterioration.
Add decorative ribbons, fabric wraps, or painted accents to the basket’s exterior. Incorporate seasonal elements like faux flowers, feathers, or fairy lights for variety. Personalize with small tags or labels that match your decor theme. Mix different textures and sizes for visual interest. Over time, update your arrangement to keep it fresh and lively.
Woven baskets with lush foliage evoke a handcrafted, earthy vibe that complements many styles. They’re easy to craft or buy, and their natural look adds warmth and texture. As you experiment with plant combinations and arrangements, your confidence in creating cozy, organic displays will grow. Ready to bring nature home?
Conclusion
With a diverse array of pot decorating ideas, you now have plenty of inspiration to personalize your plant displays and enhance your home decor. Don’t be afraid to experiment with colors, textures, and accessories to create something uniquely yours. Start decorating today and watch how your space transforms into a vibrant, stylish sanctuary that reflects your personality and love for plants!