I have been, or can be if you click on a link and make a purchase, compensated via a cash payment, gift, or something else of value for writing this post. As an Amazon Associate, I earn from qualifying purchases. Please read my full Affiliate Disclosure for more information.
A painted mirror frame can instantly transform a simple mirror into a stunning focal point, adding personality and style to any room. This popular decor trend offers endless creative possibilities, from bold colors to intricate patterns, allowing you to customize your space with ease.
In this article, you’ll find a diverse range of painted mirror frame ideas that cater to various tastes and decor styles. Whether you’re into shabby chic, boho, or modern aesthetics, these ideas will inspire you to give your mirrors a fresh, updated look that reflects your unique personality.
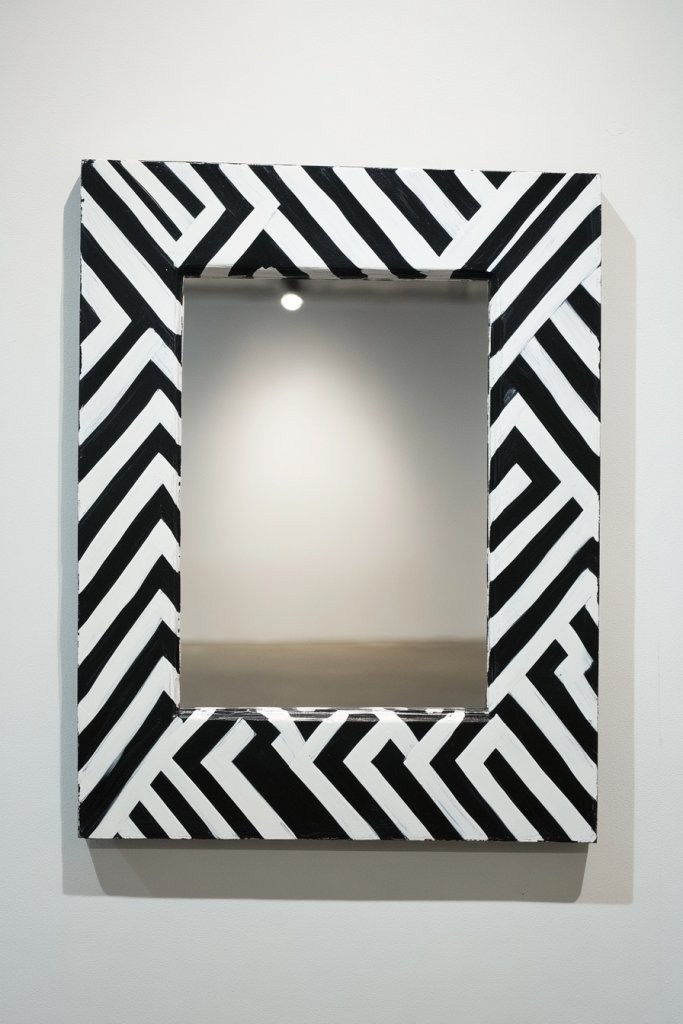
1. Bold Geometric Patterns for Modern Edge
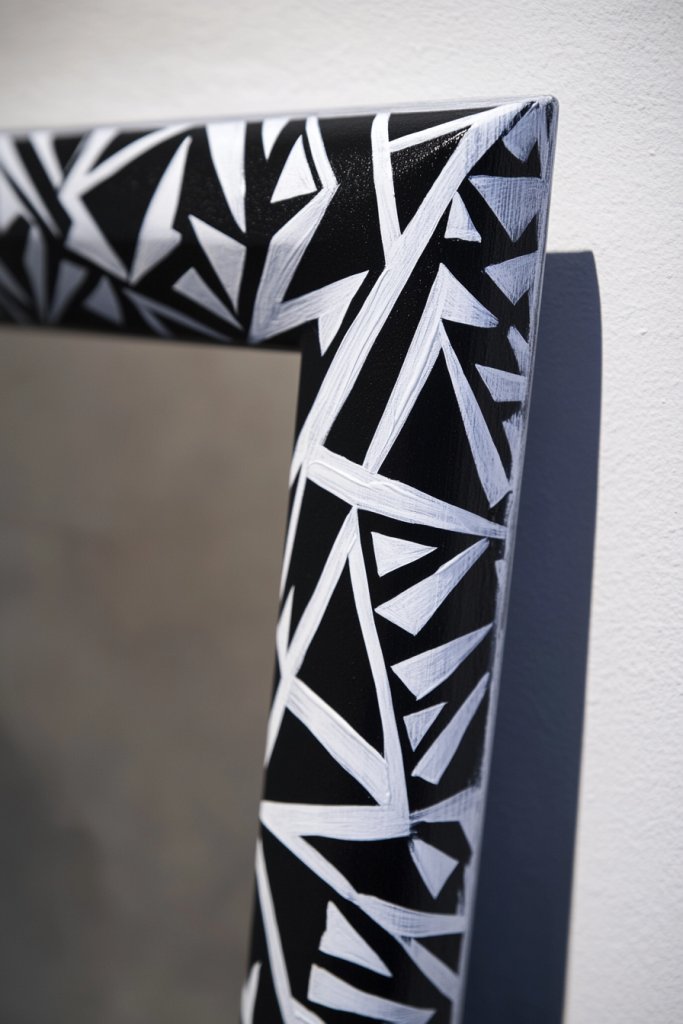
Ever felt like your mirror’s just blending into the background? Sometimes a plain frame just doesn’t cut it when you want your decor to scream modern chic. Geometric patterns can inject that bold, edgy vibe that turns a simple mirror into a statement piece. If you’re craving a fresh look that feels both sleek and artistic, this idea might be just what you need.
Recommended Products to replicate this idea
| # | Preview | Product | |
|---|---|---|---|
| 1 |

|
HQiJun Gold Mirror for Wall, 36x24 Gold Wood Framed, Scalloped Beveled Polished Rectangle Mirror,... | Check Latest Price |
| # | Preview | Product | |
|---|---|---|---|
| 1 |
|
FLFK Mirror Frame Border - Geometric Peel and Stick Wall Borders Wallpaper Decal Trim Tape Teal and... | Check Latest Price |
Imagine a mirror with a frame painted in sharp black and white triangles or dynamic hexagons. The crisp lines and contrasting colors create a visual punch, almost like a piece of abstract art framing your reflection. Think about textured paint strokes that add depth, making the patterns pop even more. The overall effect is eye-catching and modern, perfect for an accent wall or minimalist space.
This pattern can be customized with metallic accents for a luxe twist or softened with pastel shades for a subtler look. For small spaces, tiny geometric motifs work well, while larger rooms can handle bold, oversized shapes. Seasonal adaptations include darker tones for winter or bright hues for summer. You could also experiment with different shapes—circles, squares, or abstract freeforms—depending on your style.
Start with painter’s tape to outline your chosen geometric designs. Use high-quality acrylic or chalk paint for sharp lines and easy correction. For added texture, consider layered paints or metallic foils. Work slowly, ensuring each section dries before moving to the next to avoid smudging. A steady hand or stencils can make complex patterns easier to achieve. Finish with a clear sealant to protect your masterpiece from wear.
Add a splash of gold or silver paint along the edges or within certain shapes for a touch of glamour. Incorporate your favorite colors or metallics to match your decor palette. You could also embed subtle patterns like chevrons or herringbone for more visual interest. Personal touches like initials or small symbols hidden within the design can make it uniquely yours. Play with symmetry or asymmetry to match your aesthetic preference.
Bold geometric frames are a contemporary trend that instantly elevates any space. With some patience and a steady hand, you can transform a simple mirror into a modern art piece. Ready to experiment? Your decor will thank you for the fresh, striking update that’s both simple and impactful.
2. Metallic Finish for Luxe Appeal
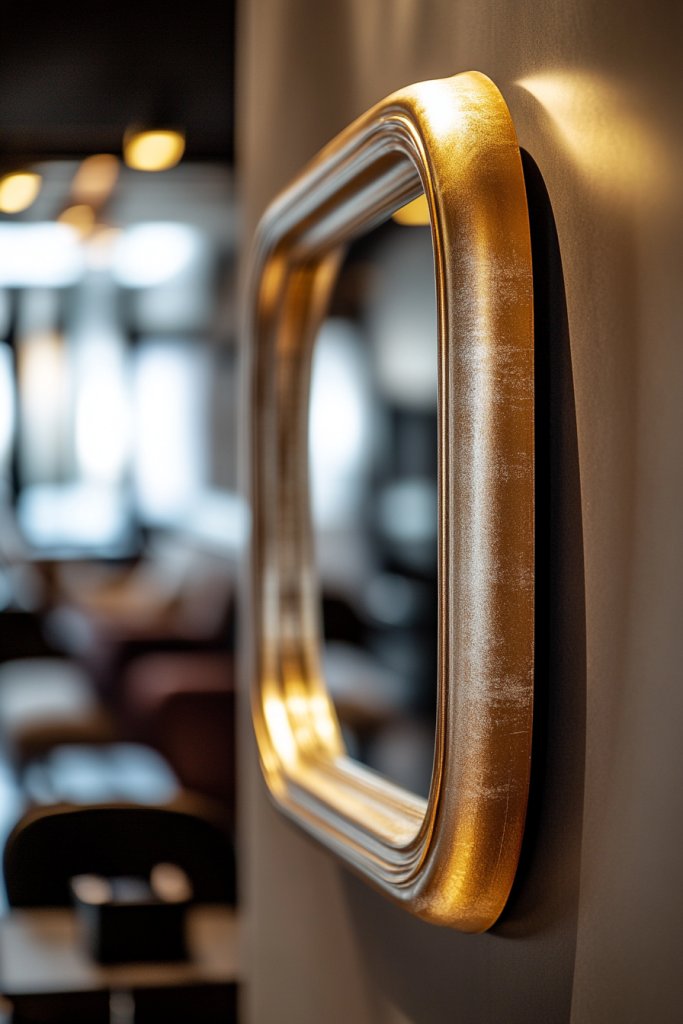
Looking to add a touch of sophistication without buying new furniture? Metallic painted frames are the shortcut to an upscale vibe. Gold, silver, or bronze finishes instantly elevate a mirror, making it feel like a curated piece in a designer space. If your style leans toward glamour or modern elegance, this idea promises a high-end look on a budget.
Recommended Products to replicate this idea
| # | Preview | Product | |
|---|---|---|---|
| 1 |
|
Rust-Oleum 340647 Specialty Metallic Spray Paint, 11 oz, Metallic Gold | Check Latest Price |
| # | Preview | Product | |
|---|---|---|---|
| 1 |

|
Ultrue Oak Wood Effect Framed Wall Mirror, 24x36 Rectangle Mirror, 1/8" Anti-desilvering Tempered... | Check Latest Price |
Picture a mirror with a frame coated in shimmering gold that catches the light with every glance. The reflective quality of metallic paint creates depth and dimension, almost like jewelry for your walls. Brightened by ambient lighting, the metallic sheen adds warmth or coolness, depending on your choice. The texture can be smooth or subtly distressed for a vintage effect, giving your space a layered, luxe feel.
Switch between matte and gloss finishes for different moods. For a more industrial vibe, combine metallic with raw wood or concrete elements. Seasonal tweaks include using darker, muted metallics in winter or bright, shiny tones for festive decor. Mixing metallics—like silver with gold—can also create a modern, eclectic look. Keep the overall palette cohesive for a polished appearance.
Choose high-quality metallic paints designed for wood or prepared surfaces. Clean the frame thoroughly and lightly sand to ensure good adhesion. Apply multiple thin coats with a foam brush or spray for an even finish. For a distressed look, lightly sand areas after drying to reveal underlying layers. Seal with a clear varnish to prevent tarnishing or chipping over time. Experiment with layering different metallic shades for a more dynamic effect.
Customize your metallic frame with decorative trim or beaded accents in metallic hues. Add subtle touches like a glittery topcoat for extra sparkle. Pair with textiles like velvet or silk in your room to complement the luxurious vibe. Or incorporate small mirrored or glass embellishments for added shine. Personalize with initials or a meaningful phrase etched into the frame for a custom touch.
A metallic finish transforms an ordinary mirror into a statement piece that radiates elegance. It’s an easy way to incorporate glamour into your decor without a major overhaul. Once done, you’ll feel like a designer, knowing you created a luxe focal point yourself. Ready to shine? This simple upgrade can make a huge impact in your space.
3. Ombre Gradient Effect for Subtle Elegance
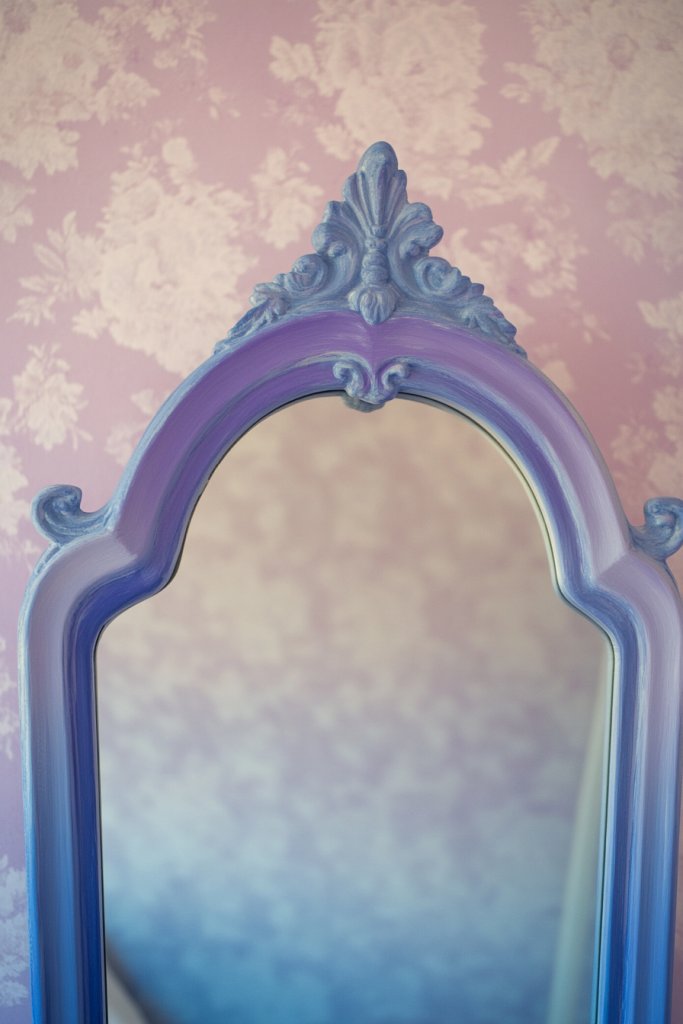
Ever wish your decor had more depth without overwhelming the space? An ombre painted frame creates a soft transition between colors, adding subtle sophistication. It’s perfect for those who love understated elegance with a modern twist. This technique can make your mirror a calming focal point, especially in bedrooms or tranquil living rooms.
Recommended Products to replicate this idea
| # | Preview | Product | |
|---|---|---|---|
| 1 |

|
Amanti Art Gold Bathroom Mirror for Over Sink, 33x43 Eva Ombre Gold Narrow Rectangle Vanity Mirror,... | Check Latest Price |
| # | Preview | Product | |
|---|---|---|---|
| 1 |

|
ARTME Iridescent Acrylic Paint Set, 20 Chameleon Colors in 2 oz/60ml Bottles, Color-shifting Acrylic... | Check Latest Price |
Imagine a frame that fades from a deep navy blue at the bottom to a crisp white at the top, like a sunset or ocean horizon. The smooth gradient creates a sense of movement and flow, making the mirror feel like part of a painting. The colors blend seamlessly, giving a soft, layered look that complements minimalist or boho decor styles. When layered with textures like matte or satin finishes, the effect becomes even more refined.
Opt for warm hues like blush pink to coral for a cozy, inviting vibe, or cool tones like teal to gray for a contemporary feel. Seasonal adaptations include using richer, darker shades in winter or bright pastels in spring. For a more dramatic look, experiment with multiple color transitions or vertical vs. horizontal gradients. This technique works well with simple frames or ornate ones, depending on your style.
Start with a clean, dry frame and use painter’s tape to mark the gradient zones. Use quality blending brushes or sponges to create smooth transitions, blending carefully to avoid harsh lines. Apply thin layers of paint, letting each dry completely before adding the next. For best results, spray or brush on a clear sealant to protect the ombre effect. Practice on a scrap piece first if you’re new to gradient techniques.
Add metallic or glitter accents at the transition zones for an extra sparkle. Incorporate textured paints or matte finishes to enhance the depth. Use custom colors that match your decor palette to make it truly unique. You could also add a metallic or contrasting border to frame the gradient visually. Personal touches like initials or small motifs can be subtly integrated into the design.
Ombre frames bring a layer of artistry and calmness to any room. They’re a fun way to experiment with color blending without committing to bold patterns. Once completed, your mirror will radiate understated elegance and style. Ready to add depth and dimension? This look makes a statement without overpowering your space.
4. Boho-Chic Tribal Designs
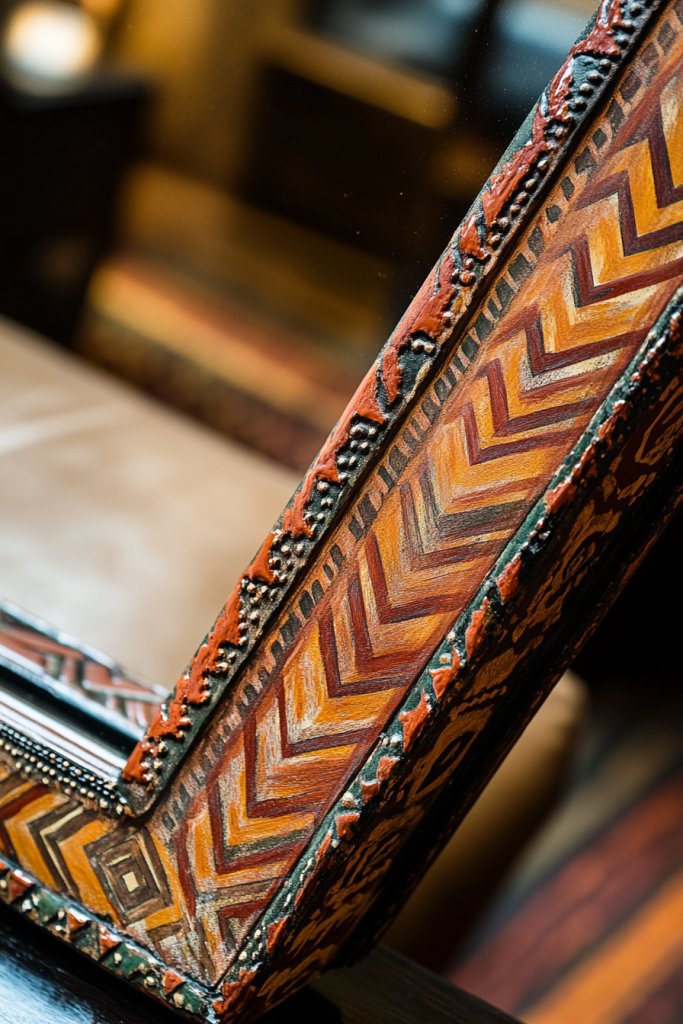
Craving a warm, eclectic vibe that feels both artistic and grounded? Tribal-inspired designs on your mirror frame can bring that boho charm to life. These patterns add personality and cultural richness, perfect for creating a cozy, inviting atmosphere. If you love mixing textures and patterns, this idea will help you craft a truly unique piece.
Recommended Products to replicate this idea
| # | Preview | Product | |
|---|---|---|---|
| 1 |

|
JFY Designs Wall & Accent Mirror Wall Décor - Vanity Mirror with Engineered Wood Frame, Boho... | Check Latest Price |
| # | Preview | Product | |
|---|---|---|---|
| 1 |

|
SWTHONY 15 Inch Boho Round Hanging Wall Mirror Decorative Rattan Circle Mirrors for Farmhouse,... | Check Latest Price |
Envision a frame painted with intricate tribal motifs—zigzags, arrows, or geometric symbols—in earthy tones like terracotta, ochre, and deep browns. The patterns can be painted freehand or stenciled for precision. Textured brushwork or crackle finishes can give it an aged, handcrafted look. The overall effect is an inviting, rustic accessory that complements woven textiles and natural materials.
Change the motifs to reflect different cultural influences, from African to Native American patterns. Use bold colors for a vibrant, energetic look or muted earth tones for subtlety. Seasonal variations include embracing warmer tones in winter and lighter shades in summer. Pair with wooden or rattan furniture to enhance the natural, earthy feel. You can also incorporate small sculptural elements or beaded accents for added dimension.
Begin by sketching your tribal patterns onto the frame lightly with a pencil. Use fine brushes and acrylic or chalk paint for detailed designs. For symmetry, create stencils or templates to ensure consistency. Add layers of wash or dry-brushing techniques to achieve an aged effect. Seal with matte varnish to prevent chipping and preserve the intricate details. Practice your patterns on paper or scrap before final application.
Include personal symbols or initials hidden within the tribal patterns for a custom touch. Incorporate textured elements like beads, shells, or small wooden pieces glued onto the frame. Use a mix of matte and gloss finishes to highlight certain parts of the design. Coordinate the color palette with other boho accessories like woven wall hangings or textured throws. This approach turns your mirror into a storytelling piece.
Tribal designs add warmth, character, and a sense of cultural depth to your decor. They’re a fantastic way to showcase your artistic side and love for global aesthetics. Once finished, your mirror will be a conversation starter and a reflection of your personal style. Ready to embrace the boho vibe? This design makes your space feel both curated and cozy.
5. Pastel Hues for Soft, Inviting Style
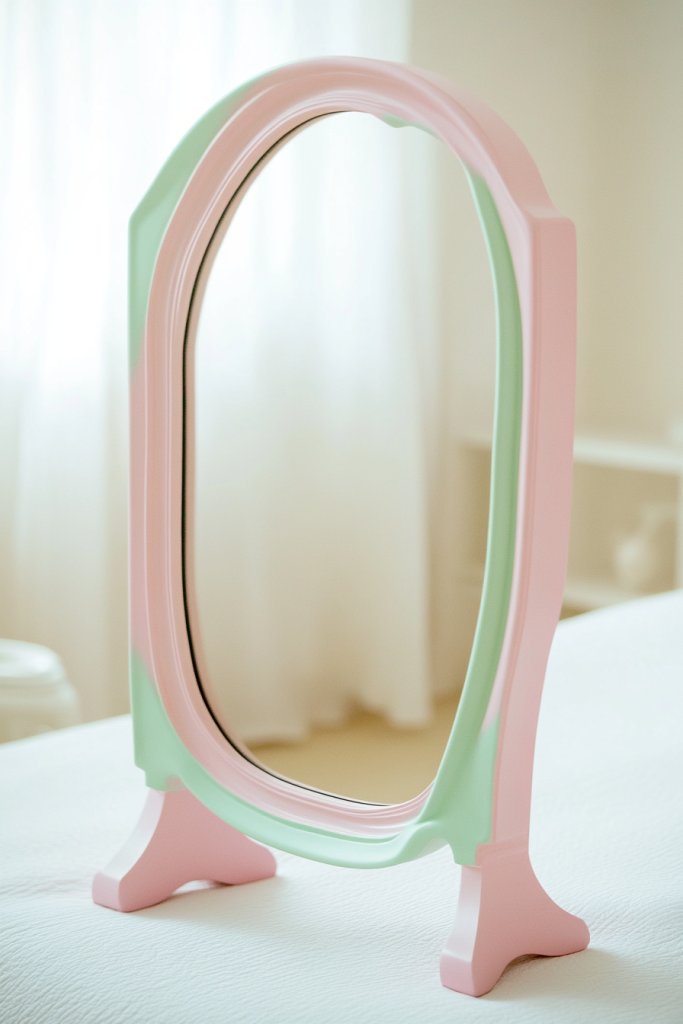
Looking for a way to create a light, airy atmosphere in your space? Pastel painted frames add a soft, inviting touch that’s perfect for bedrooms, bathrooms, or any room in need of a gentle refresh. They bring a calm, sophisticated vibe without overwhelming the decor. If you love subtlety with a splash of color, this idea might be your new favorite.
Recommended Products to replicate this idea
| # | Preview | Product | |
|---|---|---|---|
| 1 |

|
TWING Collage Picture Frames Wall Decor 10 Pack, Gallery Wall Color Picture Frame Set for Wall or... | Check Latest Price |
| # | Preview | Product | |
|---|---|---|---|
| 1 |

|
DecoArt Americana Acrylic Paint Set – Essential Pastel Colors, 9 Bottles (2 fl oz) – Art and... | Check Latest Price |
Visualize a mirror with a frame painted in blush pink, mint green, or sky blue. The pastel shades give a delicate glow, making the mirror feel like a piece of art rather than just a functional item. When paired with soft textiles and neutral walls, the overall look is serene and cohesive. The matte or satin finish enhances the gentle tone, creating a seamless blend with your decor.
Mix pastel shades for a playful, eclectic look or stick to one hue for a monochromatic effect. Change the intensity of the color based on the room’s lighting—lighter for small spaces, richer for larger rooms. Seasonal updates include switching to warmer pastel tones like peach or lavender in spring or deeper hues in winter. Complement with plush fabrics, fuzzy rugs, or textured throws for a cozy feel.
Sand the frame lightly to ensure smooth paint application. Use high-quality acrylic or chalk paint in pastel shades, applying multiple thin coats for even coverage. For added durability, seal with a clear matte varnish or wax. To get crisp edges, tape off sections or use painter’s tape for neat lines. Practice blending on scrap wood or paper if you want a gradient or ombre effect. This simple process yields a soft, polished finish.
Add subtle metallic or pearl accents to amplify the gentle aesthetic. Incorporate textured elements like embroidered trims or fabric appliqués on the frame. Personalize further by adding small decorative beads or charms that match your decor theme. Pair with pastel-colored accessories in your room, such as cushions or curtains, to unify the space. Your mirror can become a focal point that radiates calm and charm.
Pastel frames are a versatile, timeless choice that brightens any space with minimal effort. They’re both stylish and soothing, making your decor feel harmonious and inviting. When you see your finished piece, you’ll feel proud of creating a delicate, personalized touch. Ready for a soft upgrade? Pastel hues are your ticket to a tranquil, beautiful home.
6. Vintage Distressed Finish
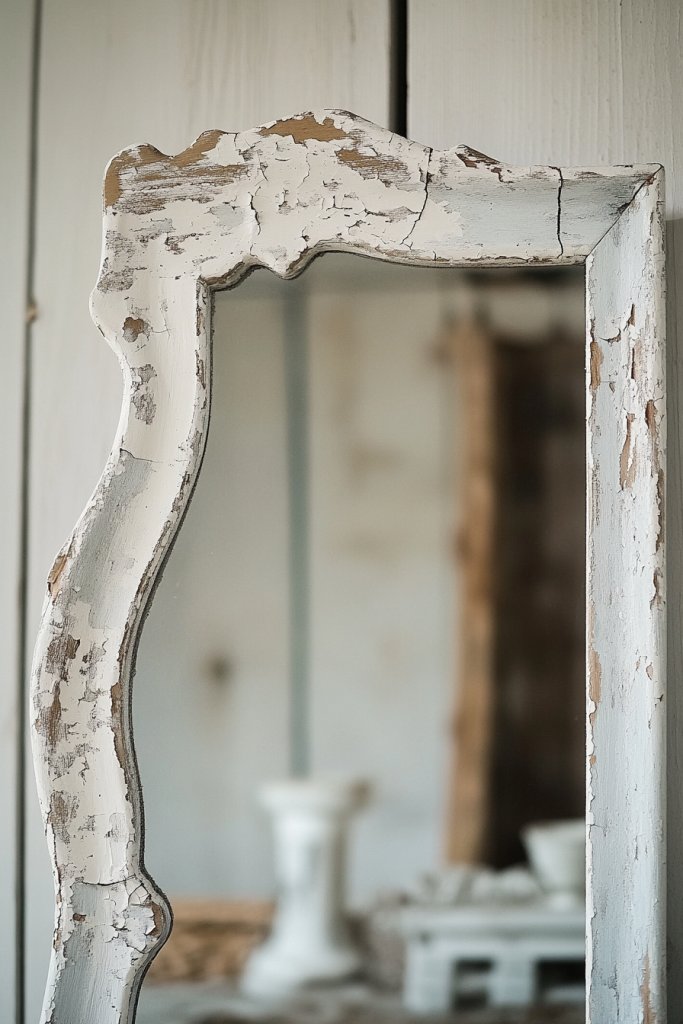
Craving that charming, shabby chic vibe that feels both nostalgic and cozy? A vintage distressed painted frame can give your mirror an antique look without hunting down real vintage pieces. It’s perfect for adding character and a sense of history to your decor. If you love rustic charm mixed with elegance, this idea will make your space uniquely yours.
Recommended Products to replicate this idea
| # | Preview | Product | |
|---|---|---|---|
| 1 |

|
EMAISON 36 X 24 inch Wall Mount Wood Frame Bathroom Vanity Mirror Rustic Horizontal/Vertical... | Check Latest Price |
| # | Preview | Product | |
|---|---|---|---|
| 1 |
|
FolkArt Home Decor Chalk Furniture & Craft Acrylic Paint in Assorted Colors, 8 ounce, Antique Wax | Check Latest Price |
Imagine a frame painted in a soft, muted color—like pale turquoise or creamy white—then lightly sanded in strategic spots to reveal layers underneath. The worn edges and chipped paint create a weathered, aged effect that feels like a treasured find. This distressed look pairs beautifully with floral fabrics, lace, or vintage furniture, enhancing a romantic or farmhouse aesthetic. The subtle imperfections tell a story of time and character.
Choose colors that suit your style—pastel shades for shabby chic, darker hues for more dramatic vintage. Use additional techniques like glazing or crackle medium for different textures and effects. Seasonal updates include adding small decorative elements like faux rust or patina effects in colder months. Complement with antique knobs or ornate hardware for a truly authentic look. Mix and match with other distressed furniture for a cohesive vintage vibe.
Start by applying a base coat of your chosen color, then use a damp cloth or sanding sponge to gently distress areas around edges and corners. To enhance the aged effect, layer with a darker or contrasting color and lightly sand again. Use a clear wax or sealant to protect the finish and add a slight sheen. Small chips or imperfections can be accentuated with a fine brush for extra authenticity. Practice on scrap before tackling your actual frame.
Add small decorative elements like vintage keys or metal charms glued onto the frame. Incorporate stenciled patterns or initials for a personalized touch. Use contrasting paints to highlight details or create a layered effect. Pair with textured fabrics, lace, or burlap to reinforce the vintage aesthetic. This distressed finish not only looks charming but also hides imperfections, making it a forgiving DIY option.
A vintage distressed frame breathes new life into old furniture and decor. It’s a timeless technique that adds warmth and character, making your mirror a focal point full of history. With some patience and a light touch, you can create a piece that looks like it’s been loved for decades. Ready to add charm and personality? Vintage distressing is a rewarding way to showcase your DIY skills.
7. Two-Tone Color Blocking for Visual Interest
Bored of monolithic frames that lack personality? Two-tone color blocking instantly adds visual punch and modern flair. It’s a simple trick to make your mirror stand out and complement various decor styles. If you’re into bold contrasts and playful designs, this idea will give your space a fresh, trendy vibe. Plus, it’s surprisingly easy to execute.
Recommended Products to replicate this idea
| # | Preview | Product | |
|---|---|---|---|
| 1 |
|
Malden International Designs 5x7 Two Tone Marbled Metal Picture Frame White Sapphire Blue Shiny... | Check Latest Price |
| # | Preview | Product | |
|---|---|---|---|
| 1 |

|
Scotch Rough Surface Extra Strength Painter's Tape, 0.94 in x 60.1 yd, Tape Protects Surfaces and... | Check Latest Price |
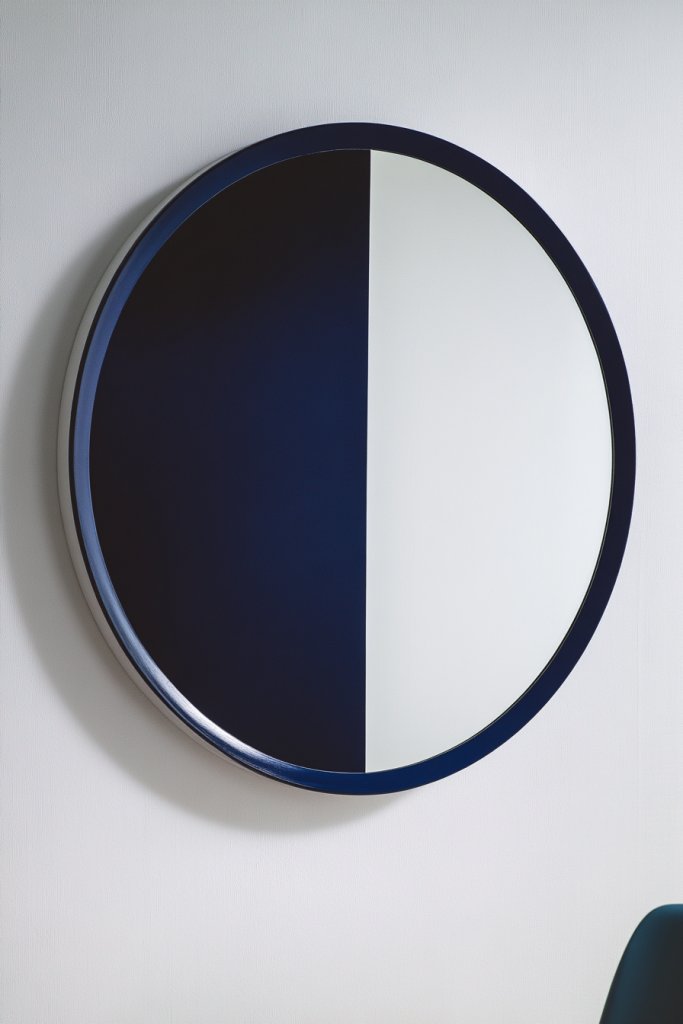
Visualize a frame divided into two sections—perhaps black and white, navy and blush, or metallic and matte. The clean lines and sharp color boundaries create a striking, geometric contrast. The effect is both sophisticated and fun, drawing the eye directly to your mirror. You can experiment with horizontal, vertical, or diagonal splits for different visual impacts. The contrast adds depth and dimension to any wall.
Use complementary or contrasting colors to match your room’s palette. For a subtler look, choose shades within the same color family but different tones. Seasonal variations include swapping bold colors for softer pastels or deep jewel tones. For smaller frames, a simple two-tone border works well, while larger frames can handle more intricate divisions. Play with matte, gloss, or textured finishes for different effects.
Start by taping off your design carefully with painter’s tape for crisp edges. Use high-quality acrylic or latex paint, applying in thin, even coats. Remove tape before fully dry to prevent smudging. For sharp lines, use a fine brush or a small foam roller. Multiple coats may be necessary for vibrant, even color. Seal with a clear protective finish to preserve the look long-term. Practice your design on scrap first for best results.
Incorporate metallic or glitter accents along the dividing lines for extra sparkle. Personalize with initials or symbols in one section or add decorative embellishments like small studs or decals. Mix textures, such as matte with gloss, for more visual interest. Coordinate the colors with accessories in your room for a cohesive look. This approach is perfect for contemporary or eclectic styles.
Two-tone color blocking is a simple way to add boldness without complexity. It’s a versatile technique that can be adapted to any space or decor style. Once finished, your mirror will feel like a custom piece designed specifically for your home. Ready to try something fun and modern? This idea elevates your decor game effortlessly.
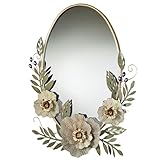
8. Floral Motifs with Hand-Painted Accents
Want to add a touch of romance and nature-inspired beauty to your space? Hand-painted floral motifs on your mirror frame bring a delicate, feminine vibe that’s both charming and artistic. It’s perfect for creating a cozy, cottage-inspired atmosphere or adding a pop of color to neutral decor. If you love DIY projects that feel personal and unique, floral designs are your new best friend.
Recommended Products to replicate this idea
| # | Preview | Product | |
|---|---|---|---|
| 1 |
|
Touch of Class Forever Blooms Pastel Floral Oval Wall Mirror | Check Latest Price |
| # | Preview | Product | |
|---|---|---|---|
| 1 |

|
Crafts 4 All Acrylic Paint Set for Adults and Artists - 24 Pack of 12mL Paints with 3 Art Brushes,... | Check Latest Price |
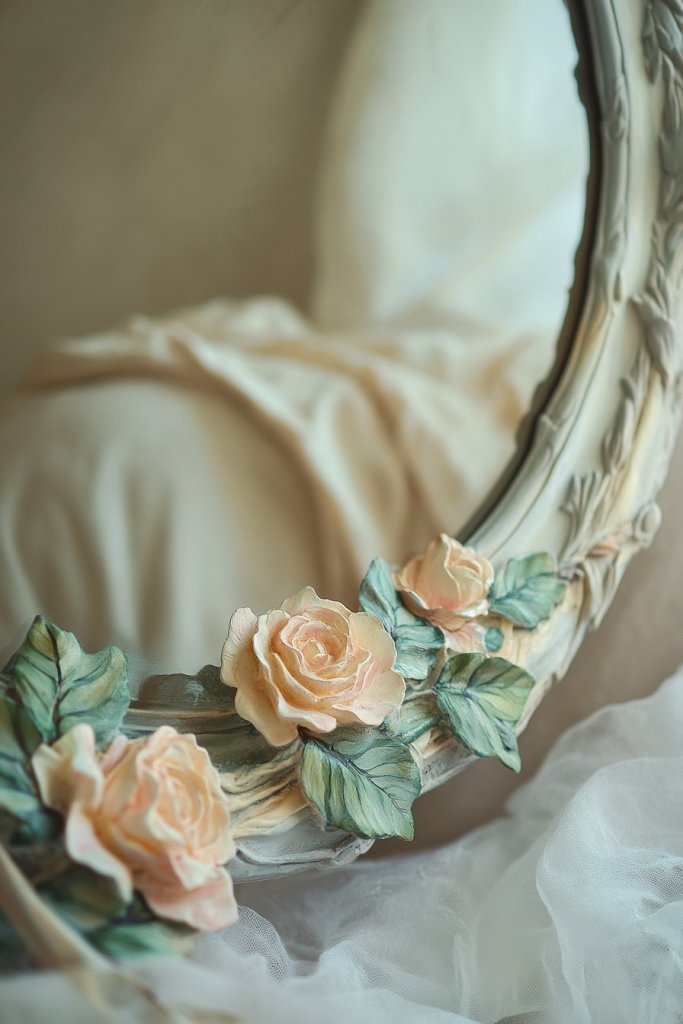
Imagine a frame adorned with blooming roses, dainty daisies, or wildflowers, painted in soft pastel or vibrant hues. The brushstrokes add texture and movement, making the flowers come alive. You might opt for a subtle border of tiny blossoms or a bold, large bouquet in one corner. The natural motifs soften the overall look and create a welcoming, romantic ambiance. Paired with textured fabrics and vintage accessories, it’s a true storybook scene.
Choose different flower types based on your personal favorites or seasonal blooms. Use watercolor effects for a gentle, airy feel or more saturated, detailed strokes for a vivid look. Change the color palette to match your decor—pastels for spring, rich reds and oranges for fall. For small frames, a single floral accent can do wonders, while larger frames can host intricate garden scenes. Incorporate leaves or vines for extra richness.
Sketch your floral designs lightly with pencil before painting. Use fine brushes and acrylic, watercolor, or chalk paint depending on your desired effect. Layer colors for depth and dimension, allowing each layer to dry before adding details. For a more authentic look, vary brush sizes and strokes to mimic natural petals and leaves. Seal with a matte or satin varnish to protect your artwork.
Add glitter or metallic accents to certain flowers or leaves for a touch of sparkle. Incorporate initials or meaningful symbols within the floral arrangement for personalization. Use textured paints or embossing powders for extra dimension. Pair with vintage floral textiles or botanical prints to complete your theme. Your floral mirror becomes a centerpiece that’s both beautiful and meaningful.
Floral motifs add timeless charm that can brighten any room. They allow your creative side to flourish and make your decor feel thoughtfully curated. Once you see the delicate details come to life, you’ll be inspired to try more hand-painted projects. Ready to bloom? Your floral masterpiece will evoke happiness and a touch of nature’s grace.
9. Bright Accent Colors for a Pop of Fun
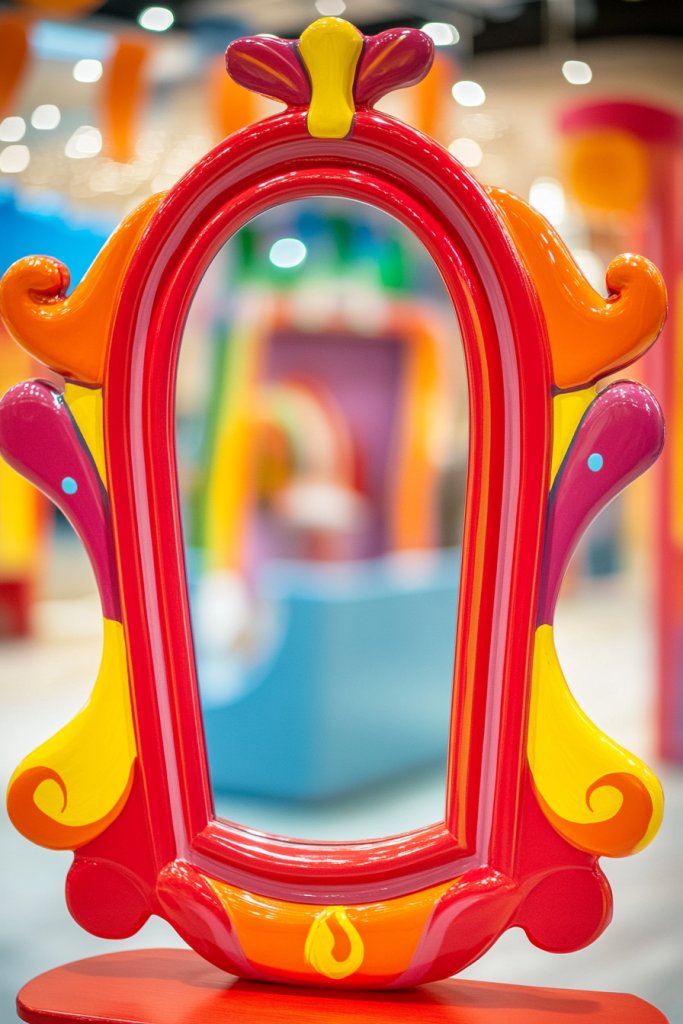
Feeling like your space needs a splash of energy? Bright accent colors on your mirror frame instantly lift the mood and add personality. Think bold reds, vibrant oranges, or lively turquoises that make your mirror stand out. If you love playful, lively decor, this idea is perfect for injecting fun into any room.
Recommended Products to replicate this idea
| # | Preview | Product | |
|---|---|---|---|
| 1 |
|
Colorful Stain Glass Paint Set with 6 Brushes, 1 Palette, 24 Color Waterproof Acrylic Enamel... | Check Latest Price |
| # | Preview | Product | |
|---|---|---|---|
| 1 |

|
TEIPAI Wall Mirror Home Office Decor, Irregular Wall-Mounted Decorative Mirrors for Modern Apartment... | Check Latest Price |
Picture a frame painted in a striking coral hue that catches your eye immediately. The vivid color creates a focal point, especially when paired with neutral walls and subdued furniture. The contrast energizes the space and makes your mirror look like a piece of art. Combining different bright shades can create a lively mosaic effect, perfect for modern or eclectic interiors. The finish can be matte for sophistication or gloss for extra vibrancy.
Choose a single bold color for a clean, impactful look or combine multiple bright hues for a playful pattern. Seasonal updates include switching to warmer tones in winter or cooler shades for summer. For small frames, a bright border can add a punch without overwhelming. Larger frames can feature painted stripes or geometric blocks of color. Use textured finishes or metallic accents to add depth.
Tape off your design carefully with painter’s tape, then apply several thin coats of high-quality acrylic or latex paint. For sharp lines, use a steady hand or stencils; for a more organic look, freehand painting works well. After drying, apply a clear sealant to preserve the vibrancy. Practice your color combinations on scrap before tackling your actual frame. Layering colors or blending can add extra dimension.
Incorporate glitter, metallic, or neon paints for an extra pop. Customize with initials or symbols in contrasting shades. Add decorative elements like small studs or painted patterns to enrich the visual effect. Pair with colorful textiles or accessories that echo the frame’s palette. Your mirror will radiate energy and joy, making your decor feel lively and fun.
Bright accents are an easy way to transform a dull space into a lively, inviting environment. They’re perfect for showcasing your bold side and experimenting with color. Once finished, your mirror will instantly draw attention and spark conversations. Ready to energize your decor? Bright, playful frames make a bold statement with minimal effort.
10. Monochrome Minimalist Style
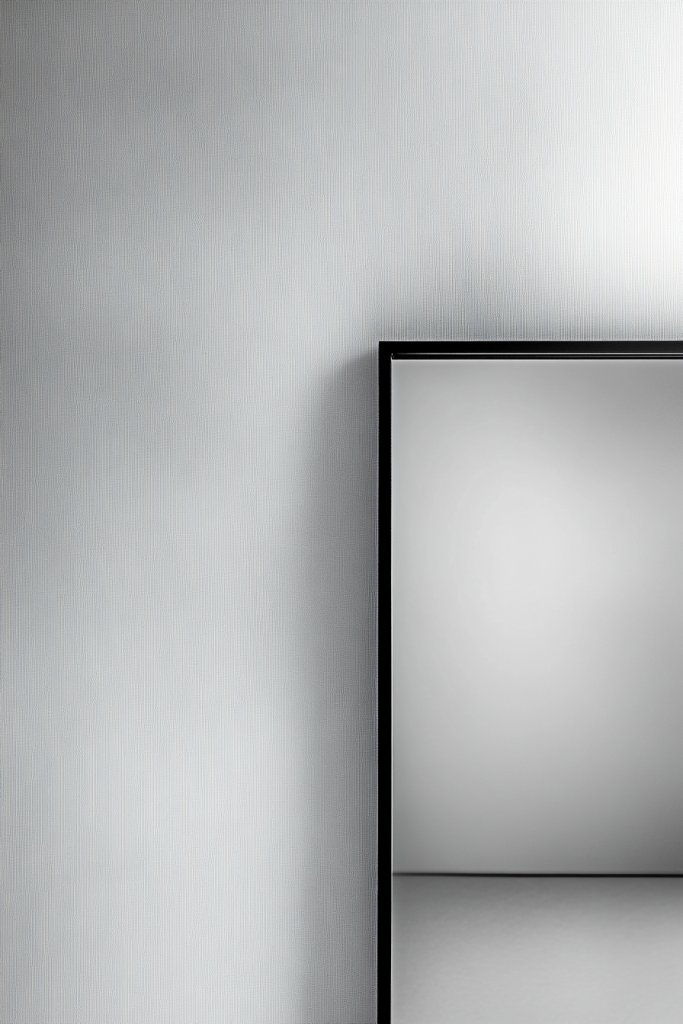
Feeling overwhelmed by clutter and busy patterns? A monochrome minimalist frame offers a clean, calming aesthetic that pairs well with modern decor. It’s the perfect choice if you crave simplicity and elegance without sacrificing style. This approach creates a sleek focal point that complements any neutral palette.
Recommended Products to replicate this idea
| # | Preview | Product | |
|---|---|---|---|
| 1 |

|
decorUhome 8x10 Picture Frame, Display Pictures 5x7 with Mat or 8x10 without Mat, Wall & Tabletop... | Check Latest Price |
| # | Preview | Product | |
|---|---|---|---|
| 1 |

|
Vittanly 15 Pack Picture Frames Collage Wall Decor for Mounting or Tabletop Display, Gallery Frame... | Check Latest Price |
Visualize a frame painted in a crisp matte black or soft white, with no embellishments or distractions. The smooth, uniform surface emphasizes clean lines and subtle sophistication. The mirror’s reflection becomes the star, enhanced by the understated frame. This minimalistic look blends seamlessly into contemporary interiors, giving a sense of spaciousness and order. It’s a quiet statement that speaks volumes.
Choose different monochrome shades—like charcoal, beige, or pastel tones—to match your decor. For a textured twist, consider matte finishes with subtle grain or velvet-like textures. Seasonal updates include adding metallic or gloss accents for contrast. The shape of the frame can also vary—thin and sleek or thick and substantial—depending on your style. Minimalism works well with a variety of interior themes, from Scandinavian to industrial.
Start by sanding the frame thoroughly and applying a primer if needed. Use high-quality acrylic or chalk paint for a smooth, even coat. Apply multiple thin layers, allowing each to dry fully to avoid streaks. For sharp edges, tape off sections carefully. Finish with a matte or satin sealant to prevent fingerprints and scratches. Keep the design simple—less is more when aiming for a minimalist aesthetic.
Add subtle metallic or gloss accents along the edges for a modern touch. Incorporate a small, engraved monogram or geometric pattern for a personalized flair. Pair with other minimalist accessories like sleek vases or sculptures to complete the look. Use contrasting textures in nearby textiles to add depth without cluttering the visual space. Your mirror will feel both refined and functional.
A monochrome minimalist frame elevates your decor with simplicity and grace. It’s a timeless approach that adapts to changing trends and personal tastes. Once installed, it provides a serene, clutter-free reflection of your style. Ready for a sleek upgrade? Less truly is more in this elegant, understated design.
11. Metallic Tap and Textured Highlights
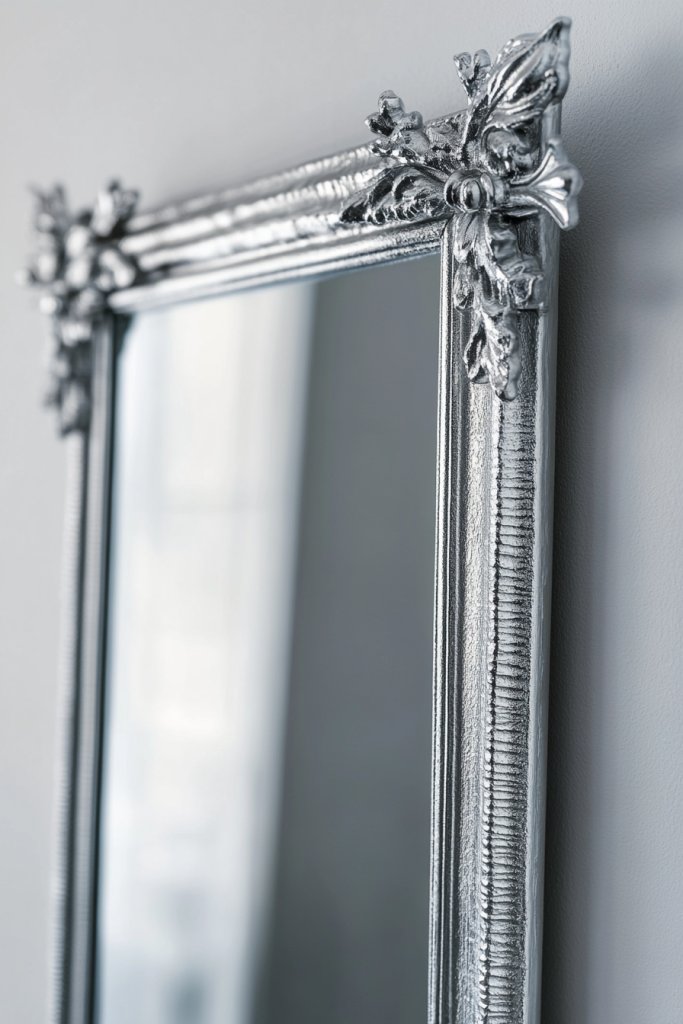
Want to add a touch of glam and dimension without redoing your entire decor? Metallic tap and textured highlights on your mirror frame bring a sophisticated, tactile element that’s both modern and luxe. It’s an easy way to upgrade a plain frame into a textured masterpiece that catches the eye and invites touch. If you love subtle luxury, this idea will make your space pop.
Recommended Products to replicate this idea
| # | Preview | Product | |
|---|---|---|---|
| 1 |

|
AMACO Rub n Buff Wax Metallic Finish 4 Color Kit - Antique Gold Silver Leaf Gold Leaf Ebony 15ml... | Check Latest Price |
| # | Preview | Product | |
|---|---|---|---|
| 1 |

|
TIANLDD 27 FT Wood Grain Wallpaper Border, Removable Waterproof Mirror Border Peel and... | Check Latest Price |
Imagine a frame painted in a matte dark base with metallic accents applied selectively to edges, corners, or patterns. Textured brushwork, stippling, or even small sculptural elements create depth and visual interest. The contrast between matte and shiny surfaces adds a layered effect, making the frame appear more dynamic. When lit properly, these highlights shimmer, making your mirror a stunning focal point.
Use metallics like gold, silver, or rose gold for different moods—warm or cool. Incorporate textured details like embossed patterns or raised motifs for extra dimension. Seasonal updates include adding glitter or metallic leaf for holiday glam. Pair with textured textiles such as velvet or boucle for a tactile, layered feel. You can also combine smooth painted areas with textured metallic highlights for a bespoke look.
Apply a base coat of paint, then use metallic leaf, foil, or metallic paint on selected areas with a fine brush. Use stippling or sponging techniques to create textured highlights. For embossed effects, apply modeling paste or thick paint before painting over it. Seal with a clear, matte or gloss varnish to protect the textures and metallic finishes. Practice your highlights on scrap to master the contrast and texture.
Add small sculptural embellishments or metallic studs for extra dimension. Use contrasting textures in nearby decor—like plush cushions or shaggy rugs—to enhance the tactile experience. Incorporate initials or symbols with metallic paint for a personal touch. Combining different metallic tones can create a rich, layered look. Your mirror will radiate elegance and artistry.
Textured metallic highlights add a rich, tactile dimension that elevates your decor instantly. They’re perfect for creating a luxe, contemporary aesthetic that feels personalized and crafted. Once completed, your mirror will be a conversation piece that showcases your attention to detail. Ready to add shine and texture? This technique blends craftsmanship with style effortlessly.
12. Striped or Chevron Patterns for Dynamic Style
Bored with plain frames that lack visual interest? Stripes and chevron patterns add movement and energy to your mirror, transforming it into a focal point. This bold design can invigorate any space, making your decor feel lively and modern. If you love patterns that catch the eye and add personality, this idea will give your mirror a fresh twist.
Recommended Products to replicate this idea
| # | Preview | Product | |
|---|---|---|---|
| 1 |

|
You Are Enough Rearview Mirror Stickers for Cars - Window Decal Decoration, Dresser Mirror Decals,... | Check Latest Price |
| # | Preview | Product | |
|---|---|---|---|
| 1 |

|
ZHIJIANHZ 42 Rolls Vintage Stripe Washi Tape Set,Decorative Tape for Scrapbooking, Journaling,... | Check Latest Price |
Picture a frame painted with crisp black and white stripes or a zigzag chevron in vibrant colors. The pattern creates a rhythmic visual that guides the eye around the mirror, adding depth and dynamism. The sharp lines and contrasting shades evoke a sense of movement, making the mirror pop against neutral walls. It’s like a piece of contemporary art framing your reflection.
Experiment with different widths of stripes or chevrons for varied visual impact. Use bold colors for a playful, energetic look or monochrome for chic minimalism. Seasonal variations include switching to warm tones for fall or cool shades for summer. Pair with geometric or abstract decor elements for a cohesive style. You can also incorporate metallic or glitter accents within the pattern for extra flair.
Tape off your design carefully with painter’s tape to ensure clean lines. Use high-quality acrylic or latex paint, applying in multiple thin coats to prevent bleeding or smudging. Remove the tape before the paint fully dries for sharp edges. For a more textured pattern, consider using textured paint or adding metallic accents. Seal with a clear matte or gloss finish to protect the pattern and enhance the colors. Practice your design on scrap to perfect your technique.
Add metallic or glitter details along the stripes or chevrons for a sparkling effect. Customize with initials or symbols embedded within the pattern for a personal touch. Incorporate contrasting textures—like matte stripes with glossy accents—to add richness. Coordinate the pattern colors with other accessories to unify your decor. Your patterned mirror becomes a bold expression of your style.
Striped and chevron patterns inject energy and modernity into your space. They’re a fun way to showcase your pattern-mixing skills and create visual interest. Once finished, your mirror will stand out as a dynamic piece that elevates your decor effortlessly. Ready for a bold, graphic upgrade? This design packs a punch with minimal effort.
13. Rustic Farmhouse Charm with Chippy Paint
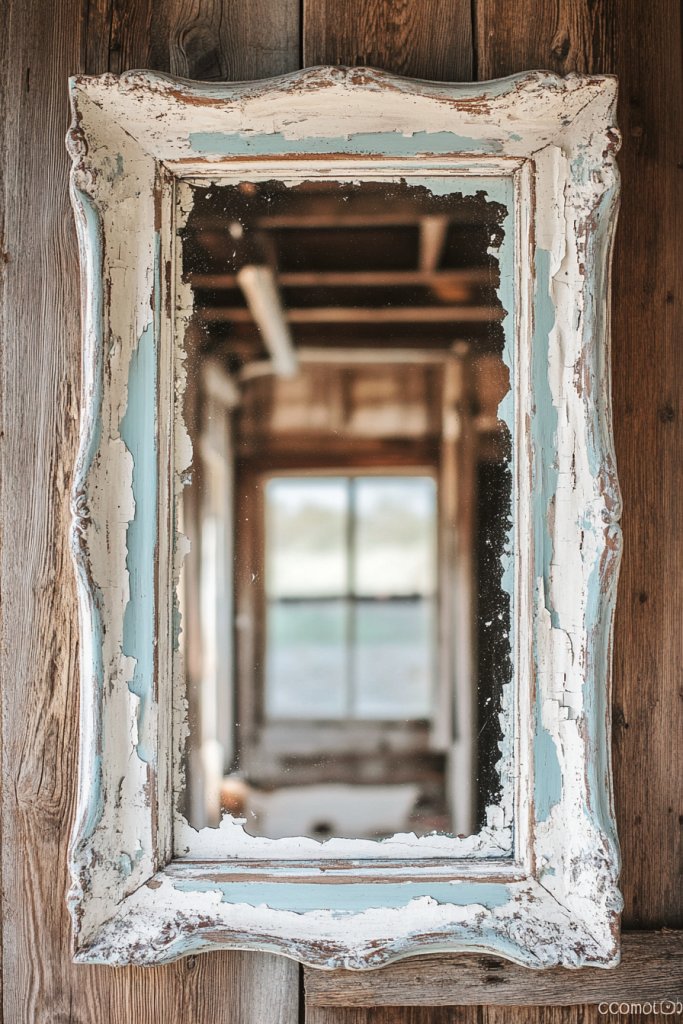
Craving that cozy, rustic charm that feels like it’s been loved for years? A chippy paint finish on your mirror frame can give you that vintage farmhouse vibe instantly. It’s perfect for creating a warm, inviting space that’s full of character. If you adore distressed, imperfect decor, this idea will make your mirror a centerpiece of rustic beauty.
Recommended Products to replicate this idea
| # | Preview | Product | |
|---|---|---|---|
| 1 |

|
Rust-Oleum Linen White Chalked All-in-One Ultra Matte Paint | One Coat Coverage | No Primer,... | Check Latest Price |
| # | Preview | Product | |
|---|---|---|---|
| 1 |
|
AAZZKANG Rustic Wall Mirror Rectangle Wood Framed Mirrors Large 20"x16" Decorative for Bedroom... | Check Latest Price |
Imagine a frame painted in a soft pastel or neutral hue, then lightly sanded or chipped to reveal layers underneath. The uneven, weathered edges and peeling paint mimic age and history, making the piece feel like a cherished antique. This textured finish pairs beautifully with wooden beams, woven textiles, and antique accessories, enhancing a homey, farmhouse aesthetic. The imperfect look adds warmth and authenticity.
Choose colors that suit the farmhouse style—soft whites, creams, or muted blues. Use crackle mediums or layered paints for more textured, aged effects. Seasonal updates include adding faux rust or patina effects for winter decor. Incorporate small decorative elements like faux nails, hinges, or wood appliqués to emphasize the rustic charm. Mix with reclaimed wood furniture and vintage textiles for a cohesive look.
Start with a base coat of your chosen color, then add distressing techniques—dry brushing, sanding, or peeling—to create chipped effects. Use a fine brush to target specific areas for uneven wear. For authenticity, apply a glaze or wax to age the finish further. Seal with a matte varnish for protection and a softer aged appearance. Practice on scrap wood or frame pieces to perfect your technique before working on your actual mirror.
Add small decorative details like faux nails or metal accents to enhance the rustic feel. Personalize with painted initials, dates, or motifs that tell your story. Incorporate natural elements like twigs, rope, or burlap for added texture. Use a contrasting color or metallic highlights to emphasize certain areas. Your rustic mirror will radiate warmth, charm, and a sense of history.
A chippy, distressed finish captures the essence of rustic farmhouse style beautifully. It’s a forgiving technique that hides imperfections, making it ideal for DIY beginners. Once you see your imperfectly perfect mirror, you’ll be inspired to embrace more distressed finishes. Ready to add cozy charm? Your rustic mirror will bring a welcoming, nostalgic touch to your home.
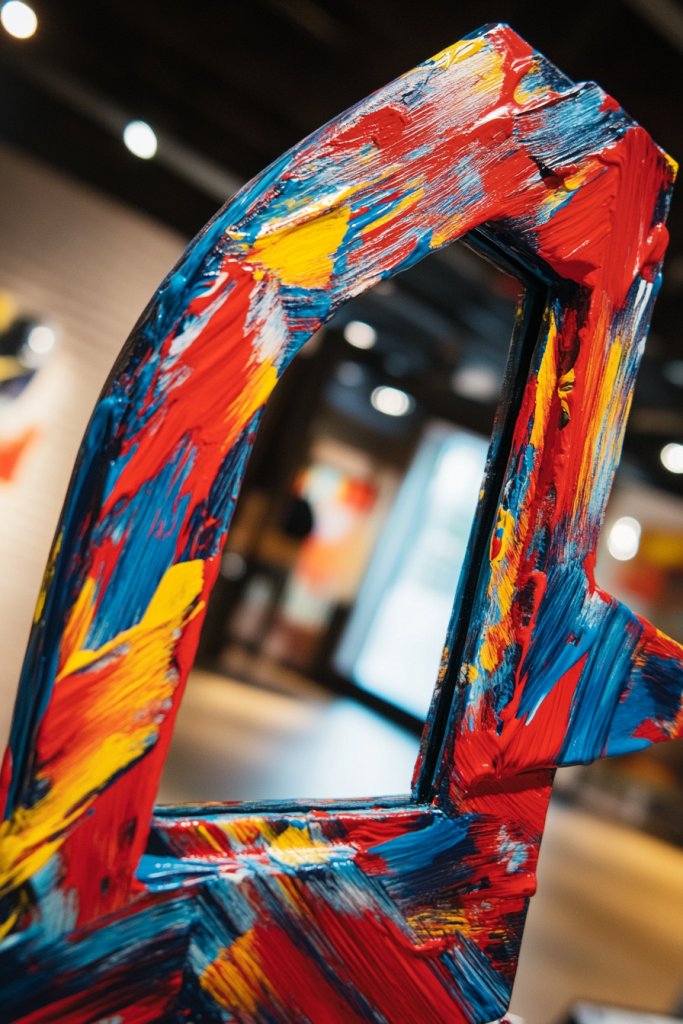
14. Abstract Art-Inspired Brushstrokes
Ever felt your space needs a little punch of personality but you’re unsure how to make it stand out? Abstract art-inspired brushstrokes on your mirror frame can turn a boring reflection into a bold statement piece. It’s a fun way to add color and energy without committing to a full painting. Plus, it’s a perfect project for anyone who loves a touch of creative chaos.
Recommended Products to replicate this idea
| # | Preview | Product | |
|---|---|---|---|
| 1 |

|
Apple Barrel, Vibrant Spectrum Collection Acrylic Craft Paint, PROMOABIII, 2 fl oz each, 16 assorted... | Check Latest Price |
| # | Preview | Product | |
|---|---|---|---|
| 1 |
|
Ultrue Oak Wood Effect Framed Wall Mirror, 24x36 Rectangle Mirror, 1/8" Anti-desilvering Tempered... | Check Latest Price |
Imagine swirling, vibrant streaks of blues, reds, and yellows that seem to dance across your mirror’s frame. The brushstrokes are irregular and spontaneous, mimicking modern art galleries. The textured paint catches the light differently depending on the angle, creating a dynamic visual effect. The imperfect lines evoke emotion and movement, making your mirror a true conversation starter.
You can adapt this idea by choosing a palette that matches your room’s vibe, from soothing pastels to fiery reds. For a more subdued look, opt for metallic or monochrome strokes. Smaller frames might benefit from delicate, fine lines, while larger ones can handle bold, sweeping gestures. Seasonal updates could use colors associated with holidays or moods, making your mirror versatile.
Start with a good quality acrylic or chalk paint, and gather different-sized brushes for variety. Tape off the mirror’s glass to avoid accidental splashes. Create abstract strokes by layering colors and blending edges while wet. Use a dry brush to add texture or streaks for more depth. Allow each layer to dry before adding new strokes to prevent muddy colors. Finish with a clear sealer for durability. No artistic degree required—just a willingness to play.
Add metallic accents or glitter to parts of your brushstrokes for extra sparkle. Incorporate metallic or neon paints to emphasize certain areas, making the artwork pop. You could also customize by adding your initials or a favorite quote within the abstract design, subtly blending it into the chaos. Experiment with different tools like sponges or palette knives for unique textures. The goal is to make it a true reflection of your personality.
Abstract brushstrokes turn your mirror into a modern art piece, elevating your decor instantly. It’s a project that encourages experimentation and personal expression. Once finished, you’ll feel a sense of pride knowing you created a one-of-a-kind piece tailored to your style, inspiring confidence to try more DIY projects. Remember, imperfect is perfect in abstract art, so have fun with it!
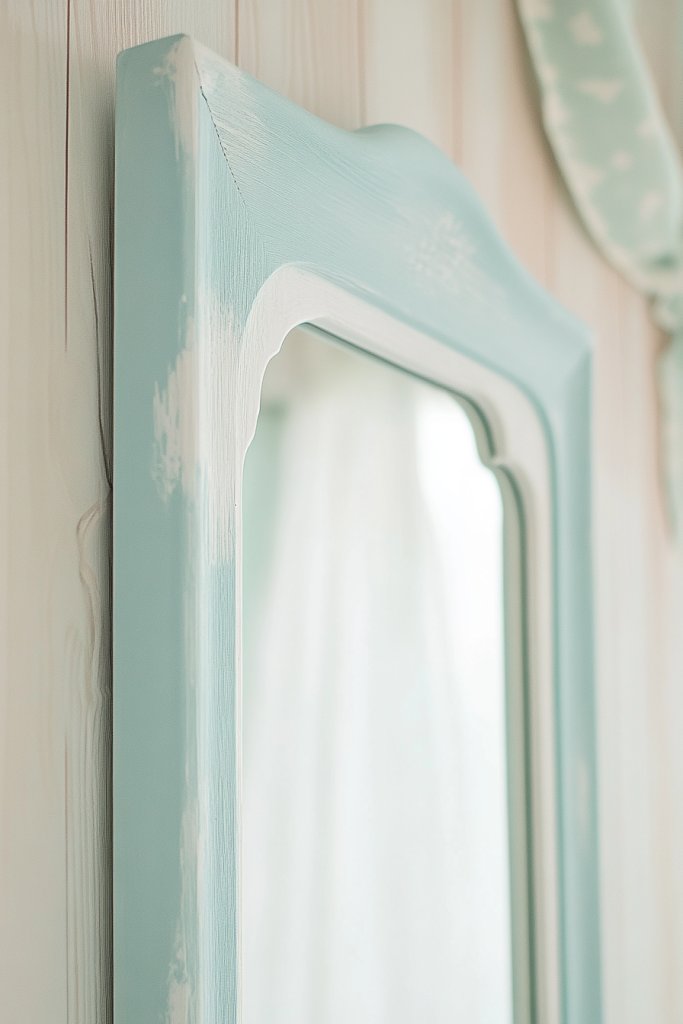
15. Coastal Inspired Light Blue and White
Craving that breezy, relaxing vibe in your home but unsure how to achieve it? Coastal-inspired decor, especially with light blue and white hues, instantly transports you to a seaside retreat. It’s a simple way to make your space feel airy, fresh, and calming without a major overhaul. Who doesn’t want their reflection to remind them of ocean waves?
Recommended Products to replicate this idea
| # | Preview | Product | |
|---|---|---|---|
| 1 |
|
Homiest Decorative Knitted Throw Blanket with Fringe Soft & Cozy Tassel Blanket for Couch Sofa Bed... | Check Latest Price |
| # | Preview | Product | |
|---|---|---|---|
| 1 |

|
TEIPAI Beach Mirror Wall Decor for Living Room, 3PCS Natural Mother of Pearl Coastal Wall Art... | Check Latest Price |
Visualize a frame painted in soft, sky blue with crisp white accents highlighting its edges. The paint is smooth and matte, mimicking the tranquil surface of shallow waters and sandy beaches. Subtle hints of white create a frothy, wave-like pattern that feels light and soothing. The overall effect is a reflection that feels like a gentle sea breeze, perfect for a bedroom or bathroom.
This look can be customized with different shades of blue—from icy tones to deeper navy—depending on your preference. For a more rustic coastal vibe, add distressed or weathered effects; for a modern twist, keep the finish sleek and glossy. Seasonal updates might include adding coral accents or beach-inspired charms. Larger mirrors can handle more detailed wave patterns, while smaller ones suit simple color blocking.
Begin with a high-quality primer suited for your surface, then apply a base coat of light blue. Use painter’s tape to create clean lines or wave patterns, or freehand for a more organic feel. Finish with white accents using a fine brush to add details like foam or cresting waves. Sand lightly after drying to add a worn, beachy texture if desired. Seal with a matte or satin clear coat to protect your work. Keep your workspace breezy and relaxed—this project should feel like a mini vacation.
Incorporate small seashell or starfish motifs by painting or attaching them to the frame for a 3D effect. Use a textured sponge to add sandy or grainy finishes to parts of the frame. For a more personalized touch, paint a favorite beach quote or your initials in a flowing script. Layering different shades of blue can create a gradient effect reminiscent of the ocean’s depth, adding visual interest.
This coastal-inspired mirror not only refreshes your space but also elevates your mood with its serene colors. It’s a reminder of carefree beach days and calming waters, making your home feel like a seaside escape. Plus, it’s a straightforward project that yields stunning results—perfect for boosting your confidence in DIY decor. Now, every time you see your reflection, you’ll be reminded to relax and breathe easy.
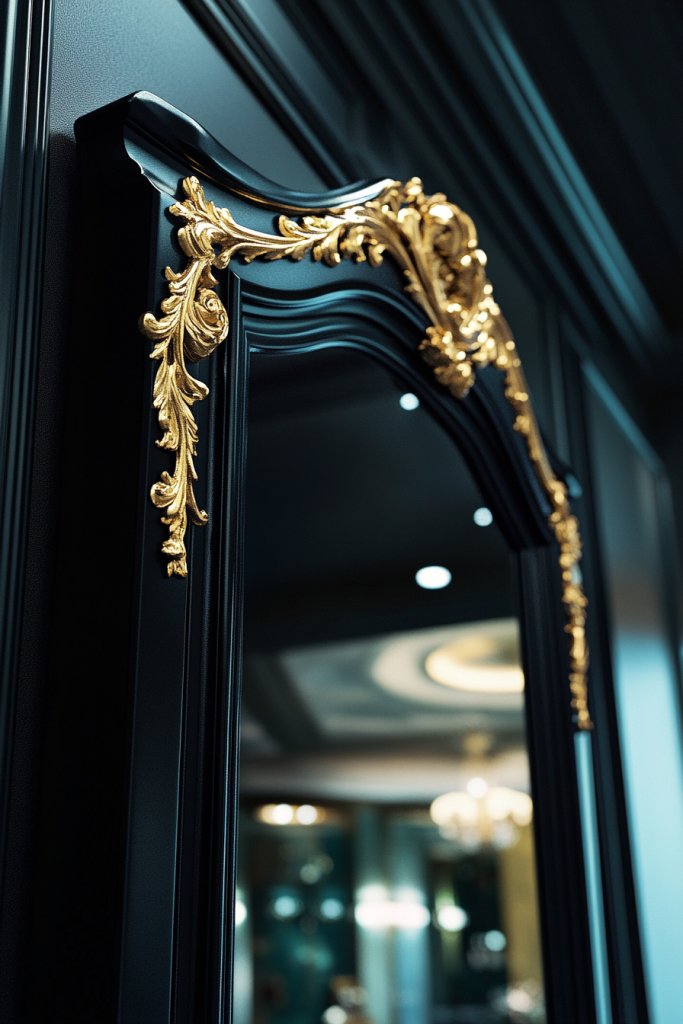
16. Glamorous Black and Gold Combination
Looking to add a touch of luxury and drama to your space? The black and gold combo is a classic way to make a statement without going over the top. It’s perfect for those who want their decor to feel sophisticated and bold at the same time. Plus, it’s surprisingly easy to achieve a high-end look with just a few paint tricks.
Recommended Products to replicate this idea
| # | Preview | Product | |
|---|---|---|---|
| 1 |

|
JiffDiff Vintage Metallic Peel and Stick Wallpaper Self Adhesive Industrial Metallic Concrete Wall... | Check Latest Price |
| # | Preview | Product | |
|---|---|---|---|
| 1 |

|
Gold Bedside Lamp Touch Control Table Lamp for Bedroom, 3-Way Dimmable Nightstand Lamp with White... | Check Latest Price |
Picture a sleek black frame with shimmering gold accents along the edges or in intricate patterns. The matte black provides a dramatic background, while the gold adds a pop of elegance. Subtle brushed strokes or metallic leafing create a textured, layered effect that catches the light beautifully. The contrast between dark and shiny makes the mirror a focal point in any room.
For a more modern feel, keep the black matte and add minimal gold details, like a thin inner border. If you prefer a vintage vibe, opt for distressed gold leafing or ornate patterns. This style adapts well to both large statement mirrors and smaller accents. You can also experiment with different finishes—glossy, matte, or satin—to match your existing decor.
Start by taping off the glass and the areas you want to keep black or gold. Use a high-quality primer suitable for your surface, then paint the entire frame black with a brush or spray paint. Once dry, apply a gold leaf adhesive or metallic paint in your chosen pattern. Use a fine brush for detailed work or a sponge for broader strokes. Seal everything with a clear protective topcoat to prevent tarnishing or chipping. Voila, instant glamour with minimal effort.
Add personalized touches by engraving initials or a meaningful date in gold. Incorporate geometric patterns or art deco motifs for an extra luxe vibe. You could also pair it with gold hardware or decorative accents elsewhere in the room. Playing with different textures—matte black with shiny gold—adds depth and sophistication, making your mirror truly one-of-a-kind.
This black and gold combo elevates any space, turning it into a chic retreat. It’s a timeless look that never goes out of style, so you’ll enjoy it for years. Plus, mastering this technique boosts your confidence in using metallics and bold contrasts. With such a striking result, you’ll feel inspired to tackle more high-impact DIY projects in the future.
17. Ombre Metallic Silver for Futuristic Style
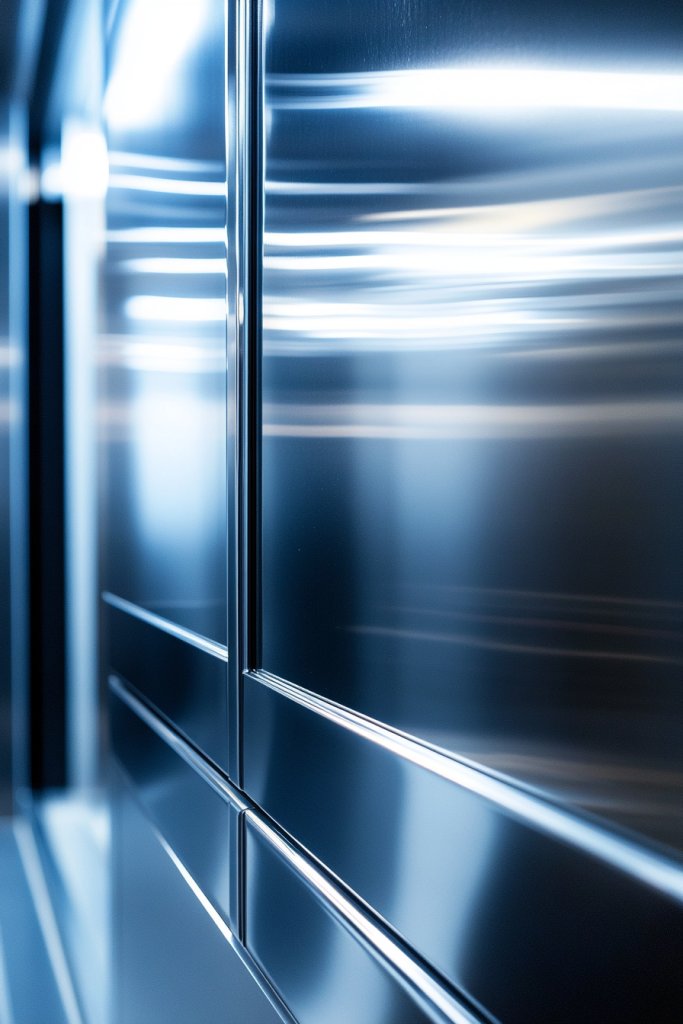
Ever want your decor to feel cutting-edge and ahead of the trend? An ombre metallic silver finish on your mirror frame can give your space a sleek, futuristic vibe. It’s perfect for modern interiors or anyone craving a high-tech aesthetic. Plus, it’s a surprisingly simple way to add shimmer and dimension without a full overhaul.
Recommended Products to replicate this idea
| # | Preview | Product | |
|---|---|---|---|
| 1 |

|
Rust-Oleum 267734 Spray Paint, Each, Silver Glitter | Check Latest Price |
| # | Preview | Product | |
|---|---|---|---|
| 1 |

|
KINNO Epoxy Gilding Adhesive Glue Set, 50ml Gold Leaf Glue,50ml Gilding Varnish and 100 Sheets 5cm... | Check Latest Price |
Imagine a gradient that transitions from a deep, reflective silver at the bottom to a bright, shimmering silver at the top. The metallic finish catches the light from every angle, creating a luminous glow. The smooth gradient makes the frame look like it’s glowing from within, adding a sci-fi edge to your decor. The subtle shimmer adds a layer of sophistication and intrigue.
You can customize this look by choosing different shades of silver or metallic hues, like platinum or pewter. For a more dramatic effect, experiment with reverse gradients or add subtle color accents in the ombre transition. Smaller frames can handle subtle transitions, while larger ones allow for more dramatic gradients. Seasonal tweaks could involve adding hints of icy blue or violet for winter or a warm gold for summer.
Begin with a primer designed for metallic paints to ensure adhesion. Use spray paints for a smooth, even finish, working in thin coats and blending the colors while wet. For a seamless ombre, spray from different angles and control the distance to avoid harsh lines. Finish with a clear, matte or gloss sealer to protect the metallic sheen. Patience is key—allow each layer to dry thoroughly before applying the next. This technique requires a steady hand but yields stunning results.
Add tiny holographic or iridescent flakes to enhance the futuristic effect. Customize further by etching sleek geometric patterns or lines in the silver. Incorporate LED backlighting or glow-in-the-dark elements for an even more high-tech look. Personal flair can also come from combining this with minimalist decor, keeping the focus on the shimmering, gradient frame.
This metallic ombre transforms your mirror into a statement piece that screams modern elegance. It’s a fun project that pushes your skills into new territory, boosting confidence in working with metallic and gradient techniques. Once completed, you’ll love how this futuristic touch elevates your entire space, making you feel ahead of the curve and inspired for more creative upgrades.
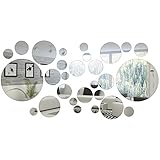
18. Whimsical Dots and Circles Pattern
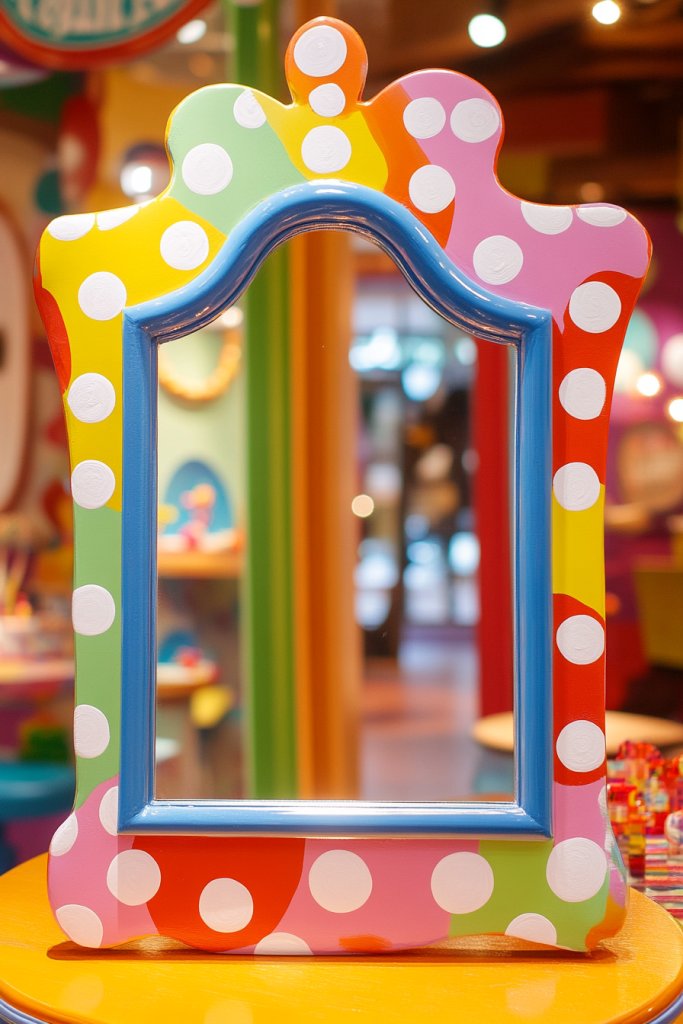
Feeling like your decor could use a playful, quirky upgrade? Dots and circles are a fun way to inject personality into your space without committing to a permanent design. They work especially well in kids’ rooms, nurseries, or anyone who loves a touch of whimsy. It’s a simple pattern that can instantly make your mirror feel more lively and cheerful.
Recommended Products to replicate this idea
| # | Preview | Product | |
|---|---|---|---|
| 1 |

|
Colorful Polka Dot Wall Decals Watercolor Dots Wall Sticker for Kids Baby Girls Teens and Nursery... | Check Latest Price |
| # | Preview | Product | |
|---|---|---|---|
| 1 |
|
32 Pieces Removable Acrylic Mirror Setting Wall Sticker Decal for Home Living Room Bedroom Decor... | Check Latest Price |
Picture a frame decorated with bright, colorful dots of varying sizes scattered playfully across the surface. The circles might be painted in pastel shades or bold primary colors, depending on your style. The pattern creates a lively rhythm, almost like a playful polka-dot fabric or a confetti explosion. When light hits the textured paint, the dots seem to pop and shimmer, adding depth and fun.
This pattern can be customized with different color schemes or sizes, from tiny subtle dots to large, statement-making circles. For a more sophisticated look, stick to monochrome or metallic palettes. You can also create concentric rings or overlapping circles for extra visual interest. Seasonal variations might include holiday colors or themed motifs, making it adaptable all year round.
Start with a good primer and base coat in your background color. Use stencils or freehand with small brushes or sponges to create your dots. For uniform dots, a round foam applicator or the end of a paintbrush works well. Vary the sizes and spacing for a more organic feel. Finish with a clear coat to seal and protect your pattern. This project is forgiving and fun—no perfect lines required.
Add metallic or glitter accents to selected dots for extra sparkle. Incorporate your favorite colors or themes, like stars or hearts, within the pattern. You can also paint a border of dots around the edge for framing the design. Or, combine this pattern with other motifs like stripes or chevrons for a customized look.
Whimsical dots and circles make your mirror a joyful focal point and showcase your playful side. It’s a simple project that can boost your confidence in painting and pattern design. Seeing your creative vision come to life will inspire you to experiment more and personalize your decor with fun, unique touches.
19. Textured Crackle Finish for Vintage Charm
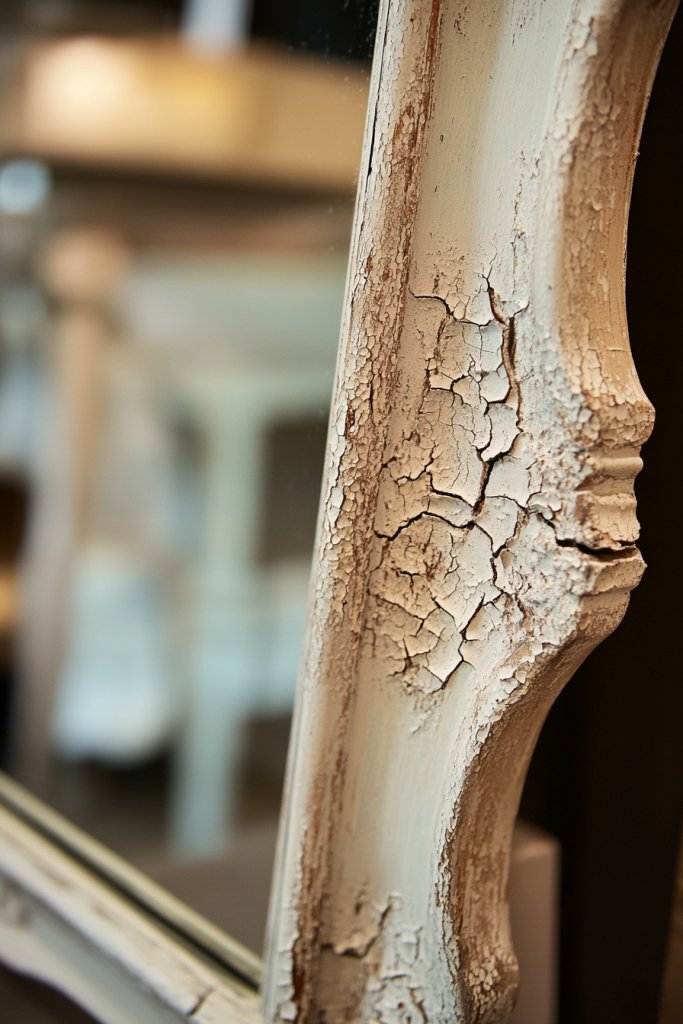
Want that charming vintage look but don’t want to invest in antique furniture? A crackle finish on your mirror frame can give it an aged, weathered appearance that oozes character. It adds visual depth and texture without the need for intricate carving or ornate details. Plus, it’s a fun way to add a little history to your decor.
Recommended Products to replicate this idea
| # | Preview | Product | |
|---|---|---|---|
| 1 |

|
FolkArt Home Decor Chalk Furniture & Craft Acrylic Paint in Assorted Colors, 8 ounce, Crackle | Check Latest Price |
| # | Preview | Product | |
|---|---|---|---|
| 1 |

|
TRAHOME 24"x36" Vintage Gold Baroque Wall Mirror, Ornate Antique Style Decorative Mirror for... | Check Latest Price |
Imagine a frame painted in a soft, muted color like cream or pastel blue, with fine cracks spreading across its surface like a web of stories. The crackle pattern reveals glimpses of a darker base coat underneath, hinting at layers of history. The textured surface creates shadows and highlights, giving the frame a tactile, almost sculptural quality. It looks like it’s been through decades of weather and love.
Choose colors that suit your vintage or shabby chic style—think distressed white, muted greens, or soft pinks. For a more dramatic effect, apply a dark base coat and a contrasting crackle topcoat. This technique works well on larger frames where cracks can be more prominent. Seasonal updates could involve adding a touch of gold or silver leafing to enhance the aged charm.
Apply a primer suitable for your surface, then paint your base color and let it dry. Use a crackle medium following the manufacturer’s instructions, then brush on your top coat in a contrasting color. The cracks will naturally appear as the top layer dries, so work quickly and evenly. Sand lightly for a more distressed look or leave it as is for maximum texture. Finish with a protective sealant to preserve the aged appearance.
Enhance the vintage vibe by adding gilded accents or metallic rubs along the cracks. Use stencils or freehand designs to add floral or scroll motifs that complement the aged look. You could also attach decorative hardware or beads that mimic antique embellishments. Regular dusting and gentle cleaning will keep the textured surface looking authentic.
A crackle finish transforms your mirror into a vintage treasure, adding instant character and history. It’s a rewarding project that proves you don’t need to be a professional to achieve professional-looking results. Once finished, you’ll feel inspired to explore other aging techniques and create a cohesive vintage-inspired decor style. Your space will feel warmer, richer, and full of stories.
20. Personalized Monogram or Quote Accent
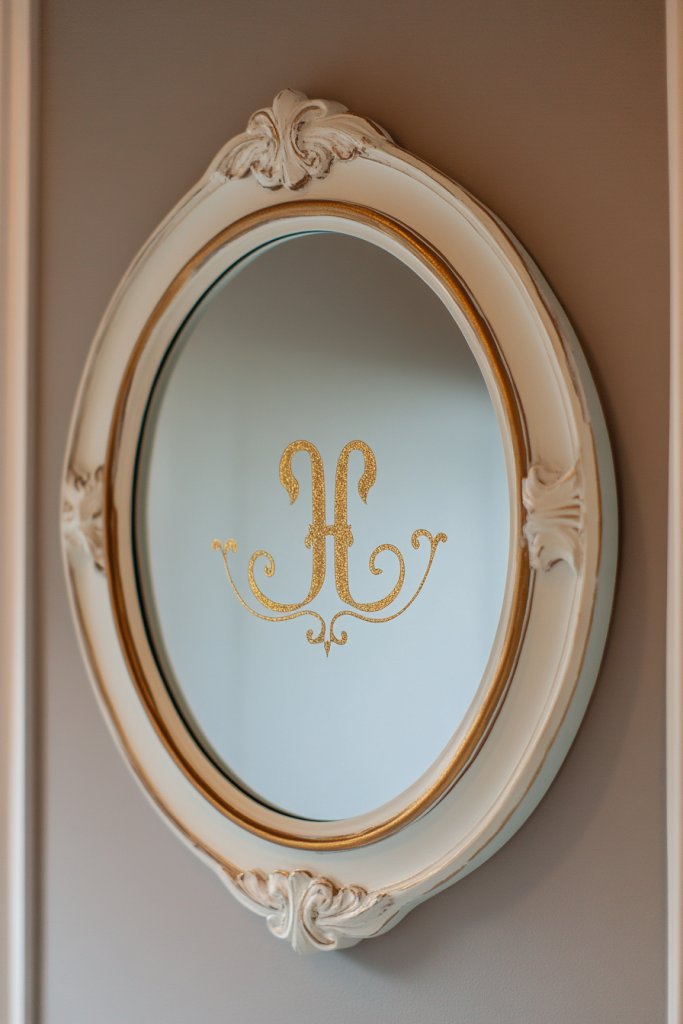
Looking for a way to make your mirror truly one-of-a-kind? Adding a monogram or an inspiring quote can elevate your decor instantly. It’s a personal touch that reflects your style or values, making your space feel more intimate. Plus, it’s a simple DIY that can have a big visual impact.
Recommended Products to replicate this idea
| # | Preview | Product | |
|---|---|---|---|
| 1 |

|
Custom Monogram Vinyl Decal - Initial Bumper Sticker, for Tumblers, Laptops, Car Windows -Circle... | Check Latest Price |
| # | Preview | Product | |
|---|---|---|---|
| 1 |

|
Zonon 5 Sheets Vinyl Wall Quotes Stickers Inspirational Quotes Decals Peel and Stick Motivational... | Check Latest Price |
Picture a sleek, elegant font spelling out your initials or a meaningful phrase across the bottom or corner of the frame. The lettering can be painted in gold, silver, or black for maximum contrast. Imagine the text standing out with subtle embossing or raised details, giving the mirror a layered, textured look. This personalized element adds a warm, inviting vibe to your space.
Choose fonts that match your decor style—modern sans-serif, vintage script, or playful handwritten styles. You can also incorporate decorative elements like flourishes, borders, or icons alongside your text. Seasonal updates could involve changing quotes or monograms to celebrate holidays or milestones. Keep the design simple for a minimalist look or go bold with large, ornate lettering.
Use stencils or vinyl decals for precise lettering, or hand-paint if you’re confident. Start with a light pencil sketch to position your design, then go over it with a fine brush or paint pen. For added dimension, consider embossing or applying a metallic foil. Seal the design with a clear coat to prevent smudging or peeling. Make sure your surface is clean and dry before starting for the best results.
Combine your monogram or quote with decorative motifs like floral accents, geometric shapes, or borders that match your room’s theme. You can also add metallic or glitter highlights to make the text pop. If you’re feeling especially creative, incorporate symbols or icons meaningful to you. This personal touch can be a daily reminder of your values or inspirations.
A personalized quote or monogram makes your mirror a special focal point, full of meaning. It’s a project that boosts your confidence in hand-painting and design skills. Once complete, your space will radiate your personality and style, inspiring you to keep customizing and creating a home that truly feels like you.
Conclusion
With this wide array of painted mirror frame ideas, you’re equipped to elevate your home decor in exciting ways. From vibrant hues to subtle accents, each idea encourages you to personalize your space with confidence. Don’t wait—start experimenting today and turn your mirrors into stunning works of art that brighten and define your home’s style!