I have been, or can be if you click on a link and make a purchase, compensated via a cash payment, gift, or something else of value for writing this post. As an Amazon Associate, I earn from qualifying purchases. Please read my full Affiliate Disclosure for more information.
Imagine a space where the kitchen and living room blend seamlessly into one open, inviting area—that’s the magic of an open floor plan! This design trend has skyrocketed in popularity because it fosters connection, maximizes natural light, and creates a spacious, airy atmosphere that makes any home feel more welcoming.
In this article, you’ll find a variety of creative ideas to help you achieve the perfect open layout. From clever layout tips to stylish decor accents, these ideas will inspire you to reimagine your living and kitchen spaces for a harmonious flow that suits your lifestyle and personality.
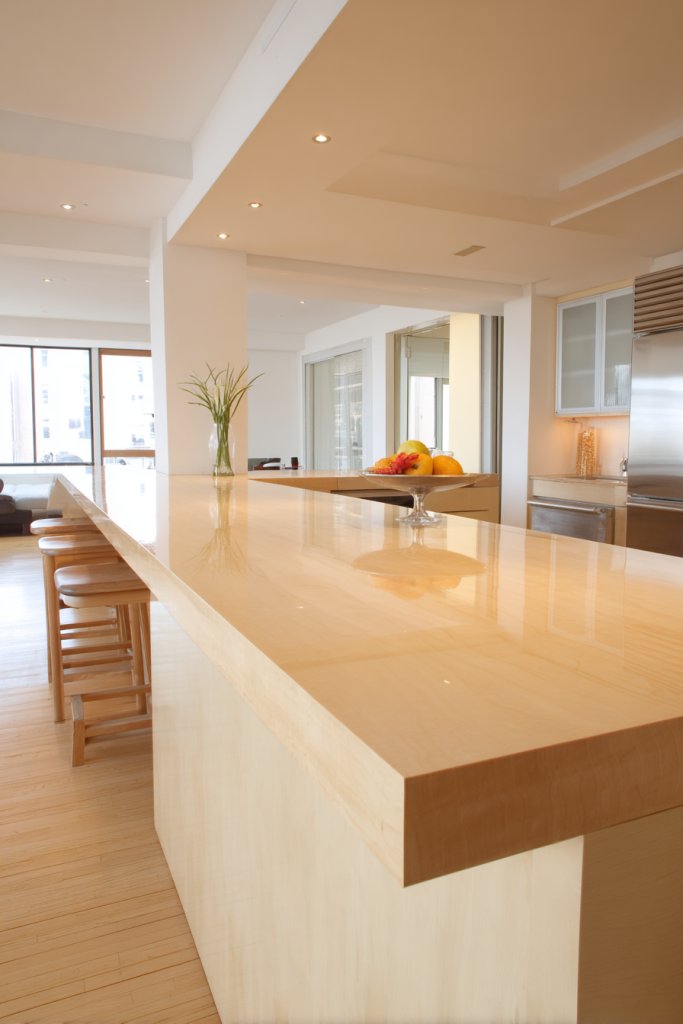
1. Incorporate a Central Island as a Natural Divider
Feeling like your kitchen and living room are fighting for attention? A central island acts as a gentle boundary that defines zones without walling them off. It allows for distinct functions—cooking, dining, socializing—while keeping the overall space open. Plus, it adds a focal point that can elevate your entire design.
Recommended Products to replicate this idea
| # | Preview | Product | |
|---|---|---|---|
| 1 |

|
Tribesigns Kitchen Island with Seating and Storage Shelves, 55.1-Inch Breakfast Counter Farmhouse... | Check Latest Price |
| # | Preview | Product | |
|---|---|---|---|
| 1 |

|
IRONCK Rolling Kitchen Island Table on Wheels with Drop Leaf, Storage Cabinet, Drawer, Spice/Towel... | Check Latest Price |
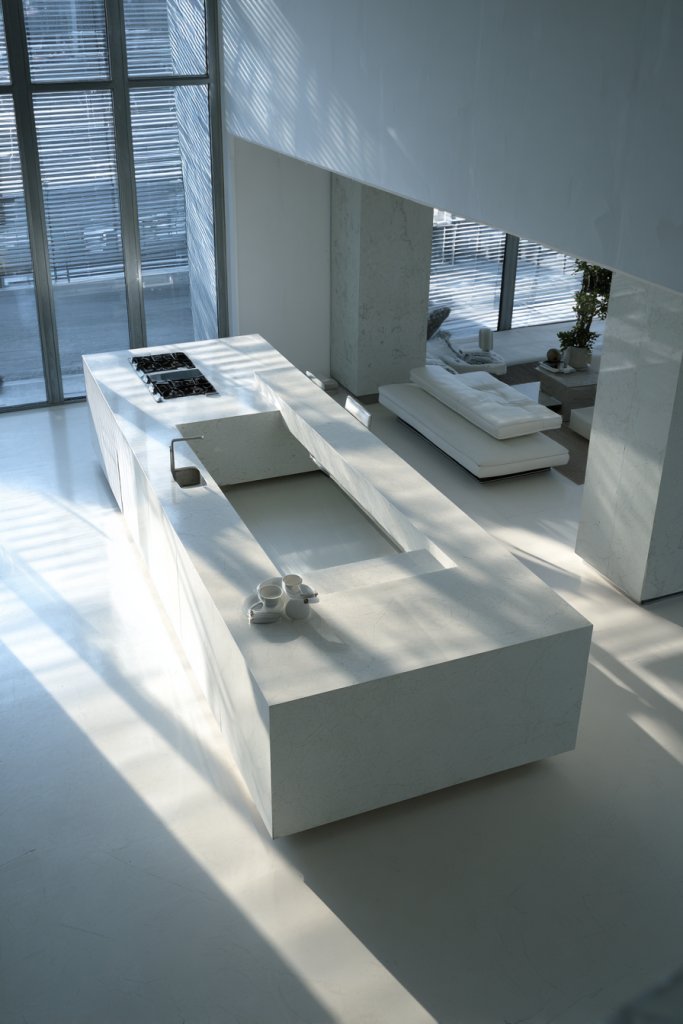
Picture a large island with a smooth marble top, surrounded by sleek barstools. The island’s size creates a natural pause in the space, drawing attention but not blocking views. Underneath, hidden storage keeps clutter out of sight. Pendant lighting hangs above, providing warm illumination that invites conversation. The island visually anchors the room, making it feel both functional and stylish.
Choose an island shape—rectangular, L-shaped, or curved—to suit your space and style. Use contrasting materials or colors to highlight it as a feature piece. For small spaces, a slim island with built-in storage can serve as a multi-purpose surface. In open-concept homes, a multi-level counter can create distinct zones while maintaining flow. Add seating options to encourage gatherings.
Begin by measuring your space and deciding the island’s size—aim for enough clearance around it for easy movement. Select durable, easy-to-clean surfaces like quartz or butcher block. Install plumbing and electrical outlets if needed for added functionality. Use sturdy cabinetry with soft-close drawers to maximize storage. Finish with a cohesive countertop that complements your overall aesthetic.
Personalize your island with decorative hardware or a pop of color on the cabinetry. Incorporate a built-in wine rack, spice drawers, or a small prep sink for extra utility. Surround it with statement barstools that match your decor style—think leather for luxe or metal for industrial chic. Add a few decorative bowls or trays for easy access to everyday essentials.
A well-designed island becomes the heart of your open space, making cooking and socializing seamless. It’s a smart investment that visually and practically bridges the kitchen and living areas. Once installed, it’s hard to imagine your space without it—an instant upgrade with long-term benefits. Ready to make your home both functional and fabulous?
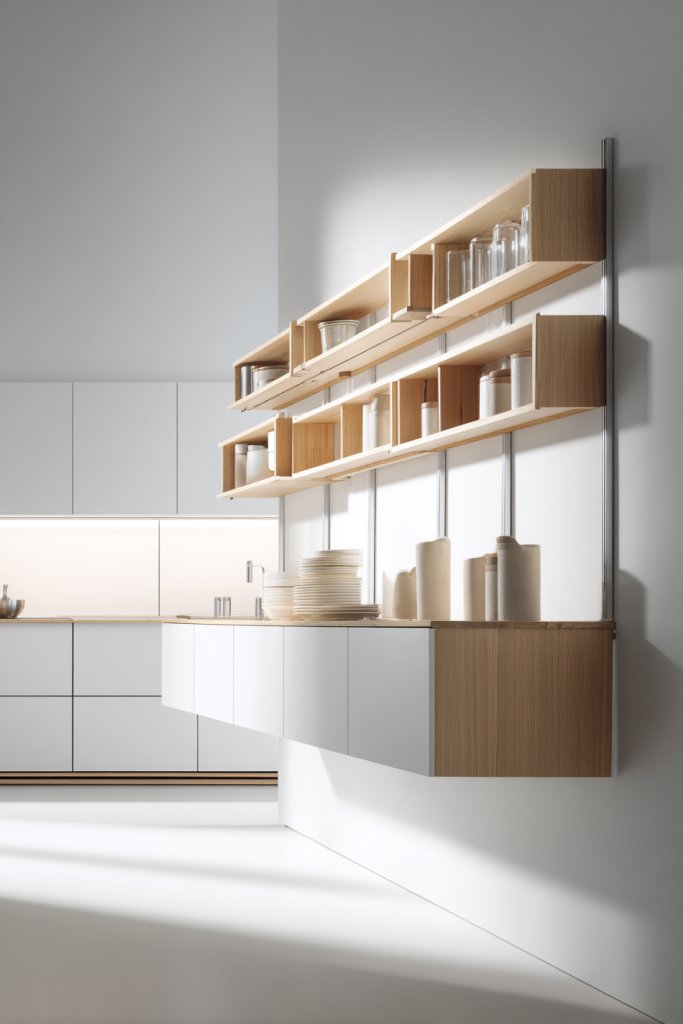
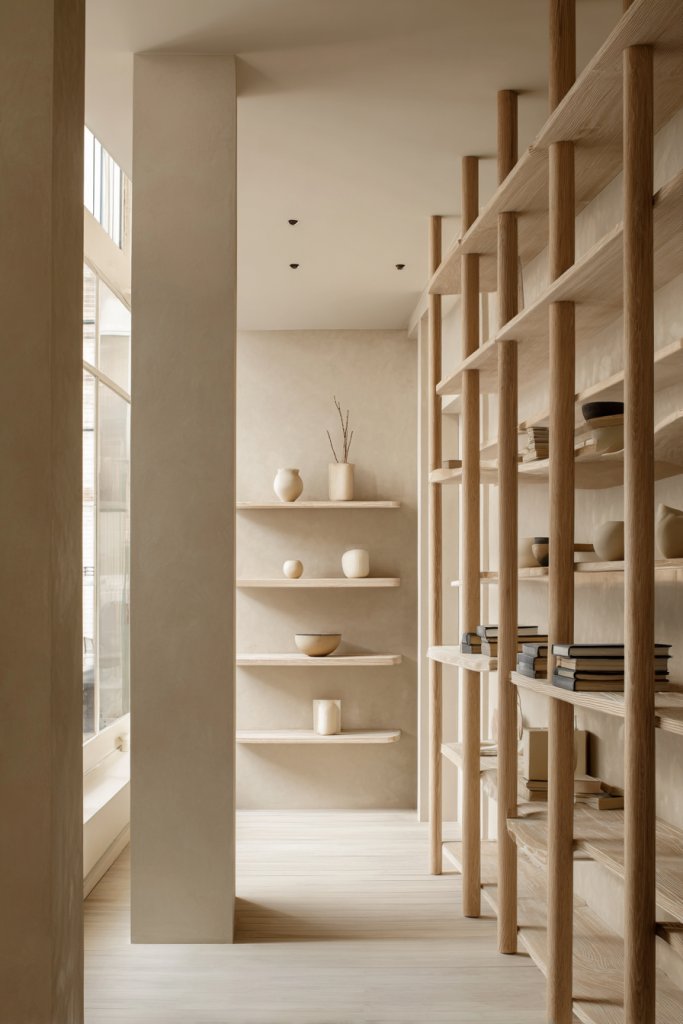
2. Opt for Open Shelving for Storage and Display
Clutter can easily take over an open floor plan, making spaces feel chaotic instead of welcoming. Open shelving offers a practical yet stylish solution to keep essentials within reach while showcasing your personality. It’s a way to reduce visual bulk and add an airy, light feel to your home.
Recommended Products to replicate this idea
| # | Preview | Product | |
|---|---|---|---|
| 1 |
|
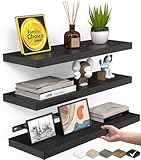
BAYKA Floating Shelves for Wall, Wall Mounted Rustic Wood Shelves for Bathroom, Bedroom, Living... | Check Latest Price |
| # | Preview | Product | |
|---|---|---|---|
| 1 |

|
Janyang Industrial Pipe Shelf Brackets for 8 10 12 14 inches Board, Iron L Pipe Floating Shelves,... | Check Latest Price |
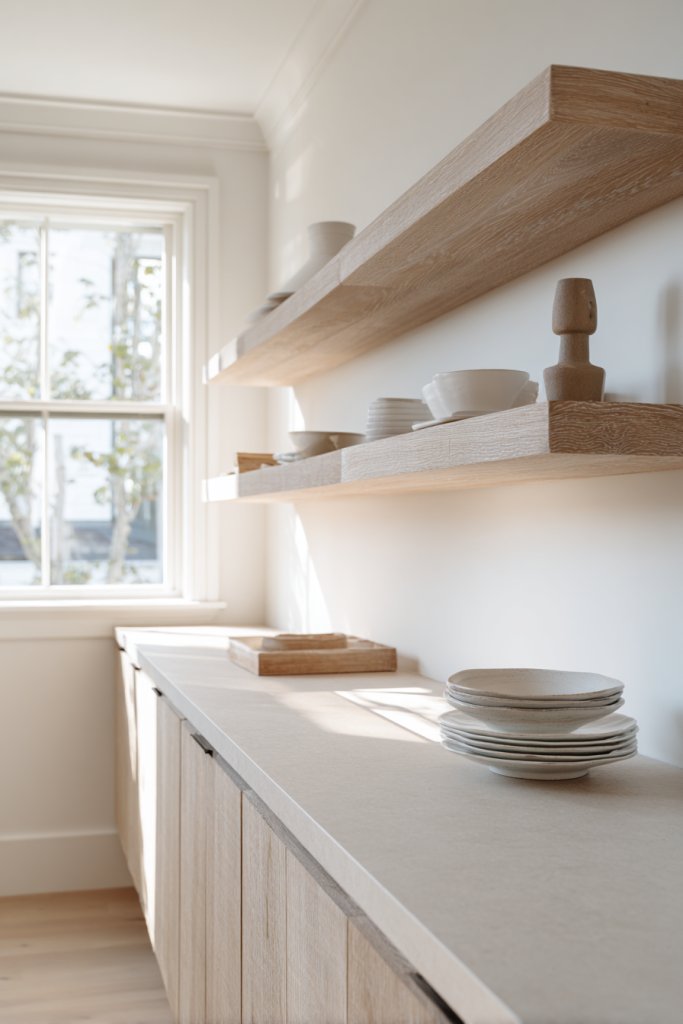
Imagine floating wooden shelves holding neatly stacked dishes, colorful mugs, and decorative bowls. The open design allows light to pass through, preventing the space from feeling crowded. Textured ceramics and curated accessories add layers of interest. Mounted at varying heights, the shelves create a dynamic rhythm that guides your eye across the room.
Choose sleek, minimalist shelves for a modern look or rustic wood for a cozy vibe. Incorporate a mix of open shelving and closed cabinets to balance display and storage. Seasonal swaps of decorative items keep the display fresh and engaging. Use brackets or hidden supports for a seamless floating effect that complements the overall aesthetic.
Start by planning the layout—decide which items you want on display and how much space each needs. Select sturdy, durable materials that can hold your favorite dishes or decorative objects. Mount the shelves securely into wall studs for safety. Use level tools to ensure perfect alignment and avoid a crooked display. Finish with matching hardware or paint to blend with your wall color.
Add decorative trays, baskets, or small plants (if you’re into greenery, but keep it minimal) to organize items beautifully. Rotate displayed items seasonally to keep the look fresh. Consider adding under-shelf lighting for a soft glow that highlights your collection. Personal touches like vintage finds or handcrafted pieces make the display uniquely yours.
Open shelving transforms storage from a necessity into a design feature, making your space appear larger and more inviting. It’s an easy way to showcase your personality and style. Once you master the art of styling, your home will radiate personality and flair. Ready to take your open plan to the next level?
3. Choose a Unified Color Palette for a Cohesive Atmosphere

Do you ever walk into a room and feel like something’s off but can’t quite put your finger on it? A mismatched color scheme can create visual chaos, especially in open layouts. A unified palette ties everything together, making your space look intentional and harmonious. It’s a simple trick that can elevate your entire home.
Recommended Products to replicate this idea
| # | Preview | Product | |
|---|---|---|---|
| 1 |

|
Magic Palette Color Mixing Guide 11.5 Inch | Check Latest Price |
| # | Preview | Product | |
|---|---|---|---|
| 1 |
|
BACKDROP | Premium Interior Paint | Large Adhesive Paint Swatch | MORNING RITUAL - Light Gray-Beige... | Check Latest Price |
Picture walls painted in soft neutral tones that blend seamlessly into furniture and decor. Accents like throw pillows, curtains, and rugs echo these hues, creating a layered, cohesive look. The subtle variations in tone add depth without overwhelming the senses. This approach makes every element feel connected, like pieces of a puzzle fitting perfectly.
Choose monochromatic schemes for sleek elegance or complementary colors for vibrant energy. Seasonal updates can involve swapping textiles or accessories in the same color family. Light shades like whites and creams brighten the space, making it feel larger, while darker hues add warmth and intimacy. Use accent colors sparingly to prevent visual clutter.
Start by selecting a base color that complements your space’s lighting and style. Use this hue for walls, large furniture, and major textiles. Incorporate secondary shades for smaller decor items and accents. Maintain consistency across both the living and kitchen areas to reinforce unity. Test paint samples in different lighting before committing. A cohesive palette simplifies decorating efforts and creates a calming environment.
Incorporate textures and patterns within your chosen palette to add visual interest. Metallic or matte finishes on hardware and fixtures can add subtle sophistication. Personalize with artwork or textiles that pick up on your colors without disrupting harmony. Keep accessories minimal to avoid clutter and maintain calm.
A unified color scheme makes decorating easier and your space more relaxing. It creates a sense of flow that guides visitors naturally through your home. When everything feels connected, your home exudes effortless style and calm. Ready to unify your space and elevate your decor?
4. Use Variations in Lighting to Define Zones

Ever notice how some rooms seem to have a personality all their own? Lighting is the secret ingredient that can make or break the vibe. In open floor plans, different lighting styles help define functional zones without walls. It’s like creating mood rings for each area, adding depth and character.
Recommended Products to replicate this idea
| # | Preview | Product | |
|---|---|---|---|
| 1 |

|
Unicozin LED Track Lighting Kit, 54.13'' Matt Nickel 8 Way Ceiling Spot Lighting, Flexibly Rotatable... | Check Latest Price |
| # | Preview | Product | |
|---|---|---|---|
| 1 |

|
SIBRILLE Floor Lamp with Linen Shade, Dimmable Tall Standing Lamp with Remote Control & 3 Color... | Check Latest Price |
Envision pendant lights hanging over the kitchen island, casting a warm glow on meal prep. Meanwhile, the living area relies on soft, ambient lamps that create a cozy retreat. Dimmers allow you to adjust brightness for different occasions, from bright mornings to romantic evenings. The layered lighting adds visual interest and guides your eye naturally across the space.
Mix direct and indirect lighting to suit your needs—think recessed lights for general illumination and accent lights for highlighting architectural features. Use wall sconces or candle sconces for a touch of elegance without bulky lamps. Seasonal adjustments—adding string lights or battery-operated candles—can change the ambiance easily. Incorporate smart lighting for remote control and mood setting.
Plan your lighting layout based on your zones and activities. Install dimmer switches for flexibility in mood creation. Select fixtures that complement your decor—sleek modern sconces or vintage-inspired pendant lights. Position task lighting where needed, like above countertops or reading areas. Use energy-efficient LED bulbs for longevity and savings. Consider adding motion sensors for convenience.
Use lighting to highlight textures or architectural details—think uplights for ceiling vaults or wall washers for textured walls. Add decorative elements like lanterns or hurricane lamps for mood lighting. Customize your lighting scheme to match your lifestyle—bright for active mornings, subdued for relaxing evenings. Play with color-changing bulbs for even more versatility.
Layered lighting transforms your home into a versatile, inviting space. It’s an easy upgrade that makes every moment more special. When your home feels warm and welcoming at any hour, you’ll love spending time there. Ready to switch on a new level of ambiance?
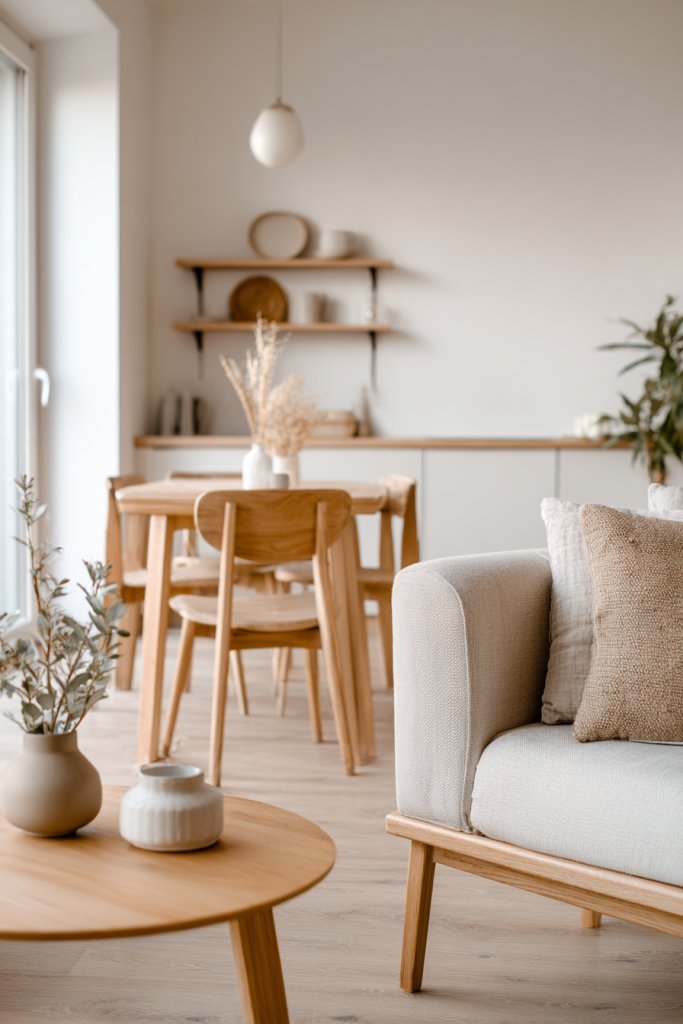
5. Incorporate Low-Profile Furniture for a Less Cluttered Feel
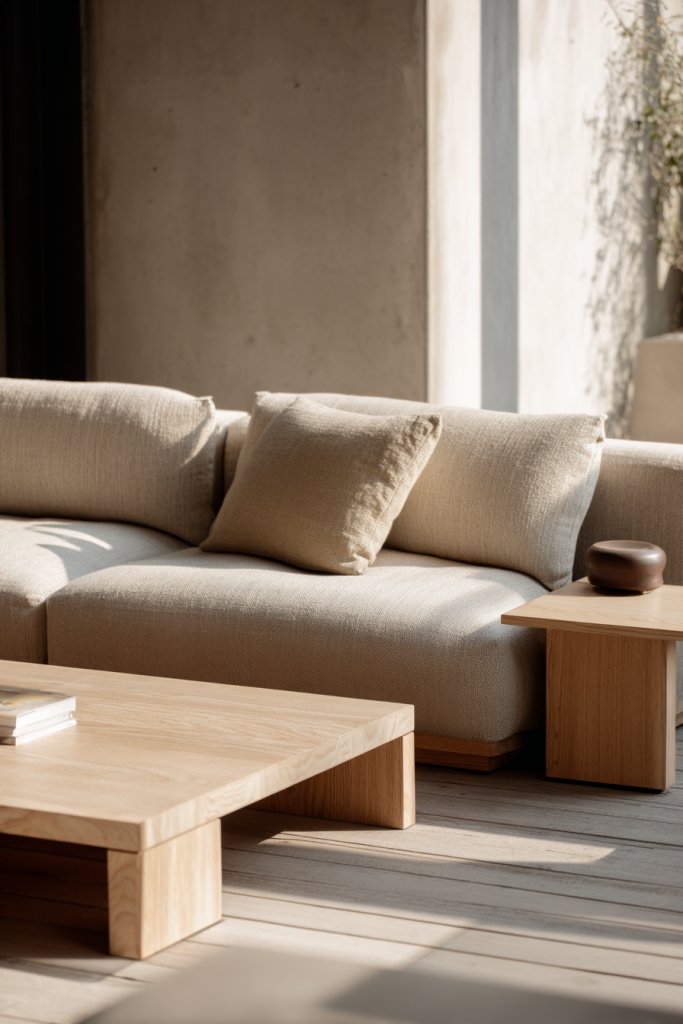
Cluttering your open space with bulky furniture can make it feel cramped and overwhelming. Low-profile pieces help keep sightlines open and make rooms feel larger than they are. They also promote a relaxed, uncluttered vibe that invites conversation and movement. Less visual weight equals more breathing room.
Recommended Products to replicate this idea
| # | Preview | Product | |
|---|---|---|---|
| 1 |

|
Christopher Knight Home Alma 63" Boucle Loveseat with Wood Legs, 2 Seater Sofa Couches for Living... | Check Latest Price |
| # | Preview | Product | |
|---|---|---|---|
| 1 |

|
VASAGLE MAEZO Collection - Round Coffee Table, 2-Tier Center Table with Storage, Tapered Legs,... | Check Latest Price |
Picture a sleek sectional sofa with slim arms and low cushions that don’t block views across the room. A minimalist dining table with thin legs creates a sense of lightness. The furniture’s low height makes ceilings seem taller and the overall space more expansive. Soft textiles like a plush rug or throw blanket add comfort without bulk.
Choose furniture with narrow profiles, rounded edges, or modular designs to adapt to your space. Compact, multi-functional pieces work well in smaller rooms, while larger open spaces can accommodate sectional sofas or low beds. Incorporate multi-use furniture like a low storage bench that doubles as seating. Opt for furniture in neutral tones to blend seamlessly into your aesthetic.
Start by selecting furniture that fits your space and style—measure carefully. Prioritize pieces with slim profiles and minimal ornamentation. Use lightweight materials or open bases to keep the room feeling airy. Arrange furniture to maximize flow and avoid blocking windows or pathways. Consider stacking or nesting options for versatility.
Layer with textured textiles—think soft throws, cushions, or low-profile area rugs—to add warmth. Incorporate furniture with sculptural forms or interesting shapes to create focal points. Keep decorative accessories minimal to prevent clutter. Personalize with color accents that pop against the low furniture’s subdued tones.
Low-profile furniture instantly lightens and modernizes your space, making it feel fresh and open. It’s a statement of intentional design that prioritizes comfort and style without sacrificing openness. Once you experience the spaciousness, you’ll wonder why you didn’t go low-profile sooner. Are you ready to embrace the minimal, modern look?
6. Install Partial Room Dividers with Openings or Shelves

Trying to define distinct areas in an open layout without losing the airy feel can be tricky. Partial dividers offer a smart solution—creating separation without making spaces feel boxed in. They add architectural interest and functionality, helping zones coexist peacefully. Plus, they prevent the space from looking cluttered or disconnected.
Recommended Products to replicate this idea
| # | Preview | Product | |
|---|---|---|---|
| 1 |

|
Tvilum Maze Modern Bookcase, Display Shelf and Decorative Room Divider with 7 Fixed Storage Shelves... | Check Latest Price |
| # | Preview | Product | |
|---|---|---|---|
| 1 |

|
Rantila Indoor Room Divider, Portable Office Divider, Room Divider Wall Screen 2 Large Panel,... | Check Latest Price |
Imagine a half-wall with open shelving that separates the kitchen from the living room. The shelves display decorative objects or books, adding personality. An open archway frames the transition, providing visual continuity. The divider’s height creates a clear boundary while still allowing light and airflow to pass through. It’s a subtle but effective way to organize your space.
Choose materials that complement your decor—wood, metal, or glass—to create contrast or harmony. Use open shelves for display or storage, or incorporate decorative screens with intricate cutouts. Vary the height of dividers based on your needs—higher for privacy, lower for openness. Seasonal or decorative accents on the divider can also change the look.
Plan the placement carefully, considering traffic flow and sightlines. Use sturdy supports and anchors to ensure stability. For open shelving, select durable materials that can handle daily use. Finish surfaces with paint or stain that matches your decor palette. Ensure enough space around for comfortable movement and access.
Decorate shelves with personal collections or decorative baskets to keep clutter hidden. Add a few wall-mounted art pieces or textiles to soften the divider’s look. Change accessories seasonally to keep the space feeling fresh. You can also integrate lighting within or above the divider for added ambiance.
Partial dividers balance openness with privacy, making your space feel thoughtfully curated. They’re versatile and can be customized to suit your style and needs. Once in place, they help your home feel organized and inviting. Ready to define your zones without sacrificing flow?
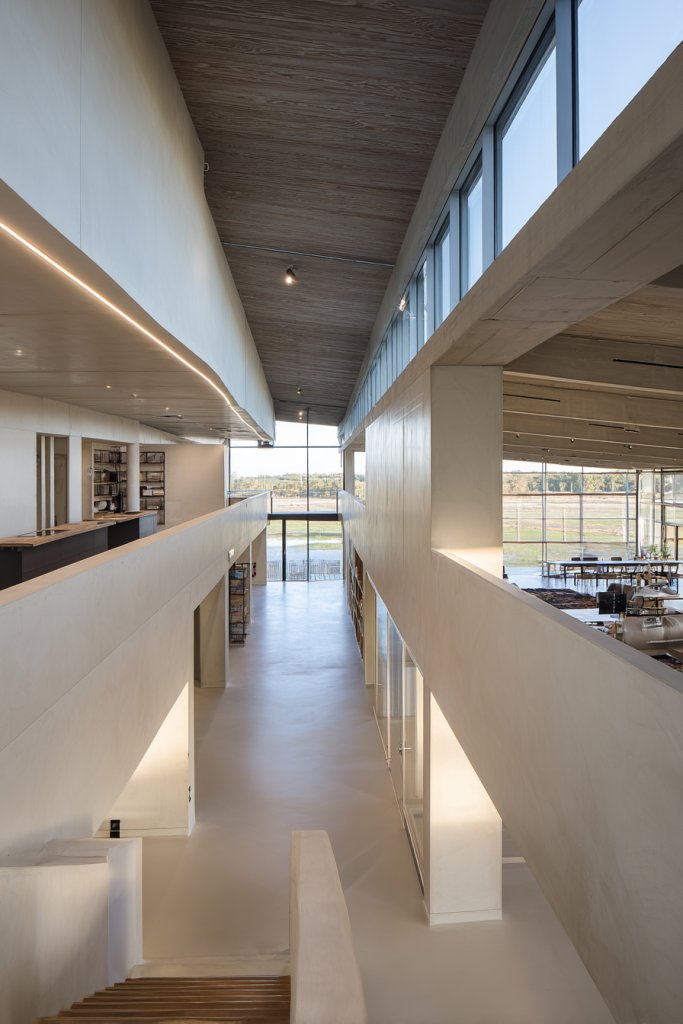
7. Maximize Natural Light with Large Windows and Glass Doors
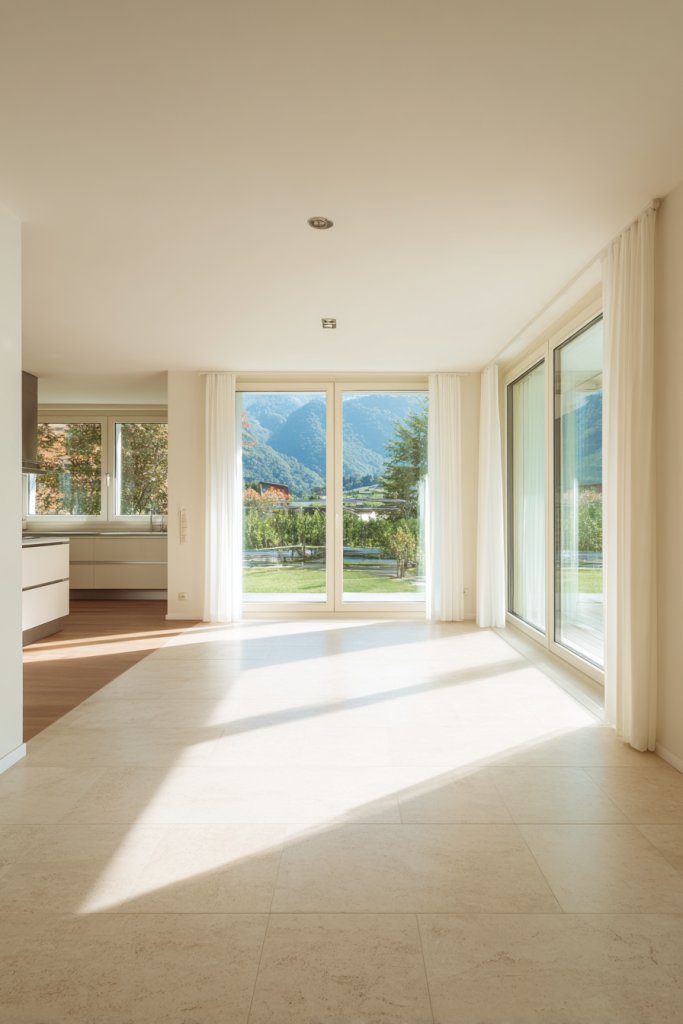
Dark, cramped spaces are the enemy of open floor plans. Natural light transforms a room, making it feel larger, more inviting, and full of life. Large windows and glass doors are the ultimate tools to flood your space with sunlight. Plus, they connect your interior with the outdoors, enhancing the sense of openness.
Recommended Products to replicate this idea
| # | Preview | Product | |
|---|---|---|---|
| 1 |
|
Sliding Door Lock Window Locks for Patio Sliding Glass Door Foot Locks for Front Door Security Bar... | Check Latest Price |
| # | Preview | Product | |
|---|---|---|---|
| 1 |

|
FLFK Fake Window Wall Sticker - Landscape Faux Window Wall Mural for Wall Decor, Stick and Peel Wall... | Check Latest Price |
Picture expansive floor-to-ceiling windows that frame a lush garden outside. The sunlight streams in, bouncing off neutral walls and reflective surfaces, creating a bright and airy atmosphere. Sliding glass doors open onto a patio, seamlessly extending your living space outdoors. Daylight highlights textures and colors, making everything feel fresh and vibrant.
Opt for minimal window treatments—think sheer curtains or blinds—that can be fully opened. Use glass doors with sleek frames to maximize transparency. For colder climates, install energy-efficient glazing to maintain comfort. During different seasons, adjust window coverings to control glare or heat. Incorporate transom windows or skylights for additional light.
Start by evaluating your space and planning to replace or enlarge existing windows. Choose high-quality, insulated glass for energy efficiency. Consider the placement for maximum sunlight exposure while maintaining privacy. Work with professionals for accurate measurements and installation. Use unobtrusive window frames and hardware to keep the aesthetic clean. Regularly clean glass surfaces to maintain clarity and brightness.
Add window seats or built-in benches with cushions to create cozy nooks. Use light-colored or reflective finishes on walls and ceilings to amplify sunlight. Incorporate exterior landscaping that enhances views and reduces glare. For privacy, consider frosted or textured glass that still allows light through without compromising privacy.
Maximizing natural light makes your home healthier, happier, and more energy-efficient. It’s a simple upgrade with a big impact on mood and aesthetics. When your rooms feel bright and connected to the outdoors, you’ll love spending time there. Ready to open up your space and invite the sunshine in?
8. Implement a Continuous Ceiling Design for Cohesion
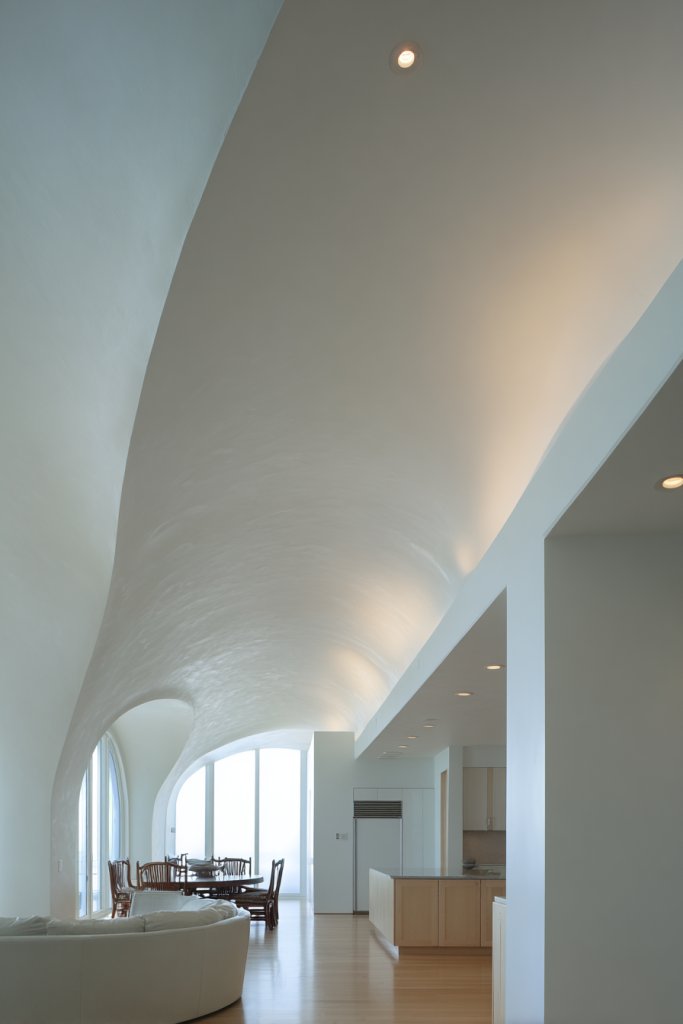
Ceilings are often overlooked, yet they play a vital role in the overall feel of an open space. A continuous ceiling design ties everything together visually, creating a sense of height and unity. It prevents the space from feeling chopped up or disjointed, especially when combined with open floor plans. It’s an under-the-radar way to elevate your home’s aesthetic.
Recommended Products to replicate this idea
| # | Preview | Product | |
|---|---|---|---|
| 1 |

|
Tongue and Groove Real Wood Planks for Walls and Ceilings | 3/8" x 3-3/4" | 5677 | Check Latest Price |
| # | Preview | Product | |
|---|---|---|---|
| 1 |

|
Feit Electric LED Downlight Retrofit Kit with Baffle Trim, 75W Equivalent, 5/6-Inch Dimmable... | Check Latest Price |
Imagine a smooth, painted ceiling that flows seamlessly across the living and kitchen zones. The same color and finish are used throughout, drawing the eye upward without interruption. Architectural details like beams or tray ceilings are kept consistent or omitted altogether for a sleek look. As natural light hits the ceiling, shadows and textures add subtle depth, emphasizing spaciousness.
Use the same paint color or finish across all ceiling areas for a unified effect. For a more dramatic look, incorporate subtle architectural details like crown molding or tray ceiling accents that run continuously. Avoid contrasting ceiling colors that may break the flow unless used intentionally for focal points. Incorporate lighting fixtures that blend into the ceiling for a clean, modern appearance.
Start by selecting a ceiling color that complements your walls and decor. Use consistent finish—matte or satin—for a uniform look. If adding architectural features, plan their placement carefully to maintain visual flow. Ensure the ceiling height is uniform or intentionally varied for effect. Hire experienced contractors to achieve smooth, flawless surfaces.
Add subtle textures like popcorn or stucco only if they complement your style, but keep finishes simple for a modern look. Incorporate hidden LED strips or spotlights to highlight architectural details subtly. Personalize with decorative ceiling medallions or minimal molding to add character without breaking cohesion. Keep fixtures low-profile or flush-mounted.
A continuous ceiling elevates your entire space into a cohesive, elegant environment. It’s a subtle upgrade that makes your home feel taller and more polished. When every element flows perfectly, the overall design looks intentional and refined. Ready to lift your home’s style with a seamless ceiling design?
9. Use Area Rugs to Define and Connect Different Zones

Open floor plans can sometimes feel like a sea of flooring with no clear boundaries. Area rugs help anchor specific zones—like the living area or dining space—without walls or dividers. They add warmth, texture, and visual interest, making each zone feel intentional and cozy. Plus, they help reduce noise and echo.
Recommended Products to replicate this idea
| # | Preview | Product | |
|---|---|---|---|
| 1 |

|
Soalmost Washable Area Rug 8x10, Large Soft Rugs for Living Room Vintage Beige Carpet 8x10 Area Rugs... | Check Latest Price |
| # | Preview | Product | |
|---|---|---|---|
| 1 |

|
Srugn Washable Rugs 8x10 Area Rugs for Living Room,Ultra Soft Faux Wool Retro Rugs for... | Check Latest Price |
Picture a plush, neutral-toned rug under a sectional sofa, defining the seating area. A woven, patterned rug under the dining table adds a pop of personality. The rugs’ colors and patterns harmonize with your decor, creating visual flow. Their placement guides the eye and enhances the sense of an organized, welcoming environment.
Choose rugs that complement your overall color palette—soft neutrals for a calming vibe, bold patterns for a lively look. Layering rugs can also add depth and personality, especially in larger spaces. Use different textures—knitted, shaggy, flatwoven—to create contrast and tactile interest. Seasonal options include lighter rugs in summer and plush, warmer ones in winter.
Start by measuring your zones carefully to select appropriately sized rugs. Consider how the rug will work with furniture placement—aim for at least the front legs of sofas and chairs to rest on the rug. Use non-slip pads underneath to prevent movement. Coordinate colors and textures to maintain harmony across zones. Clean and maintain your rugs regularly to keep the space fresh.
Add decorative borders or fringes to personalize your rugs. Incorporate accents like cushions or throws that match or contrast with the rug for a layered look. Switch out rugs seasonally to refresh the space and reflect your changing style. Consider custom rugs with personal patterns or monograms for a unique touch.
Using area rugs effectively creates a warm, inviting atmosphere that feels thoughtfully designed. It’s an easy way to add personality and define your space’s function. When well-chosen, rugs can be the centerpiece that ties everything together beautifully. Ready to anchor your open layout with style and comfort?
10. Incorporate Built-In Storage Solutions for a Clean Look
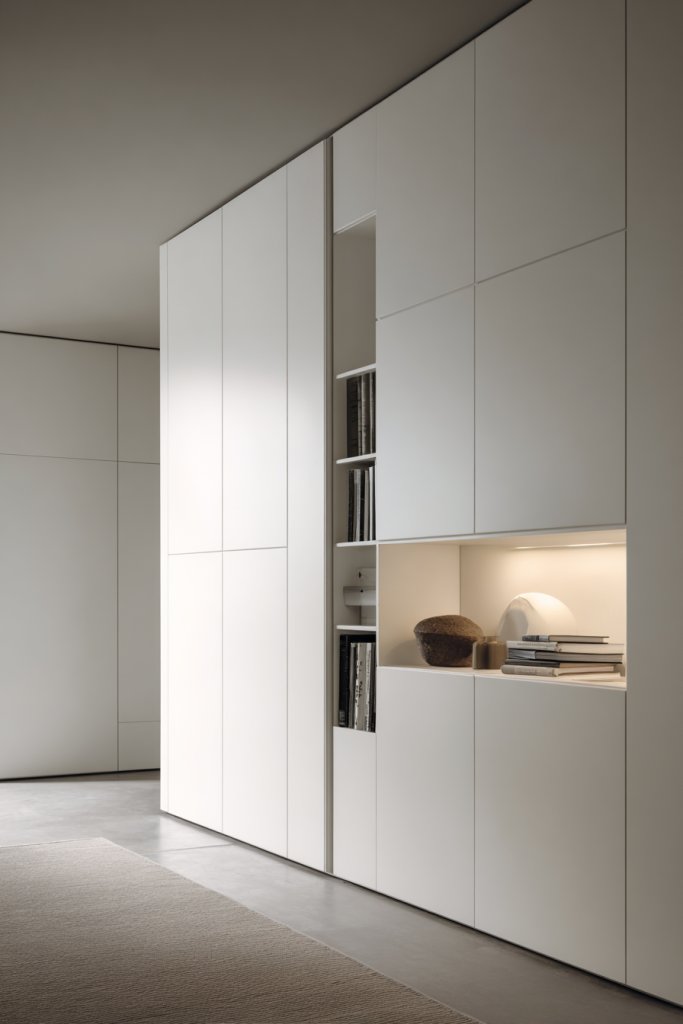
Clutter is the enemy of an open, airy space. Built-in storage helps keep your home organized and looking sleek without sacrificing style. It blends seamlessly into your architecture, reducing visual noise and making your entire space feel more spacious. Who doesn’t want a home that’s both functional and tidy?
Recommended Products to replicate this idea
| # | Preview | Product | |
|---|---|---|---|
| 1 |

|
Homleke Bathroom Wall Cabinet, Over Toilet Storage Cabinet with Barn Doors and Adjustable Shelves,... | Check Latest Price |
| # | Preview | Product | |
|---|---|---|---|
| 1 |

|
Aheaplus Closet System with 6 Drawers, 4.5ft Wood Closet Organizer System, Walk-in Closet or Small... | Check Latest Price |
Imagine custom cabinets that stretch from floor to ceiling, providing vast storage while blending into the wall. Niche shelving or hidden compartments keep everyday items out of sight. The smooth, flush surfaces create a sleek backdrop, letting your decor shine. Integrated storage turns clutter into a thing of the past, giving your home a polished, curated vibe.
Opt for minimalist cabinetry with handleless fronts for a modern look or ornate woodwork for a classic feel. Incorporate open shelves within the built-ins to display select items or keep things accessible. Use custom inserts or dividers to organize smaller items efficiently. Storage units can be tailored to your needs—media centers, wine racks, or hidden laundry hampers.
Work with a carpenter or designer to plan your storage needs thoroughly. Measure your available wall space and consider future needs for flexibility. Choose durable, high-quality materials that match your decor, like wood, MDF, or laminate. Ensure proper installation with sturdy supports and secure mounting. Finish with paint or stain that complements your walls for a seamless look.
Add decorative elements like moulding or trim to elevate the built-ins. Incorporate lighting within or beneath shelves to highlight display areas. Use decorative hardware or paint accents to give a personalized touch. Keep frequently used items accessible and arrange your stored items aesthetically for a clutter-free appearance.
Built-in storage offers a clutter-free, sophisticated aesthetic that elevates your entire home. It’s a smart investment that maximizes space and minimizes mess. Once installed, you’ll love how organized and streamlined your living environment feels. Ready to transform your clutter into calm?
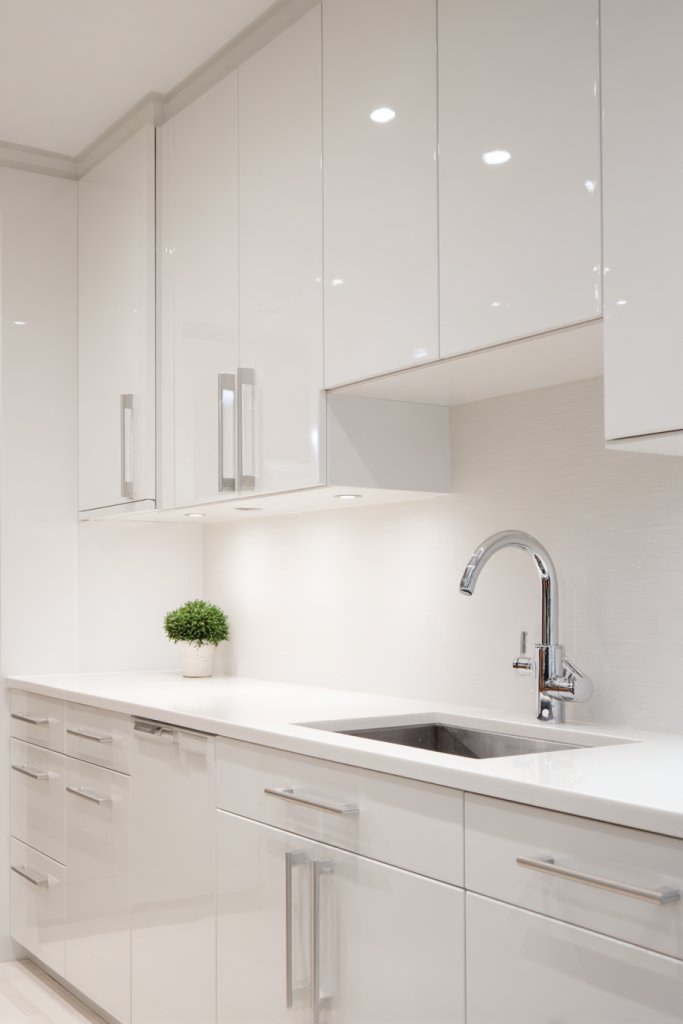
11. Choose Streamlined Cabinets and Countertops for a Modern Aesthetic
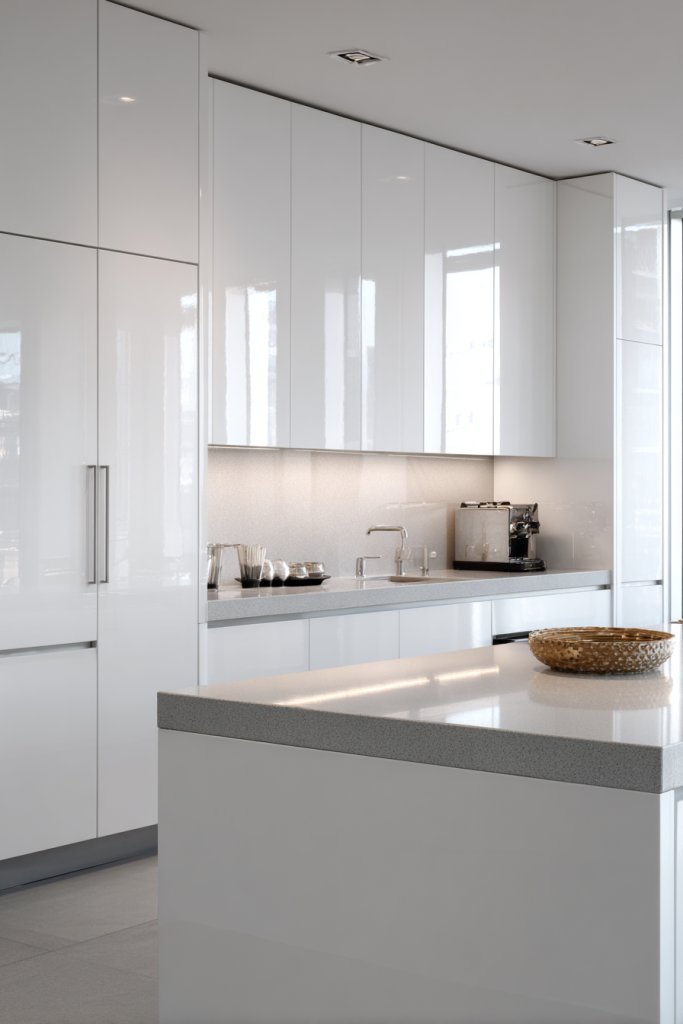
Overly ornate or bulky cabinetry can weigh down an open floor plan, making spaces feel cramped. Sleek, streamlined cabinets and countertops create a minimalist aesthetic that promotes openness and simplicity. This modern approach emphasizes clean lines and functional design, making your home look effortlessly chic.
Recommended Products to replicate this idea
| # | Preview | Product | |
|---|---|---|---|
| 1 |

|
CUSTOM Glass Cabinet Door - 5 Glass Options, 4 Frame Styles, & 5 Frame Colors | Assembled &... | Check Latest Price |
| # | Preview | Product | |
|---|---|---|---|
| 1 |

|
3-in-1 Adjustable Suction Seam Setter for Countertop Joining, 90-270 Degree Adjustable Vacuum... | Check Latest Price |
Picture handleless cabinets with smooth, matte finishes in neutral tones. The countertops are sleek quartz or solid surface with subtle veining, adding just enough texture. The absence of hardware and ornamentation keeps the visual clutter at bay. The continuous flow from cabinetry to countertops creates a seamless, sophisticated look that feels calm and organized.
Opt for flat-panel or slab-front cabinets for ultra-modern appeal. Use monochromatic color schemes or subtle two-tone contrasts for visual interest. Incorporate integrated appliances for an even cleaner look. Material choices like concrete or glass can add unique textures while maintaining the streamlined aesthetic.
Choose high-quality, durable materials suited for your lifestyle—think scratch-resistant surfaces or easy-to-clean finishes. Work with professionals for precise measurements and installation. Ensure all hardware is concealed or integrated into the design. Consistency in color and finish across cabinets and countertops reinforces the modern, minimal look.
Add subtle accents like matte black handles or brushed metal fixtures if you prefer hardware. Incorporate built-in features such as pull-out shelves or soft-close drawers for added convenience. Keep your workspace clutter-free by integrating organizers and dividers. Personal touches like a pop of color on a few cabinet doors can add personality.
Sleek, modern cabinetry and countertops elevate your space and streamline your daily routines. They combine form and function in a way that’s both beautiful and practical. When your kitchen looks this good, cooking becomes a joy rather than a chore. Ready for a fresh, contemporary update?
12. Utilize Multi-Functional Furniture for Versatility
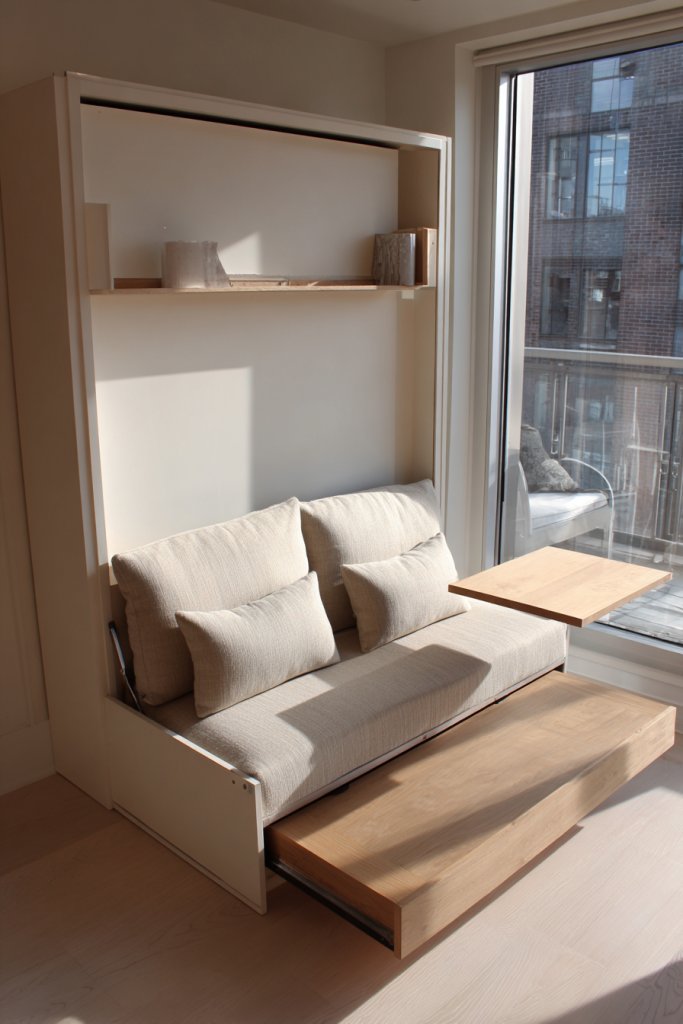
Living in a space that needs to do double duty? Multi-functional furniture turns one piece into many, saving space and adding flexibility. It’s perfect for open plans where every square inch counts. Plus, it keeps your home looking uncluttered while offering maximum utility.
Recommended Products to replicate this idea
| # | Preview | Product | |
|---|---|---|---|
| 1 |

|
CUBENTE 78.8" Convertible Sofa Bed,Corduroy Futon Couch with Storage Pocket,Folding Pull Out Futon... | Check Latest Price |
| # | Preview | Product | |
|---|---|---|---|
| 1 |

|
Sweetcrispy Lift Top Coffee Tables for Living Room, Small Rising Wooden Center Tables with Storage... | Check Latest Price |
Imagine a sleek sofa bed or a storage ottoman that doubles as a coffee table. A foldable dining table can expand for guests or tuck away when not needed. These pieces blend seamlessly into your decor, offering comfort and practicality without sacrificing style. The furniture’s clean lines and neutral tones keep the look modern and fresh.
Choose versatile pieces with hidden features—think beds with built-in drawers or desks that fold into the wall. In small spaces, modular furniture allows you to reconfigure as needed. Use neutral finishes that match your overall palette for a cohesive look. Add decorative textiles to personalize and soften multi-purpose pieces.
Start by identifying your most pressing space needs and selecting furniture that offers multiple functions. Measure carefully to ensure proper fit and clearance. Opt for quality materials that can withstand frequent use. If you’re handy, DIY options like fold-down desks or custom storage can be rewarding. Layer with accessories that hide or reveal features as needed.
Add decorative cushions or throws to make multi-functional furniture inviting. Incorporate personal touches, like a stylish tray on a storage ottoman or colorful covers on foldable chairs. Use coordinated textiles and colors to tie the pieces into your overall decor. Keep accessories minimal to preserve the streamlined look.
Multi-functional furniture makes your space adaptable and stylish, perfect for busy lifestyles. It’s a smart way to maximize every inch without clutter. Once you experience the versatility, you’ll wonder how you ever lived without it. Ready to make your home work smarter, not harder?
13. Apply Wall-Mounted Elements to Save Floor Space
Floor space is precious, especially in open layouts where clutter can quickly take over. Wall-mounted elements free up valuable floor area, making rooms feel larger and more organized. They also add a modern, streamlined look that’s both functional and stylish. Who knew that hanging things could make such a difference?
Recommended Products to replicate this idea
| # | Preview | Product | |
|---|---|---|---|
| 1 |
|
BAYKA Floating Shelves for Wall, Wall Mounted Rustic Wood Shelves for Bathroom, Bedroom, Living... | Check Latest Price |
| # | Preview | Product | |
|---|---|---|---|
| 1 |
|
Homleke Bathroom Wall Cabinet, Over Toilet Storage Cabinet with Barn Doors and Adjustable Shelves,... | Check Latest Price |
Imagine a wall-mounted TV that hangs flush with the wall, eliminating bulky stands. Floating shelves hold essentials or decorative items, creating visual interest without taking up floor space. Hooks and racks for coats, bags, or accessories keep clutter off surfaces. The result is a sleek, open environment that feels airy and uncluttered.
Choose minimal, unobtrusive hardware for a seamless look. Use adjustable wall mounts for TVs or artwork to customize viewing angles. Incorporate modular wall systems that can be reconfigured over time. Keep color schemes neutral or matching to enhance the sense of cohesion and space.
Plan your layout to maximize wall space without obstructing windows or doorways. Use studs and anchors to secure heavier items safely. Select slim-profile brackets or mounts to keep things sleek. Install at optimal heights for comfort and visibility. Regularly check and tighten fixtures to ensure safety.
Decorate with personal photos, artwork, or functional hooks that match your style. Consider adding LED strip lighting behind mounted items for a dramatic effect. Keep the overall look minimalist—avoid overcrowding walls. Change out mounted elements seasonally for a fresh feel.
Wall-mounted solutions make your space feel larger and more organized. They’re versatile and can be tailored to any style—from modern to rustic. Once you master this approach, your home will look sleek and thoughtfully designed. Ready to free up space and elevate your decor?
14. Create Visual Continuity with Similar Decor Styles
A jumbled mix of decor styles can make your open space feel chaotic and disconnected. Creating visual continuity ties everything together, making your home look intentional and harmonious. It’s about choosing a style and sticking with it—think of it as a visual language that speaks to your personality.
Recommended Products to replicate this idea
| # | Preview | Product | |
|---|---|---|---|
| 1 |

|
MIULEE Pack of 4 Couch Throw Pillow Covers 18x18 Inch Neutral Soft Decorative Chenille Pillow Covers... | Check Latest Price |
| # | Preview | Product | |
|---|---|---|---|
| 1 |

|
Neutral Botanical Prints Wall Art Decor Plant Minimalist Canvas Pictures Vintage Beige Wall Art... | Check Latest Price |
Imagine a space where furniture, textiles, and accessories all echo a Scandinavian minimalism theme—light woods, neutral tones, and simple lines. The consistent use of materials and colors creates a calming flow from room to room. Even small details like matching cushion covers or picture frames reinforce the cohesive look.
Choose a decor style that resonates with you—industrial, coastal, boho—and carry it throughout your space. Mix textures within the same style to keep things interesting, but avoid clashing patterns or colors. Seasonal updates can be as simple as swapping textiles or decorative accents that match your core theme. Consistency in style makes decorating easier and more fun.
Begin by selecting a unifying style and gathering matching or complementary items. Use mood boards or samples to visualize how pieces work together. Stick to a color palette to guide your choices. Incorporate furniture, textiles, and decorative items that follow the same design principles. This approach simplifies decisions and creates a polished, intentional look.
Add personal touches like vintage or handcrafted pieces that fit your style. Keep accessories minimal but meaningful—like a few well-chosen art pieces or textiles. Use consistent hardware and finishes for furniture and fixtures. Rotate seasonal decor that still aligns with your overall theme to keep the space fresh.
A cohesive decor style elevates your space into a unified, stylish home. It simplifies decorating and makes everything feel more put-together. When your home reflects a clear aesthetic, it boosts your confidence and makes hosting a breeze. Ready to create a space that feels as good as it looks?
15. Incorporate Open-Concept Kitchen Cabinets with Glass Fronts
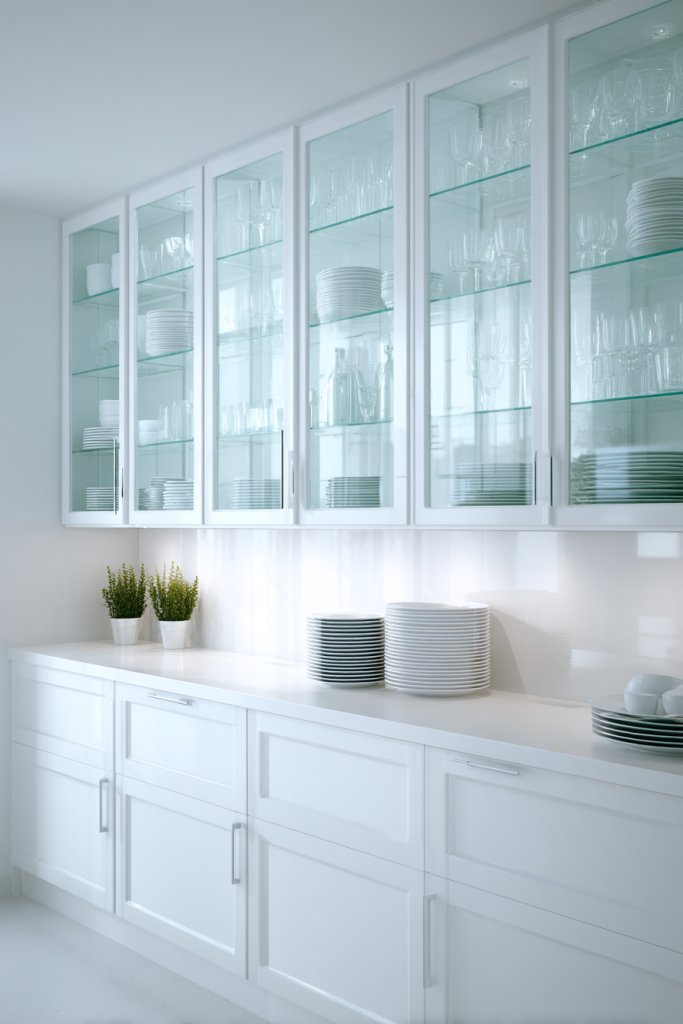
Closed cabinets can make your kitchen and adjoining space feel heavy and cluttered. Open-concept cabinets with glass fronts add a sense of airiness and showcase your dishware or decorative items. They create visual interest and help your home feel more spacious and curated. Who doesn’t want a kitchen that’s both functional and stylish?
Recommended Products to replicate this idea
| # | Preview | Product | |
|---|---|---|---|
| 1 |

|
Furnaza Kitchen Wall Cabinets 4 Doors - Laundry Wall Mounted Storage Cabinets with Acrylic Glass... | Check Latest Price |
| # | Preview | Product | |
|---|---|---|---|
| 1 |

|
JUSJUBR Black Display Shelf Lighting, 4 Pack x12 Inch Display Lights for Display Case, LED Display... | Check Latest Price |
Imagine sleek glass-front cabinets displaying neatly arranged dishes and glassware. The transparent doors reflect light and make the space look larger. Interior lighting inside the cabinets adds a warm glow, highlighting your collection. The open view simplifies access while giving the room an elegant, airy vibe.
Choose frosted or textured glass for a softer look or clear glass for maximum visibility. Mix open and closed cabinetry for a balanced aesthetic—use open shelves for frequently used items and closed cabinets for less attractive storage. Incorporate decorative interior elements like colored dishes or stylish storage jars. Keep the overall look consistent for cohesion.
Start by evaluating your storage needs and choosing cabinets with glass fronts. Work with a designer or contractor to ensure proper installation. Use lighting features to enhance display areas—LED strips or puck lights work well. Keep the interior organized with uniform dishware and accessories. Seal or treat glass surfaces for easy cleaning.
Display personal collections or heirlooms behind glass to add personality. Incorporate decorative trays or baskets inside cabinets to keep things tidy. Use matching hardware or minimalistic handles for a sleek look. Switch out displayed items seasonally to keep things fresh.
Glass-front cabinets elevate your kitchen’s style and make everyday items part of your decor. They turn storage into a feature, adding depth and interest. When styled thoughtfully, they showcase your personality and taste. Ready to open up your kitchen in style?
16. Use Light-Colored Walls to Enhance Brightness and Spaciousness
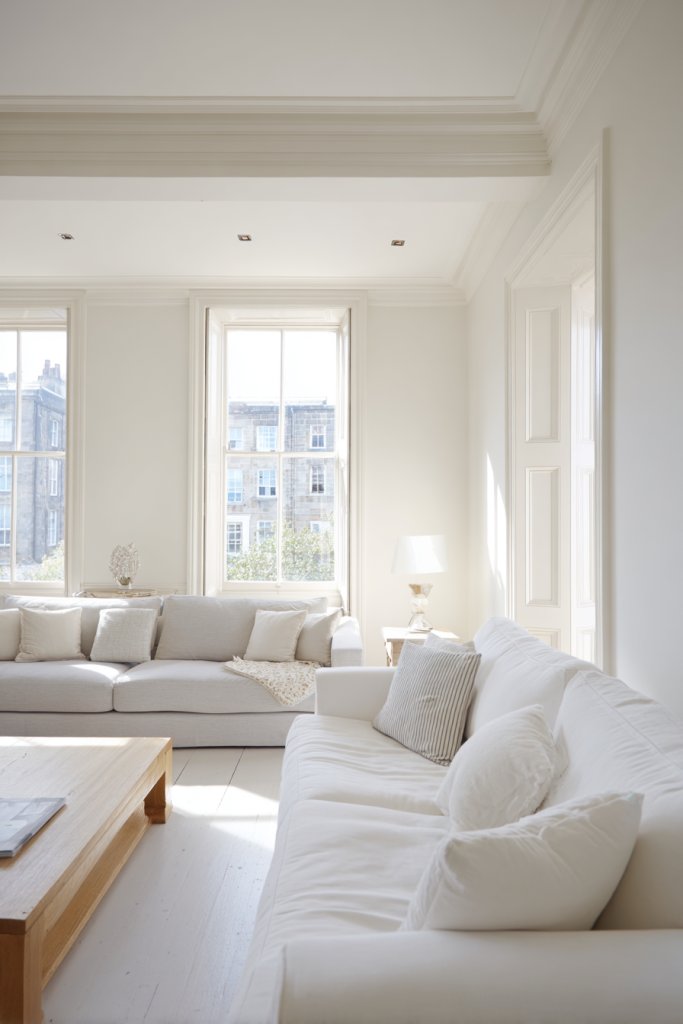
Dark walls can make even the largest rooms feel cramped and closed off. Light-colored walls reflect natural and artificial light, instantly making a space feel larger and more inviting. It’s a simple trick that transforms your entire home into a bright, airy haven.
Recommended Products to replicate this idea
| # | Preview | Product | |
|---|---|---|---|
| 1 |

|
ALL-IN-ONE Paint by Heirloom Traditions, Heathered Gray (Light Cool Gray), Quart - Durable cabinet... | Check Latest Price |
| # | Preview | Product | |
|---|---|---|---|
| 1 |

|
Micpolo 15.7" x 118" Solid Grey Peel and Stick Wallpaper - Matte Grey Contact Paper for Bedroom,... | Check Latest Price |
Imagine crisp white or soft neutral walls that bounce sunlight around the room. The light hues create a blank canvas, allowing your furniture and decor to stand out without competing for attention. Subtle textures or matte finishes add depth without darkening the space. The overall effect is a fresh, clean environment that feels expansive.
Choose warm neutrals like creams or beiges for a cozy vibe, or cool tones like pastels and soft blues for serenity. Seasonal accents—like darker textiles or colorful accessories—can add contrast without overwhelming. Use reflective surfaces, like mirrors or glossy finishes, to amplify the brightness. For small rooms, white walls are especially effective.
Select high-quality paint with good light reflectance and low VOCs for a healthier home. Prepare walls properly—clean, patch, sand—and use painter’s tape for crisp lines. Apply multiple thin coats for even coverage. Pair wall color with light-colored furniture and textiles to maximize the effect. Regular cleaning keeps the walls looking fresh.
Incorporate textured or patterned wallpaper as an accent wall to add visual interest. Use light-colored curtains or blinds that diffuse light softly. Personalize with artwork or photographs that pop against the neutral background. Keep clutter minimal to maintain the clean, bright aesthetic.
Light walls create a sense of openness and calm that enhances your home’s ambiance. They’re a timeless choice that ages well and adapts easily to changing decor. When your space feels bright and expansive, spending time there becomes a joy. Ready to brighten up your walls?
17. Integrate a Shared Statement Piece as a Focal Point
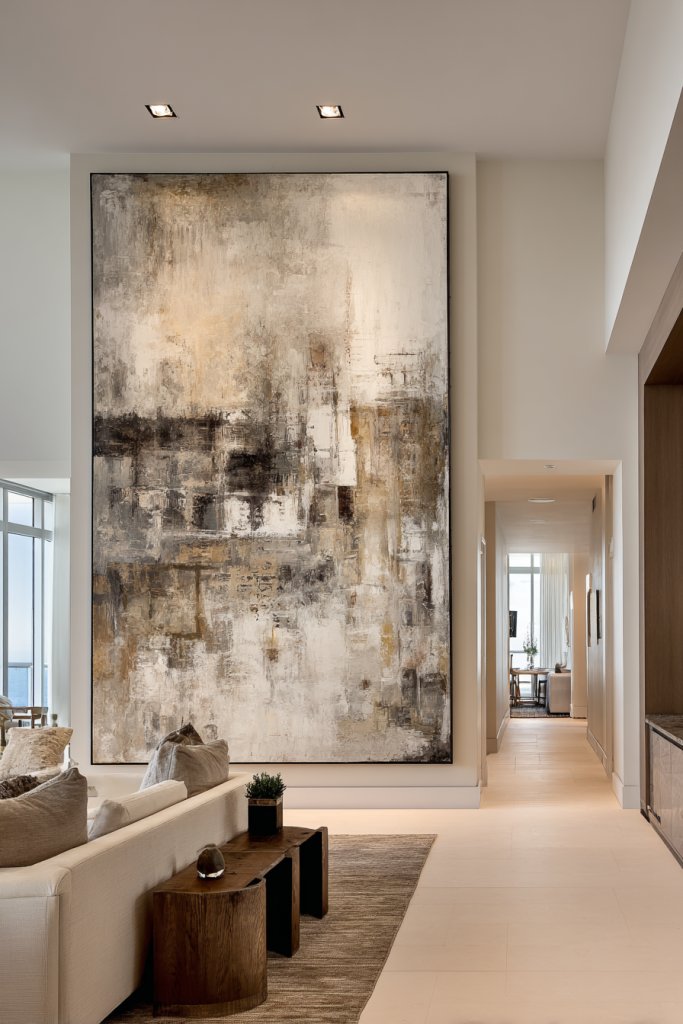
In an open floor plan, having a single eye-catching element can unify the space and create a sense of purpose. It acts as a visual anchor that draws attention and ties everything together. Think of it as the home’s signature piece—something that sparks conversation and leaves an impression.
Recommended Products to replicate this idea
| # | Preview | Product | |
|---|---|---|---|
| 1 |

|
Large Framed Colorful Abstract Wall Art for Living Room, Oversized Modern Horizontal Bright Canvas... | Check Latest Price |
| # | Preview | Product | |
|---|---|---|---|
| 1 |

|
Scenekoy Sculptural 65.5” Floor Lamp for Living Room Bedroom, Gold Leaf Finish & Resin Body, Pull... | Check Latest Price |
Imagine a large, sculptural chandelier hanging over the dining area, casting a warm glow. Or a bold, modern sofa in a vibrant color that anchors the living zone. The statement piece creates a focal point, guiding the flow of the room and emphasizing your style. Surround it with complementary decor that enhances its impact.
Select a statement piece that reflects your personality—artwork, furniture, or architectural features. Keep surrounding elements simple to let it shine. Use color, texture, or scale to create contrast—think a bright rug under a neutral statement sofa. Change or update the piece over time to keep the space fresh.
Identify your space’s natural focal points and choose a piece that commands attention without overwhelming. Invest in quality to ensure durability. Position it centrally or along a key sightline for maximum effect. Balance the rest of the decor around it, maintaining harmony and avoiding clutter.
Add accent pillows, throws, or decorative accessories that echo the statement piece’s colors or materials. Incorporate complementary textures—metal, wood, or fabric—to create visual depth. Use lighting—like spotlights or uplights—to highlight the focal element. Rotate accessories seasonally for variety.
A well-chosen focal point anchors your entire decor and showcases your personality. It’s an effortless way to add drama and style without overcrowding. Once you find your signature piece, your space will feel complete and curated. Ready to make a statement?
18. Emphasize Vertical Space with Tall Storage or Shelves
In homes with high ceilings or limited floor space, vertical storage is a game-changer. It draws the eye upward, making rooms feel taller and more expansive. Tall shelves or cabinets maximize storage without sacrificing precious floor area. It’s a smart way to keep your home organized and airy.
Recommended Products to replicate this idea
| # | Preview | Product | |
|---|---|---|---|
| 1 |

|
Hzuaneri Ladder Shelf, Bookshelf Bookcase, Freestanding Corner Storage Shelve with 2 Hooks for Home... | Check Latest Price |
| # | Preview | Product | |
|---|---|---|---|
| 1 |

|
Sauder Select Storage Cabinet/ Pantry cabinets, White finish | Check Latest Price |
Imagine floor-to-ceiling shelves filled with books, decorative boxes, or stylish baskets. The vertical lines elongate the walls, creating a dramatic effect. Open shelving with a mix of items adds personality, while closed cabinets hide clutter. The overall look is sleek, functional, and height-enhancing.
Use different materials—wood, metal, glass—for a layered, textured effect. Incorporate adjustable shelves to accommodate various item sizes. For a more minimalist look, keep the design simple and uniform. Add decorative elements like sculptural objects or vases (avoiding restricted items) to add interest.
Measure your wall height and choose shelving units that fit proportionally. Secure shelves into studs for safety and stability. Consider paint or stain to match your decor or create contrast. Use decorative brackets or keep supports hidden for a streamlined look. Organize items neatly to maximize visual appeal.
Personalize with colorful storage bins or decorative boxes that complement your color scheme. Incorporate lighting—LED strips or small spotlights—for added depth. Mix open and closed storage to balance display and concealment. Regularly update shelves to keep the display fresh and reflective of your style.
Vertical storage not only adds function but also elevates your decor. It makes your home feel taller, more open, and thoughtfully designed. When well-executed, it’s a stunning feature that enhances your entire space. Ready to reach new heights in your home’s design?
19. Design a Continuous Bar or Breakfast Nook
In open kitchens and living areas, creating a shared space for casual dining is a must. A continuous bar or breakfast nook fosters interaction and makes meal times social and effortless. It’s a practical feature that also visually connects your culinary and social zones, making everything feel more integrated.
Recommended Products to replicate this idea
| # | Preview | Product | |
|---|---|---|---|
| 1 |

|
Homestyles Mobile Kitchen Island Cart with Wood Top and Dropleaf Breakfast Bar, 18" D x 53.5" W x... | Check Latest Price |
| # | Preview | Product | |
|---|---|---|---|
| 1 |

|
DUMOS 26 Inch Counter Height Bar Stools Set of 4, Modern Faux Leather High Barstools with Back and... | Check Latest Price |
Picture a sleek, integrated island with a built-in breakfast bar along one side. Barstools in a matching finish add comfort and style. The design flows seamlessly into the kitchen cabinetry, creating a unified look. The counter becomes a gathering spot for quick bites, family chats, or coffee mornings, radiating warmth and functionality.
Choose materials that match your overall decor—granite, quartz, or wood. Incorporate a raised counter for a visual separation while maintaining flow. Use different heights or shapes to create visual interest. For smaller spaces, a compact breakfast nook with built-in seating can be just as effective.
Plan your layout around your existing kitchen and dining space. Measure available space to ensure comfortable seating and movement. Install a sturdy, level surface that can handle daily wear. Choose durable materials that complement your decor palette. Finish with seamless edges or decorative trims for a polished look.
Personalize with cushions or upholstered seats that match your style. Add decorative lighting—pendant fixtures or sconces—to create ambiance. Incorporate small shelves or hooks for accessories or utensils nearby. Keep the area tidy with designated storage or organizer trays.
A continuous bar or breakfast nook turns everyday meals into social events. It encourages interaction and makes your space feel more connected and functional. When styled thoughtfully, it elevates your entire open layout into a welcoming hub. Ready to serve up style and connection?
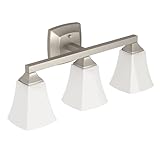
20. Use Uniform Hardware and Fixtures for a Polished Look
Inconsistencies in hardware and fixtures can subtly disrupt the harmony of an open space. Uniformity creates a sleek, cohesive aesthetic that ties everything together effortlessly. It’s a small detail that makes your entire decor look professionally curated and intentional.
Recommended Products to replicate this idea
| # | Preview | Product | |
|---|---|---|---|
| 1 |

|
Ravinte Hardware 10 Pack Cabinet Handles with 3 Inch (76mm) Hole Center Matte Black Cabinet Pulls... | Check Latest Price |
| # | Preview | Product | |
|---|---|---|---|
| 1 |
|
Moen Voss Brushed Nickel 3-Light Dual-Mount Bathroom Vanity Fixture with Frosted Glass, Bath... | Check Latest Price |
Imagine matching brushed nickel faucets, cabinet handles, and light fixtures that reflect a modern, minimalist vibe. The consistent finish creates a seamless flow across your kitchen and living areas. Simple, clean hardware enhances the overall sleekness and prevents visual clutter. It’s the finishing touch that elevates your space.
Choose hardware that aligns with your style—matte black for industrial, brass for vintage, or chrome for contemporary. Keep finishes consistent across all fixtures or mix metals thoughtfully for a layered look. Small hardware details, like knobs and pulls, can also express your personality. Incorporate matching switch plates and outlet covers for extra polish.
Start by selecting hardware finishes that complement your overall decor palette. Measure existing or new fixtures precisely before purchasing. Use the right tools to remove old hardware and install new pieces securely. Tighten all screws and check alignment for a professional finish. Regular cleaning keeps hardware looking shiny and new.
Add decorative touches like engraved or custom-designed hardware for a personal flair. Switch out hardware seasonally or for special occasions. Use coordinated hardware in different rooms to unify your decor. Keep spare hardware on hand for quick updates or repairs.
Uniform hardware and fixtures make your entire space look more polished and intentional. It’s a subtle upgrade that pays off visually and functionally. When everything matches, your home instantly feels more cohesive and styled. Ready to add that perfect finishing touch?
21. Incorporate Recessed or Track Lighting for Flexibility

Lighting that adapts to your needs is key in open spaces. Recessed or track lighting offers a flexible solution that can highlight specific zones or create mood lighting. It’s an efficient way to add layers of illumination without cluttering your ceiling or walls. Who doesn’t want control at their fingertips?
Recommended Products to replicate this idea
| # | Preview | Product | |
|---|---|---|---|
| 1 |

|
Amico 12 Pack 6 Inch 5CCT Ultra-Thin LED Recessed Ceiling Light with Junction Box, 1050LM... | Check Latest Price |
| # | Preview | Product | |
|---|---|---|---|
| 1 |
|
Unicozin LED Track Lighting Kit, 54.13'' Matt Nickel 8 Way Ceiling Spot Lighting, Flexibly Rotatable... | Check Latest Price |
Imagine sleek recessed lights spaced evenly across the ceiling, providing uniform illumination. Track lights with adjustable heads can focus on artwork, architectural details, or seating areas. The minimal design blends into the ceiling, keeping your space feeling clean and modern. This setup allows you to change the atmosphere easily, from bright and lively to soft and cozy.
Choose between fixed or adjustable fixtures depending on your needs. Use dimmers for versatility—bright for cooking, dim for relaxing. Position fixtures strategically to highlight focal points or create zones. Keep the look consistent with your decor style—sleek and modern or industrial and rugged. Incorporate color-changing LEDs for even more mood options.
Plan your layout based on activity zones—kitchen, seating, pathways. Hire a professional electrician for safe, code-compliant installation. Select fixtures that blend into your ceiling or ceiling finish. Use the right bulbs—LEDs are energy-efficient and long-lasting. Test different angles and intensities during setup to get the perfect ambiance.
Add decorative trims or diffusers to soften light or create unique effects. Use directional lighting to highlight art or architectural features, but avoid over-lighting. Combine with table or floor lamps for layered lighting. Regularly update bulbs or fixtures to keep your lighting fresh and functional.
Recessed and track lighting give your home a sleek, flexible, and high-tech vibe. They’re practical and stylish, elevating your decor effortlessly. When you control your lighting with ease, every moment at home feels just right. Ready to shed some light on your design?
22. Plan for Clear Pathways to Maintain Open Flow
Crowded walkways can turn an open space into a maze, disrupting the flow and making your home feel cramped. Proper planning ensures easy movement and visual clarity, which is essential in a busy household. Clear pathways help your space breathe and stay functional, not just pretty.
Recommended Products to replicate this idea
| # | Preview | Product | |
|---|---|---|---|
| 1 |

|
SUPERJARE 78.8 inch Narrow Console Table with Outlet, Sofa Tables, Behind Couch Table, Long Entryway... | Check Latest Price |
| # | Preview | Product | |
|---|---|---|---|
| 1 |

|
Optish Coat Rack Wall Mount, 16.5 Inches Wood Coat Hooks, Wall Hooks for Hanging, Hat Rack Bag... | Check Latest Price |
Imagine unobstructed routes from the kitchen to the living room and the entrance. Furniture is arranged to leave wide, inviting corridors, not bottlenecks. It’s like a well-organized city street—everything flows smoothly and effortlessly. Consistent spacing and thoughtful placement keep the space feeling open and welcoming.
Use furniture sizes that suit your space—avoid oversized pieces that block pathways. Position sofas, tables, and chairs to create natural routes, not obstacles. Incorporate multi-functional pieces that can serve dual purposes without crowding. Consider the traffic pattern—entry points, high-use zones—and plan accordingly.
Map out your floor plan, marking major walkways and traffic zones. Measure furniture and fixture dimensions to ensure sufficient clearance—generally at least 36 to 48 inches wide. Rearrange pieces to optimize flow, and remove unnecessary clutter. Use rugs or lighting to subtly guide pathways visually. Regularly reassess and adjust as needed for changes in your space.
Add visual cues like different flooring patterns or lighting to emphasize pathways. Keep pathways free of decorative objects or furniture that blocks movement. Use furniture with rounded or tapered edges to reduce bumping hazards. Personalize with artwork or accents along walls that reinforce direction without cluttering.
Thoughtful planning of pathways transforms your home into a smooth-flowing environment. It boosts functionality and makes daily routines easier and more enjoyable. When movement feels natural, your space becomes more inviting and user-friendly. Ready to streamline your flow?
23. Add Texture with Subtle Wall Treatments or Fabrics
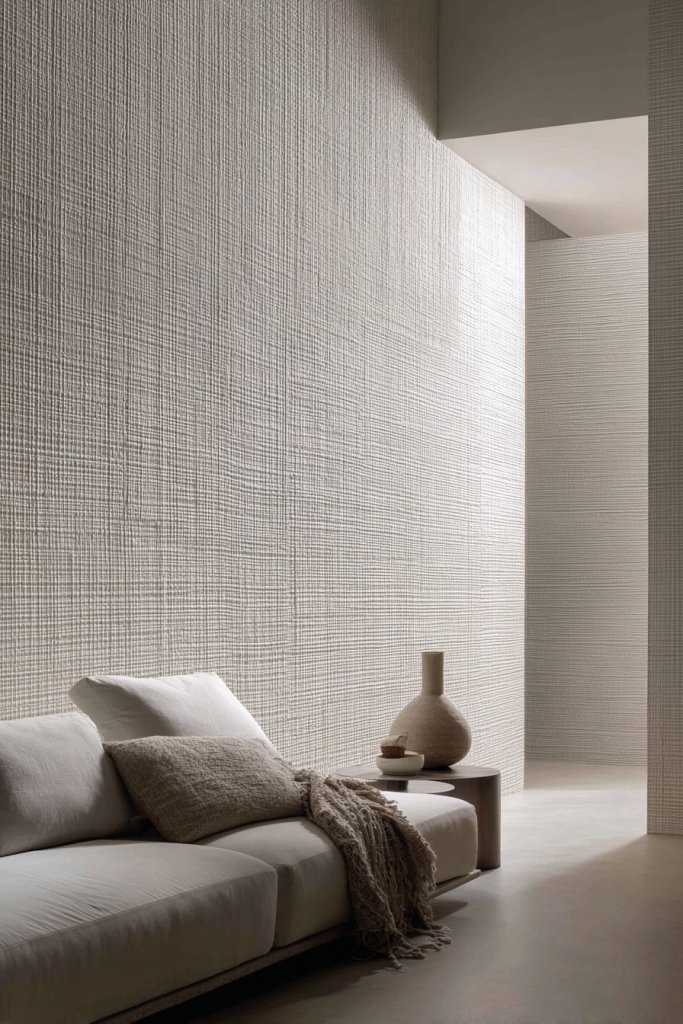
A flat, monotonous wall can make your open space feel dull and lifeless. Adding subtle textures creates depth and interest without overwhelming the minimalist vibe. It’s an easy way to enrich your decor and make your home feel cozy yet modern. Who said simplicity can’t be layered?
Recommended Products to replicate this idea
| # | Preview | Product | |
|---|---|---|---|
| 1 |

|
lenify Beige Grasscloth Peel and Stick Wallpaper Textured Contact Paper 15.7inch x 118.1inch Faux... | Check Latest Price |
| # | Preview | Product | |
|---|---|---|---|
| 1 |

|
NICETOWN White Linen Sheer Curtains and Drapes 84 inches Long, Rod Pocket & Back Tab semitransparent... | Check Latest Price |
Imagine walls with soft, textured paint or subtle wall panels that catch the light differently throughout the day. Fabrics like soft curtains or textured wall coverings add tactile interest. These elements create a layered look that invites touch and visual exploration. The gentle variation in texture makes the space feel more dynamic and inviting.
Choose neutral textures like linen, woven fabric, or subtle embossed wallpapers for a calm, sophisticated look. For more drama, incorporate textured wall panels or 3D wall tiles. Use textiles—cushions, throws, or upholstered furniture—in complementary textures to deepen the effect. Seasonal fabric swaps can refresh the room’s feel.
Select high-quality materials that suit your decor style and maintenance preferences. Install textured or patterned wallpaper carefully, ensuring smooth application and proper sealing. Use fabric wall hangings or panels with velcro or hooks for easy updates. Mix textures thoughtfully to avoid clutter or visual chaos. Regular cleaning and care keep textures looking fresh.
Layer textiles—think a soft cream throw blanket with chunky knit texture or velvet cushions—to add richness and comfort. Incorporate architectural details like textured plaster or wall sculptural accents for a modern touch. Use color and pattern sparingly to maintain a calm, cohesive environment. Personalize with unique fabrics that reflect your personality.
Adding texture elevates your space from flat to fabulous, creating a layered, inviting atmosphere. It’s an affordable way to add depth and personality without cluttering your decor. When textures work together harmoniously, your home exudes warmth and style. Ready to add subtle sophistication?
24. Personalize with Minimalist Decor Accents
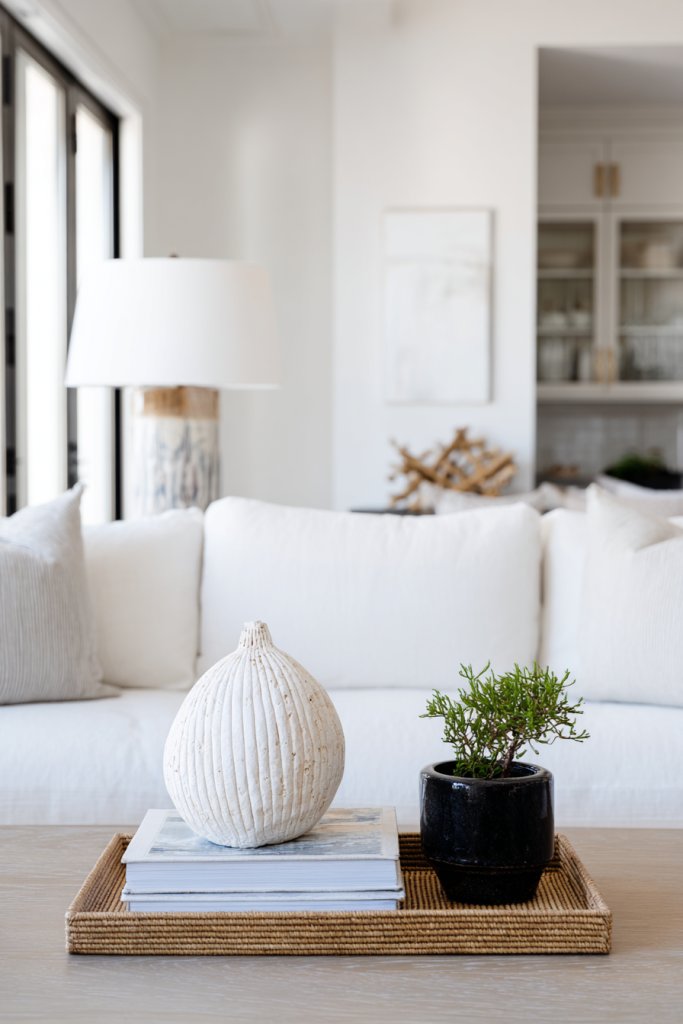
Your home should reflect who you are, but cluttered or overly busy decor can dilute your style. Minimalist accents help you personalize your space without overwhelming it. They add just enough personality to make your home feel uniquely yours—clean, calm, and curated.
Recommended Products to replicate this idea
| # | Preview | Product | |
|---|---|---|---|
| 1 |

|
Ceramic Vase Set of 4, Modern Minimalist Colors Home Decor, White Decorative Flowers Vases for... | Check Latest Price |
| # | Preview | Product | |
|---|---|---|---|
| 1 |

|
ASTRDECOR Abstract Framed Wall Art, Minimalist Boho Art Prints Women Portrait Line Art Wall Decor,... | Check Latest Price |
Imagine a simple ceramic bowl on a sleek coffee table or a single piece of abstract art on the wall. A few curated accessories—like a sculptural vase or a sleek tray—add interest without clutter. These small touches make your space feel intentional and sophisticated. The key is choosing quality pieces that resonate with your taste.
Select decor in neutral tones or subtle metallics to maintain a calm aesthetic. Incorporate functional accents—like a stylish clock or a minimalist sculpture—that serve both form and function. Change out pieces seasonally or as your style evolves to keep things fresh. Keep the overall look simple by avoiding excessive grouping.
Start with a few statement pieces that reflect your personality—think a modern bowl or sleek candle holder. Avoid clutter by limiting accessories to a few well-chosen items. Use symmetry or asymmetry intentionally for visual balance. Scale items appropriately to your space—small for shelves, larger for mantels. Regularly edit to keep the look intentional.
Combine different textures—matte, glossy, soft—to add subtle complexity. Personalize with monogrammed or handcrafted items for a unique touch. Keep color schemes minimal but meaningful—perhaps a pop of your favorite color. Use these accents to tell a story about your style and personality.
Minimalist decor accents showcase your personality with elegance and restraint. They make your space feel curated and calm, encouraging relaxation and confidence. When every piece has a purpose, your home becomes a true reflection of you. Ready to keep it simple and stylish?
Conclusion
With a diverse array of open floor plan ideas, you’re equipped to transform your living and kitchen areas into a unified, stylish haven. Whether you prefer modern minimalism or cozy warmth, these concepts can be tailored to match your vision. Don’t hesitate to experiment and personalize your space—embrace the opportunity to create a home that feels open, functional, and uniquely yours. Your dream layout is just a step away!