I have been, or can be if you click on a link and make a purchase, compensated via a cash payment, gift, or something else of value for writing this post. As an Amazon Associate, I earn from qualifying purchases. Please read my full Affiliate Disclosure for more information.
Imagine transforming your kitchen into a streamlined haven that combines style with efficiency — that’s the magic of long kitchen layouts! These designs have become increasingly popular because they maximize space, enhance workflow, and create a seamless cooking experience, especially in open-concept homes. Whether you have a narrow space or simply want to optimize every inch, a well-planned long layout can make your kitchen feel more spacious and functional.
In this article, you’ll discover a variety of long kitchen layout ideas that cater to different tastes and needs. From minimalist designs to more traditional setups, these ideas will inspire you to reimagine your space and boost your culinary efficiency. Get ready to explore creative solutions that perfectly blend practicality with aesthetic appeal!
1. Installing a Galley Kitchen with Optimized Work Zones
Ever felt overwhelmed trying to cook in a cramped kitchen that makes everything more complicated? A galley layout can turn that chaos into efficiency. It’s perfect for small spaces but surprisingly effective for larger kitchens too. The goal is to create a smooth flow that minimizes walking back and forth while prepping and cooking.
Recommended Products to replicate this idea
| # | Preview | Product | |
|---|---|---|---|
| 1 |

|
Seinloes 2Pack Expandable Pull Out Cabinet Organizer 21"Deep With Raising Pad for Framed Cabinets,... | Check Latest Price |
| # | Preview | Product | |
|---|---|---|---|
| 1 |

|
Magnetic Knife Holder for Wall, Knife Magnetic Strip Magnetic Knife Holder for Refrigerator Mount... | Check Latest Price |
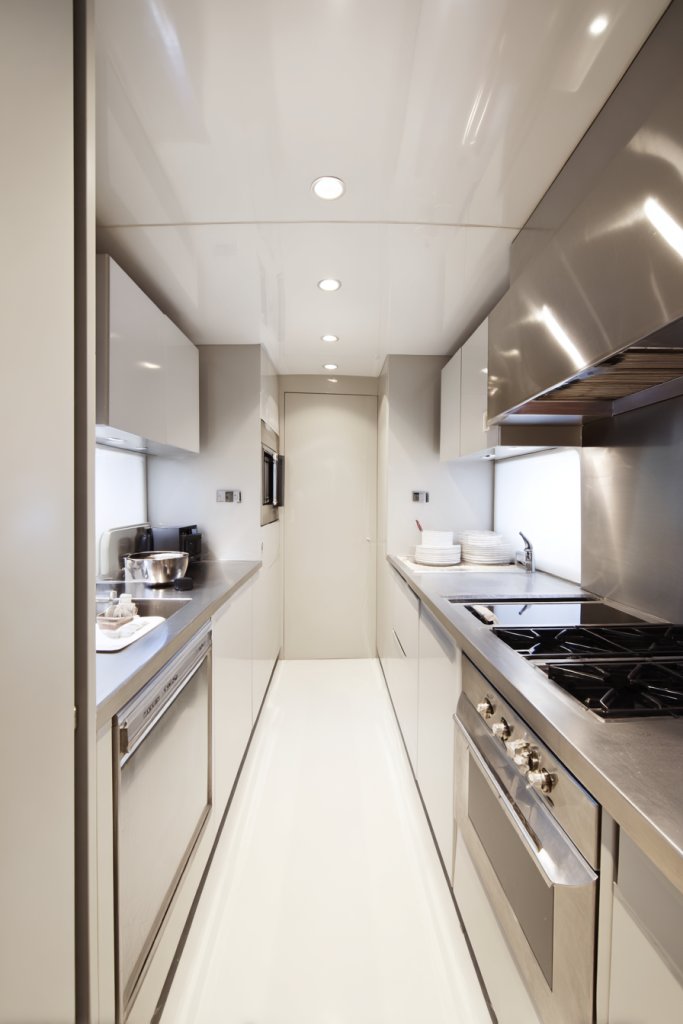
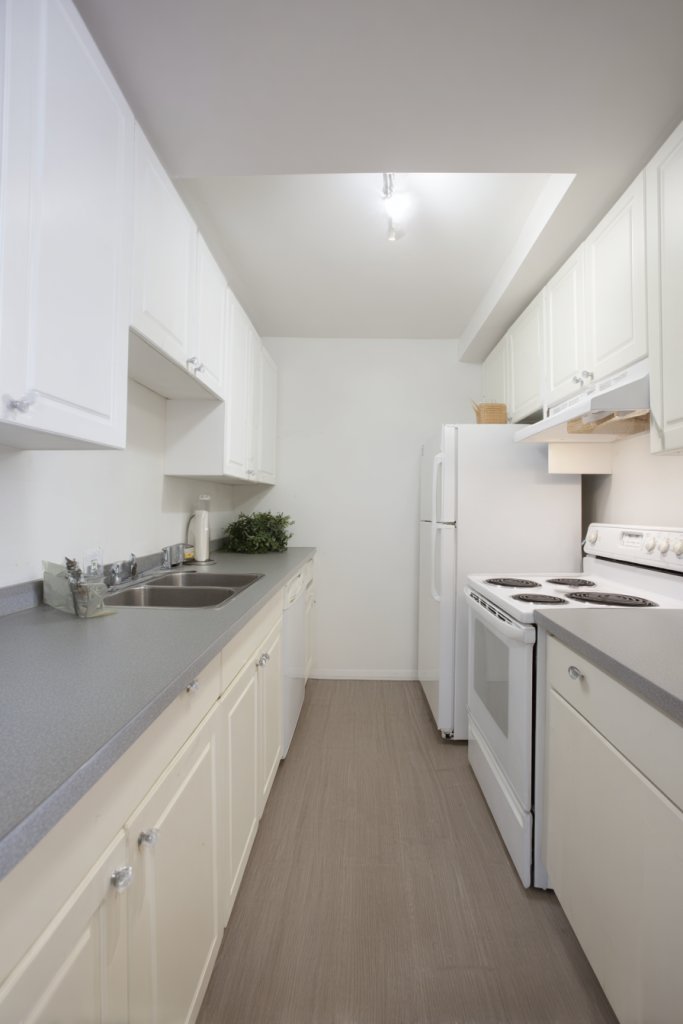
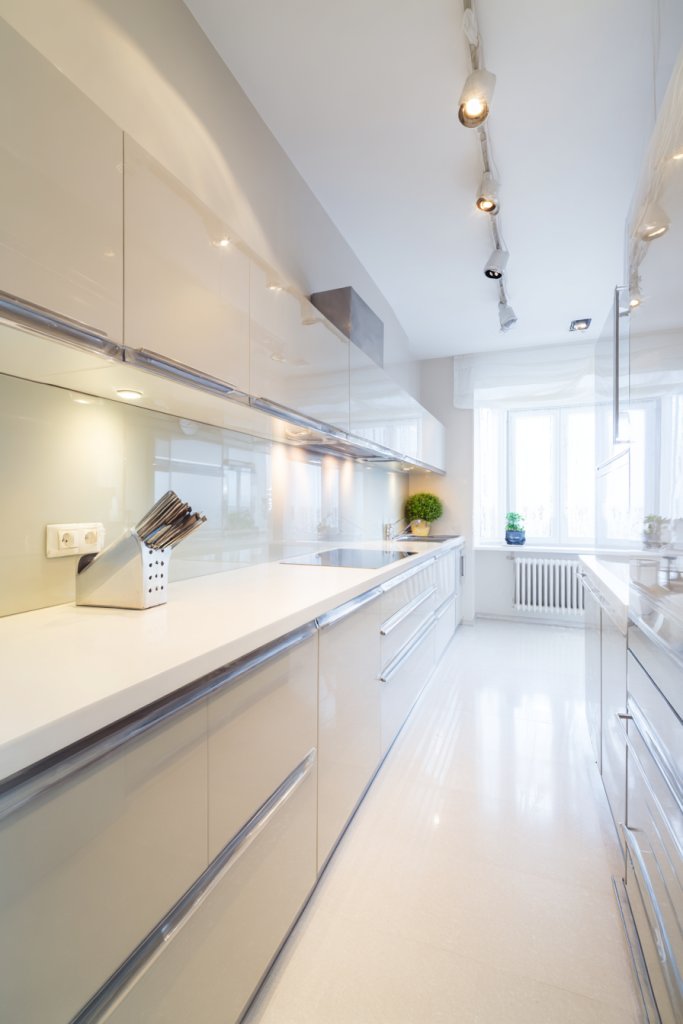
Imagine two parallel countertops with a clear pathway in between, like a well-oiled assembly line. Sleek cabinets line both sides, with a dedicated prep zone on one side and a cooking zone on the other. Bright LED under-cabinet lighting highlights the workspace, while textured backsplashes add visual interest. Everything feels organized, accessible, and clutter-free.
You can customize the galley to match your style, from ultra-modern with glossy finishes to cozy farmhouse with rustic wood. For open-concept spaces, incorporate open shelving or glass-front cabinets to keep it airy. If space allows, add a narrow breakfast bar or a pull-out cart for extra prep space. Seasonal accents like colorful dish towels or textured rugs can also refresh the look.
Start by measuring your available space carefully. Choose slim-line cabinetry and appliances to maximize floor area. Use a combination of open and closed storage to keep essentials within reach without cluttering surfaces. Install under-cabinet lighting for clarity, and consider using drawer organizers to keep utensils and tools tidy. Plan the workflow by placing frequently used items near the cooking or prep zones. Keep pathways clear to prevent congestion.
Add personal touches with decorative hardware, like matte black handles or vintage knobs. Use colorful or patterned shelf liners inside cabinets for a pop of character. Incorporate textured textiles such as woven baskets or soft mats to soften the space. You can also incorporate a magnetic strip on the wall for knives or spice jars for easy access and a modern touch.
A galley kitchen setup proves that smart design makes a big difference. It boosts your efficiency and makes cooking less stressful. With a little planning, you can transform even a narrow space into a culinary haven. Ready to make your kitchen work smarter, not harder?
2. Incorporating a Continuous Run with Built-In Storage Solutions
Cluttered countertops and nowhere to hide those chaotic kitchen tools? A continuous run with built-in storage can tidy up your space instantly. It’s all about creating a seamless look that keeps essentials hidden but accessible. Plus, it makes your kitchen look sleek and organized.
Recommended Products to replicate this idea
| # | Preview | Product | |
|---|---|---|---|
| 1 |

|
VEVOR White Shaker Base Cabinet with Drawer, 30-Inch Unassembled Drawer Base Cabinet, 30" W x 24" D... | Check Latest Price |
| # | Preview | Product | |
|---|---|---|---|
| 1 |

|
PAKETA 4 Pack Expandable Pull Out Cabinet Organizer, 21'' Deep Pull Out Drawers for Cabinets,Upgrade... | Check Latest Price |
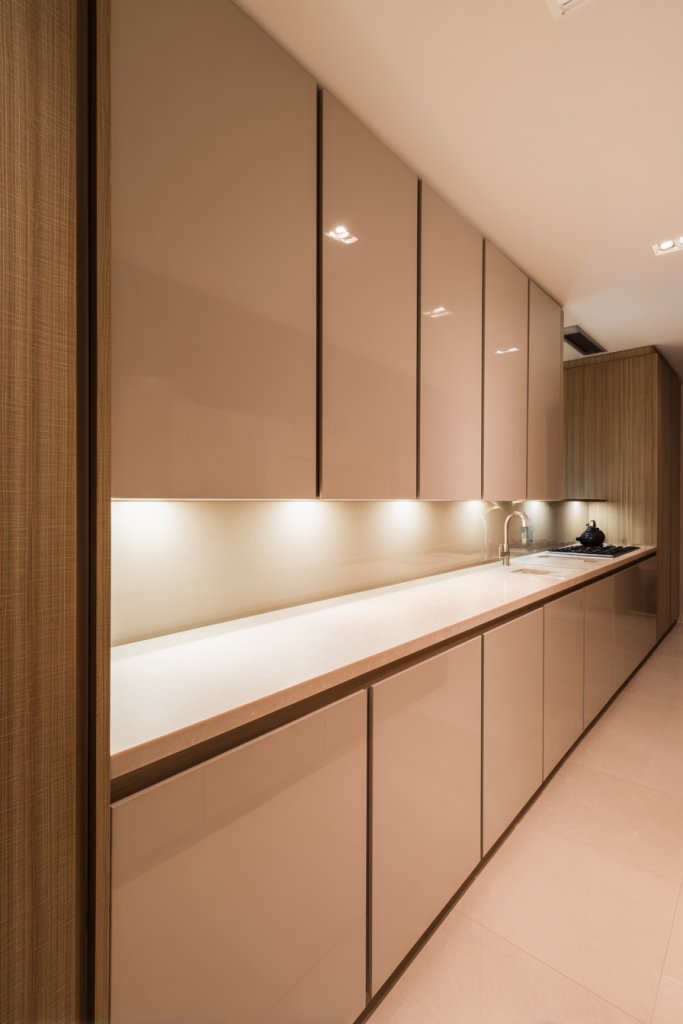
Picture a long, uninterrupted countertop stretching from one end of the room to the other. Beneath it, drawers and cabinets blend into the design, with soft-close mechanisms that whisper shut. The surface is clutter-free, with appliances tucked neatly away inside the cabinetry. The color palette is consistent, with matte finishes and subtle textures that add depth.
Opt for a monochrome palette for a minimalist vibe, or mix textures like matte cabinetry with glossy countertops for contrast. For a rustic look, pair distressed wood cabinetry with stone countertops. In a smaller kitchen, incorporate vertical storage solutions like tall cabinets to maximize space. Seasonal accessories like a woven placemat or a soft cloth napkin can add warmth.
Start by planning your layout with a focus on flow and accessibility. Choose cabinetry with ample storage options, including pull-out shelves and lazy Susans. Install a continuous countertop made of durable material such as quartz or granite for longevity. Use integrated appliances to keep the surface clean and cohesive. Organize inside cabinets with dividers and trays to keep everything tidy and easy to find. Finish with soft-close hinges and sleek hardware for a polished look.
Customize with color accents in hardware or cabinet finishes to match your personality. Use decorative drawer pulls or knobs to add a touch of elegance. Incorporate hidden compartments for spice jars or utensils. Consider adding a built-in wine rack or spice drawer for added functionality and style.
A continuous run with built-in storage transforms a cluttered nightmare into a streamlined paradise. It encourages organization and makes daily routines smoother. With thoughtful planning, you’ll enjoy a kitchen that looks great and functions flawlessly. Time to embrace the sleek, clutter-free lifestyle!
3. Designing a Single Wall Kitchen for Small Spaces
Living in a tiny apartment or studio and feeling like your kitchen needs a serious upgrade? The single wall kitchen is your best friend. It packs all essentials into one streamlined line, freeing up space for other activities. Plus, it’s super easy to clean and maintain.
Recommended Products to replicate this idea
| # | Preview | Product | |
|---|---|---|---|
| 1 |

|
JPND 24 x 33 Inch Wall Cabinet set of 1, Kitchen Wall Mounted Wooden Storage Cabinet, Double Door... | Check Latest Price |
| # | Preview | Product | |
|---|---|---|---|
| 1 |

|
Frigidaire, 2 Door Apartment Size Refrigerator/Freezer Combo, 7.5 cu ft, Platinum Series, Stainless,... | Check Latest Price |
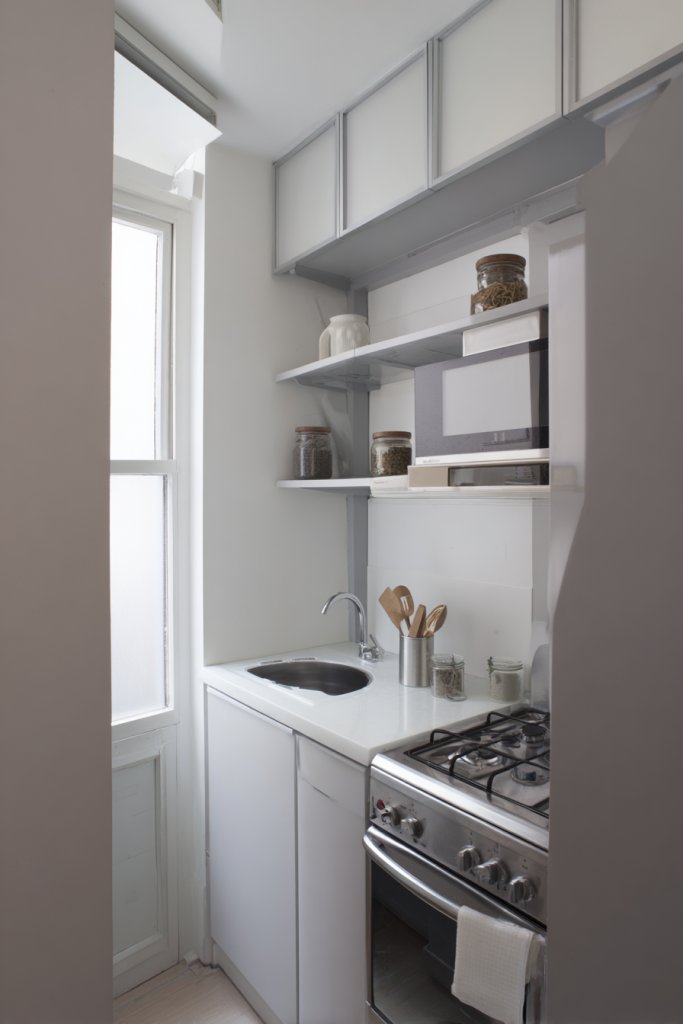
Visualize a single, long wall with mounted cabinets above and open shelves below. Appliances are tucked into designated spots, while a slim peninsula doubles as a prep surface or dining area. The color palette is light and bright, making the space feel larger. A minimal backsplash with a subtle pattern adds just enough personality without overwhelming.
Choose sleek, handle-less cabinets for a modern look, or go with vintage-inspired open shelving for charm. For a more industrial vibe, opt for metal finishes and exposed pipes. If space permits, add a fold-down table or a small island for extra prep or dining options. Seasonal textiles like a soft rug or patterned dish towels bring warmth.
Start by measuring your wall to maximize storage without crowding. Use wall-mounted cabinets to keep counters clear and install a magnetic strip for knives and utensils. Choose compact appliances that fit seamlessly into the design. Use pull-out drawers to organize utensils, pots, and pans efficiently. Finish with a durable, easy-to-clean surface like quartz or laminate. Keep the layout linear to streamline workflow.
Personalize with colorful hardware, or add decorative wall panels or tiles for visual interest. Consider installing a pegboard for hanging utensils or small tools. Use open shelving to display favorite dishes or glassware if you want a touch of openness. Add a cozy textile in front of the sink or along the floor for extra comfort.
A single wall kitchen proves that less can be more. It’s all about smart storage and clever design choices. With this setup, cooking becomes a breeze, and your space feels instantly larger. Ready to maximize your small space in style?
4. Using Open Shelving for Easy Access and Visual Appeal
Tired of digging through cluttered cabinets for that one specific mug or spice jar? Open shelving offers instant access and adds a touch of personality to your kitchen. It’s all about balancing accessibility with style, making your space both functional and attractive.
Recommended Products to replicate this idea
| # | Preview | Product | |
|---|---|---|---|
| 1 |

|
QEEIG Floating Shelves for Wall Bathroom Shelf Bedroom Kitchen Living Room Hanging Book Shelves... | Check Latest Price |
| # | Preview | Product | |
|---|---|---|---|
| 1 |

|
Churboro 25 Spice Jars with 547 Labels- Glass Spice Jars with Black Metal Caps, 4oz Empty Spice... | Check Latest Price |
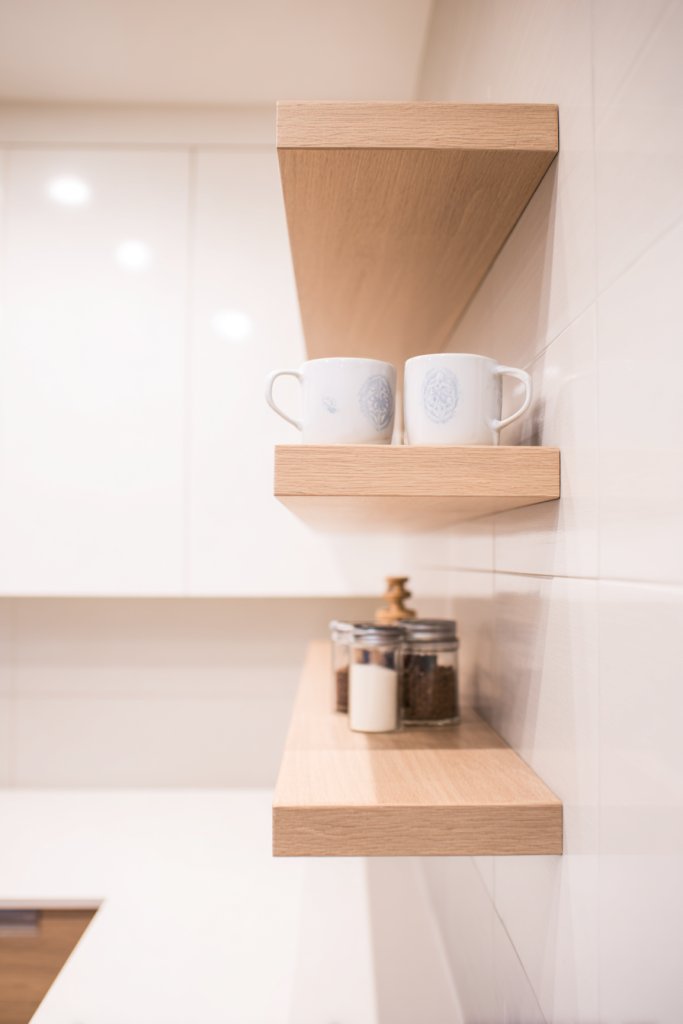
Imagine a row of floating shelves running along the length of your kitchen wall. They hold your go-to dishes, glasses, and cookbooks in an organized yet casual display. The open design reveals the textures of your favorite ceramics or metalware, adding depth. Underneath, sleek cabinets or drawers keep less-used items out of sight, maintaining a clean look.
Mix open shelves with closed cabinetry for contrast and practicality. Use different materials such as reclaimed wood, glass, or metal for a layered look. For a farmhouse vibe, incorporate open shelving with vintage brackets. In a small kitchen, keep the shelves shallow to avoid crowding the space. Add decorative accents like baskets or textured textiles to soften the overall look.
Start by installing sturdy brackets or floating shelf hardware at the right height and spacing. Choose durable, heat-resistant materials like wood or metal for longevity. Organize your items into groups—glasses together, spices in small jars, baking supplies in baskets. Keep the most-used items at eye level for quick access. Finish by sealing the wood or painting the shelves to match your decor.
Display your personality with curated collections, like vintage mugs or colorful bowls. Incorporate decorative elements like a small sculpture or textured ceramics. Use LED strip lighting underneath the shelves to highlight your display. Regularly rotate items to keep the display fresh and interesting.
Open shelving not only makes your kitchen more accessible but also showcases your style. It encourages organization and keeps essentials within reach. With creative styling, your kitchen becomes a reflection of your personality. Ready to make your space more inviting and practical?
5. Creating a Peninsula Layout for Zone Separation

Struggling to define different areas in an open kitchen? A peninsula offers a smart way to separate zones without sacrificing flow. It creates a natural division between cooking, prep, and social spaces while maintaining openness. It’s perfect for multitasking and entertaining.
Recommended Products to replicate this idea
| # | Preview | Product | |
|---|---|---|---|
| 1 |
|
Tribesigns Kitchen Island with 3 Shelves, 55 Inches Width Kitchen Shelf with Large Worktop, Stable... | Check Latest Price |
| # | Preview | Product | |
|---|---|---|---|
| 1 |

|
DUMOS 26 Inch Counter Height Bar Stools Set of 4, Modern Faux Leather High Barstools with Back and... | Check Latest Price |
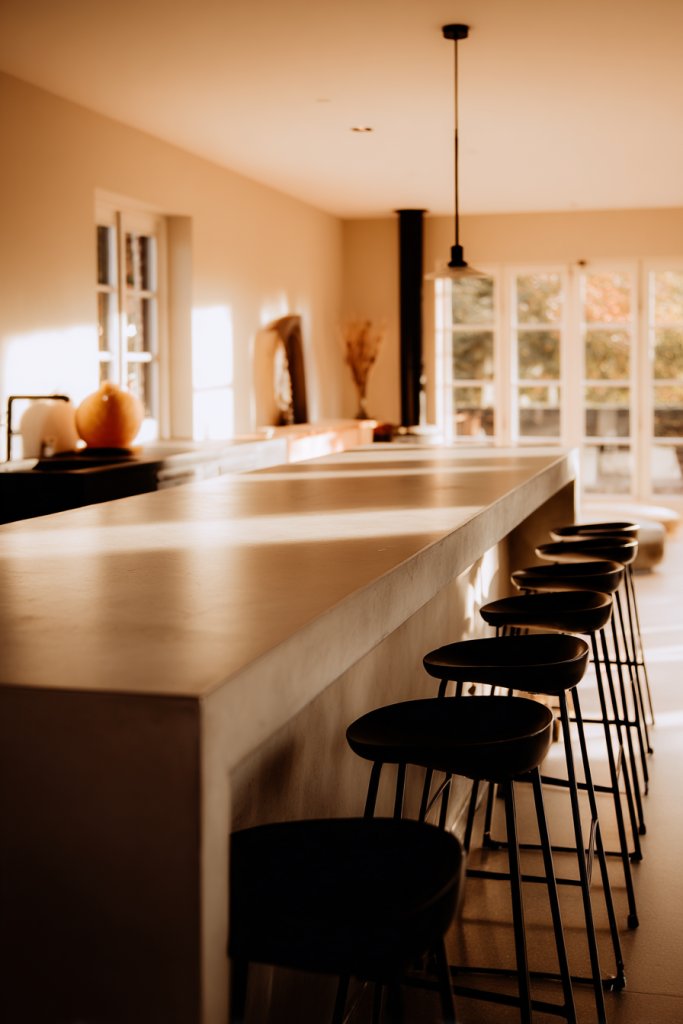
Visualize a long, narrow counter extending from one side of the kitchen, creating a partial barrier. On one side, you have your stove and prep area; on the other, a casual seating zone with bar stools. Pendant or sconce lighting above highlights the separation, while textured cabinetry adds visual appeal. The result is a cohesive yet distinct space for different activities.
Choose contrasting materials or colors for the peninsula to emphasize its function. For a sleek look, go with high-gloss finishes or concrete textures. For a warmer vibe, incorporate wood or butcher block surfaces. You can also add built-in storage underneath or a small sink for extra convenience. Seasonal decor like a soft textile runner can add personality.
Measure your space carefully to ensure enough clearance around the peninsula. Use strong, durable materials like quartz, granite, or sealed wood. Install pendant lighting or wall sconces to define the space visually. Incorporate drawers or cabinets underneath for storing utensils, cookware, or serveware. Finish with hardware that complements your overall design theme.
Add decorative accents such as textured panels or a colored trim. Personalize with a collection of your favorite dishware or a small, sculptural centerpiece on the surface. Use lighting to create ambiance for different times of day. Incorporate a small chalkboard or message center for notes or recipes.
A peninsula layout boosts functionality while maintaining an open feel. It’s perfect for hosting gatherings or multitasking in a compact space. With thoughtful design, it becomes a stylish hub that invites conversation. Ready to define your space with a smart, functional addition?
6. Incorporating a Walk-In Pantry Along the Length of the Kitchen
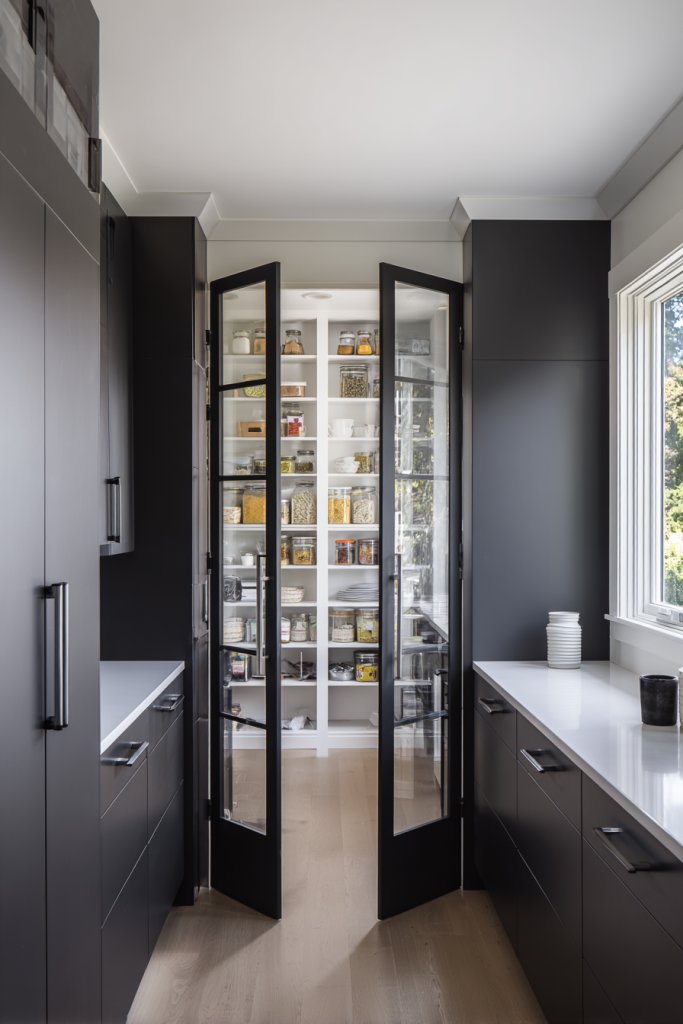
Cluttered countertops and overflowing cabinets making your kitchen feel chaotic? A walk-in pantry solves that problem by providing dedicated storage space. It keeps ingredients organized and accessible, transforming your workflow and reducing stress. Plus, it’s a dream for any serious home chef.
Recommended Products to replicate this idea
| # | Preview | Product | |
|---|---|---|---|
| 1 |

|
HOMEDANT House 36.2" W 5 Tier Heavy Duty Garage Shelving Adjustable Metal Rack Storage Shelves... | Check Latest Price |
| # | Preview | Product | |
|---|---|---|---|
| 1 |
|
PRAKI Airtight Food Storage Containers Set with Lids - 24 PCS, BPA Free Kitchen and Pantry... | Check Latest Price |
Imagine a long, narrow room or closet with open shelving and labeled containers. The shelves are filled with neatly arranged jars, canned goods, and dry ingredients. LED lighting illuminates the space, making everything easy to find. The door is flush with the wall, and the interior features adjustable shelves to adapt as your needs change.
Design your pantry with a mix of open shelves and closed cabinets for a tidy look. Use colorful storage bins or clear containers for a pop of personality. Incorporate a small work surface or pull-out drawers for prep. For a rustic touch, consider reclaimed wood shelving; for high-end, opt for sleek, matte finishes. Seasonal organization can include holiday-themed containers or holiday-specific storage.
Plan the location carefully, ideally near your main kitchen work zone. Measure the available space and decide on shelving height based on your storage needs. Install adjustable shelves for flexibility. Use durable, easy-to-clean materials like metal or sealed wood. Label containers for quick retrieval, and consider adding hooks or small bins for utensils or small tools. Finish with a door that seals tightly to keep pests out.
Add decorative touches like a chalkboard for notes or a small plant (if allowed, avoiding restricted content). Use colorful baskets or bins to organize loose items. Incorporate a small step stool for reaching upper shelves. Personalize with custom labels or tags to keep everything orderly. Seasonal decorations or themed containers can make the pantry fun and functional.
A walk-in pantry turns chaos into order, making cooking more enjoyable. It’s a smart investment that pays off by saving time and reducing stress. With some planning, your pantry becomes a showcase of efficiency and style. Ready to take your storage to the next level?
7. Installing Long Under-Cabinet Lighting for Enhanced Visibility
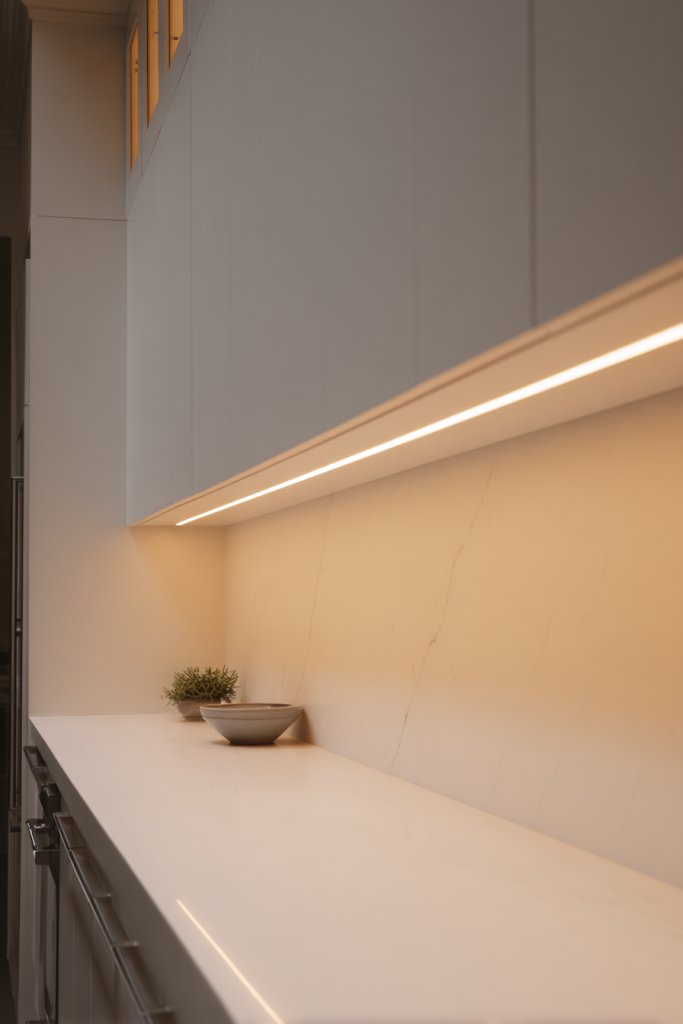
Ever struggled to see what you’re doing in the dim corners of your kitchen? Long under-cabinet lighting can dramatically improve visibility and safety. It creates a warm, inviting glow that makes cooking and prep work easier and more enjoyable. Plus, it adds a modern touch to your space.
Recommended Products to replicate this idea
| # | Preview | Product | |
|---|---|---|---|
| 1 |

|
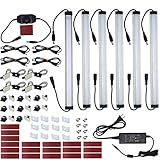
STBTECH 110V LED Under Cabinet Lighting,17inch LED Strip Light Bar with 6ft Power Cord,Magnetic... | Check Latest Price |
| # | Preview | Product | |
|---|---|---|---|
| 1 |
|
Under Cabinet LED Lighting Kit Plug in or Hardwired, 6 pcs 12 Inches Light Strips, 2000 Lumen, Super... | Check Latest Price |
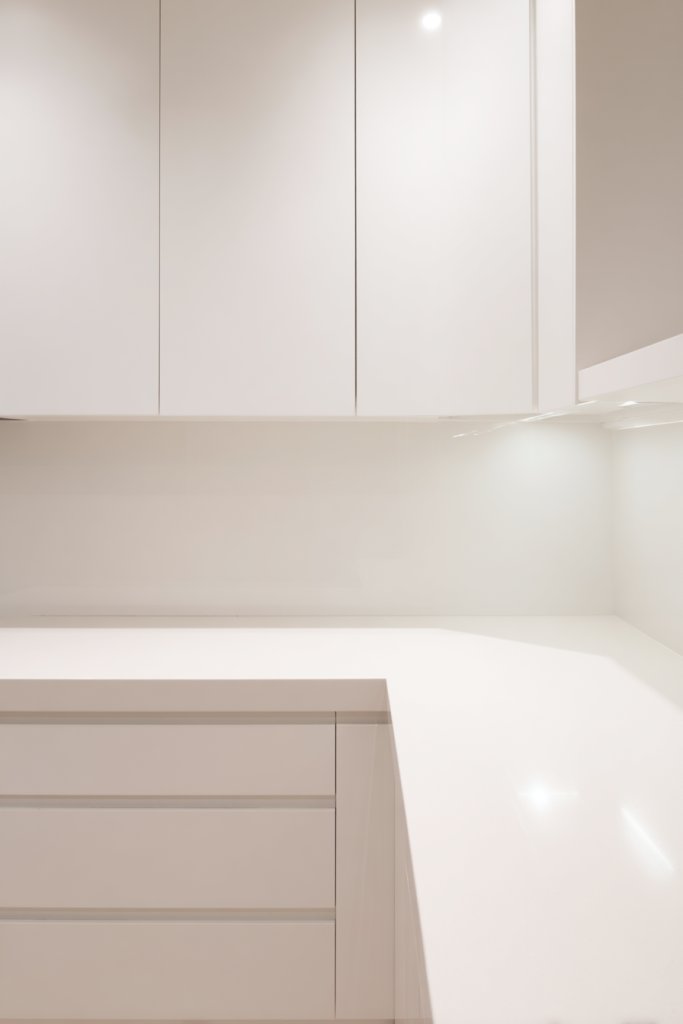
Imagine a sleek, continuous strip of LED lights mounted beneath your upper cabinets, casting even illumination across the countertop. The light is soft but bright enough to see clearly, with no shadows or flickering. The cabinets themselves are a uniform color, reflecting the clean, crisp glow. The overall effect is a workspace that feels bright, welcoming, and functional.
Choose LED strips with adjustable color temperatures—warm white for cozy evenings or cool white for task lighting. For a high-tech look, incorporate dimmable or color-changing LEDs. For a softer ambiance, add textured or frosted covers. In smaller kitchens, layer with task lighting in other areas for maximum effect. Seasonal accents like a string of fairy lights can add a playful touch.
Start by measuring the length of your cabinets and choosing the right LED strip with appropriate lumens and color temperature. Use a compatible power supply and install dimmer switches if desired. Mount the strips using adhesive backing or mounting channels for a clean look. Connect to a power source with a switch or timer for convenience. Test the lighting before sealing everything in place. Regular cleaning ensures the strips stay bright and dust-free.
Customize lighting with color-changing options or smart controls that sync with your home automation system. Use clips or decorative covers to hide wiring and create a seamless look. Add small motion sensors to turn on lights automatically when you enter the space. Layer lighting with pendant fixtures or sconces for a dynamic, personalized environment.
Proper lighting makes your kitchen safer and more inviting. It elevates your cooking experience and helps prevent accidents. With a little technical know-how, you can create a bright, efficient workspace that feels as good as it looks. Time to shed some light on your kitchen’s potential!
8. Using Uniform Materials for a Cohesive, Streamlined Look
Clashing colors or mismatched textures can make a kitchen feel disorganized and chaotic. Using uniform materials creates a seamless, harmonious space that looks polished and modern. It simplifies maintenance and instantly elevates your design aesthetic. Who doesn’t want a sleek, clutter-free kitchen?
Recommended Products to replicate this idea
| # | Preview | Product | |
|---|---|---|---|
| 1 |

|
Home Hero 54-Piece Stainless Steel Kitchen Utensils Set - Heat-Resistant Nonstick Silicone &... | Check Latest Price |
| # | Preview | Product | |
|---|---|---|---|
| 1 |
|
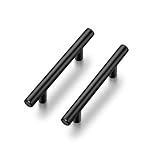
Ravinte 30 Pack | 5 Inch Cabinet Pulls Matte Black Stainless Steel Kitchen Drawer Pulls Cabinet... | Check Latest Price |
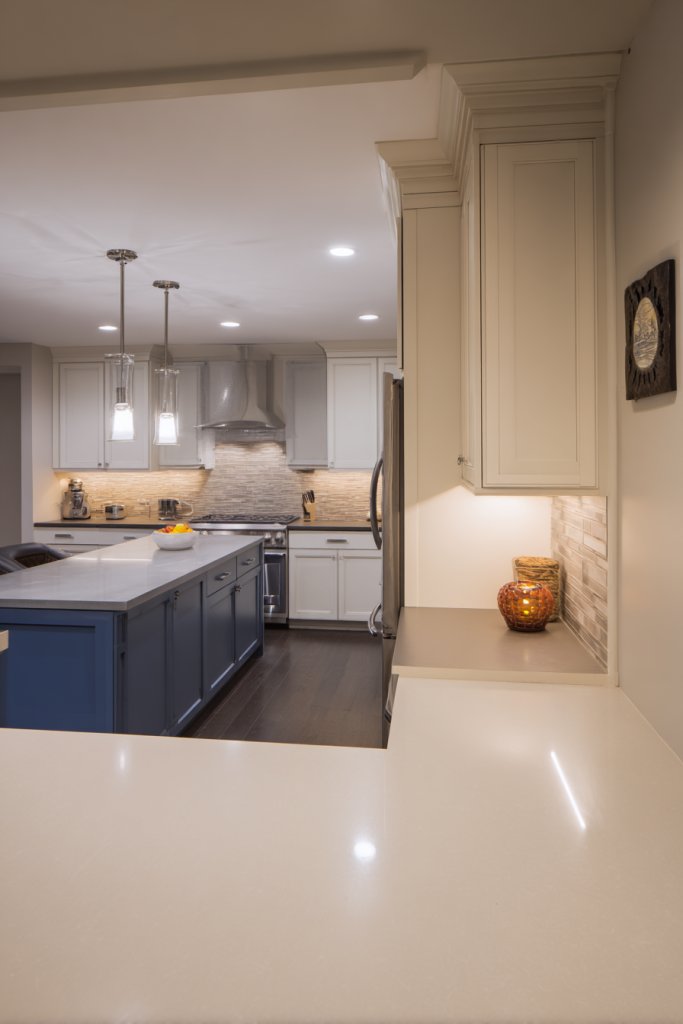
Picture cabinets, countertops, and flooring all in shades of soft gray or warm beige. The consistent material choice creates a calming visual flow from wall to floor. The matte finishes reduce glare, while subtle textures add depth. Without contrasting elements, the space feels larger and more cohesive. It’s like a well-curated art gallery, but for your cooking zone.
Opt for monochromatic schemes or tone-on-tone combinations for a minimalist vibe. For warmth, choose woods in similar shades with matte or satin finishes. For a high-end look, pair quartz countertops with matching cabinetry. In smaller spaces, keep everything in light, reflective materials to boost brightness. Seasonal textiles like a cozy throw or woven mats can add charm without breaking the uniformity.
Select durable, easy-to-clean materials that match your style and budget. Use the same finish and color for cabinets, countertops, and even appliances where possible. Keep hardware minimal and consistent, like matte black or brushed nickel handles. Install flooring that complements the cabinetry, such as large-format tiles or wood planks. Maintain a clean, uncluttered appearance by choosing accessories and storage solutions that blend in.
Introduce subtle variations within the same material family—slightly different shades or textures—to prevent monotony. Incorporate textured wall panels or decorative trims that match the overall look. Use uniform lighting fixtures to reinforce cohesion. Personalize with small accents like matching utensil holders or storage jars that blend with the overall palette.
A cohesive material palette simplifies your design choices and makes your kitchen appear larger and more organized. It’s a timeless approach that appeals to both minimalists and modern enthusiasts. With consistent textures and colors, your space will feel effortlessly elegant. Ready to create a sleek, unified haven?
9. Combining Long Countertops with Vertical Storage for Max Space

Limited storage and counter space can turn cooking into a juggling act. Combining long countertops with vertical storage solutions maximizes every inch in your kitchen. It keeps essentials within arm’s reach while maintaining a clutter-free surface. Sounds like kitchen magic, right?
Recommended Products to replicate this idea
| # | Preview | Product | |
|---|---|---|---|
| 1 |
|
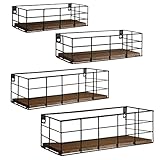
Fixwal Hanging Floating Shelves, 4 Sets of Wall Mounted Shelves for Wall Storage, Hanging Storage... | Check Latest Price |
| # | Preview | Product | |
|---|---|---|---|
| 1 |

|
Baffect 3 Tiers Pull Down Spice Rack, Pull Out Spice Organizer for Inside Cabinets, Drop Down Spice... | Check Latest Price |
Picture a sprawling countertop stretching along one wall, with tall cabinets or open racks rising vertically nearby. Spices, oils, and utensils are stored on open vertical racks, making them easy to grab. The countertops are kept clear for prep work, with a few decorative bowls or cutting boards to add warmth. The overall feel is open, organized, and functional.
Use sleek, high-gloss cabinets for a modern look or rustic wood for a cozy vibe. Incorporate open vertical racks made of metal or wood to display frequently used items. For small kitchens, opt for slim, tall cabinets instead of bulky units. Incorporate pull-out baskets or baskets for hidden storage, and rotate items seasonally for freshness.
Measure your space carefully and select vertical storage that complements your countertops. Mount open shelving or racks at accessible heights. Use durable materials like stainless steel or sealed wood for racks. Incorporate magnetic strips or hooks for utensils and small tools. Keep countertops clear by storing bulky appliances inside cabinets or on tall units. Finish with easy-to-clean surfaces and hardware.
Add decorative elements like handcrafted baskets or colorful containers. Use labels or tags for organization. Incorporate lighting within the vertical storage for visibility. Personal touches such as a collection of vintage jars or a spice rack can add character. Rotate stored items seasonally for freshness and style.
Maximizing vertical storage frees up valuable counter space, making cooking more comfortable. It encourages organization and makes your kitchen feel more spacious. With clever integration, your space becomes both beautiful and practical. Ready to elevate your storage game?
10. Integrating a Long Breakfast Bar for Casual Dining and Prep
Craving a casual spot to enjoy your morning coffee or quick meal? A long breakfast bar combines prep space with a dining area in one sleek feature. It’s perfect for busy mornings or relaxed weekend brunches. Plus, it creates a social hub in your kitchen.
Recommended Products to replicate this idea
| # | Preview | Product | |
|---|---|---|---|
| 1 |

|
Tribesigns Kitchen Island with Seating and Storage Shelves, 55.1-Inch Breakfast Counter Farmhouse... | Check Latest Price |
| # | Preview | Product | |
|---|---|---|---|
| 1 |
|
DUMOS 26 Inch Counter Height Bar Stools Set of 4, Modern Faux Leather High Barstools with Back and... | Check Latest Price |
Imagine a long, sturdy countertop extending from your main workspace, with stylish bar stools lined up underneath. The surface is smooth and durable, ideal for chopping or serving. Pendant or sconce lighting hangs overhead, creating a cozy ambiance. Decor accents like textured textiles or a row of colorful dishes on open shelves add personality.
Choose a material that complements your decor—marble, wood, or concrete. For a cozy look, add upholstered stools or woven cushions. If space is tight, opt for a slim profile or extend the bar into an L-shape. Seasonal decor like a soft runner or decorative placemats can refresh the look. Personalize with a collection of favorite mugs or a small centerpiece.
Start by measuring available space and determining the ideal length and height for comfort. Use durable, easy-care materials like quartz or sealed wood. Install appropriate lighting, such as pendant fixtures or LED strips, to enhance visibility. Secure the bar to the wall or support it with sturdy legs for stability. Arrange stools for easy access without blocking pathways. Finish with thoughtful detailing like decorative trims or edge profiles.
Personalize with a variety of textured cushions or throws on the stools. Incorporate a small shelf or hooks nearby for storing accessories. Use decorative elements like a tray or a collection of cookbooks to add charm. Seasonal accents like a woven basket or a cozy blanket can make it inviting year-round.
A long breakfast bar makes your kitchen more versatile and welcoming. It encourages family meals and lively conversations while you cook. With the right materials and layout, it becomes a focal point that enhances your space’s style and function. Time to upgrade your kitchen with a social centerpiece!
11. Employing Sliding Doors or Fold-Out Partitions for Flexible Space
Need to hide messes or create privacy in an open kitchen? Sliding doors or fold-out partitions offer flexible solutions that adapt to your needs. They allow you to enclose or open up areas instantly, giving your space incredible versatility. Perfect for multitasking or creating a cozy nook.
Recommended Products to replicate this idea
| # | Preview | Product | |
|---|---|---|---|
| 1 |

|
SMARTSTANDARD 6.8 FT Heavy Duty Sturdy Sliding Barn Door Hardware Kit, Black, (Whole Set Includes 1x... | Check Latest Price |
| # | Preview | Product | |
|---|---|---|---|
| 1 |

|
Room Divider 6FT Portable Room Dividers and Folding Privacy Screens, 88'' W Fabric Divider for Room... | Check Latest Price |
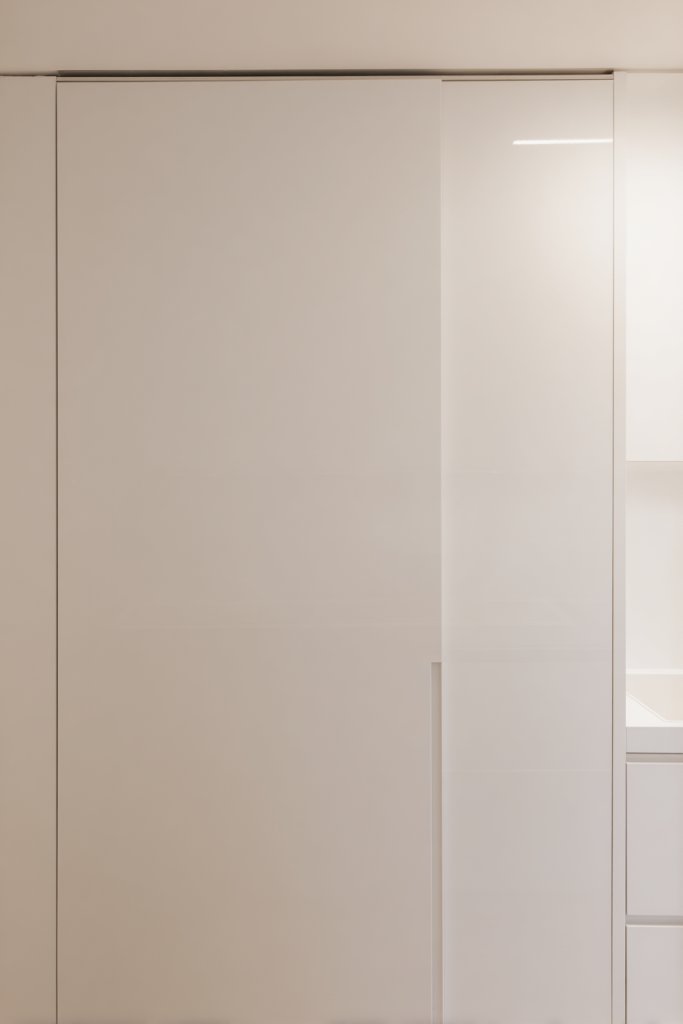
Visualize a sleek, sliding door that seamlessly integrates into your cabinetry or wall. When closed, it hides a messy pantry or laundry area, keeping your main kitchen tidy. When opened, it reveals additional storage or a hidden workspace. The smooth movement and minimal hardware add a modern, clean look. Textured or frosted glass panels can soften the appearance and add privacy.
Choose from various materials: wood, metal, or glass, depending on your style. For a rustic vibe, opt for barn-style sliding doors with hardware. Modern spaces benefit from sleek, handle-less panels. Fold-out partitions can be made from lightweight materials like fabric or lightweight wood, ideal for temporary separation. Incorporate color or pattern for visual interest.
Start by assessing the space and identifying areas that need flexibility. Install tracks and hardware carefully, ensuring smooth operation. Choose durable, high-quality materials that match your overall decor. Incorporate locking mechanisms if needed for security or noise reduction. Regular maintenance of tracks and hardware ensures longevity. Finish with seamless integration into your wall or cabinetry.
Add decorative hardware or accents that match your style. Consider frosted or patterned glass for privacy and visual interest. Personalize with a collection of small decorative elements or a message board on fold-out sections. Use contrasting colors or textures to highlight the functional parts.
Flexible partitions turn a static space into a dynamic environment. They let you adapt your kitchen for work, play, or privacy in seconds. With thoughtful design, they are both functional and stylish. Ready to create a space that adapts as you do?
12. Adding a Linear Backsplash with Patterned Tiles for Visual Interest
Bored of plain, boring kitchen backsplashes? A linear backsplash with patterned tiles adds instant personality and visual interest. It’s a simple way to elevate your entire space without a full renovation. Plus, it’s easy to clean and maintain.
Recommended Products to replicate this idea
| # | Preview | Product | |
|---|---|---|---|
| 1 |

|
Vamos Tile 100-Piece Glossy Dolomite White Peel and Stick Backsplash Tile,3''x6'' PVC Subway Tile... | Check Latest Price |
| # | Preview | Product | |
|---|---|---|---|
| 1 |

|
Art3d 102-Piece Peel and Stick Wall Tile for Kitchen Backsplash, Bathroom, Fireplace, 3in. × 6in.... | Check Latest Price |
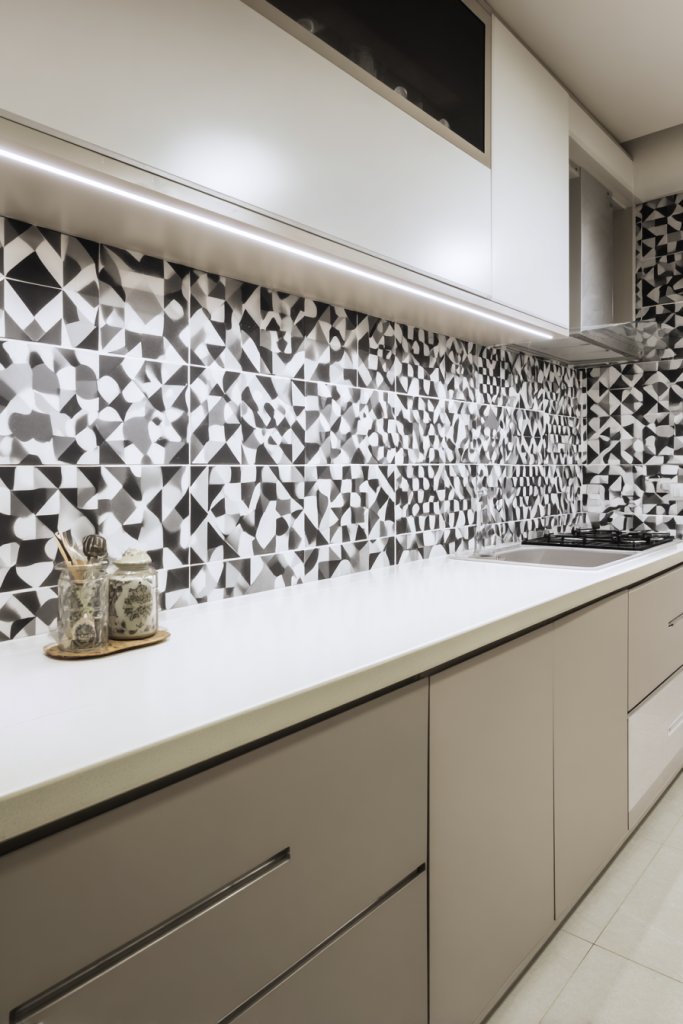
Imagine a long stretch of wall behind your countertop covered with striking patterned tiles—geometric, floral, or abstract. The tiles create a focal point, drawing the eye along the length of the kitchen. The pattern adds depth and texture, contrasting beautifully with smooth countertops and cabinetry. Light-colored grout keeps the look fresh and modern.
Mix and match patterns for a boho vibe, or keep it uniform for a cohesive, modern look. Use bold colors for a statement or stick with monochrome for subtle elegance. Incorporate metallic or textured tiles for added dimension. Seasonal decor like a colorful dish towel or a textured cloth can complement the tile design.
Start by selecting tiles that match your decor style and are suitable for kitchen environments. Prepare the wall surface by cleaning and leveling it. Use a high-quality adhesive and spacers for precise alignment. Seal the tiles with a grout sealer to prevent stains. Consider hiring a professional for intricate patterns or complex layouts. Regular cleaning with gentle solutions keeps the tiles looking fresh.
Add decorative accents like metallic or textured tiles to create a unique border or focal point. Incorporate custom-made mosaic art for a personalized touch. Use lighting to highlight the pattern and texture of the tiles. Rotate decorative accessories like a soft cloth or a textured mat to keep the space lively.
A patterned backsplash showcases your style and makes your kitchen memorable. It’s an easy upgrade that brings color and charm without a complete overhaul. With a little planning, you can create a stunning visual impact that lasts. Ready to transform your backsplash into a work of art?
13. Implementing a Long Work Triangle for Streamlined Movement
Ever feel exhausted after cooking because you’re constantly running around? The long work triangle is a classic kitchen design principle that minimizes unnecessary movement. It keeps your sink, stove, and fridge in optimal positions for maximum efficiency. Less walking means more cooking and less stress.
Recommended Products to replicate this idea
| # | Preview | Product | |
|---|---|---|---|
| 1 |
|
Nicpro Architectural Drafting Tools, 3 PCS Templates for House Plan Furniture Kitchen, Building,... | Check Latest Price |
| # | Preview | Product | |
|---|---|---|---|
| 1 |
|
SoftTouch 4703595N Appliance Slider- Move Heavy Appliances Effortlessly, 3", Beige (4 Pack) | Check Latest Price |
Picture a linear layout where your fridge, sink, and stove form a triangle along a long countertop. The spacing between each point is perfect—neither too close nor too far—making tasks flow smoothly. Bright task lighting highlights each zone, and open shelving or cabinets keep essentials within easy reach. The overall effect is a space that feels intuitive and effortless.
In larger kitchens, extend the triangle into a linear or L-shape, maintaining the spacing for efficiency. For open-concept designs, incorporate a long island to act as a central hub. Use contrasting colors or textures to define zones visually. Seasonal accents like a cozy runner or textured textiles can enhance the feeling of warmth and comfort.
Plan the placement of your major appliances carefully, ensuring the distances between the sink, stove, and fridge are balanced. Use measuring tools or layouts to visualize the triangle. Install cabinetry and countertops to facilitate smooth workflow. Keep pathways clear and avoid placing large furniture or appliances in the middle of the triangle. Adjust spacing as needed for comfort and accessibility.
Personalize with colored hardware, or incorporate a small decorative element near each point of the triangle. Use lighting to highlight each zone, and consider adding a small rug or textured mat in front of the sink or stove. Keep frequently used utensils and tools close at hand for quicker access. Seasonal updates like colorful towels or decorative jars can add charm.
A well-executed work triangle makes cooking more enjoyable and efficient. It creates a logical flow that reduces fatigue and frustration. With some careful planning and a few tweaks, your kitchen will be a model of functional design. Ready to streamline your cooking space?
14. Using Vertical Pull-Out Storage for Hard-to-Reach Areas
Ever wish you had more space for tiny essentials like spices and oils? Vertical pull-out storage is a clever solution for hard-to-reach spots. It maximizes vertical space and keeps everything organized and accessible. No more crawling on your hands and knees to find that elusive jar.
Recommended Products to replicate this idea
| # | Preview | Product | |
|---|---|---|---|
| 1 |

|
Household Essentials Glidez Multipurpose Chrome-Plated Steel Pull-Out/Slide-Out Storage Organizer... | Check Latest Price |
| # | Preview | Product | |
|---|---|---|---|
| 1 |

|
Pull Out Spice Rack Organizer for Cabinet, 3 Packs Slide Out Spice Racks Organizer, Spice Cabinet... | Check Latest Price |
Imagine slim, tall cabinets with pull-out shelves that extend smoothly when needed. Inside, small bottles, jars, and utensils are neatly arranged in labeled compartments. The cabinet blends seamlessly into your cabinetry, maintaining a sleek look. The pull-out mechanism is quiet and sturdy, making access effortless. The overall effect is a hidden storage treasure trove.
Choose minimalist, handle-less designs for a modern aesthetic, or vintage-inspired hardware for a rustic feel. Use dividers or baskets within the pull-outs to organize different items. For added style, incorporate decorative trims or colored interiors. These units work well in narrow gaps or unused corners, turning dead space into valuable storage.
Start by measuring the depth and height of your cabinetry openings. Select pull-out systems that fit your dimensions and are rated for the weight of your items. Install the units with proper guides and test their smooth operation. Organize items by frequency of use, placing the most-used at the front. Regularly clean and maintain the mechanisms for longevity. Use labels or color coding inside for quick identification.
Decorate the interior with colored liners or small containers matching your decor. Incorporate small hooks or clips inside for utensils or keys. Consider adding LED lighting inside pull-outs for visibility. Personal touches like vintage labels or decorative trims make the storage feel intentional and stylish.
Vertical pull-out storage turns awkward spaces into practical, organized zones. It’s a smart way to keep your kitchen clutter-free and efficient. With simple installation and clever organization, you’ll enjoy a neater, more functional environment. Ready to make the most of your vertical space?
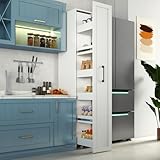
15. Installing Long, Narrow Floor-to-Ceiling Cabinets for Extra Storage
Running out of storage but don’t want bulky furniture? Floor-to-ceiling cabinets maximize vertical space and add elegant storage without sacrificing style. They keep your kitchen tidy by hiding away seldom-used items and creating a clean, seamless look. It’s a win-win for space-starved kitchens.
Recommended Products to replicate this idea
| # | Preview | Product | |
|---|---|---|---|
| 1 |

|
HOSTACK 71" Tall Pantry Cabinet with Charging Station, 55" Wide Kitchen Pantry Storage Cabinet with... | Check Latest Price |
| # | Preview | Product | |
|---|---|---|---|
| 1 |

|
Elite 6-Piece White Storage Cabinet System with Panel Doors, Ideal for Bathroom, Garage, Home... | Check Latest Price |
Imagine sleek, tall cabinets that stretch from the floor to the ceiling, with minimalist handles or push-to-open mechanisms. The cabinet doors seamlessly blend with your wall, creating a unified background. Inside, adjustable shelves and hidden compartments organize everything from large appliances to seasonal decor. The glossy or matte finish adds a modern touch, reflecting light and expanding the space visually.
Choose high-gloss finishes for a contemporary look or textured wood for warmth. For small spaces, incorporate mirrored panels or glass inserts to add depth. Use color or hardware accents to break the monotony if desired. Integrate pull-out drawers or baskets for versatile storage options. Decorate the top with decorative items or lighting to highlight the vertical lines.
Measure the full height of your wall and select cabinetry accordingly. Install wall anchors and secure the units firmly to prevent tipping. Use a level for perfect alignment, and consider professional installation for large or complex units. Inside, organize with adjustable shelves, baskets, or dividers. Finish with matching trim or molding for a polished appearance. Regularly clean and check hardware for smooth operation.
Add decorative handles or hardware that reflect your style. Use interior lighting or small spotlights to illuminate the contents. Incorporate decorative panels or textured finishes to add visual interest. Label shelves or compartments for quick access and organization. Seasonal or themed accessories can also add a personal touch.
Floor-to-ceiling cabinets provide unmatched storage and sleek aesthetics. They make your kitchen feel taller and more spacious while hiding clutter. With proper planning, you create a modern, organized environment that lasts. Ready to go vertical for maximum storage?
16. Creating a Continuous Countertop with Integrated Sink and Cooktop
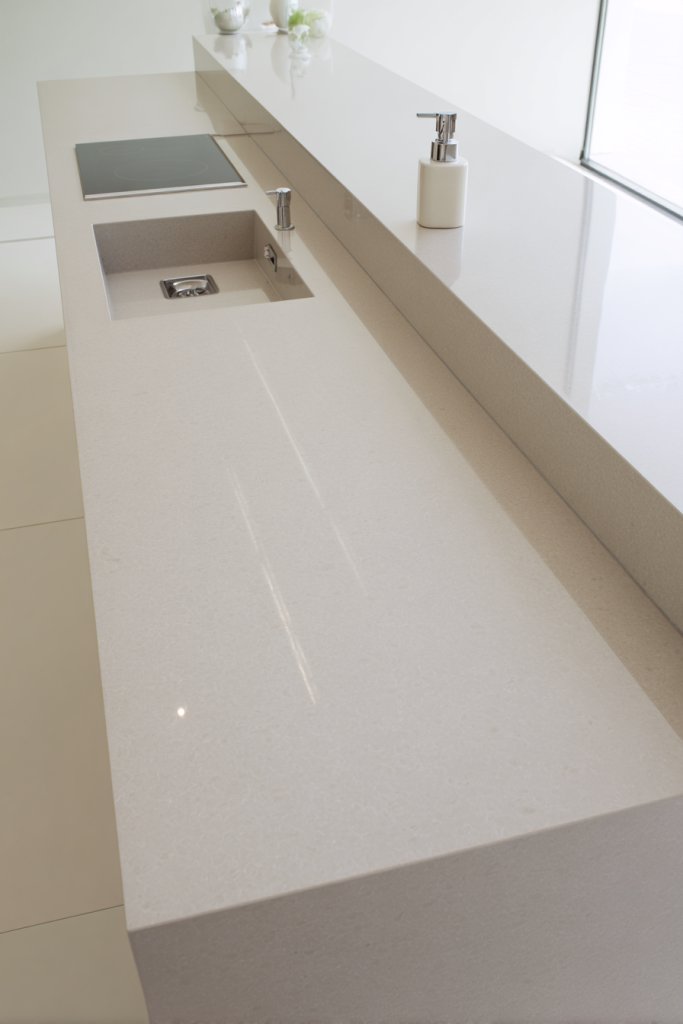
Tired of cluttered, segmented counters that interrupt your workflow? A continuous countertop with integrated appliances offers a sleek, unified look. It creates an uninterrupted workspace that’s both functional and stylish. Plus, it makes cleaning a breeze.
Recommended Products to replicate this idea
| # | Preview | Product | |
|---|---|---|---|
| 1 |

|
KUMOYOU Boat Caravan RV Camper Gas Stove, 2-Burner Camping Cooktop Propane Stove, Portable Stainless... | Check Latest Price |
| # | Preview | Product | |
|---|---|---|---|
| 1 |
|
HIGHTOP 2PCS 6 inch Seamless Seam Setter With Vacuum Suction Cups For Seam Joining Leveling,Solid... | Check Latest Price |
Picture a seamless slab of quartz or granite with a flush-mounted sink and cooktop. The surface flows smoothly from prep to cooking, with no gaps or edges to catch crumbs. The integrated sink has a clean, modern look, while the cooktop appears to float on the surface. Underneath, storage drawers or cabinets keep everything within reach. The overall aesthetic is clean, minimalist, and contemporary.
Choose contrasting materials or colors for the countertop and appliances for visual interest. For a rustic vibe, opt for reclaimed wood with embedded fireproof surfaces. For ultra-modern looks, use sleek, matte finishes and hidden controls. Incorporate a pop-up outlet or small built-in features for added convenience. Seasonal accents like a textured runner or decorative cutting boards can brighten the space.
Select durable, heat-resistant materials that can handle daily use. Carefully plan the placement of the sink and cooktop for optimal workflow, considering plumbing and electrical connections. Use a professional for installation to ensure seamless integration. Install under-counter drawers or cabinets for easy access to utensils and cookware. Seal all edges thoroughly and test appliances before use. Regular maintenance keeps surfaces looking pristine.
Add personal touches like a custom-designed sink or a unique countertop edge profile. Incorporate a hidden trash or recycling drawer underneath for convenience. Use decorative accessories like textured mats or coordinated utensils to reflect your style. Keep the surface clutter-free with organizers and trays.
A continuous, integrated countertop not only looks stunning but also enhances your efficiency. It simplifies cleaning and creates a cohesive look that elevates your entire kitchen design. With thoughtful choices, your space will feel larger, cleaner, and more inviting. Ready for a seamless upgrade?
17. Adding a Long, Multi-Level Counter for Different Functional Zones
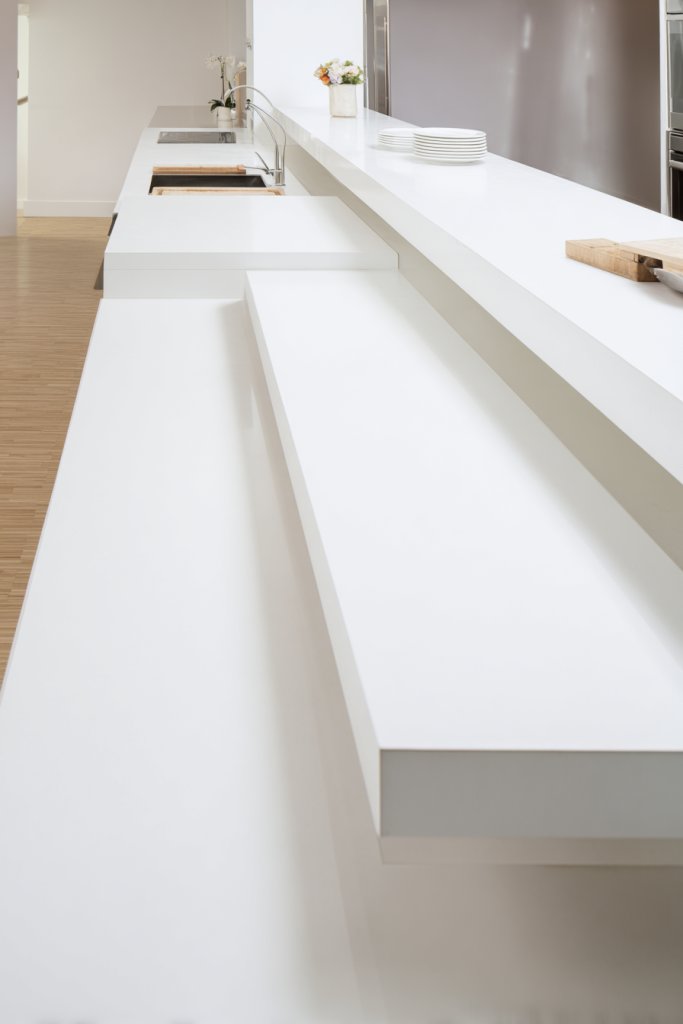
Feeling that your kitchen lacks organization? A long, multi-level counter creates distinct zones for prep, cooking, and serving within one continuous surface. It adds visual interest and boosts functionality. Plus, it helps you stay organized and reduces clutter.
Recommended Products to replicate this idea
| # | Preview | Product | |
|---|---|---|---|
| 1 |
|
IDEALHOUSE Rolling Kitchen Island with Drop Leaf Countertop, Charging Station & Ample Storage -... | Check Latest Price |
| # | Preview | Product | |
|---|---|---|---|
| 1 |

|
ANBOXIT Countertop Coffee Station Organizer, 2 Tier Wooden Shelf for Coffee Bar Accessories,... | Check Latest Price |
Visualize a long countertop with varying heights—lower for prep, higher for serving or bar seating. The different levels are defined by contrasting materials or trims, creating a dynamic look. The lower section holds cutting boards and mixing bowls, while the taller part acts as a buffet or bar. Pendant or sconce lighting highlights each zone, making the entire space inviting.
Use contrasting finishes, such as wood and stone, to delineate zones. For a cozy feel, incorporate textured materials or warm tones. In contemporary kitchens, go for sleek, monochrome surfaces with integrated lighting. Adjust the heights based on your needs—higher for bar seating, lower for prep work. Seasonal touches like colorful textiles or decorative dishes can add personality.
Plan the height differences based on ergonomic comfort and usage. Use sturdy, durable materials like quartz, concrete, or wood with sealed finishes. Install appropriate supports or legs for stability. Incorporate electrical outlets or lighting at each level to enhance usability. Organize tools and utensils within reach, using drawers or open shelves. Finish with seamless edges and consistent design details.
Add decorative elements like textured trims or contrasting colors to emphasize zones. Incorporate a collection of your favorite dishes or glassware on open shelves. Use layered textiles like a woven runner or textured mats to soften the look. Personalize with functional accessories like utensil holders or spice racks.
A multi-level counter transforms your kitchen into a versatile, stylish space. It encourages organization and makes multitasking easier. With some creative planning, you’ll enjoy a space that’s both beautiful and highly functional. Ready to create zones that work for you?
18. Using Light Colors and Reflective Surfaces to Enhance Space Perception
Feeling that your long kitchen feels cramped and dark? Light colors and reflective surfaces can instantly open up the space. They bounce light around, making everything feel brighter and larger. It’s a simple trick that can turn a claustrophobic room into a welcoming haven.
Recommended Products to replicate this idea
| # | Preview | Product | |
|---|---|---|---|
| 1 |

|
Ruomeng Home Gym Mirrors 12 Inch x 12Pcs Wall Mounted Mirror Glass Frameless Full Length Mirror... | Check Latest Price |
| # | Preview | Product | |
|---|---|---|---|
| 1 |
|
Vamos Tile 100-Piece Glossy Dolomite White Peel and Stick Backsplash Tile,3''x6'' PVC Subway Tile... | Check Latest Price |
Imagine a kitchen dominated by white or soft pastel cabinetry, with glossy countertops and backsplash tiles. Large windows let in natural light, which reflects off the shiny surfaces. The space is airy, with minimal clutter and a sense of openness. Textured textiles or subtle metallic accents add depth without overwhelming.
Opt for high-gloss or semi-gloss finishes for a sleek look. Use reflective materials like glass, polished stone, or metallic accents for backsplashes and hardware. Light-colored flooring, such as pale wood or tiles, complements the overall brightness. Seasonal touches like colorful textiles or decorative objects can add personality while maintaining a light aesthetic.
Choose cabinets with reflective finishes or glass-front doors. Install glossy or matte tiles for backsplashes, and select light-colored flooring. Maximize natural light with large windows or skylights. Use layered lighting—ambient, task, and accent—to enhance brightness. Keep surfaces clean and free of clutter for the best effect. Regular cleaning maintains the reflective qualities.
Add subtle metallic or mirrored accents to furniture or fixtures. Use light-colored or textured textiles to soften the space. Incorporate a few colorful accessories or artwork for contrast, but keep overall light tones dominant. Use lighting to highlight reflective surfaces and create a lively atmosphere.
Light colors and reflective surfaces make your kitchen feel bigger, brighter, and more inviting. They create a timeless, elegant look that works with any style. With a few simple updates, you can enjoy a space that feels fresh and open every day. Ready to brighten your kitchen?
19. Incorporating Long, Narrow Windows for Natural Light and Ventilation
Feeling closed in during long, dark winters? Long, narrow windows flood your kitchen with natural light and fresh air. They improve ventilation and create a connection to the outdoors. Plus, they add architectural interest and style to your space.
Recommended Products to replicate this idea
| # | Preview | Product | |
|---|---|---|---|
| 1 |

|
VEVOR Concession Window Aluminum Alloy Frame Service Windows for Food Truck, Up to 85 Degrees Stand... | Check Latest Price |
| # | Preview | Product | |
|---|---|---|---|
| 1 |

|
Mellroom Adjustable Window Screen Replacement kit with Zipper Opening, Fiberglass White 63"X63"... | Check Latest Price |
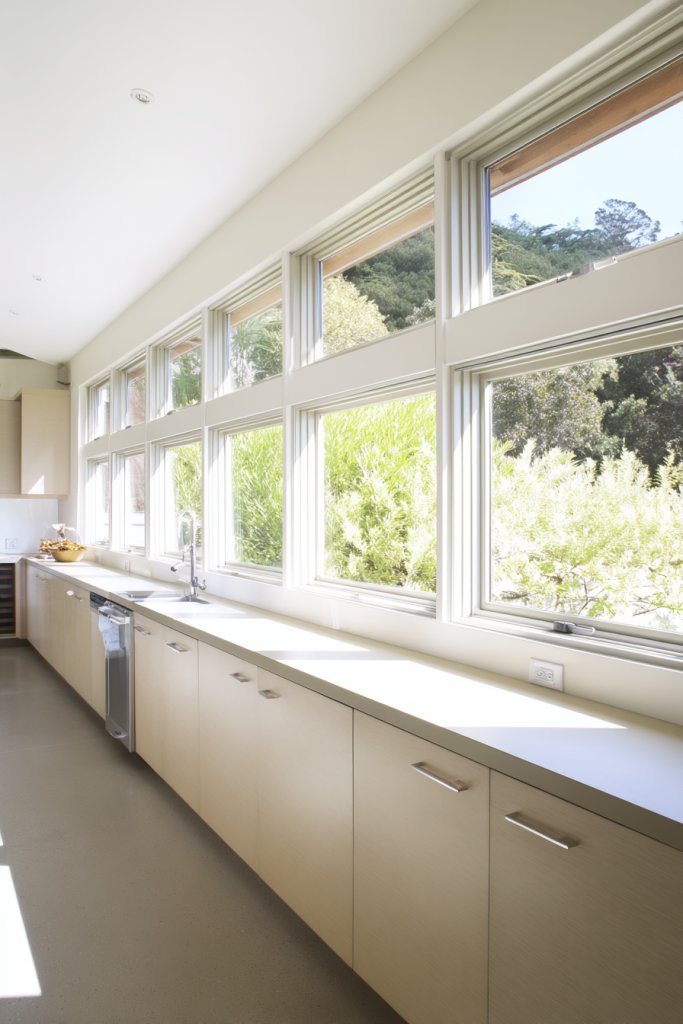
Imagine a row of slim, elongated windows stretching along the length of your kitchen wall. The sunlight streams in, casting long shadows and highlighting textures. The view outside adds depth, making the space feel larger. Inside, minimal window treatments keep the look clean and modern, while soft textiles and warm tones inside create a cozy atmosphere.
Choose window frames in contrasting colors or materials like black metal or natural wood for a modern look. Use frosted or textured glass if privacy is a concern. For a rustic style, incorporate wooden frames and shutters. Consider adding window sills for small potted herbs or decorative objects, keeping in mind restricted content rules.
Measure the wall carefully and select narrow, elongated window styles that fit your aesthetic. Work with professionals for precise installation, ensuring proper sealing and insulation. Keep window treatments minimal—blinds, shades, or curtains should complement the design without blocking light. Regularly clean the glass to maximize brightness. Use window film or tinting for UV protection if needed.
Personalize with decorative window treatments, like textured shades or simple blinds. Incorporate small window ledges or sills for plants or decorative objects, avoiding restricted content. Use lighting strategically to complement the natural light during evenings. Seasonal accents like fairy lights or decorative decals can add charm.
Long, narrow windows transform your kitchen into a bright, airy space. They boost ventilation and bring the outdoors inside, making your space feel more alive. With the right design, you’ll enjoy a healthier, more inviting environment every day. Ready to let the light in?
20. Installing Under-Floor Heating for Comfort in Long Spaces
Long kitchens can be chilly, especially during winter. Installing under-floor heating offers consistent warmth from below, making your space cozy and inviting. It’s a subtle luxury that elevates your entire home experience. Plus, it frees up wall space by eliminating radiators.
Recommended Products to replicate this idea
| # | Preview | Product | |
|---|---|---|---|
| 1 |

|
Warming Systems - 15 Sqft 120V Electric Radiant Floor Heating Mat – Includes Heating Mat,... | Check Latest Price |
| # | Preview | Product | |
|---|---|---|---|
| 1 |

|
Programmable Thermostat for House Radiant Underfloor Heating, Home Heat Floor Mat Controller... | Check Latest Price |
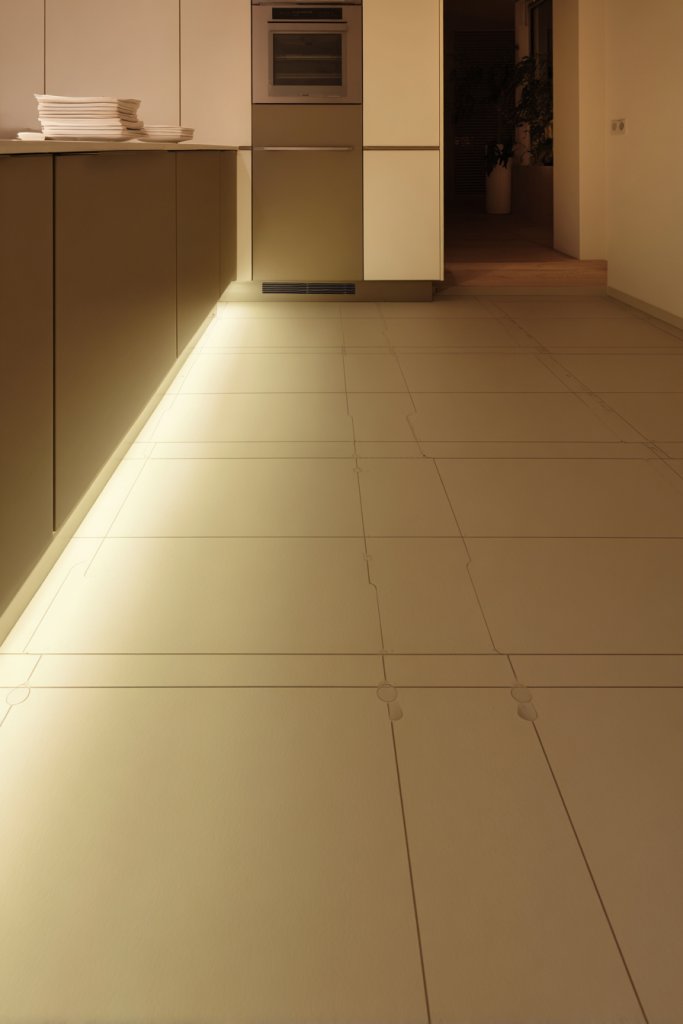
Imagine warm tiles underfoot, glowing gently as you cook or gather. The heat radiates evenly, eliminating cold spots and drafts. The sleek flooring seamlessly covers the heating elements, creating a clean, modern look. The space feels more comfortable, especially during cold mornings or winter evenings.
Choose from electric or hydronic under-floor systems based on your budget and needs. Use large-format tiles or sealed hardwood for a sleek, uniform appearance. Consider adding heated mats in specific zones like the sitting or prep areas for targeted comfort. Seasonal accents like cozy slippers or textured rugs can complement the warmth.
Consult with professionals to plan the system appropriate for your floor type and space. Prepare the subfloor by leveling and insulating it properly. Install the heating elements according to manufacturer instructions, ensuring even coverage. Finish with your chosen flooring material—tile, wood, or composite—over the heating system. Test the system thoroughly before regular use.
Control the temperature with smart thermostats or timers for energy efficiency. Use textured or patterned tiles to add visual interest. Incorporate rugs or mats in specific zones for added comfort and style. Keep the flooring clean and well-maintained for longevity.
Under-floor heating makes your kitchen a haven of comfort, especially in long spaces. It adds a touch of luxury that enhances your daily routine. With proper installation, you’ll enjoy a warm, inviting environment all year round. Ready to step into cozy comfort?
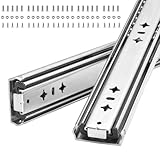
21. Creating a Long, Narrow Storage Corridor with Sliding Shelves
Running out of accessible storage in a tight kitchen? A long, narrow storage corridor with sliding shelves turns wasted space into a practical pantry. It keeps essentials close at hand without sacrificing precious room. Plus, it keeps your kitchen looking sleek and organized.
Recommended Products to replicate this idea
| # | Preview | Product | |
|---|---|---|---|
| 1 |
|
6 Tier Slim Rolling Pantry Storage Cart Wood Spice Rack on Wheels Next to Fridge Mobile Shelving... | Check Latest Price |
| # | Preview | Product | |
|---|---|---|---|
| 1 |
|
Heavy Duty Drawer Slides, 40 Inch, 300 lb Load Capacity, Side Mount, Full Extension, Ball Bearing,... | Check Latest Price |
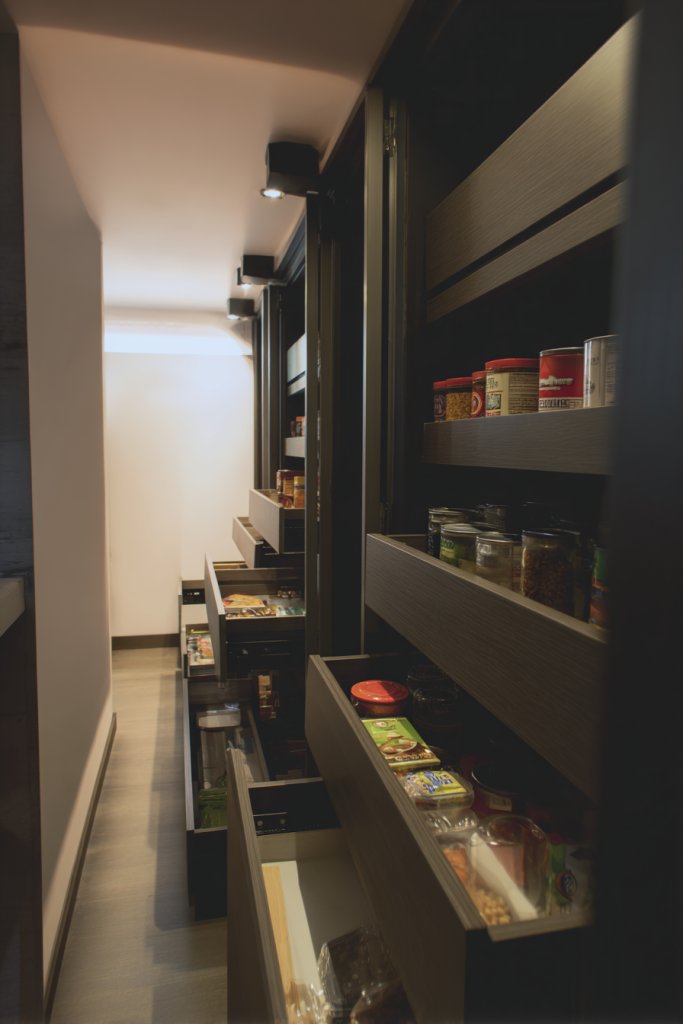
Envision a corridor along the side of your kitchen with slim sliding shelves that glide out smoothly. Inside, spices, cans, or utensils are neatly arranged, ready for quick retrieval. The shelves are made of wood or metal, matching your decor. The corridor remains clean and unobstructed when not in use, creating a hidden storage solution that’s both functional and stylish.
Use contrasting materials—metal for a modern look, wood for warmth—to match your style. Incorporate labels or color-coded containers to keep everything organized. For added convenience, install soft-close mechanisms or locking features. Decorate with textured wall finishes or paint to complement the overall design.
Assess the available space and decide on the width and depth of your sliding shelves. Choose high-quality guides and hardware for smooth operation. Install the sliding units securely into wall studs or built-in framing. Organize your items in small bins or baskets for easy access. Regularly clean and lubricate the guides for optimal performance.
Label containers or add decorative touches like patterned liners. Incorporate LED lighting inside the corridor for visibility. Use textured or colorful wall finishes to enhance the aesthetic. Personalize with small decorative objects or artwork outside the corridor to make it inviting.
A long storage corridor with sliding shelves turns a narrow space into a highly functional zone. It simplifies your cooking routines and declutters your main areas. With some planning, you can enjoy a smarter, more organized kitchen. Ready to transform your storage solutions?
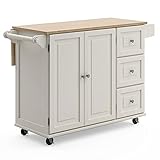
22. Using Multi-Purpose Long Counters with Fold-Down Tables
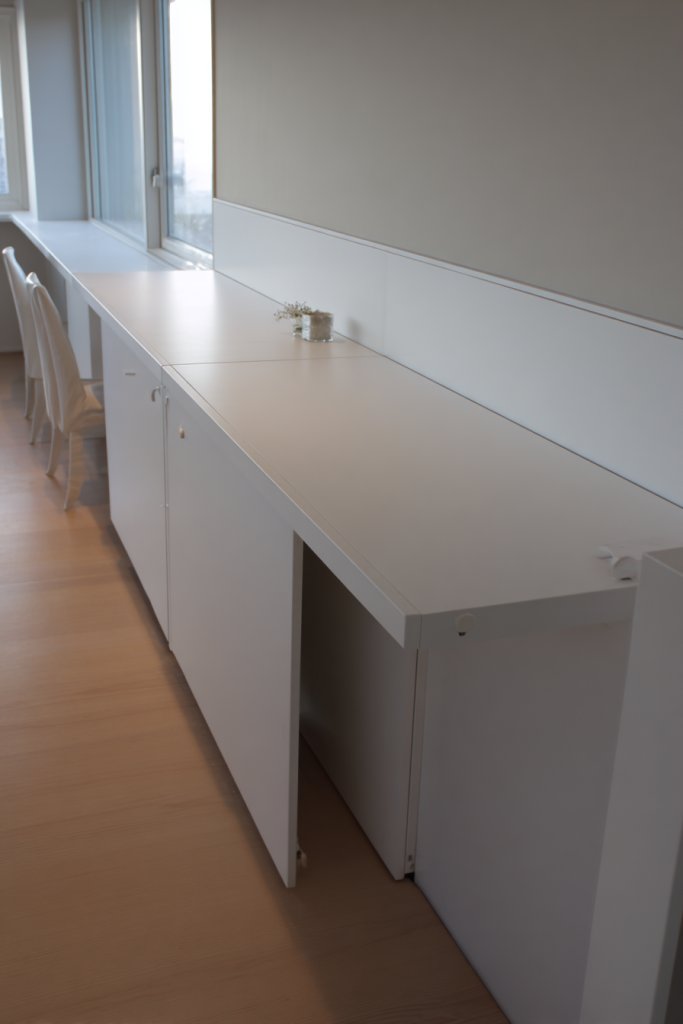
Limited space for both prep and dining? Multi-purpose long counters with fold-down tables are a game-changer. They offer flexible solutions for meal prep, casual dining, or even working from home. It’s a smart way to make every inch count.
Recommended Products to replicate this idea
| # | Preview | Product | |
|---|---|---|---|
| 1 |
|
Homestyles Dolly Madison Off-White Mobile Kitchen Island Cart with Wood Drop Leaf Breakfast Bar | Check Latest Price |
| # | Preview | Product | |
|---|---|---|---|
| 1 |

|
COSTWAY Wall Mounted Folding Table, 31.5" x 23.5" Drop-Leaf Floating Writing Desk for Small Spaces,... | Check Latest Price |
Imagine a long countertop that extends into a fold-down table when needed. When folded up, it blends seamlessly into the counter, keeping the space sleek. When folded down, it creates an intimate dining nook or extra prep area. The surface is durable and easy to clean, with subtle hardware that hides when not in use. Chairs or stools tuck underneath effortlessly.
Choose materials that match your decor—marble, wood, or laminate. For a minimalist look, opt for handle-less fold-down tables with hidden hinges. Add decorative accents like textured textiles or colorful cushions for comfort. Adjust the height for ergonomic comfort, and consider adding a small shelf or storage underneath.
Start by measuring your space and selecting a sturdy, foldable support system. Use durable, wipeable surfaces for easy maintenance. Install the hinges or support brackets securely into the wall or countertop. Ensure the folded-down table is level and stable before use. Keep the area around the fold-down clear for easy operation. Regularly inspect and tighten hardware.
Personalize with a variety of textures—wood grain, glossy finishes, or textured laminates. Use decorative cushions or textiles on stools or chairs. Incorporate a small shelf or hooks nearby for storing utensils or accessories. Seasonal accents like a textured runner or place mats can add charm.
Multi-purpose counters with fold-down tables maximize versatility without sacrificing style. They turn a small space into a multifunctional hub for cooking, dining, or working. With some clever design, your kitchen becomes more adaptable and inviting. Ready to fold in some extra functionality?
23. Enhancing Workflow with Zone-Specific Lighting and Color Coding
Ever feel disorganized or distracted while cooking? Zone-specific lighting and color coding help you focus and improve efficiency. They visually define different areas, making your kitchen more intuitive. It’s a simple upgrade with a big impact.
Recommended Products to replicate this idea
| # | Preview | Product | |
|---|---|---|---|
| 1 |

|
Maylit Under Cabinet Lights Plug in, 3 Pcs 12 Inch Ultra Thin Under Cabinet Lighting, Super Bright... | Check Latest Price |
| # | Preview | Product | |
|---|---|---|---|
| 1 |

|
Tag-A-Room Color Coded Moving Box Label (Kitchen) | Check Latest Price |
Imagine different zones illuminated with task lighting—warm in prep areas, cool over cooking zones. Color-coded containers or labels match the lighting, creating visual cues for organization. For example, red for spices, blue for utensils, green for cleaning supplies. The overall effect is a cohesive, easy-to-navigate space that feels tailored to your routine.
Use colored LED strips or puck lights to highlight specific zones. Incorporate matching storage containers, labels, or baskets to reinforce color themes. Choose lighting styles that suit your decor—industrial, modern, or rustic. Seasonal variations can include cozy textiles or themed accents that complement your color scheme.
Plan your zones carefully, identifying key areas for prep, cooking, cleaning, and storage. Install adjustable lighting fixtures like under-cabinet LEDs or spotlights for targeted illumination. Use color-coded storage solutions—bouches, bins, or labels for quick identification. Test different lighting intensities and colors to find what works best for each zone. Keep wiring neat and hidden for a clean look.
Add decorative accents like textured wall panels or painted stripes to reinforce zones. Personalize with themed labels, tags, or decals. Use lighting controls to change ambiance for different times—bright for cooking, dim for relaxing. Incorporate personal items or favorite colors to make zones feel uniquely yours.
Zone-specific lighting and color coding make your kitchen more organized and efficient. They help you work faster and reduce mistakes. With a little planning, your space becomes both practical and personalized. Ready to light up your workflow?
24. Opting for Minimalist, Streamlined Cabinets for a Clean Look
Cluttered cabinets and handles can make your kitchen look busy and overwhelming. Minimalist, handle-less cabinets give a sleek, modern vibe that simplifies the space. They make cleaning easier and create a calm, clutter-free environment. Who doesn’t want that?
Recommended Products to replicate this idea
| # | Preview | Product | |
|---|---|---|---|
| 1 |

|
CUSTOM Glass Cabinet Door - 5 Glass Options, 4 Frame Styles, & 5 Frame Colors | Assembled &... | Check Latest Price |
| # | Preview | Product | |
|---|---|---|---|
| 1 |

|
Magnetic Touch Push Open Latch (2, Black) | Check Latest Price |
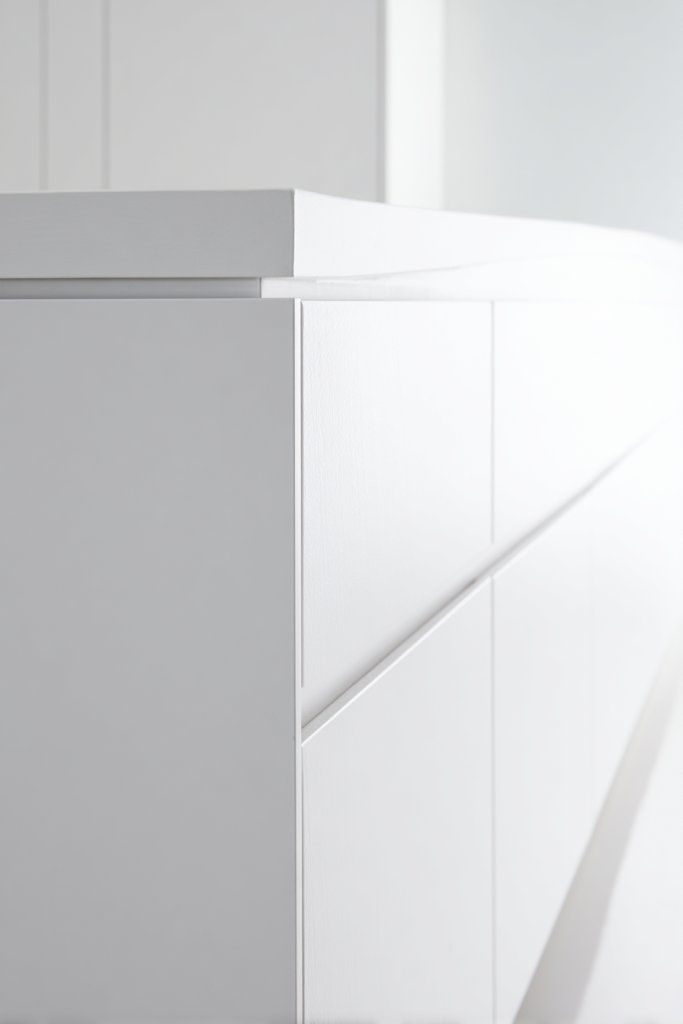
Imagine smooth, flat-front cabinets with no visible hardware, finished in matte or gloss. The surfaces are seamless, reflecting light and making the room appear larger. The overall look is understated but sophisticated, with integrated handles or push-to-open mechanisms maintaining the clean lines. The space feels calm, organized, and effortlessly elegant.
Choose neutral tones like white, gray, or black for a timeless look, or add subtle textures like wood grain or matte finishes for depth. Incorporate hidden handles or touch-activated openers for a sleek appearance. Complement with minimalist appliances and subtle hardware for a cohesive look. Seasonal accents like textured textiles or decorative bowls add warmth without clutter.
Select cabinets with integrated handle-less designs or push-to-open systems. Ensure precise measurements and professional installation for seamless alignment. Use soft-close hinges for a quiet, smooth operation. Inside, organize with minimalist trays, dividers, or baskets to keep everything tidy. Finish with a durable, easy-to-clean surface that complements your decor.
Personalize with subtle hardware accents, like colored or textured handles, if desired. Use lighting to highlight the minimalist design—LED strips or spotlights work well. Incorporate decorative textures or panels on cabinet doors for visual interest. Keep countertops clutter-free with hidden storage solutions.
Minimalist, streamlined cabinets create a timeless, elegant look that simplifies daily routines. They make your kitchen feel bigger and more organized. With thoughtful choices, your space will exude calm and sophistication. Ready to embrace the minimalist trend?
Conclusion
These long kitchen layout ideas showcase a diverse range of options to enhance both the functionality and beauty of your space. Whether you prefer sleek modern lines, cozy traditional touches, or innovative storage solutions, there’s a design here to inspire your renovation. Don’t hesitate to experiment with these concepts in your own home—your ideal kitchen is within reach. Take action today and create a long kitchen layout that transforms your cooking experience into pure joy!