I have been, or can be if you click on a link and make a purchase, compensated via a cash payment, gift, or something else of value for writing this post. As an Amazon Associate, I earn from qualifying purchases. Please read my full Affiliate Disclosure for more information.
Have you ever wanted to turn your personal space into a vibrant expression of your unique style? Indie Room Ideas are gaining popularity because they celebrate individuality, creativity, and a touch of rebellious spirit that breaks away from mainstream decor. These ideas inspire you to craft a space that truly reflects who you are, filled with eclectic touches and bold statements.
In this article, you’ll discover a diverse array of indie-inspired decor ideas that cater to every taste and personality. From vintage finds and DIY projects to unconventional color schemes and quirky accessories, there’s something to ignite your imagination and help you create a room that’s as original as you are.
1. Upcycled Furniture with a Boho Twist
Ever felt like your room could use a splash of personality without breaking the bank? Upcycled furniture offers a way to give old pieces new life and reflect your indie vibe. It’s perfect for those who want unique, eco-friendly decor that tells a story. Plus, it’s a fun project that lets you showcase your creativity and sustainability values.
Recommended Products to replicate this idea
| # | Preview | Product | |
|---|---|---|---|
| 1 |

|
yhslmh Floral Stencils for Painting on Wood Furniture Wall Reusable Canvas Flower Flourish Swirls... | Check Latest Price |
| # | Preview | Product | |
|---|---|---|---|
| 1 |

|
Rust-Oleum Linen White Chalked All-in-One Ultra Matte Paint | One Coat Coverage | No Primer,... | Check Latest Price |
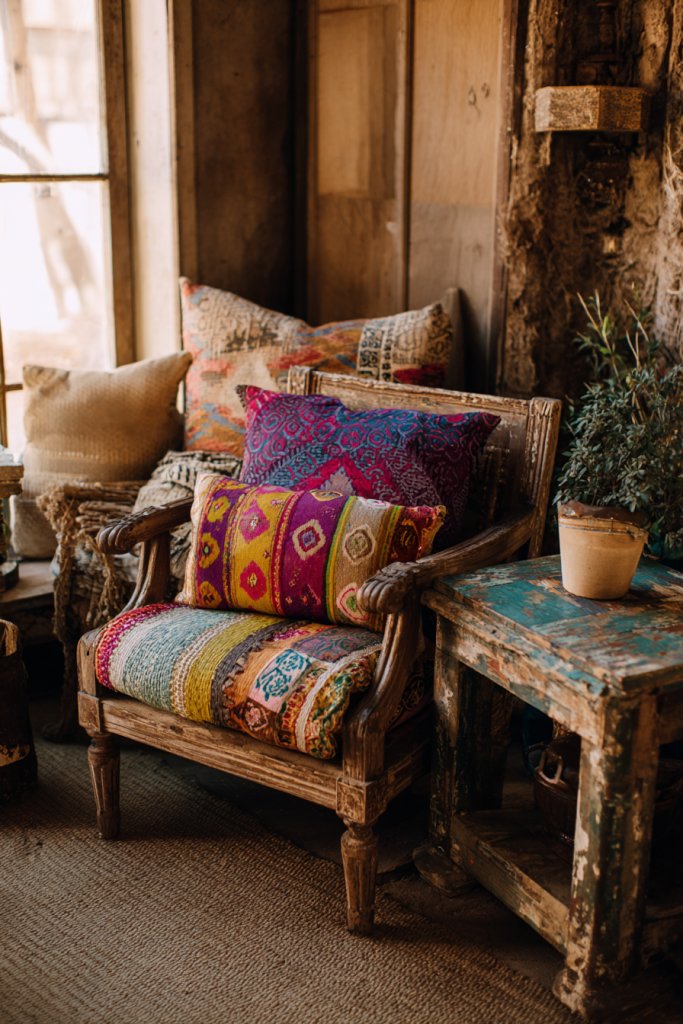
Imagine a vintage wooden chair painted in vibrant, mismatched patterns, adorned with fringe and fabric scraps. A repurposed dresser with distressed paint and colorful knobs becomes a focal point. Textures vary from rough wood to soft textiles, creating an eclectic mix. The room feels warm and inviting, full of character and history, all thanks to clever upcycling.
You can choose a Boho twist with bright colors, or go for a muted, earthy palette for a more subdued indie look. Small pieces like side tables can be painted or decoupaged, while larger furniture like beds and dressers can be reimagined with bold finishes or carvings. Seasonal accents, like cozy throws or lightweight fabrics, can refresh the style throughout the year.
Start by hunting for vintage furniture at thrift stores or flea markets. Sand down rough surfaces and clean thoroughly before applying primer. Use chalk paint or acrylics to add color, then seal with a matte finish. Embellish with fabrics, carvings, or decorative hardware to enhance the boho aesthetic. Consider adding small details like tassels or beads for extra flair. This project is beginner-friendly but requires patience for sanding and painting.
Customize each piece with stencils, freehand designs, or decoupage using your favorite fabrics or paper. Mix and match textures like woven textiles, leather, or metal to create a layered look. Personal touches, like adding a favorite quote or meaningful symbols, make each item truly yours. Don’t be afraid to experiment with colors and finishes to match your room’s vibe.
Upcycled furniture proves that you don’t need to buy new to achieve a stunning indie room. Your creativity can turn everyday objects into statement pieces, making your space uniquely yours. With a little effort, you’ll have a room that sparks joy and conversation. Ready to transform old furniture into art? Get your paintbrushes and start creating!
2. Creative Lighting with Handmade Lanterns
Ever wish your room had a softer, more inviting glow? Standard lighting can be dull, but handmade lanterns add warmth and personality effortlessly. They’re perfect for creating that indie, cozy ambiance that makes your space feel like a retreat. Plus, crafting your own gives you a sense of accomplishment and style.
Recommended Products to replicate this idea
| # | Preview | Product | |
|---|---|---|---|
| 1 |

|
2 Pcs Hanging Hexagon Decorative Moroccan Candle Lantern Holders, Handmade Hanging Tea Light Holder... | Check Latest Price |
| # | Preview | Product | |
|---|---|---|---|
| 1 |

|
Homemory 24Pcs Flickering Flameless Candle Battery Operated, 200+Hours Fake Electric LED Tea Lights... | Check Latest Price |
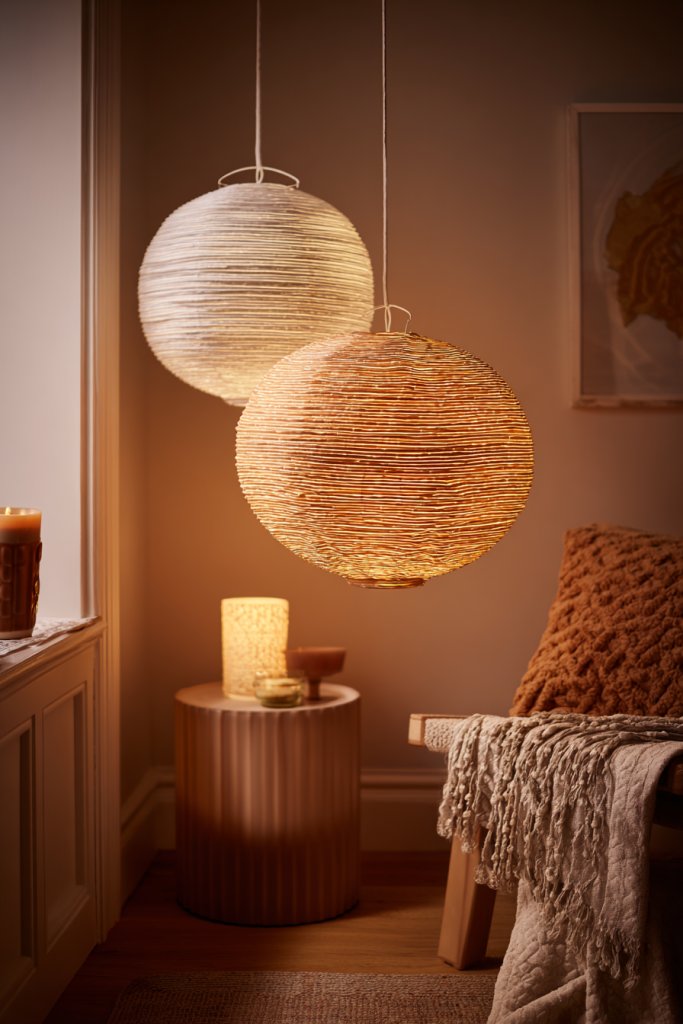
Imagine a series of lanterns crafted from natural materials like rattan, paper, or wire, hanging in a cluster. The glow filters through textured surfaces, casting soft shadows that dance across the walls. The lanterns’ shapes are organic and imperfect, adding to the relaxed, bohemian vibe. The room feels intimate and warm, perfect for relaxing or entertaining.
Use different shapes and sizes—round, cylindrical, or geometric—to add visual interest. Seasonal variations include lightweight paper lanterns for summer or plush, fabric-covered ones for winter warmth. Pair with candles or LED lights inside for different lighting effects. Hang them at varying heights to create a layered, dynamic look suitable for bedrooms, living rooms, or cozy corners.
Start with simple materials like paper lantern kits or DIY wireframes. Use natural twine or leather cords for hanging. Decorate with additional elements such as tassels, beads, or fabric strips for extra texture. For a more rustic look, incorporate reclaimed wood or bamboo accents. Install hooks or ceiling mounts to hang multiple lanterns at different levels, experimenting with placement for the best ambiance. Use LED bulbs to avoid fire hazards and prolong the life of your art.
Paint or decorate lanterns with patterns, quotes, or doodles to match your style. Incorporate your favorite textures, like fringes or woven accents, for extra flair. Use different light sources—warm white LEDs or flickering candles—for mood setting. Change the arrangement periodically to refresh your space’s feel and keep the cozy vibe alive.
Handmade lanterns turn simple lighting into a statement of creativity. They make your room feel warm, inviting, and totally personalized. Plus, they’re easy enough for beginners and impressive enough to wow your friends. Time to craft your way to a softer, more indie-inspired glow!
3. Hang Tapestry or Fabric Art for Texture and Color
Do your walls feel flat and uninspired? Hanging a tapestry or fabric art can instantly add texture and color, transforming your space into a cozy indie haven. It’s an affordable way to introduce softness without relying on traditional art pieces. Plus, it’s a great DIY project that can reflect your aesthetic and mood.
Recommended Products to replicate this idea
| # | Preview | Product | |
|---|---|---|---|
| 1 |

|
KHOYIME Large Macrame Wall Hanging Boho Woven Tapestry, Chic Home Decor Modern Bohemian Handmade... | Check Latest Price |
| # | Preview | Product | |
|---|---|---|---|
| 1 |

|
Beyeutao Tapestry Hanger Wooden Tapestry Hanging Telescopic Rod Room Adjustable 16-44 Inch Wooden... | Check Latest Price |
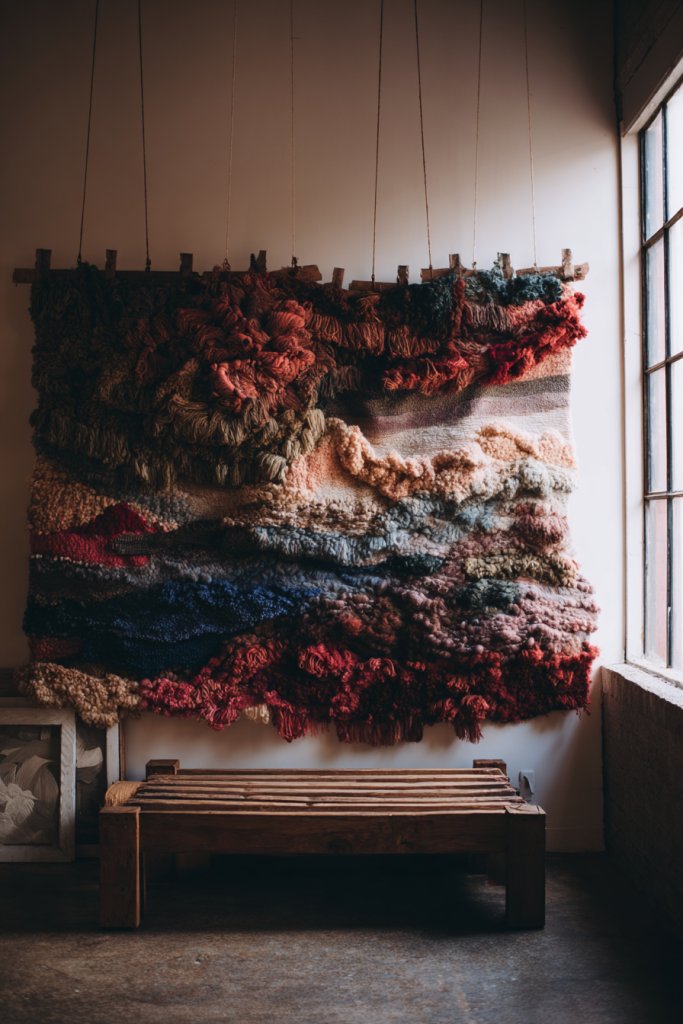
Picture a vibrant, patterned textile draped across a wall, its fringes and embroidery catching the light. The fabric’s rich textures—knits, weaves, or embroidered motifs—bring warmth and depth. Layered over neutral walls, it acts as a focal point that invites touch and adds visual interest. The room feels layered, inviting, and full of personality.
Choose textiles in bold patterns or subtle textures depending on your style—boho, rustic, or minimalist. Seasonal swaps, like heavier fabrics for winter or lightweight linens for summer, keep your decor fresh. Drape or hang with rods, clips, or tape for different effects. Incorporate trims, tassels, or embroidery details to personalize further. Use multiple layers or combine with other textiles for an eclectic look.
Select a fabric that complements your room palette and style. Use a ceiling-mounted rod or removable hooks to hang the textile evenly. For a polished look, fold the fabric at the top and secure it with clips or a decorative rod. Add fringe or tassels for extra texture. Keep the fabric clean and avoid direct sunlight to prevent fading. Mix and match different textiles over time for variety.
Add your own touches with hand-stitched embroidery, patches, or fabric paint. Incorporate meaningful symbols or patterns that resonate with your personality. Mix textures—velvet, linen, burlap—for a tactile experience. Layer with string lights or fairy lights behind for a subtle glow that enhances the fabric’s texture.
Fabric art is a flexible and affordable decor choice that instantly elevates your room’s vibe. It’s easy to update and customize as your tastes evolve. Plus, it adds a layer of comfort and intimacy that makes your space feel truly yours. Ready to drape your walls in style? Find your favorite textiles and start hanging!
4. DIY Macramé Wall Hangings and Plant Holders
Craving a boho-chic look but don’t want to spend a fortune? DIY macramé wall hangings and plant holders are the perfect solution to add texture and visual interest. They’re a fun craft that elevates any space with intricate knots and patterns. Plus, they’re a fantastic way to showcase your personality and craftsmanship.
Recommended Products to replicate this idea
| # | Preview | Product | |
|---|---|---|---|
| 1 |

|
NOANTA Natural Macrame Cord 3mm x 109Yards, Beige Macrame Rope, Cotton Cord for Wall Hanging, Plant... | Check Latest Price |
| # | Preview | Product | |
|---|---|---|---|
| 1 |

|
BENECREAT 6PCS Wooden Dowels with Two Holes, 11.8inch Navajo White Round Wooden Rod Sticks for Quilt... | Check Latest Price |
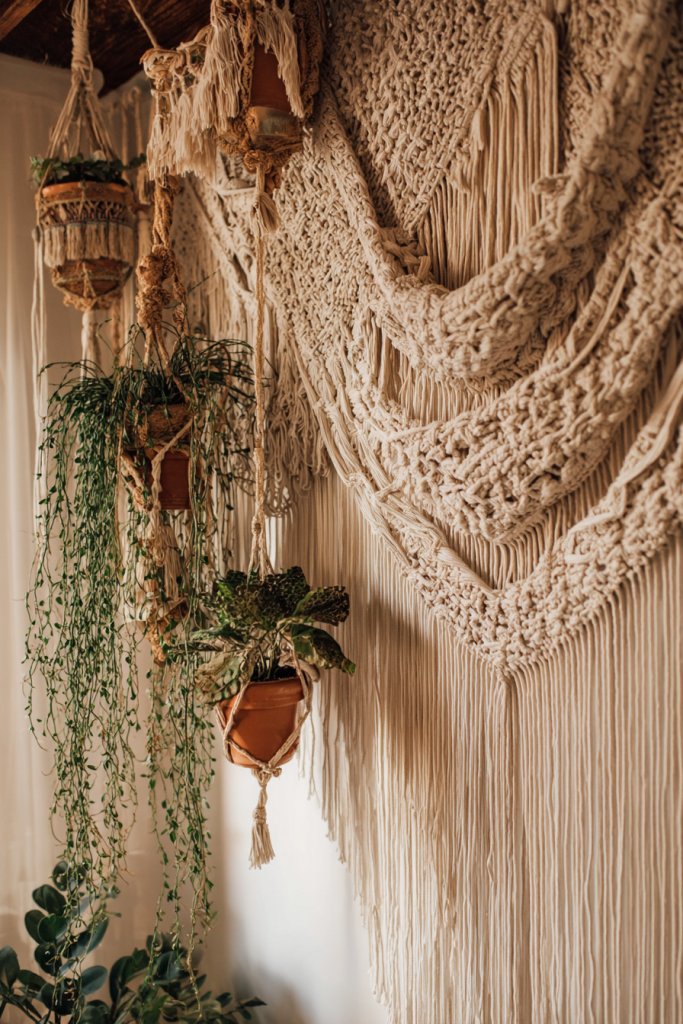
Imagine a large, detailed macramé piece with tassels and geometric patterns hanging on the wall. Complement it with hanging planters made from knotted cords, with lush greenery spilling out—without the actual plants, of course. The textured cords contrast beautifully with smooth walls, creating a layered, relaxed vibe. The room feels lively, artistic, and full of movement, thanks to the tactile elements.
Use different knot styles to create bold or delicate patterns. Opt for natural fibers like jute, cotton, or hemp for a rustic look, or shiny synthetic cords for a modern touch. Change the size and complexity based on your skill level and room size. Incorporate beads, shells, or feathers into the designs for added detail. For seasonal updates, swap out colors or add decorative trims.
Start with a simple macramé kit or tutorials online. Measure and cut cords to desired lengths. Use basic knots like square, half hitch, and spiral for the main design. Attach the finished piece to a wooden dowel or ring, then hang on a sturdy hook or nail. For plant holders, knot cords to create a cradle for your container, ensuring stability and style. Secure everything tightly to prevent sagging.
Personalize with colored cords, beads, or charms that match your theme. Create a series of smaller hangings for a gallery effect. Mix in different knot patterns for visual interest. Add tassels or fringes at the bottom for a playful touch. Use your macramé as a backdrop for decorative lights or to frame a cozy corner.
Macramé is a timeless craft that adds a handcrafted, indie feel to your room. It’s easy to learn, highly customizable, and endlessly rewarding. Your wall will look like it belongs in a boutique or art studio. Ready to knot your way to a stylish space? Grab some cords and get started!
5. Vintage Suitcase or Crate Storage with Decor
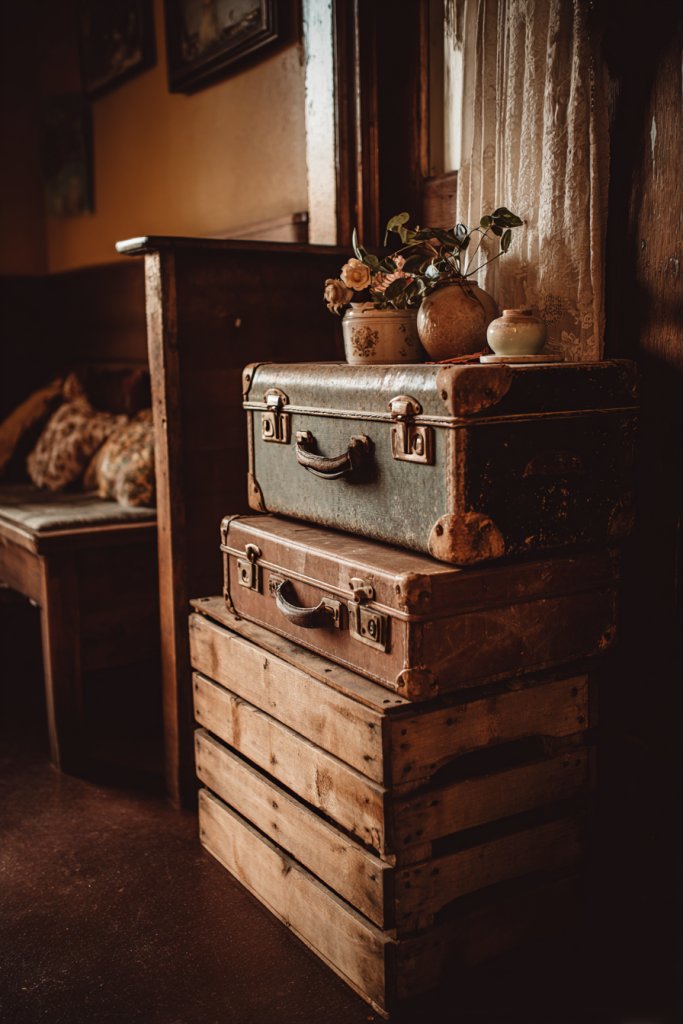
Do cluttered storage solutions ruin your vibe? Vintage suitcases and crates are not only practical but add instant character. They turn ordinary storage into decorative statements that reflect your indie style. Plus, repurposing old items is eco-friendly and budget-friendly.
Recommended Products to replicate this idea
| # | Preview | Product | |
|---|---|---|---|
| 1 |

|
DECOR4SEASON Wooden Vintage Suitcases Set - 2 Sizes, Antique Decorative Storage Chests with Lids,... | Check Latest Price |
| # | Preview | Product | |
|---|---|---|---|
| 1 |

|
TIMRIS Set of 3 Rustic Distressed Wood Nesting Crates, Farmhouse Decorative Wooden Storage Boxes,... | Check Latest Price |
Picture an open vintage suitcase used as a side table, filled with blankets or magazines. A weathered crate stacked with other crates becomes a multi-level storage unit, with decorative touches like fabric lining or paint. The distressed finishes and rustic hardware add charm, making storage look intentional and stylish rather than messy. The overall look is nostalgic, eclectic, and full of personality.
Choose suitcases and crates in various sizes, colors, and finishes to match your decor. Decorate with stencils, stickers, or paint to customize further. Use them for different purposes—clothing, books, or craft supplies—and add cushions on top for seating. Stack or place them separately to create visual interest. Seasonal accents like cozy fabrics or vintage collectibles can refresh the look.
Source vintage suitcases or crates from thrift stores, flea markets, or online marketplaces. Clean and repair any damage, then add personal touches like paint or fabric linings. Use sturdy hardware or brackets if stacking multiple units. Place them strategically around your room for easy access and aesthetic appeal. For added durability, seal painted surfaces with clear matte varnish. Incorporate labels or tags for organization.
Line the interiors with colorful fabric or wallpaper for a hidden pop of pattern. Attach decorative handles or vintage hardware to enhance the antique feel. Add small decorative objects on top—like candles or sculptures—for visual appeal. Personalize with your favorite memorabilia or travel souvenirs inside the suitcases or crates.
Vintage storage solutions do double duty—keep your space tidy and showcase your love for retro style. They’re versatile, customizable, and endlessly charming. With a little effort, you transform clutter into curated decor. Ready to give your storage a vintage makeover? Find your favorite pieces and start styling!
6. Artistic Rug Layering and Color Blocking
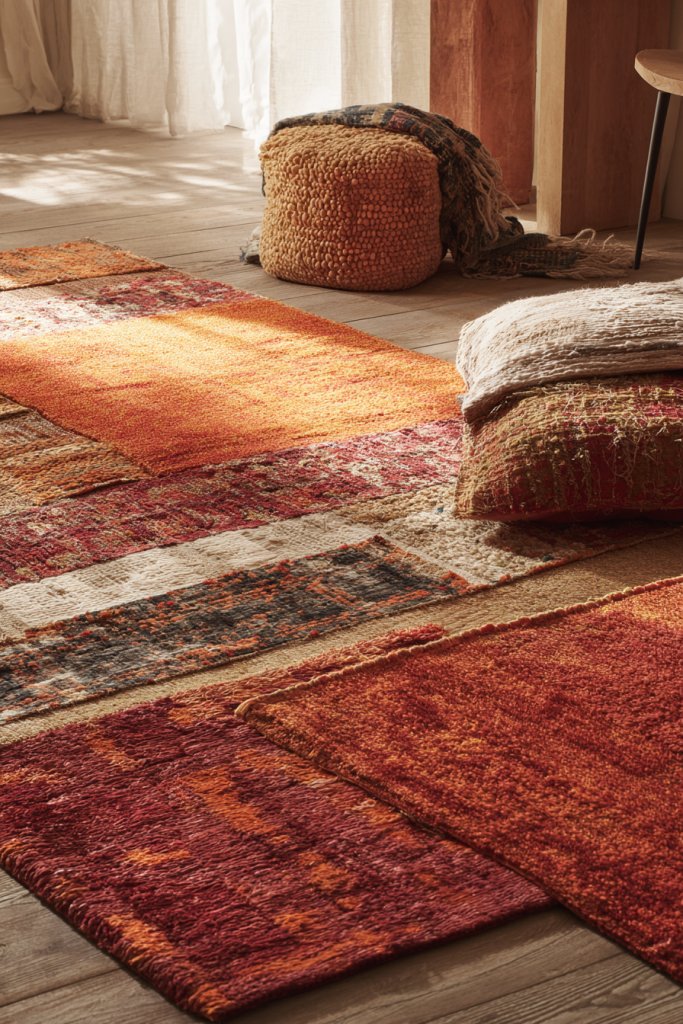
Is your floor feeling dull or disconnected from your room’s vibe? Artistic rug layering and color blocking bring life and personality to your space. It’s an easy way to define zones, add comfort, and showcase your style. Plus, it’s an inexpensive method to update your room without replacing all your furniture.
Recommended Products to replicate this idea
| # | Preview | Product | |
|---|---|---|---|
| 1 |

|
Simple Geometric Color Block Area Rug, Black White Brown Geometric Non Slip Accent Rug, Machine... | Check Latest Price |
| # | Preview | Product | |
|---|---|---|---|
| 1 |

|
S & L Homes Jute Cotton Hand Woven Natural Farmhouse Area Rug for Living Room - Rustic Vintage... | Check Latest Price |
Imagine a layered arrangement of rugs—one large, neutral base with smaller, vibrant rugs on top. Textures range from shaggy to flatweave, creating a tactile mosaic underfoot. Bright colors and bold patterns contrast with muted tones, making the space feel lively yet balanced. The combination of textures and hues creates a cozy, inviting atmosphere that invites you to kick off your shoes and relax.
Mix patterned rugs with solid ones to create focal points or zones. Use seasonal colors—warm tones for fall, cool hues for summer—to reflect your mood. Layer different textures like wool, jute, or synthetic fibers for added depth. Consider geometric patterns or abstract designs for a modern indie look. Adapt the layering for small spaces by using thin rugs or for larger rooms with oversized options.
Start with a neutral, large-area rug as your base. Add smaller accent rugs on top, arranging symmetrically or asymmetrically depending on your aesthetic. Use double-sided tape or non-slip pads to keep rugs in place. Mix and match patterns and textures for visual interest, but keep a cohesive color palette to avoid chaos. Focus on creating a balanced layout that guides the eye naturally through the space. Replace or rearrange rugs periodically for a fresh feel.
Incorporate rugs with personal significance—handwoven, vintage, or handmade pieces. Use contrasting textures to highlight different areas, like a plush rug beside a flatweave. Add decorative fringes or tassels for extra flair. Layer rugs over different floor types—wood, tile, concrete—for varied visual effects. This approach makes your room feel curated and thoughtfully styled.
Artistic rug layering transforms plain floors into artful statements. It’s a simple, budget-friendly way to elevate your indie decor. Experiment with different combinations to find what feels right for you. Your space will look curated and cozy, perfect for relaxing or entertaining. Ready to layer your way to a stylish floor? Start mixing and matching today!
7. Handmade Dreamcatchers and Textile Art Pieces
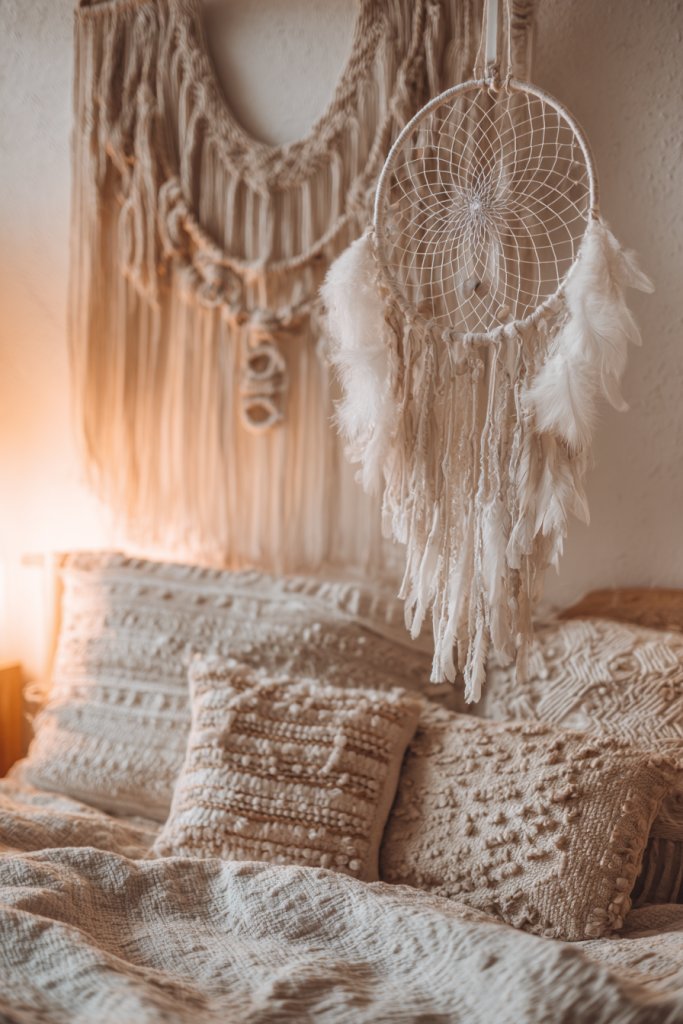
Looking for a whimsical touch that adds a dreamy vibe? Handmade dreamcatchers and textile art pieces are perfect for bringing a mystical, indie charm to your room. They’re easy to craft or buy, and instantly create a cozy, bohemian atmosphere. Plus, they add a layer of texture and softness that invites touch.
Recommended Products to replicate this idea
| # | Preview | Product | |
|---|---|---|---|
| 1 |

|
Large Dream Catchers, Dreamocean Crystal Tree of Life Dream Catcher with Healing Stones Handmade... | Check Latest Price |
| # | Preview | Product | |
|---|---|---|---|
| 1 |

|
Flber Macrame Wall Hanging Macrame Wall Decor Large-Scale Tie-Dye Tapestry Living Home Room Wall... | Check Latest Price |
Visualize a wall decorated with a large, intricate dreamcatcher adorned with feathers, beads, and embroidery. Surround it with smaller textile pieces—woven wall hangings, embroidered patches, or fabric banners. The textures vary from soft and fluffy to tightly woven, creating visual depth. The overall effect is enchanting and peaceful, making your space feel like a personal sanctuary.
Use natural fibers like cotton, wool, or hemp for a rustic look. Incorporate bold colors or keep it monochrome for a minimalist vibe. Mix in metallic accents or beads for a touch of glam. Hang dreamcatchers at different heights or cluster several for a focal point. Combine with other textile art to create a layered, textured gallery.
Create your own dreamcatchers using hoops, string, and decorative elements like feathers and beads. Watch tutorials for various knotting techniques. For textile art, sew or weave fabric strips into wall hangings or tapestries. Mount with hooks, nails, or removable adhesive strips, ensuring even spacing. Use lightweight materials to avoid damage and make adjustments easy. Incorporate personal symbols or colors to reflect your style.
Add personal touches with embroidered initials or meaningful symbols. Mix different textiles—fringe, tassels, embroidery—for diversity. Create a themed display—nature-inspired, mystical, or vintage. Experiment with different hanging styles—framing, suspending, or layering—to enhance visual interest. Keep your textile art refreshed by swapping pieces seasonally.
Dreamcatchers and textile art turn simple walls into magical retreats. They’re a fun, creative way to personalize your space and showcase your craftsmanship. They also evoke a sense of calm and inspiration. Ready to craft your own mystical wall? Dive into textile art and start creating!
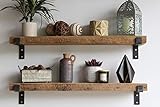
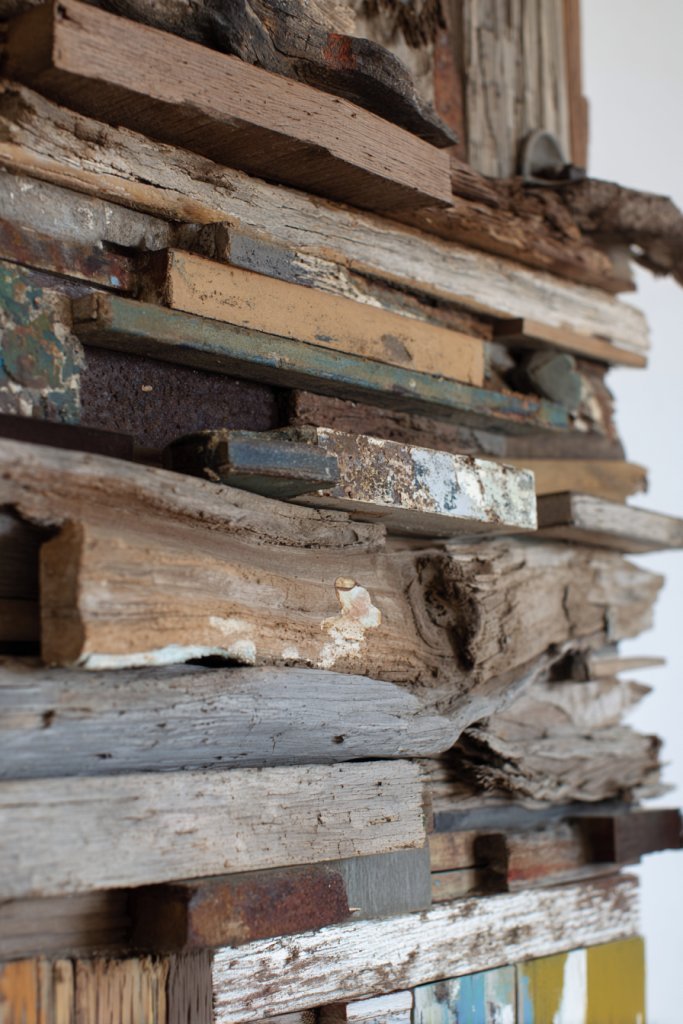
8. DIY Shelving with Reclaimed Wood and Unique Brackets
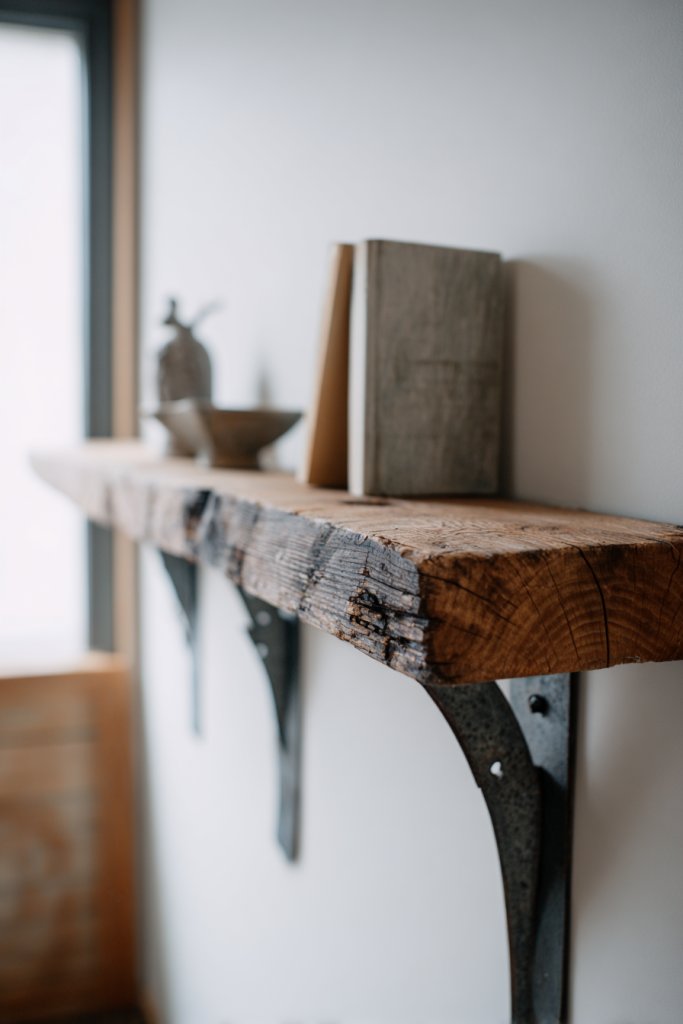
Are your walls feeling empty or cluttered? DIY shelving made from reclaimed wood and creative brackets can solve both problems while adding a rustic, indie touch. It’s a practical upgrade that doubles as art, giving your room a handcrafted vibe. Plus, it’s a satisfying project that boosts your DIY confidence.
Recommended Products to replicate this idea
| # | Preview | Product | |
|---|---|---|---|
| 1 |
|
Urban Legacy Accent Shelves | Reclaimed Barn Plank | Set of 2 with Full Brackets (Natural, 36"x 7"x... | Check Latest Price |
| # | Preview | Product | |
|---|---|---|---|
| 1 |

|
MIUGO 6 Pack Heavy Duty Shelf Brackets 6 inch, Floating Shelf Brackets(1/5”-Thick), L-Shaped Wall... | Check Latest Price |
Picture a set of floating shelves crafted from rough, weathered wood with mismatched, artistic brackets—some iron, some painted, some minimalist. The shelves hold books, trinkets, or decorative objects, arranged in a casual, layered style. The mix of textures and finishes creates a curated, vintage feel. The room looks warm and personal, with each shelf telling its own story.
Use different sizes and lengths of reclaimed wood for variety. Choose brackets that contrast or complement the wood—metal, painted, or sculptural. Install shelves at varying heights for visual rhythm or symmetry for a more structured look. Mix in small decorative objects or plants (if you’re cool with restricted content) for added interest. Change the arrangement seasonally or as your taste evolves.
Source reclaimed wood from salvage yards, online marketplaces, or DIY projects. Sand and treat the wood for safety and appearance. Use strong brackets—think industrial or vintage styles—and drill into studs for secure mounting. Measure carefully for level placement, and use a level tool during installation. Seal or paint the wood if desired for protection and style. Load shelves gradually to ensure stability.
Paint or stain the wood in colors that match your room palette. Incorporate decorative hardware or painted brackets for extra flair. Add personal items like favorite books, vintage collectibles, or DIY crafts. Use some brackets as display surfaces for small framed photos or miniature art pieces. Keep your shelves functional yet stylish, reflecting your indie aesthetic.
DIY reclaimed wood shelves showcase your craftsmanship and sense of style. They add warmth and an artisanal feel to any room. Plus, they’re customizable and adaptable, growing with your tastes. Your space will look thoughtfully curated and uniquely yours. Ready to build your own statement shelves? Gather your materials and start drilling!
9. Personal Collection Display with Vintage Finds
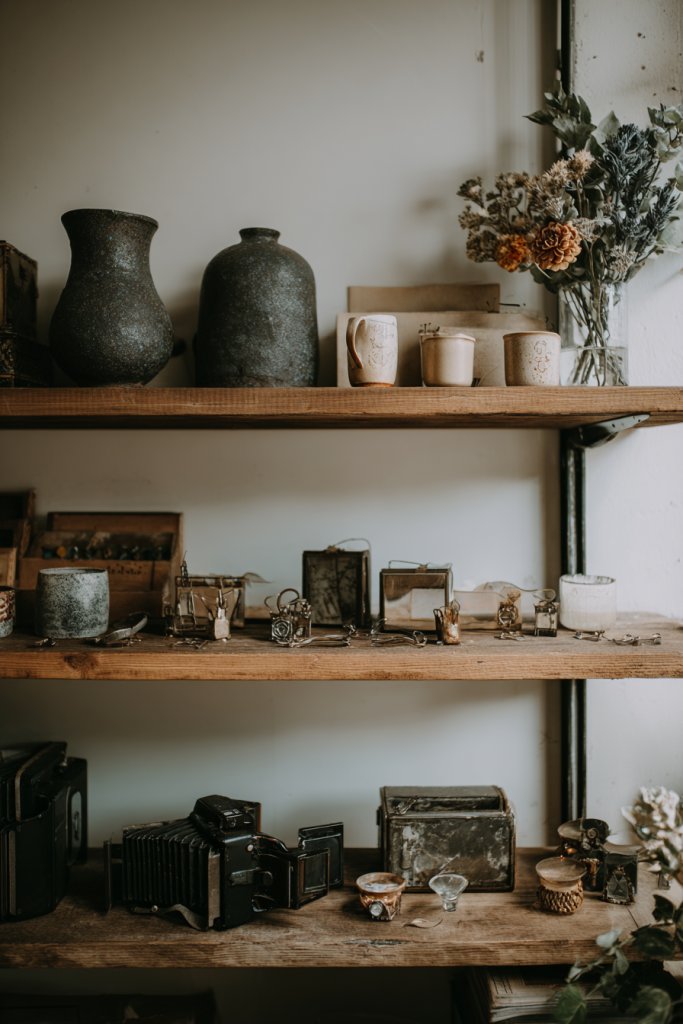
Do you have a collection of vintage treasures but no idea how to display them? Showcasing your finds turns clutter into art and adds a personal touch to your indie room. It’s a conversation starter and a way to keep your passions front and center. Plus, it makes your space feel curated and full of stories.
Recommended Products to replicate this idea
| # | Preview | Product | |
|---|---|---|---|
| 1 |

|
BROTTAR Display Cabinet with Glass Doors, 4-Tier Curio Cabinet with 3 Color Lights for Collectibles,... | Check Latest Price |
| # | Preview | Product | |
|---|---|---|---|
| 1 |

|
WOPITUES Wood Floating Shelves Set of 6, Shelves for Wall Decor, Farmhouse Shelf for Bedroom,... | Check Latest Price |
Imagine open shelving or shadow boxes filled with vintage cameras, trinkets, or jewelry. The items are arranged thoughtfully, mixing sizes, shapes, and textures. Some pieces are grouped for impact, others stand alone as focal points. The display feels intentional and nostalgic, inviting viewers to explore each item’s history. Your collection becomes a visual narrative that adds depth and character.
Use floating shelves, shadow boxes, or open cabinets to display your collection. Group similar items—like old keys, postcards, or ceramics—for cohesion. Incorporate lighting, such as small LED strips, for dramatic effect. Rotate pieces seasonally or as your collection grows. Mix in personal photos or artwork for a layered, eclectic look that reflects your personality.
Choose a display method—shelves, shadow boxes, or a combination. Clean and organize your items before arranging. Use small stands or mounts to stabilize fragile or uneven pieces. Attach shelves securely to the wall, ensuring they can handle the weight of your collection. Arrange items in a balanced, eye-catching way, leaving some negative space for breathing room. Regularly update the display for freshness.
Label items or add handwritten notes to tell their story. Incorporate decorative elements like vintage frames or tiny stands. Group items by theme, era, or color for visual harmony. Use different display heights or depths to add dimension. Your collection becomes a curated exhibit that reflects your passions and history.
Displaying your vintage finds turns your space into a personal museum. It highlights your tastes and stories, making your room uniquely yours. It’s also a rewarding way to celebrate your collecting hobby. Ready to showcase your treasures? Set up your display and enjoy the nostalgic glow!
10. Creative Use of Mirrors with Artistic Frames
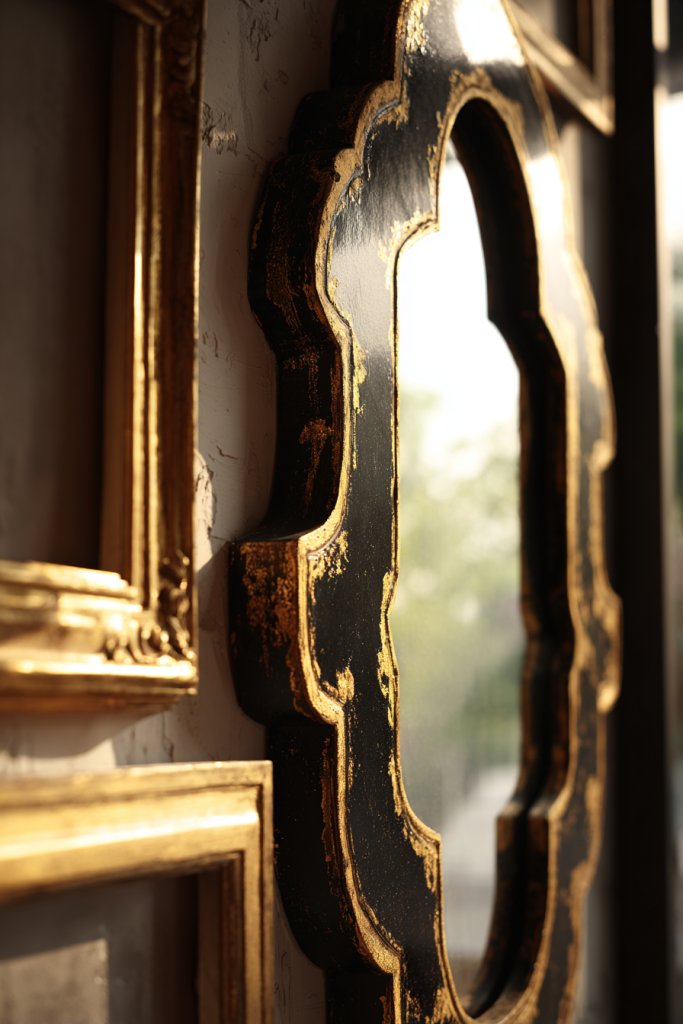
Plain walls lacking depth? Mirrors are the go-to for adding light and space, but they can be so boring. Creative, artistic frames turn a functional piece into a true decor statement. They reflect your style, whether minimalist, boho, or eclectic, and can dramatically change your room’s vibe.
Recommended Products to replicate this idea
| # | Preview | Product | |
|---|---|---|---|
| 1 |
|
TRAHOME Vintage Gold Mirror for Wall, 30"x45" Antique Decorative Baroque Mirror with Imitation Metal... | Check Latest Price |
| # | Preview | Product | |
|---|---|---|---|
| 1 |

|
inoseen 20x30 Oval Rattan Mirror for Wall, Boho Decorative Mirror for Bathroom Vanity, Farmhouse &... | Check Latest Price |
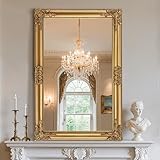
Picture a large, ornate mirror with a distressed, painted frame that looks vintage. Surround it with smaller, uniquely framed mirrors—some with colored borders, others with geometric shapes. The reflections bounce light around your space, making it feel larger and brighter. The eclectic mix of frames adds personality and artistic flair, transforming a simple mirror into a focal point.
Use frames in different styles—bohemian, industrial, shabby chic—to match your decor. Experiment with painted, carved, or layered frames for a more artistic look. Hang mirrors at various heights or cluster smaller ones for a gallery effect. Seasonal changes, like adding a wreath or decorative elements, can refresh the look. Incorporate mirrors with textured or colorful frames for extra impact.
Select mirrors with frames that complement your style. Mount them securely using appropriate hooks or brackets, ensuring they’re level. For a layered effect, hang multiple mirrors in a grid or irregular pattern. Consider creating a custom frame for a plain mirror using wood or foam and decorating it with paint, fabric, or embellishments. Be mindful of placement to maximize light reflection and visual balance. Regularly clean the glass to keep reflections bright.
Paint or decorate frames with patterns, quotes, or textures. Incorporate materials like fabric, beads, or metallic accents to enhance the frames. Use mirrors to reflect artwork, textiles, or lighting features for added depth. Combine with other wall decor to create a cohesive, artistic display. Your mirror wall will become a dynamic feature that continually evolves.
Artistic mirrors elevate a room’s style and functionality, making it feel larger and more inviting. They’re perfect for adding a personal touch and a sense of artistry. With some creativity, your mirror wall becomes a statement of your taste. Ready to craft your reflective masterpiece? Start selecting unique frames today!
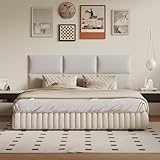
11. Customized Headboards with Fabric or Art Panels

Tired of boring, generic headboards? Custom fabric or art panels turn your bed into a focal point with personality and style. It’s an easy DIY upgrade that instantly elevates your room’s vibe. Plus, it’s a chance to showcase your favorite colors, patterns, or artwork.
Recommended Products to replicate this idea
| # | Preview | Product | |
|---|---|---|---|
| 1 |
|
MAQQL 6-Piece Wall Mount Headboard Kit - White Peel and Stick Upholstered Headboard for Queen Size... | Check Latest Price |
| # | Preview | Product | |
|---|---|---|---|
| 1 |

|
Aurawall Velvet 3d wall panels for Interior wall Decor peel and stick, Soundproof Geometric Textured... | Check Latest Price |
Imagine a plush fabric headboard with bold geometric patterns or a canvas panel featuring your favorite abstract art. The textures and colors set the tone—boho, modern, or vintage—adding depth and visual interest behind your bed. The fabric’s softness contrasts with the sleek bedding, creating a cozy yet stylish focal point. The headboard becomes a statement piece that reflects your personality.
Use different fabrics—velvet, linen, or embroidered textiles—to match your aesthetic. For art panels, choose prints or paintings that resonate with your style. Attach fabric to a wooden frame, or mount art directly onto the wall behind your bed. Change the fabric seasonally or with mood shifts. Incorporate decorative trims or embellishments for extra flair.
Build or buy a sturdy frame for your fabric or art panel. Stretch the fabric tightly and staple it to the back for a clean finish. For art, frame your chosen piece and mount it securely. Attach the headboard to the wall or secure it behind your bed with brackets. Use padding or foam for a soft, cushioned effect if desired. Ensure everything is level and sturdy for daily use.
Add personal touches like embroidered initials, patches, or quotes on fabric. Mix textures or patterns for a layered look. Incorporate trims, tassels, or beaded details for extra personality. For an art panel, customize with your favorite colors or styles. Regularly update the fabric or art for a fresh look that evolves with you.
A customized headboard instantly personalizes your space and makes your bed the centerpiece. It’s a DIY project that’s both practical and stylish, showcasing your taste. With a little effort, your bedroom becomes a reflection of your style and creativity. Ready to craft your perfect headboard? Start designing today!
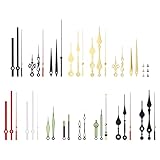
12. Artistic DIY Wall Clocks or Timepieces

Standard clocks are boring and often forgettable. An artistic DIY wall clock can become the centerpiece of your indie room, blending function with style. It’s a chance to express your creativity while staying punctual. Plus, making your own is a fun project that results in a one-of-a-kind piece.
Recommended Products to replicate this idea
| # | Preview | Product | |
|---|---|---|---|
| 1 |

|
Timelike 3D Clock Hands, DIY Large Wall Clock Needles, Home Art Decor Quartz Mechanism Accessories | Check Latest Price |
| # | Preview | Product | |
|---|---|---|---|
| 1 |
|
PATIKIL Clock Hands Kit, 16 Set Clock Hands Kits Clock Mechanism Movement Aluminum Wall Clock Hands... | Check Latest Price |
Picture a clock made from a vintage vinyl record with painted or glued elements creating numbers and hands. Or imagine a wooden clock with painted geometric patterns or abstract designs. The clock’s face is a canvas—bold, colorful, or minimalist—complementing your decor. Its unique design draws attention and sparks conversations.
Use unconventional materials—scrap metal, cork, or repurposed objects—for the clock face. Play with shapes—circular, square, or irregular—to match your style. Incorporate bold colors or metallic finishes for a modern or industrial vibe. Keep it minimalist with subtle tones or vibrant with contrasting hues. Change the design seasonally for variety.
Choose your base—vinyl, wood, or cardboard—and cut into your desired shape. Decorate with paint, collage, or glued objects. Attach clock hands and a mechanism at the center, ensuring accurate movement. Mount securely on the wall, balancing aesthetics and visibility. Use a level for perfect placement. Test the clock for accuracy and silent operation.
Add personal symbols, patterns, or favorite colors to match your room’s theme. Use stencils or freehand painting for creative designs. Incorporate textures like metallic accents or textured paint. Pair with other art pieces or textiles for a cohesive look. Regularly update or change the face for freshness.
A DIY wall clock is a statement of your creativity and style. It’s functional art that can brighten your space and keep you on schedule. Making your own boosts confidence and adds a personal touch to your decor. Ready to craft your timepiece? Grab your supplies and start designing!
13. Innovative Bedside Tables with Unexpected Materials
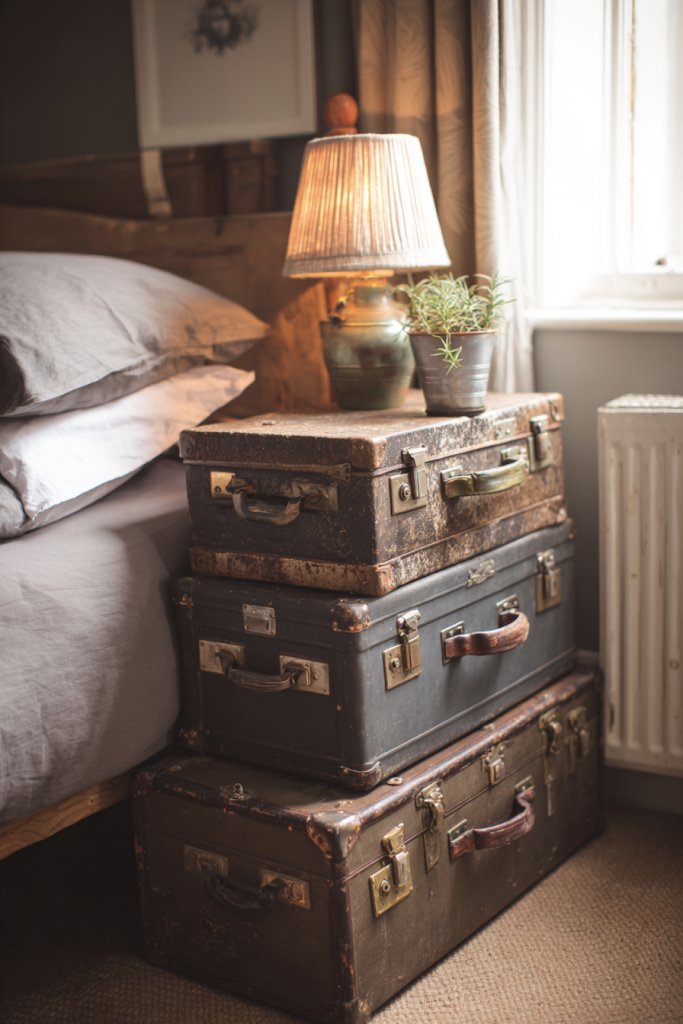
Your bedside table shouldn’t be just a boring surface. Innovative materials turn a simple piece into a conversation starter, adding personality and flair. Think outside the box—stacked books, vintage crates, or repurposed furniture can all work. It’s a quick way to add a unique touch to your indie bedroom.
Recommended Products to replicate this idea
| # | Preview | Product | |
|---|---|---|---|
| 1 |

|
The Lakeside Collection Rustic Wooden Crate End Tables - Wood | Check Latest Price |
| # | Preview | Product | |
|---|---|---|---|
| 1 |
|
ZICOTO Decorative Storage Boxes with Lids – Set of 2 Beautiful PU Leather Organizer Bins for Your... | Check Latest Price |
Picture a bedside table made from stacked vintage suitcases, each with distinct colors and textures. Or a reclaimed wooden crate painted in bold hues, topped with a quirky lamp or decorative object. The mix of materials—metal, wood, fabric—creates a layered, eclectic look. It feels personal and curated, like a mini art installation right beside your bed.
Use unexpected items like stacked books, metal carts, or antique boxes. Paint or decorate them to match your room’s palette. Add trays or small platforms for a flat surface. Incorporate small storage solutions—baskets or jars—inside or on top. Change the arrangement seasonally, or swap out items for different moods and styles.
Select sturdy, safe materials—wood, metal, or strong cardboard. Clean and, if needed, reinforce the structures. Paint or decorate using stencils, stickers, or fabric wraps. Secure stacks with glue or screws for stability if necessary. Place the table beside your bed, ensuring easy reach and stability. Add a small lamp, clock, or personal items for functionality.
Decorate with fabric covers, decals, or painted patterns. Incorporate your favorite colors or styles—industrial, rustic, or vintage. Add small personal objects like photos, candles, or collectibles. Use trays or coasters to keep surfaces tidy. Periodically update with seasonal objects or new decor pieces.
Unique bedside tables showcase your creativity and style sense. They turn a practical necessity into a design feature. With a little imagination, you can craft a piece that perfectly fits your aesthetic. Ready to rethink your bedside? Gather your materials and start building!
14. Creative Use of Color: Bold Walls or Accents
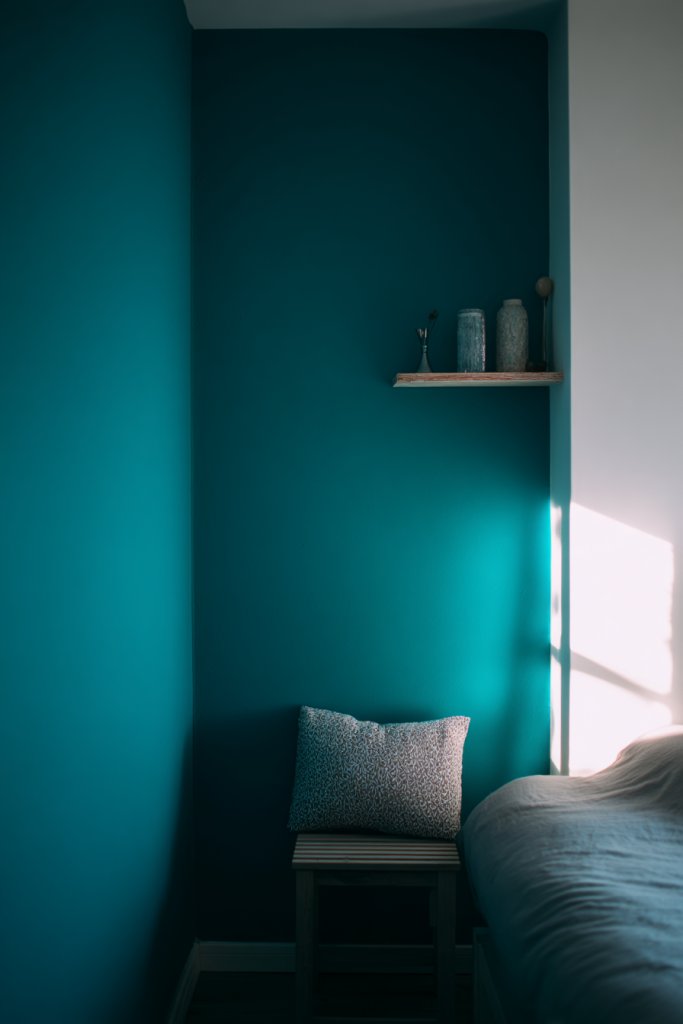
Walls can feel dull and uninspiring, especially if your room lacks personality. A bold color or accent wall instantly energizes the space and sets the mood. It’s a simple, budget-friendly way to inject your indie style and make a strong visual statement. Plus, it’s an easy project anyone can do.
Recommended Products to replicate this idea
| # | Preview | Product | |
|---|---|---|---|
| 1 |
|
Art3d Smoothing Tool Kit for Applying Peel and Stick Wallpaper, Vinyl Backsplash Tile | Check Latest Price |
| # | Preview | Product | |
|---|---|---|---|
| 1 |

|
Chroma Mural Paint, Assorted Primary Colors, Pints, Set of 6 | Check Latest Price |
Imagine a wall painted in a deep, vibrant hue—like teal, mustard, or terracotta—that contrasts with neutral furnishings. Or a geometric pattern in contrasting colors adds a modern, artistic touch. The bold color draws the eye and creates a sense of depth and personality. The room feels more vibrant, inviting, and uniquely yours.
Choose a single statement wall or incorporate multiple colors with stripes, blocks, or patterns. Use decals, painter’s tape, or stencils to create designs—nothing fancy needed. Seasonal updates can include different shades or patterns. Pair bold walls with neutral furniture or mixed textures for balance. Experiment with matte, gloss, or textured finishes to add dimension.
Pick a color that complements your existing decor and mood. Use painter’s tape to create clean lines or geometric shapes. Prepare the wall by cleaning and priming, then apply multiple coats for rich color. Remove tape carefully once dry to reveal crisp edges. Consider sealing with a clear matte or gloss for durability. Add complementary accessories—like cushions or curtains—that match or tone down the boldness.
Combine paint with decorative decals or stencils for added flair. Use colors that evoke your personality—bright, muted, or pastel shades. Incorporate metallic or textured paints to add a luxe touch. Keep the rest of your decor simple to let the wall shine. Periodically repaint or add new patterns for fresh updates.
Bold walls are a powerful way to showcase your creativity and set the tone for your space. They make your room feel lively and full of energy. With minimal effort, you can make a big impact and reflect your personality. Ready to go bold? Pick your colors and start transforming your walls!
15. Handmade Pillows and Textiles with Unique Patterns
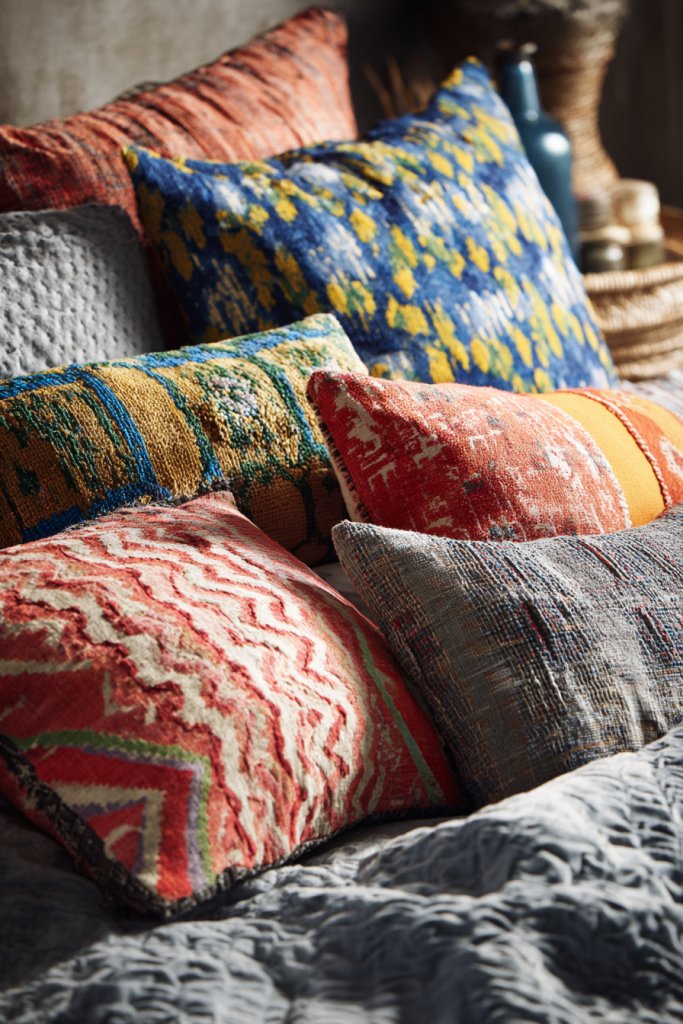
Standard pillows can be boring and generic. Handmade pillows with unique patterns add personality, color, and comfort to your indie room. They’re an easy way to refresh your space without a big investment. Plus, sewing or customizing your own gives you a sense of accomplishment and style.
Recommended Products to replicate this idea
| # | Preview | Product | |
|---|---|---|---|
| 1 |

|
REDEARTH · Handmade Boho Throw Pillow Covers - Bohemian Chic Farmhouse Style - Accent Woven Indoor... | Check Latest Price |
| # | Preview | Product | |
|---|---|---|---|
| 1 |

|
Topfinel Decorative Throw Pillow Covers Cushion Cases, Set of 4 Soft Velvet Modern Double-Sided... | Check Latest Price |
Imagine a bed or sofa adorned with pillows in bold prints, embroidery, or patchwork. Textures range from soft velvets to rough woven fabrics, creating a tactile mix. Patterns might include geometric shapes, florals, or abstract designs—whatever matches your vibe. The pillows invite you to touch and curl up, making your space cozy and inviting.
Use different fabrics—linen, velvet, or cotton—for variety. Sew or glue patches, embroidery, or appliqué designs to add a personal touch. Mix patterns and colors but keep a cohesive theme—like earthy tones or vibrant hues. Change pillow covers seasonally or for special occasions. Incorporate trims, tassels, or fringe for extra detail.
Start with basic sewing skills or use fabric glue for quick projects. Choose fabrics that match your room’s palette. Cut and sew pillow covers, or upcycle old textiles. Insert filling—foam, stuffing, or recycled fabric scraps—and close up. Experiment with different shapes—square, round, or bolster—to diversify the look. Place pillows strategically for maximum impact.
Add embroidered initials, quotes, or symbols for a personal touch. Use fabric dye or paint for custom designs. Incorporate trims, beads, or patches that reflect your style. Mix and match textures to create a layered, textured look. Keep some pillows plain and add decorative covers for variety.
Handmade pillows are a simple way to boost your room’s style and comfort. They showcase your creativity and make your space uniquely yours. Plus, they’re easy to update or swap out. Ready to sew your way to a cozy, indie vibe? Grab some fabrics and start designing!
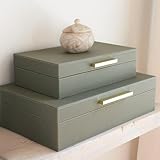
16. Artistic Storage Bins and Baskets with Decor
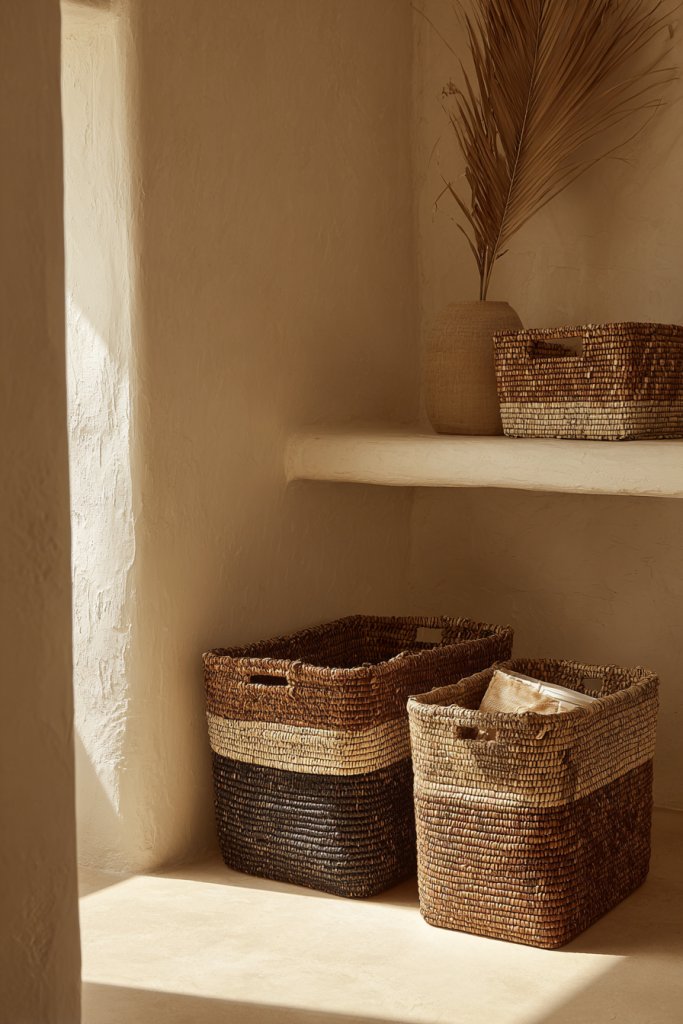
Clutter can kill your room’s vibe, but stylish storage solutions make organization look effortless. Artistic bins and baskets hide messes while adding texture and color. They’re perfect for keeping your indie room neat and giving your decor a curated feel. And the best part? They’re super easy to DIY or buy for a personal touch.
Recommended Products to replicate this idea
| # | Preview | Product | |
|---|---|---|---|
| 1 |

|
Posprica Woven Storage Baskets for Organizing 6 Pack, Large&Small Storage Cube Bins Set for... | Check Latest Price |
| # | Preview | Product | |
|---|---|---|---|
| 1 |

|
4 Pack Large Closet Storage Baskets Bins for Shelves | Fabric Closet Organizers and Storage with... | Check Latest Price |
Picture woven baskets in earthy tones, painted fabric bins with bold patterns, or vintage-inspired containers. They hold everything from clothes to craft supplies, all while enhancing your room’s aesthetic. Place them in open shelving, under tables, or beside your bed for functional style. Layered, textured, and colorful, they create a cozy, organized space that feels inviting.
Use different shapes—round, square, or elongated—to suit your space. Decorate plain baskets with paint, fabric, or embellishments like tassels and pom-poms. Incorporate natural materials like jute, rattan, or cork for rustic touches. Mix sizes and styles for a curated, layered look. Incorporate seasonal or themed decor to keep things fresh.
Choose baskets that fit your storage needs and aesthetic. Decorate plain baskets with fabric wraps, paint, or decoupage. Secure embellishments with glue or sewing for durability. Use labels or tags for organization. Place them strategically—under beds, on shelves, or in corners—to maximize space and style. Maintain by cleaning or replacing as needed.
Add personal touches like embroidered initials, painted patterns, or decorative charms. Incorporate your favorite colors or textures—wicker, felt, or velvet. Use decorative trims or ribbons for extra charm. Swap out covers or embellishments seasonally to keep your storage stylish and fresh.
Artistic storage bins and baskets turn organization into a design feature. They reflect your taste and keep your space tidy, making it more functional and beautiful. Creating or customizing them is a satisfying project that pays off daily. Ready to organize in style? Find or craft your perfect baskets today!
17. DIY Art Installations with Recycled Materials
Looking to make a bold statement without spending a fortune? DIY art installations from recycled materials can turn your room into an indie gallery. They demonstrate creativity, resourcefulness, and environmental consciousness all at once. Plus, they’re a perfect way to showcase your artistic side.
Recommended Products to replicate this idea
| # | Preview | Product | |
|---|---|---|---|
| 1 |

|
300 Sheets Vintage Scrapbook Paper 5.1x3.1 Inch Mixed Special Decorative Paper for Junk Journal DIY... | Check Latest Price |
| # | Preview | Product | |
|---|---|---|---|
| 1 |

|
TFu Wall Hanging Photo Display, DIY Picture Photo Frame String with 12 Clips for Hanging Photos... | Check Latest Price |
Imagine a large mobile crafted from scrap metal, fabric scraps, and plastic pieces hanging from the ceiling. Or a wall sculpture made from broken tiles, bottle caps, and old tools arranged in a striking pattern. These pieces use upcycled stuff to create textured, colorful, and dynamic art. They add movement, depth, and personality to your space.
Use different materials—metal, plastic, fabric, paper—for variety. Experiment with shapes—geometric, organic, abstract—to suit your style. Incorporate movement with mobiles or kinetic sculptures. Change the scale by making small clusters or large focal pieces. Mix colors and textures to match your room’s vibe.
Gather scrap materials from your environment or sources like thrift stores and donations. Plan your design—sketch or lay out on the floor. Secure pieces with glue, wire, or nails, depending on the material. Mount larger pieces on walls using appropriate hardware. Ensure stability and safety, especially for mobiles or hanging sculptures. Regularly refresh or add new elements for ongoing creativity.
Add personal touches with painted details, layered textures, or meaningful symbols. Incorporate your favorite colors or themes—nature, abstract, vintage. Use LED lights or reflective surfaces to enhance visual impact. Mix recycled elements with new materials for contrast. Your installation becomes a unique, evolving piece of art.
Recycled material art installations showcase your ingenuity and commitment to sustainability. They transform everyday objects into eye-catching decor. Creating them boosts confidence and sparks ongoing creativity. Your space becomes a reflection of your eco-conscious, artistic spirit. Ready to craft your own recycled masterpiece? Dive into your stash and start building!
18. Indie-inspired Color Palette and Decor Themes

Feeling like your room lacks a cohesive vibe? An indie-inspired color palette and decor theme can tie everything together and reflect your artistic personality. It’s a way to create a curated, artsy space that feels authentic and inspiring. Plus, it’s fun to plan and execute.
Recommended Products to replicate this idea
| # | Preview | Product | |
|---|---|---|---|
| 1 |

|
Fardes Eclectic Wall Decor | Check Latest Price |
| # | Preview | Product | |
|---|---|---|---|
| 1 |
|
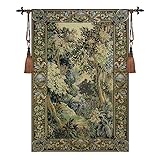
Aubelin Tapestry Green Forest Landscape Vintage Tapestry Wall Hanging 100% Cotton Size 62"x42" | Check Latest Price |
Imagine a room painted in earthy, muted tones—terracotta, olive green, warm beige—accented with pops of vibrant color like mustard or deep teal. Decor includes textured textiles, vintage furniture, and handcrafted accessories that match the palette. The overall effect is warm, inviting, and full of personality. Every element supports the indie aesthetic—raw, layered, and expressive.
Mix earthy, muted tones with vibrant accents for contrast. Incorporate natural materials—wood, linen, wool—and handcrafted objects to enhance the indie feel. Change theme accents seasonally—warm in winter, fresh in summer. Use patterns like stripes, florals, or abstract shapes to add variety. Keep the color palette balanced for harmony or intentionally eclectic for a more vibrant vibe.
Select a base color palette and paint walls or add decals accordingly. Choose textiles, furniture, and accessories that match or complement these tones. Incorporate handcrafted or vintage pieces for authenticity. Use layered textiles, rugs, and curtains to deepen the textured, indie look. Add personalized decor—handmade art, DIY accents—matching the chosen palette. Keep everything cohesive but layered.
Add your favorite patterns and textures—patchwork, embroidery, or hand-painted details. Use earthy and vibrant tones strategically to highlight key areas. Incorporate natural or recycled materials for authenticity. Mix modern and vintage for a curated, artsy vibe. Regularly update accessories or add new handcrafted pieces to keep the aesthetic fresh.
An indie-inspired color palette creates a room that’s both stylish and meaningful. It reflects your personality and artistic sensibilities. Your space becomes a sanctuary of creativity and comfort. With a thoughtful palette, every day feels inspiring. Ready to craft your perfect indie room? Start planning your colors and decor today!
Conclusion
Exploring these indie room ideas showcases the endless ways you can personalize your space with creativity and flair. Each concept offers a chance to infuse your home with character and charm, encouraging you to experiment and have fun. Don’t hesitate to try these ideas and make your room a true reflection of your artistic spirit—your perfect sanctuary awaits!