I have been, or can be if you click on a link and make a purchase, compensated via a cash payment, gift, or something else of value for writing this post. As an Amazon Associate, I earn from qualifying purchases. Please read my full Affiliate Disclosure for more information.
Imagine turning a blank wall into a vibrant canvas that reflects your personality and sparks joy every time you see it. Funky wall paint ideas have surged in popularity because they offer a fun, affordable way to infuse character and energy into any space, making your home uniquely yours.
In this article, you’ll find a variety of creative ideas to help you transform your walls—from bold patterns and playful color combos to artistic murals and unexpected finishes. Get ready to be inspired and discover how simple paint techniques can dramatically elevate your home’s style and atmosphere.
1. Geometric Shapes with Bold Contrasts
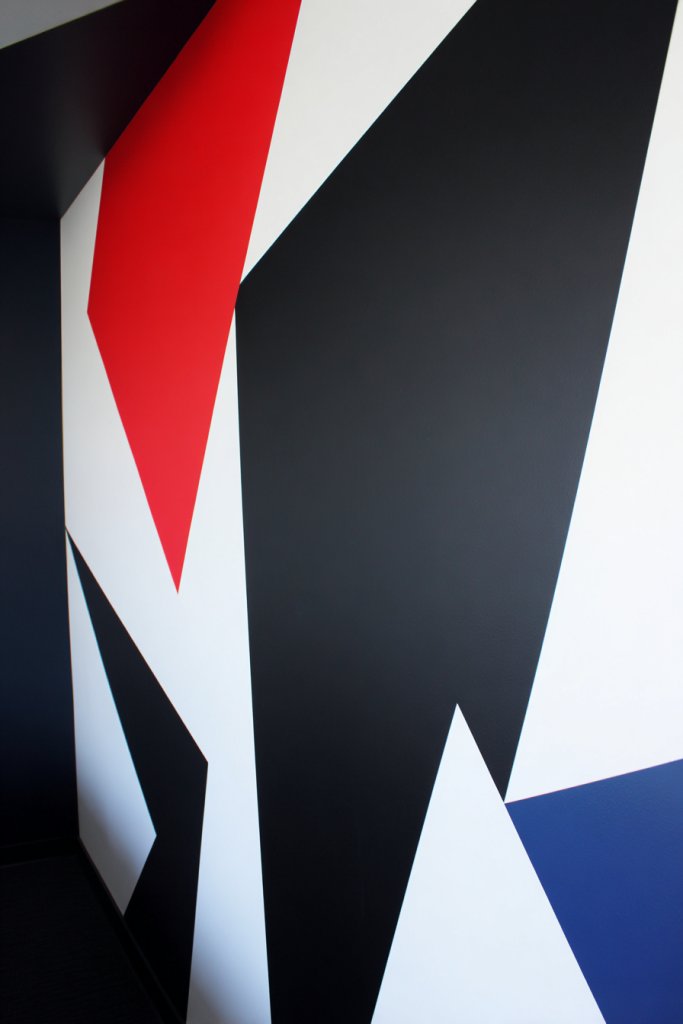
Ever felt like your walls are just plain canvases that need a serious upgrade? Maybe you crave a space that screams modern and edgy but don’t want to spend a fortune on artwork. Geometric shapes with bold contrasts provide that perfect punch of personality. They turn simple walls into focal points that energize any room and reflect your daring style.
Recommended Products to replicate this idea
| # | Preview | Product | |
|---|---|---|---|
| 1 |

|
Large Framed Black and White Neutral Abstract Wall Art for Living Room, 3 Piece Boho Canvas Prints... | Check Latest Price |
| # | Preview | Product | |
|---|---|---|---|
| 1 |
|
MAQIHAN Masking Tape Bulk - 8 Rolls x 14.3 Yards Adhesive Painters Tape for Painting, Black & White... | Check Latest Price |
Imagine crisp lines forming triangles, squares, or polygons painted in vibrant hues against a neutral background. The sharp contrast between colors like black and white, or jewel tones with matte shades, creates a visual rhythm. These shapes can be arranged symmetrically for order or randomly for a more chaotic vibe. The textures are smooth, with clean edges that pop from the wall surface.
You can adapt this idea for small accent walls or an entire feature in a large living room. Play with metallic paints for a futuristic twist or matte finishes for a subdued, sophisticated look. For seasonal variations, swap out colors to match holiday themes or your mood. Vary the shapes’ sizes and orientations to suit minimalist or maximalist tastes. It’s all about expressing your unique flair.
Start with painter’s tape to outline your geometric patterns precisely. Choose high-quality acrylic or latex paints in contrasting shades. Use a level and a pencil to mark your design lightly. Fill in the shapes with a brush or foam roller for sharp edges. Remove the tape carefully before the paint dries to keep lines crisp. For added durability, apply a clear matte or gloss sealer.
Add a metallic or iridescent finish inside some shapes for extra dimension. Personalize by incorporating your favorite colors or even subtle patterns within the shapes. Use stencils to add small motifs or initials for a custom touch. Complement the wall with matching textiles or decorative accessories that echo the geometric theme.
Bold geometric walls instantly elevate your space and showcase your creative side. They’re perfect for modern apartments, studios, or even offices looking for a fresh vibe. With a little patience and a steady hand, you can pull off this look and amaze friends with your design skills.
2. Ombre Gradient Walls
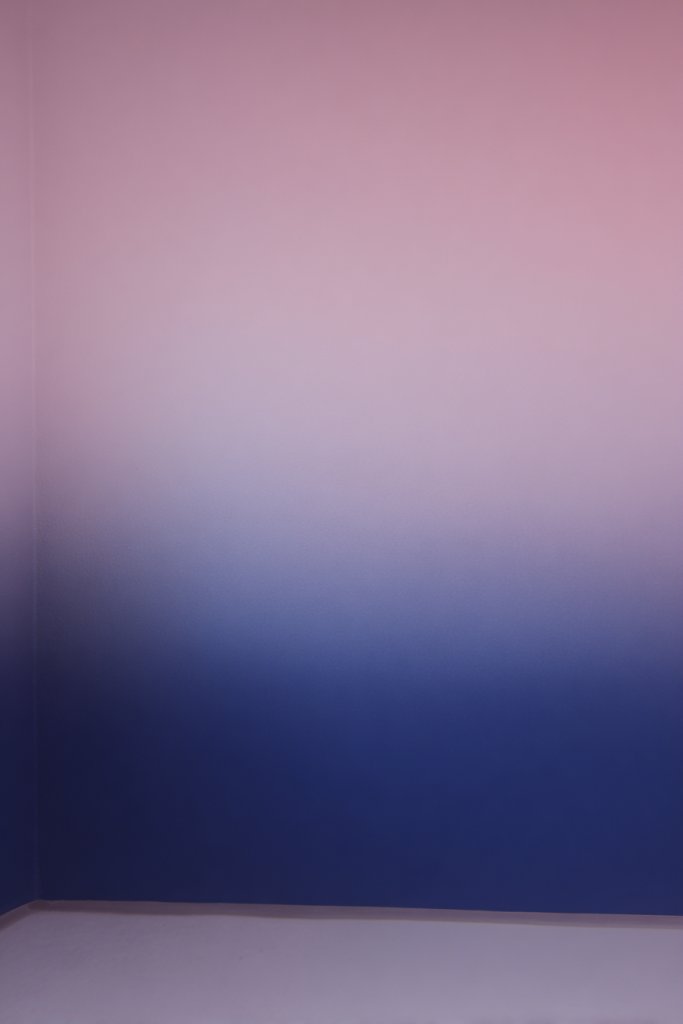
Tired of boring, flat walls that do nothing for your mood? Want to add a subtle yet striking element to your space? An ombre gradient wall offers a seamless transition of colors that creates depth and softness. It’s like painting a sunset or ocean scene right on your wall, bringing calm and serenity into any room.
Recommended Products to replicate this idea
| # | Preview | Product | |
|---|---|---|---|
| 1 |

|
VOCHIC Sip and Paint Kit, Pre Drawn Canvas Couples Painting Party Kits Paint Art Set with Outline... | Check Latest Price |
| # | Preview | Product | |
|---|---|---|---|
| 1 |

|
30 Pcs Round Sponges Brush Set, Round Sponge Brushes for Painting, Paint Sponges for Acrylic,... | Check Latest Price |
Visualize a wall where colors gradually fade from a deep sapphire blue at the bottom to a pale sky at the top. The transition is smooth, almost hypnotic, inviting your eyes to wander and relax. The blending of shades creates a sense of movement and flow, making the space feel larger and more dynamic. Light plays differently on the gradient, adding further dimension.
You can customize an ombre effect with any two or more colors, from warm reds and oranges to cool blues and greens. Try vertical or horizontal gradients depending on your room’s layout. For seasonal updates, switch to warmer hues in winter or brighter tones in summer. Use textured brushes or sponges for a more organic, less uniform blend. It adapts beautifully to bedrooms, living rooms, or even entryways.
Choose your color palette carefully, selecting shades that complement your existing decor. Prep the wall with a primer or a base coat of the lightest color. Use painter’s tape along edges to keep lines clean if doing a partial gradient. Mix your paints with a medium to extend blending time. Start from the darker shade and gradually add lighter hues, blending with a sponge or soft brush. Work in sections, feathering the colors together for a seamless fade. Finish with a clear sealer for longevity.
Incorporate metallic or pearl finishes within the gradient for a subtle shimmer. Add decorative elements like textured wall panels or fabric accents that echo the gradient’s hues. You can also create a layered look by applying a second gradient overlay with different colors. Complement with matching decor pieces like cushions or rugs for a cohesive style.
Ombre walls add a sophisticated, artistic vibe that’s perfect for any space craving a soft touch of color. They’re surprisingly easy to achieve with patience and the right tools. This technique is a favorite for those who want a personalized, calming environment that still feels stylish and vibrant.
3. Metallic Accents and Highlights
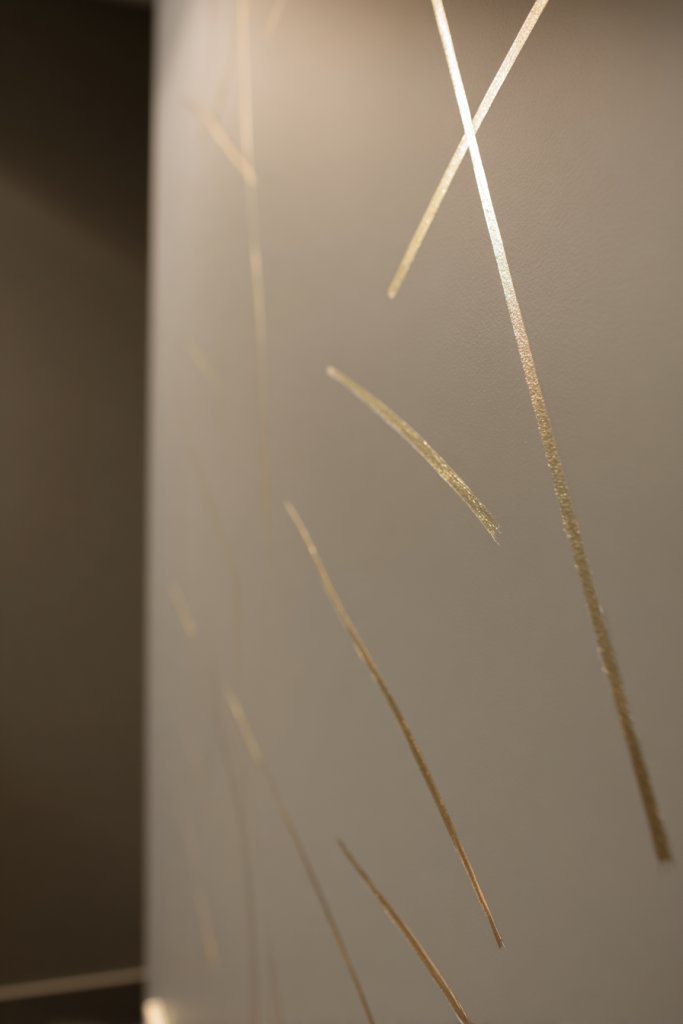
Looking for a way to make your walls sparkle without going full-on disco ball? Metallic accents add a touch of glamour and sophistication that instantly elevates your decor. They catch the light and create eye-catching highlights, perfect for modern or luxe interiors. Plus, they’re versatile enough to blend into various styles, from industrial to glam.
Recommended Products to replicate this idea
| # | Preview | Product | |
|---|---|---|---|
| 1 |
|
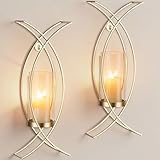
Walasis Candle Sconces Wall Decor Set of 2: Wall Hurricane Candle Holder Modern Metal Wall Mounted... | Check Latest Price |
| # | Preview | Product | |
|---|---|---|---|
| 1 |

|
Seekplore Gold Leaf Wall Decals - Peel & Stick Botanical Leaf Wall Stickers for Living Room &... | Check Latest Price |
Picture a matte wall with strategic metallic streaks or patches that shimmer when you move around. Gold, silver, bronze, or rose gold—pick your favorite hue to add warmth or coolness. The reflective quality draws attention to specific areas, like a fireplace or headboard wall, without overwhelming the space. The contrast between matte and metallic textures adds richness and depth.
Use metallic paints as subtle highlights or bold stripes for dramatic impact. For a contemporary look, combine metallic with matte or satin finishes. Seasonal shifts can be achieved by switching from warm golds to icy silvers. Incorporate metallic foils or leafing for textured accents. This technique works well on feature walls or small sections to add luxe details.
Select high-quality metallic paints designed for wall use, and prep your surface thoroughly. Use painter’s tape to create precise lines or shapes if desired. Apply the metallic paint with a smooth brush or foam roller to avoid streaks. For accent patches, consider sponging or stippling for textured effects. Pair with a matte sealer to prevent tarnishing or fading over time. Layer metallics with other paint techniques for extra dimension.
Customize by mixing metallic paints with clear glazes for a bespoke shimmer. Add stenciled patterns or geometric shapes for a modern touch. Use metallic accents in combination with textured wall panels or architectural moldings for a cohesive look. Incorporate complementary decor pieces like textiles or furniture in metallic finishes to unify the space.
Metallic walls radiate elegance and create a luxurious ambiance that’s hard to ignore. They’re a simple way to add visual interest without cluttering your space. With a little planning, you can achieve stunning effects that reflect your style and personality, making your home feel more upscale and unique.
4. Chalkboard Wall for Interactive Art
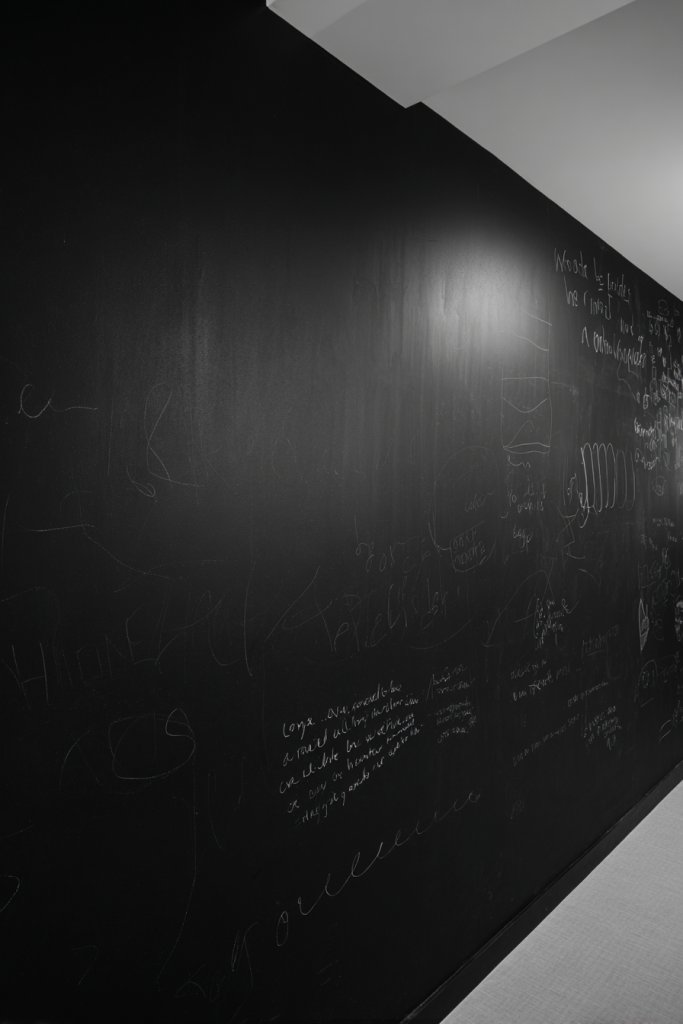
Ever wanted a space that’s both functional and fun? A chalkboard wall provides a dedicated canvas for doodles, notes, or inspirational quotes, making your home more interactive. It’s perfect for families, creative souls, or anyone who loves changing things up without damaging the walls. Plus, it’s a great way to add personality and spontaneity.
Recommended Products to replicate this idea
| # | Preview | Product | |
|---|---|---|---|
| 1 |

|
Rust-Oleum 206540 Chalkboard Brush-On Paint, 30 oz, Black | Check Latest Price |
| # | Preview | Product | |
|---|---|---|---|
| 1 |
|
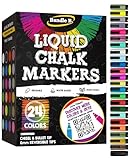
Bandle B. Chalk Markers - 24 Vibrant, Erasable, Non-Toxic, Water-Based, Reversible Tips. For Glass... | Check Latest Price |
Imagine a large black matte wall where colorful chalks dance across the surface, creating whimsical drawings or daily reminders. The contrast of chalk against a dark background makes everything pop. You can write in bold, playful fonts or sketch intricate designs that evolve over time. The tactile feel invites touch and participation, making it a lively focal point.
Choose different chalkboard paints in matte black, deep charcoal, or even vibrant hues like navy or emerald. For a softer look, frame the chalkboard with decorative molding or wallpaper borders for contrast. Seasonal updates can be made by changing chalk colors or themes. This idea works well in kitchens, kids’ rooms, or creative studios, adaptable to various spaces.
Start with a smooth, clean wall surface. Use painter’s tape to mark your desired boundaries. Apply a few coats of chalkboard paint, allowing adequate drying time between layers. Once dry, season the surface with chalk by rubbing across the entire area and erasing. This prevents ghosting and gives a smoother writing experience. Keep chalk and erasers handy for quick notes or art sessions. Consider sealing with a clear matte finish if you want extra durability.
Personalize with hand-painted borders, quotes, or themed decals that complement your decor. Use colorful chalks or liquid chalk markers for vivid designs. Incorporate magnetic paint underneath for added functionality with magnets or notes. Change themes seasonally, from holiday greetings to motivational quotes, keeping the space lively.
A chalkboard wall turns any room into a creative playground, encouraging spontaneous expression. It’s a space where ideas flow freely and personalities shine through. With minimal effort, you transform a plain wall into a dynamic, interactive feature that brings joy and utility to your home.
5. Striped Walls with Varying Widths
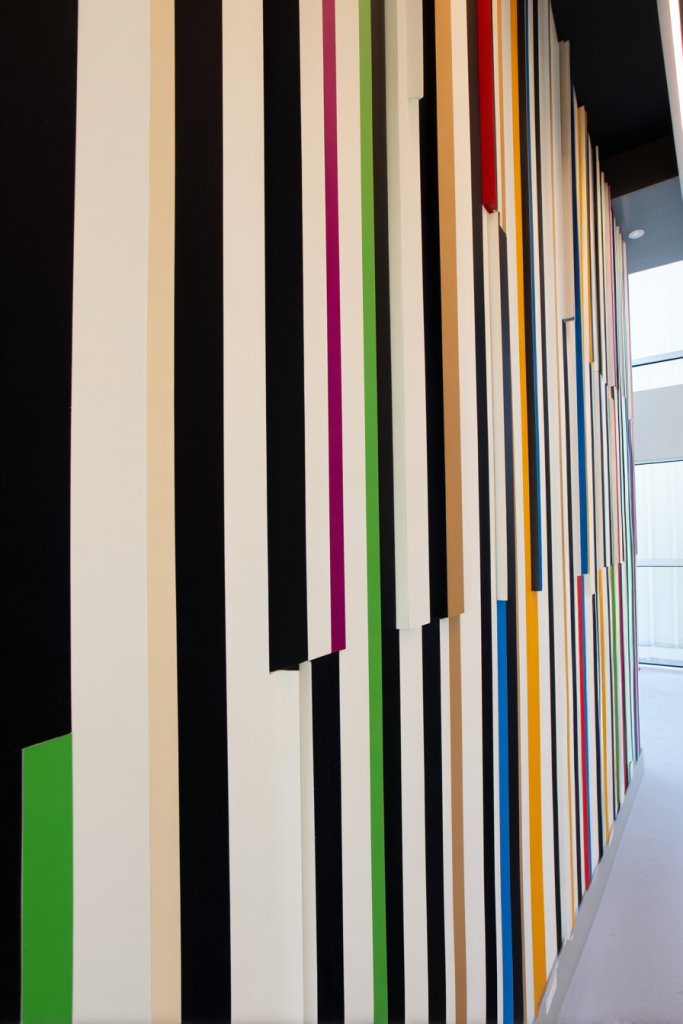
Bored of plain, boring walls that do nothing for your interior vibe? Stripes are a classic way to add visual interest and energy to any room. Varying widths make the design more dynamic and less predictable, giving your space a lively personality. Plus, they’re surprisingly easy to DIY if you follow the right steps.
Recommended Products to replicate this idea
| # | Preview | Product | |
|---|---|---|---|
| 1 |

|
Pro Grade Paint Roller Kit, Brush & Roller,10 Piece Set, Wall Painting Naps for Professionals &... | Check Latest Price |
Picture bold horizontal or vertical stripes that stretch across an accent wall or entire room. Wide stripes in contrasting colors like navy and white create a crisp, modern look, while thinner stripes in pastel shades add softness. The varied widths create a sense of movement, guiding the eye around the space. The pattern can make ceilings look higher or walls seem wider, depending on orientation.
Use tape to mark your stripes carefully, experimenting with different color combinations to match your style. For a playful vibe, alternate bright colors and bold patterns; for elegance, stick to monochromes or metallics. Seasonal shifts are easy—swap out colors or add metallic accents for a festive touch. This technique works well in bedrooms, living rooms, or even hallways.
Start by choosing your stripe widths and colors. Use painter’s tape to create sharp lines, applying tape along your marked lines. Paint each section with a high-quality latex or acrylic paint, maintaining even strokes. Remove the tape carefully before the paint dries to ensure crisp edges. For a seamless look, consider using a small roller or brush for touch-ups. Finish with a matte or semi-gloss sealer for durability and easy cleaning.
Add metallic or glitter accents within some stripes for extra flair. Incorporate textured tapes or different finishes to create contrast. Pair with matching textiles or accessories that highlight your stripe colors. You could also experiment with asymmetrical or diagonal stripes for a more contemporary look. Keep the pattern flexible to suit changing decor or mood.
Stripes are timeless and versatile, allowing you to showcase your creative side effortlessly. They can transform a dull wall into a striking feature that energizes your entire space. With patience, you’ll achieve professional-looking results that reflect your personal style and confidence in DIY projects.
6. Abstract Art with Large Brush Strokes
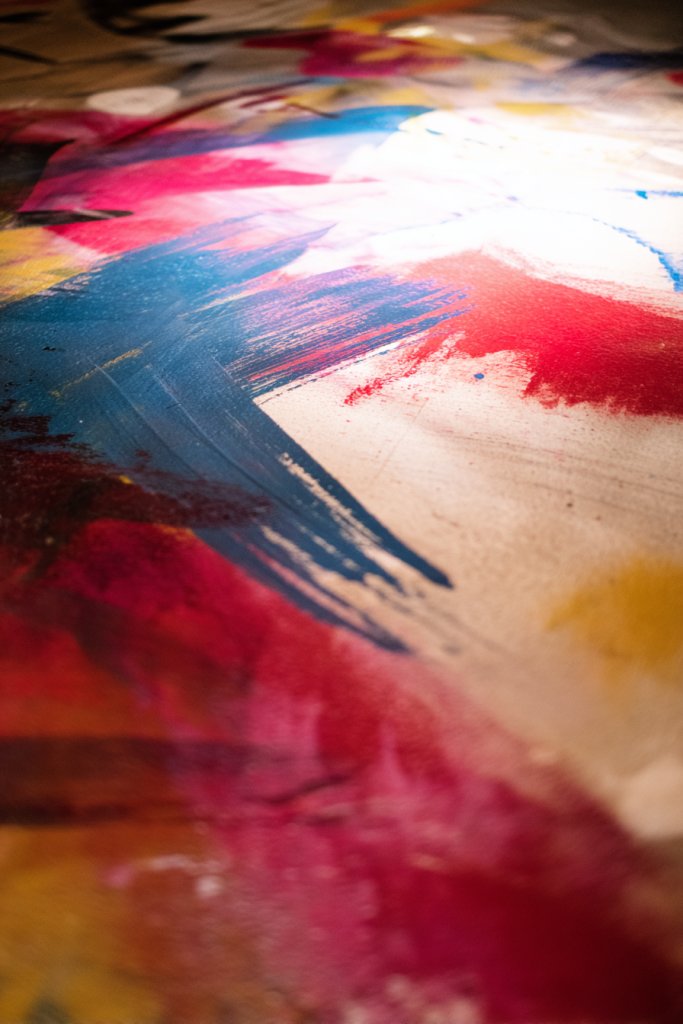
Feeling uninspired by your current wall decor? Want to add a burst of energy and personality without committing to detailed artwork? Abstract art with large brush strokes offers a bold, spontaneous look that captures emotion and movement. It’s perfect for creating a statement wall that invites curiosity and conversation.
Recommended Products to replicate this idea
| # | Preview | Product | |
|---|---|---|---|
| 1 |

|
Large Framed Black and White Abstract Wall Art for Living Room, 3 Piece Big Canvas Prints Paintings... | Check Latest Price |
| # | Preview | Product | |
|---|---|---|---|
| 1 |

|
Large Framed Colorful Abstract Wall Art for Living Room, Oversized Modern Horizontal Bright Canvas... | Check Latest Price |
Imagine huge, sweeping strokes of vivid colors layered in a chaotic yet intentional way. Thick applications of paint create texture and depth, making the wall feel alive. The irregular shapes and overlapping hues evoke feelings of freedom and creativity. When light hits these strokes differently throughout the day, the wall transforms, keeping the energy fresh.
Use bold colors like reds, blues, and yellows for maximum impact or subdued shades for a more sophisticated look. You can experiment with different brush sizes and techniques, from palette knives to sponges. Incorporate metallic or iridescent paints for a shimmering effect. This style adapts well to eclectic or contemporary interiors and works as a contrast element in minimalist spaces.
Start with a blank wall and sketch rough ideas if needed. Use large brushes or even household tools like spatulas to apply the paint freely. Layer colors without overthinking, letting some areas be more textured or transparent. Don’t worry about perfection—embrace imperfections for authentic energy. Protect your floor and furniture, and consider sealing the finished work for longevity. This approach allows for spontaneous, free-form art.
Add metallic accents or splatters to increase visual interest. Incorporate personal symbols or motifs within the strokes for a unique touch. Frame sections with washi tape or decorative borders to give a finished look. Change or add to the artwork over time, making it a living piece of your home’s personality.
Abstract wall art celebrates your creative spirit and breaks away from traditional decor rules. It’s a simple way to turn your wall into a dynamic, energetic centerpiece. With each brushstroke, you build confidence in your artistic instincts and create a space that truly feels like you.
7. Color Block Sections for a Modern Look
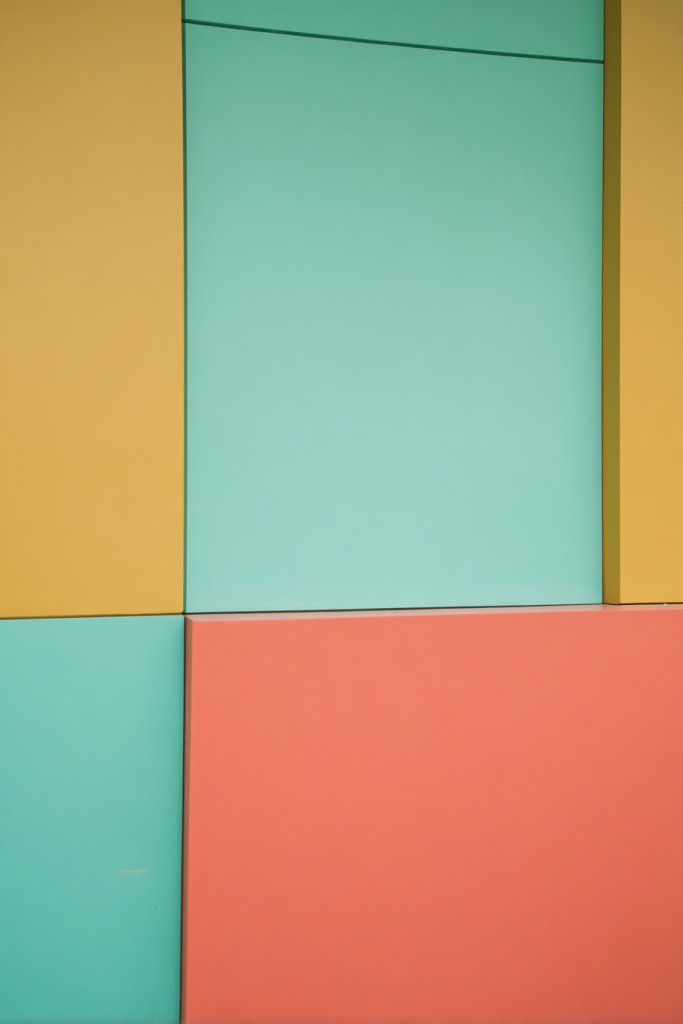
Ever wish your walls could be more than just a single color? Color blocking introduces bold, defined sections that add structure and style to your space. It’s a modern twist that’s surprisingly easy to DIY and can make even small rooms look larger and more intentional. Ready to turn your walls into a statement piece?
Recommended Products to replicate this idea
| # | Preview | Product | |
|---|---|---|---|
| 1 |

|
ScotchBlue PROSharp Painter's Tape 2 Inch Wide (1.88 in x 60 yd) 1 Roll Blue Tape Protects Surfaces... | Check Latest Price |
| # | Preview | Product | |
|---|---|---|---|
| 1 |
|
Pro Grade Paint Roller Kit, Brush & Roller,10 Piece Set, Wall Painting Naps for Professionals &... | Check Latest Price |
Visualize large, crisp rectangles or squares painted in contrasting or harmonious shades. Imagine a wall divided into three or four sections, each painted a different color—think deep navy, soft blush, mint green, and warm beige. The clean lines and vivid color separation create a graphic, contemporary aesthetic. When balanced correctly, it adds vibrancy without overwhelming.
Experiment with vertical or horizontal blocks based on your room’s proportions. Use painter’s tape to create sharp edges and avoid bleeding. Play with different color combinations to match seasonal themes or your decor palette. Add textured finishes or matte and gloss contrasts for extra interest. This approach suits bedrooms, living rooms, or even kitchens.
Begin by planning your layout and selecting your colors. Use painter’s tape to mark off each section, ensuring straight, even lines. Paint each segment with quality latex or acrylic, applying multiple coats if necessary. Carefully remove the tape once the paint is dry for clean edges. For a seamless look, consider sealing with a clear coat. This method is straightforward but highly effective.
Incorporate metallic or glitter paints within specific blocks to add shimmer. Layer different shades within a section for a subtle gradient effect. Use decorative tape or stencils to create patterns within blocks. Complement the color blocks with matching textiles, art, or furniture to tie the room together.
Color blocking is a bold, clean approach that instantly modernizes any room. It’s an excellent way to showcase your color sense and design confidence. With some planning and patience, you can create a striking feature wall that reflects your personality and style.
8. Sponged or Rag-rolled Texture Techniques

Bored of flat, lifeless walls that lack character? Want to add texture and depth without complicated techniques? Sponging and rag-rolling are fantastic ways to give your walls a rich, tactile finish. They’re simple to learn and can be customized to suit any decor style, from rustic to modern.
Recommended Products to replicate this idea
| # | Preview | Product | |
|---|---|---|---|
| 1 |

|
LATHER - Natural Sea Wool Sponge, 5-6" - Organic Exfoliating Body Scrubber - Soft, Gentle Cleansing... | Check Latest Price |
| # | Preview | Product | |
|---|---|---|---|
| 1 |

|
Wooster Brush R527-9 Microfiber Paint Roller | Check Latest Price |
Picture a wall with a subtle, mottled texture created by sponge dabbing or rag-rolling with multiple shades. The surface has a soft, almost velvety appearance that catches light differently depending on your angle. The variations create a layered look that mimics natural textures like stone or fabric. This technique adds depth and interest without the need for wallpaper or textured panels.
Choose colors that complement or contrast your base wall color. For a more dramatic look, use darker shades layered over lighter ones. Seasonal updates can be achieved by switching to warm earth tones or cool pastels. Use natural sea sponges or rags for organic patterns or synthetic tools for more uniform effects. This method works well in bedrooms, dining areas, or accent walls.
Start with a well-prepared, primed wall. Use a sponge or rag dipped in a slightly diluted paint mixture. Dab or roll the paint onto the wall in random patterns, overlapping for a textured, mottled appearance. Experiment on scrap drywall to perfect your technique. For variation, layer different colors, blending or creating subtle transitions. Seal the finished surface with a matte or satin clear coat for durability.
Add metallic or pearl accents within the sponge or rag layers for extra shimmer. Incorporate contrasting textures such as embossed patterns or stenciled motifs nearby. Use different sponge sizes and shapes to create varied textures. Personalize with color combinations that reflect your style, from warm neutrals to vibrant hues.
Textured walls add warmth and personality that flat paint can’t match. They’re a cost-effective way to create a bespoke look that feels rich and inviting. Once you master the technique, your confidence in DIY interior design will soar, opening doors to endless creative possibilities.
9. Stenciled Artistic Patterns
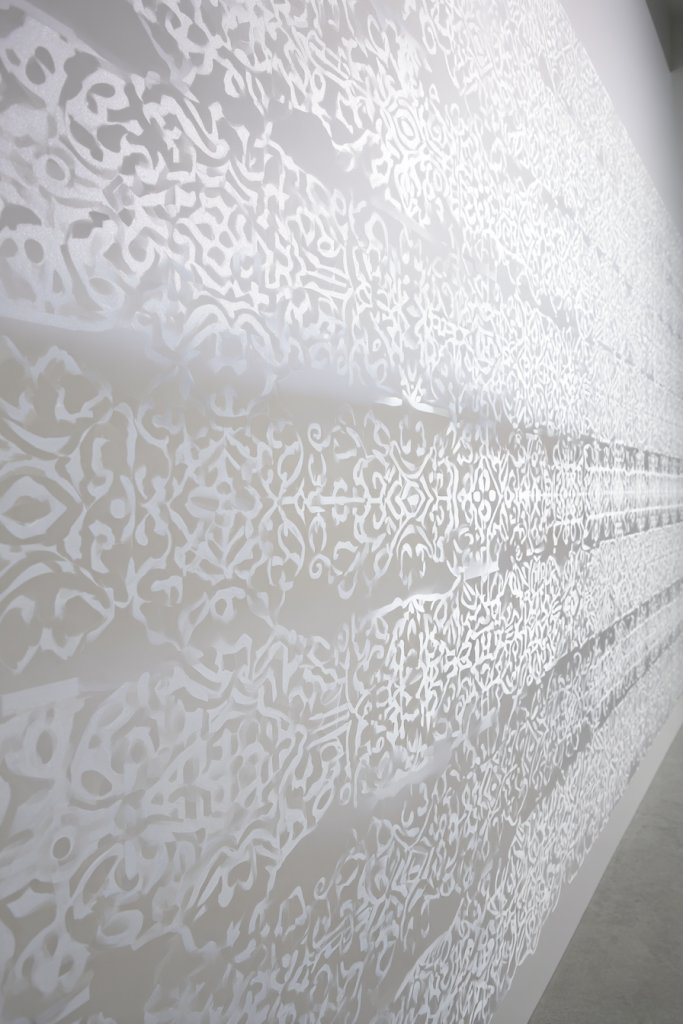
Looking for a way to add intricate detail without expensive art pieces? Stenciling allows you to create detailed, repeating patterns that elevate your walls with minimal effort. It’s perfect for customizing spaces with floral, geometric, or tribal motifs. Plus, it’s a fun project that lets your personality shine through.
Recommended Products to replicate this idea
| # | Preview | Product | |
|---|---|---|---|
| 1 |

|
24 Pcs Flower Stencils for Painting, 6 x 3 Inch Reusable Leaf and Flower Stencil, Wildflower DIY... | Check Latest Price |
| # | Preview | Product | |
|---|---|---|---|
| 1 |

|
Cutting Edge Stencils - Stencil Essential Kit - Dense Foam Roller, White Bristle Brush, and Clip-On... | Check Latest Price |
Imagine delicate floral patterns or bold geometric shapes painted neatly across your wall in a consistent, repeatable manner. The contrast of colors—like white on navy or metallic accents—makes patterns stand out. Repeating motifs create rhythm and harmony, transforming bland walls into gallery-like surfaces. The precision of stenciling adds an artisanal touch that feels both modern and timeless.
Select stencils that match your style—large, complex designs for statement walls or small, subtle motifs for accents. Use spray adhesive to keep stencils in place and avoid paint bleed. Experiment with metallic or glow-in-the-dark paints for extra impact. Seasonal or themed patterns work well for holidays or special occasions. This technique works in bedrooms, entryways, or even bathrooms.
Start by choosing your stencil pattern and prepping your wall with a clean, smooth surface. Secure the stencil with painter’s tape or spray adhesive. Use a sponge or small brush to dab paint onto the stencil, avoiding excess paint to prevent bleeding. Carefully lift the stencil and reposition as needed to create a seamless pattern. Repeat the process across the wall, maintaining alignment. Finish with a clear sealant for longevity.
Mix custom colors or metallics for a unique look. Incorporate layered patterns or overlapping motifs for complexity. Frame or highlight certain sections with contrasting colors or borders. Customize by adding small details or initials within the pattern for personalized touches. These subtle enhancements elevate the overall design.
Stenciled patterns showcase your artistic side and allow for precise, repeatable designs. They elevate your decor without the need for costly artwork. Once you get the hang of it, your confidence in creating custom wall art skyrockets, opening a world of DIY possibilities.
10. Faux Finish with Brick or Stone Effect
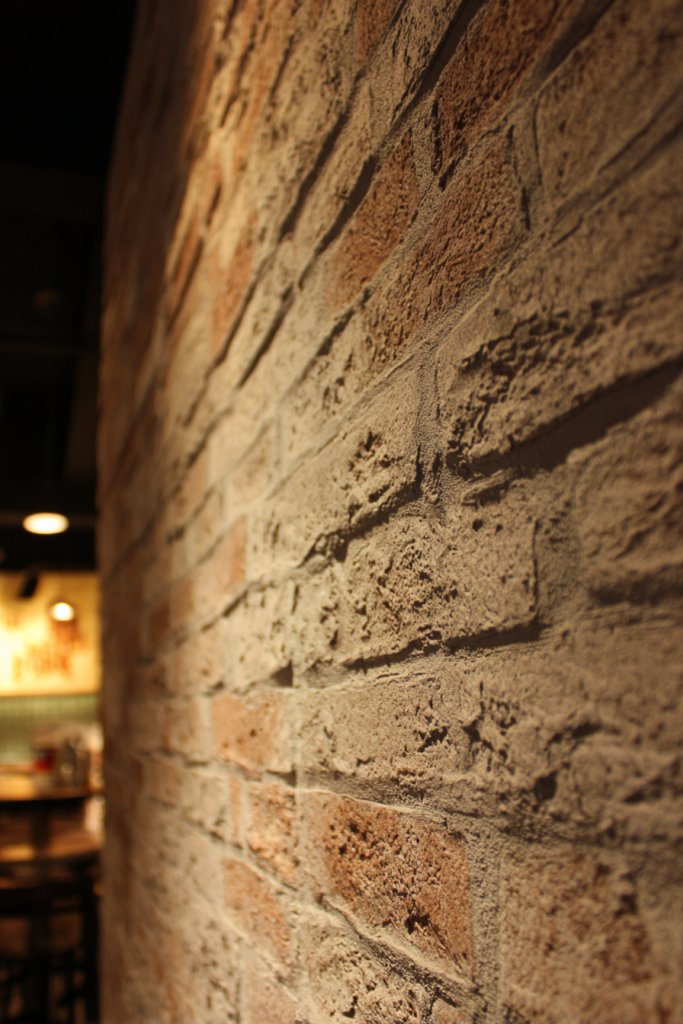
Craving the charm of exposed brick or natural stone but don’t want the hassle or cost of actual masonry? Faux finishes offer a clever solution that can give your walls a textured, rustic, or industrial vibe. It’s an affordable way to add character and warmth without major renovations. Ready for a wall transformation that feels authentic?
Recommended Products to replicate this idea
| # | Preview | Product | |
|---|---|---|---|
| 1 |

|
Hopeak Red Brick Wallpaper Self-Adhesive Peel and Stick Wallpaper Waterproof and Removable Good for... | Check Latest Price |
| # | Preview | Product | |
|---|---|---|---|
| 1 |

|
CONCORD WALLCOVERINGS ™ Retro-Art 3D Faux Stone Wall Panels, Pack of 10, Grey Beige Brown Wild... | Check Latest Price |
Picture a wall that looks like it’s been built from weathered bricks or rugged stone blocks. The textures are rough, with subtle color variations that mimic real materials. The painted surface has depth and dimension, with shadows and highlights adding realism. The effect can be subtle or dramatic, depending on your color choices and techniques.
Use specialized faux brick or stone paints in earthy tones or vibrant hues for a modern twist. Integrate with other textured finishes like plaster or textured wallpaper. Seasonal updates can involve changing the color palette to match decor shifts or themes. This idea works well in feature walls, fireplaces, or accent areas to add visual interest.
Begin by prepping your wall with a smooth, clean surface. Use stencils or freehand techniques with brushes or sponges to apply the faux finish. Layer different shades of paint to create realistic depth, starting with a base color and adding darker and lighter hues for shadowing. Use a stippling sponge or a dry brush for texture effects. Seal with a matte or semi-gloss varnish for durability.
Add weathered or distressed details with sanding or sponging to enhance realism. Incorporate elements like faux mortar lines or grout for extra authenticity. Use contrasting colors for chips or cracks to mimic age. Personalize with your favorite color schemes, from neutral rustic to bold modern palettes, for a tailored look.
Faux brick or stone finishes bring instant warmth and texture, elevating your space with minimal effort. They’re a fantastic way to introduce rustic charm or urban edge without structural changes. With patience and practice, you’ll master this technique and enjoy a stunning, realistic feature wall that boosts your decorating confidence.
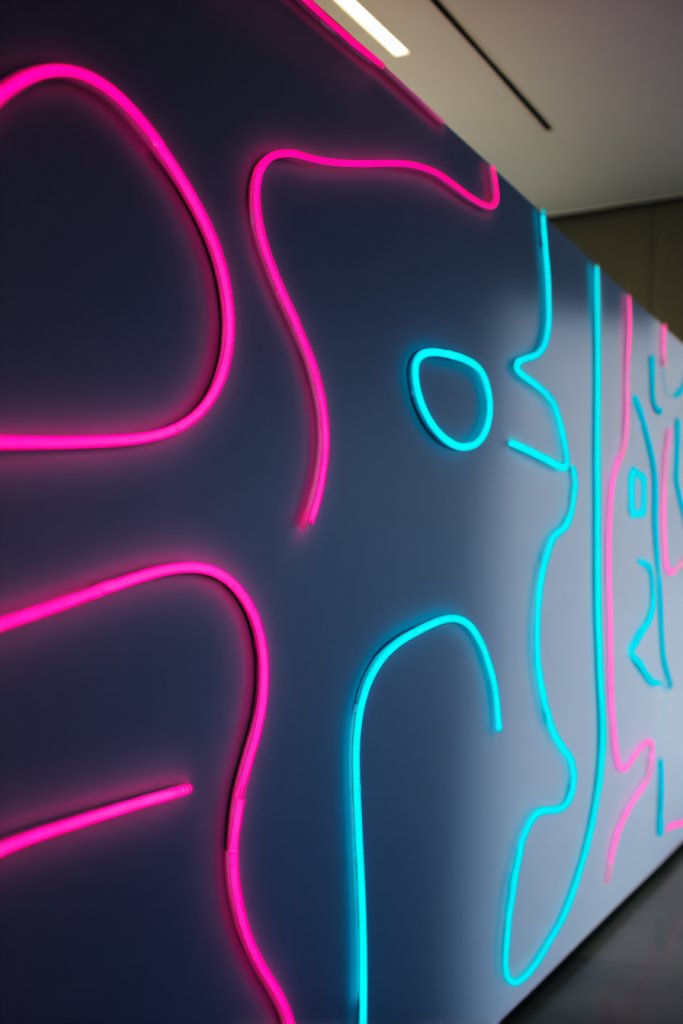
11. Neon or Fluorescent Paint Accents
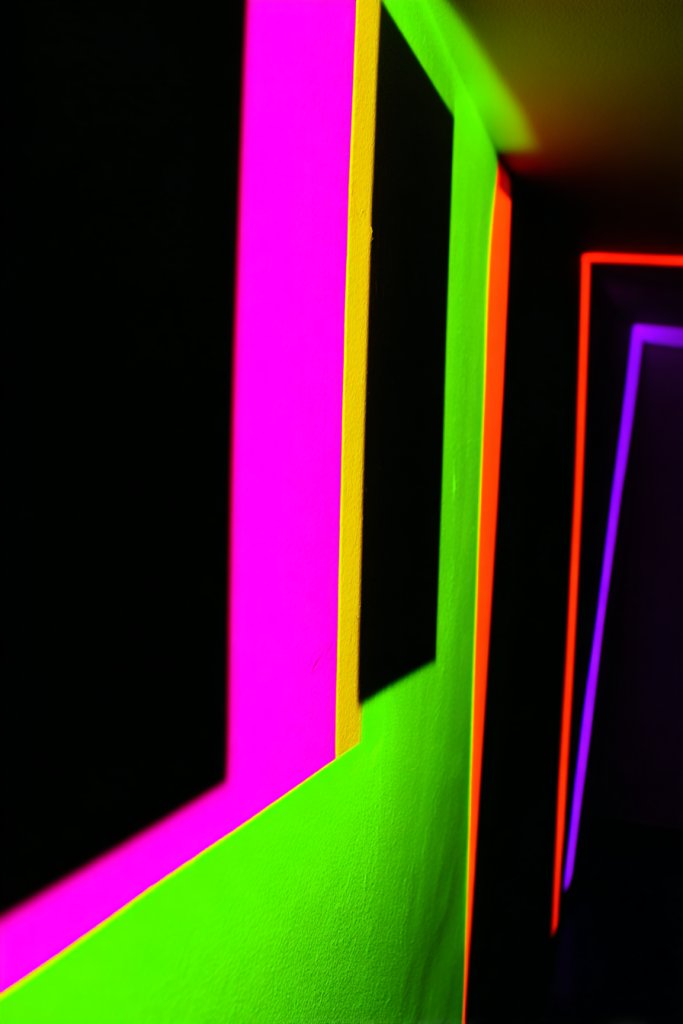
Want to inject some energy and fun into your space? Neon or fluorescent accents can do exactly that, transforming dull walls into vibrant statements. These bright hues glow under black light or natural daylight, making your room stand out. They’re perfect for a playful, modern vibe or a lively entertainment area.
Recommended Products to replicate this idea
| # | Preview | Product | |
|---|---|---|---|
| 1 |

|
BLUEBIRD Studio Acrylic Paints, Neon Colors, 6-Pack 3.4 Fl Oz each, Basic Acrylic Paint For DIY... | Check Latest Price |
| # | Preview | Product | |
|---|---|---|---|
| 1 |

|
SHGPODA 50 Foot Black Light Strip & Remote, 900LEDs, Dimmable 12V Flexible Black Lights for Glow... | Check Latest Price |
Visualize a wall with bold neon shapes or lines that seem to pulse and glow when the lights dim. Think geometric patterns, abstract doodles, or even words in electric pink, green, or orange. The luminous effect captures attention and creates a dynamic, youthful atmosphere. When paired with neutral backgrounds, these accents pop dramatically.
Use neon paints to create borders, outlines, or small motifs that highlight architectural features. For a softer approach, combine neon with pastel shades for a balanced look. Seasonal or themed decor can incorporate neon colors for holidays or parties. They work especially well in game rooms, home bars, or teenager bedrooms.
Start by selecting high-quality fluorescent or neon paints designed for walls. Use painter’s tape to outline your shapes or patterns for clean edges. Apply with a small brush or stencil for precision. For maximum glow, paint in dim lighting and let dry thoroughly. In low light, the colors will glow vividly, creating a captivating effect.
Add glow-in-the-dark elements or layered effects with multiple neon shades. Incorporate black or dark backgrounds to enhance the luminous effect. Use stencils or freehand techniques to craft unique designs. Pair with black light fixtures for an immersive experience that’s sure to impress.
Neon accents turn any room into a vibrant, energetic space that’s full of personality. They’re a fantastic way to showcase your bold style and creativity. With some practice, you’ll master the art of glowing walls and create a space that’s truly unforgettable.
12. Multi-layered Murals with Overlapping Colors
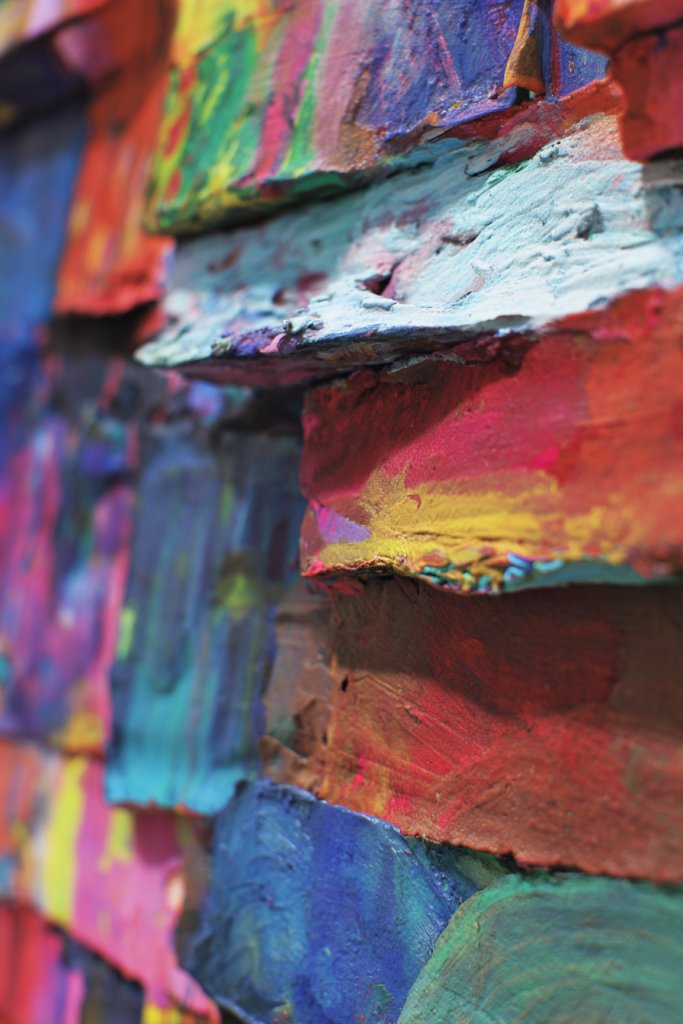
Looking to make a big statement without committing to a single fixed image? Multi-layered murals with overlapping colors create a vibrant, collage-like effect that feels dynamic and personalized. It’s an artistic approach that adds depth, movement, and a touch of chaos—perfect for free spirits.
Recommended Products to replicate this idea
| # | Preview | Product | |
|---|---|---|---|
| 1 |

|
Roman’s E-Z Hang Peel & Stick Wallpaper Helper, Clear, Non-Staining, 32 Fluid Ounces | Check Latest Price |
| # | Preview | Product | |
|---|---|---|---|
| 1 |

|
Nicpro 14 Colors Large Bulk Acrylic Paint Set (16.9 oz,500 ml) Rich Art Painting Supplies, Non Toxic... | Check Latest Price |
Imagine a wall bursting with layers of different colors and shapes, overlapping to form abstract forms or subtle landscapes. Each layer adds complexity and richness, with some colors peeking through others. The result is a lively, textured surface that invites curiosity and exploration. Light and shadow dance across the layers, changing the mood constantly.
Use bold or pastel shades depending on your style. Incorporate transparent or semi-transparent paints for overlapping effects. Experiment with different brush sizes and techniques—sponge, rag, or even spray—to create varied textures. Seasonal updates can include adding new layers or adjusting color intensity. Works well in eclectic, bohemian, or contemporary interiors.
Start with a blank wall and sketch your layout lightly. Use multiple colors and layers, letting some dry before adding new ones. Overlap with different shapes, transparency, and textures for visual interest. Use masking tape or stencils for precise shapes if desired. Finish with a clear protective coat to preserve the layered effect. Play with transparency and blending for depth.
Add metallic or shimmering paints within some layers for extra sparkle. Incorporate personal symbols, initials, or motifs into certain layers. Use contrasting textures—matte, gloss, or textured finishes—to enhance the layered look. Change or add new layers over time for evolving artwork.
Multi-layered murals turn your wall into a lively canvas full of personality. They’re perfect for showcasing your artistic side and creating a focal point. With patience and experimentation, you’ll develop confidence in your ability to craft complex, stunning visuals that reflect your unique taste.
13. Splatter and Drip Art

Craving a wall that exudes energy and rebellious spirit? Splatter and drip art is all about boldness, spontaneity, and raw creativity. It’s an easy way to add a street-art vibe to your home without needing artistic skills. Plus, it’s super fun and liberating to create.
Recommended Products to replicate this idea
| # | Preview | Product | |
|---|---|---|---|
| 1 |

|
Nicpro Acrylic Pouring Kit, Artist Starter Supplies Including 19 Colors Acrylic Paints,Pouring... | Check Latest Price |
| # | Preview | Product | |
|---|---|---|---|
| 1 |

|
BAKEYBA Canvas Boards for Painting 60 Pack, 8x10 Inch Painting Canvas Panels, 100% Cotton White... | Check Latest Price |
Picture a wall covered in splatters of bright paint, some deliberate, some accidental, forming a chaotic masterpiece. Drips run down in irregular lines, adding movement and texture. The visual chaos feels alive, like a frozen moment of an artist’s outburst. It’s imperfect perfection, full of personality and attitude.
Choose vibrant, contrasting colors to make the splatters pop. Use brushes, sponges, or even spray bottles for different effects. Incorporate metallic or neon paints for extra impact. Seasonal themes can be created by adjusting color schemes. Works well in contemporary, industrial, or eclectic spaces, especially as an accent.
Lay down a drop cloth and prep your wall with a base coat if needed. Load brushes or spray bottles with bright paints. Flick, splatter, or drip paint onto the wall, varying the force and angle for randomness. Use stencils or masking tape if you want defined shapes mixed with chaos. Let everything dry thoroughly before sealing with a clear coat. Clean up quickly to prevent smudges.
Add metallic or glow-in-the-dark splatters for extra flair. Incorporate layered effects by overpainting or adding smaller splatters on top. Customize by choosing colors that reflect your personality or mood. Frame or surround the splatter wall with minimalist decor to keep focus on the art.
Splatter and drip art liberates your inner rebel and makes a bold statement. It’s a perfect project for expressing spontaneous creativity with minimal planning. Once mastered, you’ll feel confident turning any blank space into a lively, energetic focal point.
14. Pastel Chalky Finish for Soft Creativity

Want a wall that feels soft, inviting, and subtly artistic? A pastel chalky finish offers a matte, velvety surface that’s perfect for gentle color blends and playful doodles. It’s ideal for creating cozy atmospheres in bedrooms, nurseries, or creative corners without overwhelming the senses.
Recommended Products to replicate this idea
| # | Preview | Product | |
|---|---|---|---|
| 1 |

|
FolkArt FA HD Acrylic CHALK 9PC SET 2 OZ, Top Pastels | Check Latest Price |
| # | Preview | Product | |
|---|---|---|---|
| 1 |

|
Apple Barrel, Acrylic Paint Set, 16 pc - 2 oz Bottles, Pastel Perfection, Perfect for DIY Arts and... | Check Latest Price |
Imagine a wall with a muted, chalk-like texture in blush pinks, mint greens, or lavender. The matte finish absorbs light softly, giving the surface a velvety feel. It invites touch and interaction, perfect for doodling or writing with chalk markers. The colors blend seamlessly, creating a dreamy, calming effect.
Choose pastel shades or mix your own for a customized look. Use chalky paints or matte finishes that mimic chalkboard surfaces. Seasonal updates can include adding metallic or glitter accents to enhance the soft aesthetic. This style works beautifully in bedrooms, craft rooms, or kids’ spaces.
Start with a smooth, clean wall. Apply a primer if necessary to enhance adhesion. Use a roller or brush to apply chalky paint evenly. For a more textured look, sponge or stipple the paint onto the surface. Once dry, use chalk or chalk markers for doodles or messages. Seal with a matte clear coat to protect the finish and prevent smudging.
Add metallic or pearl accents to parts of the wall for a subtle shimmer. Incorporate decorative borders or stenciled motifs that complement the pastel palette. Change your doodles seasonally or for special occasions. Keep a stash of chalk or markers nearby for spontaneous creativity.
A pastel chalky finish creates a serene, artistic environment that’s both functional and beautiful. It encourages playful expression and personal touches. With a little effort, you’ll craft a gentle, charming feature wall that invites positivity and inspiration.
15. Monochrome with Textured Patterns
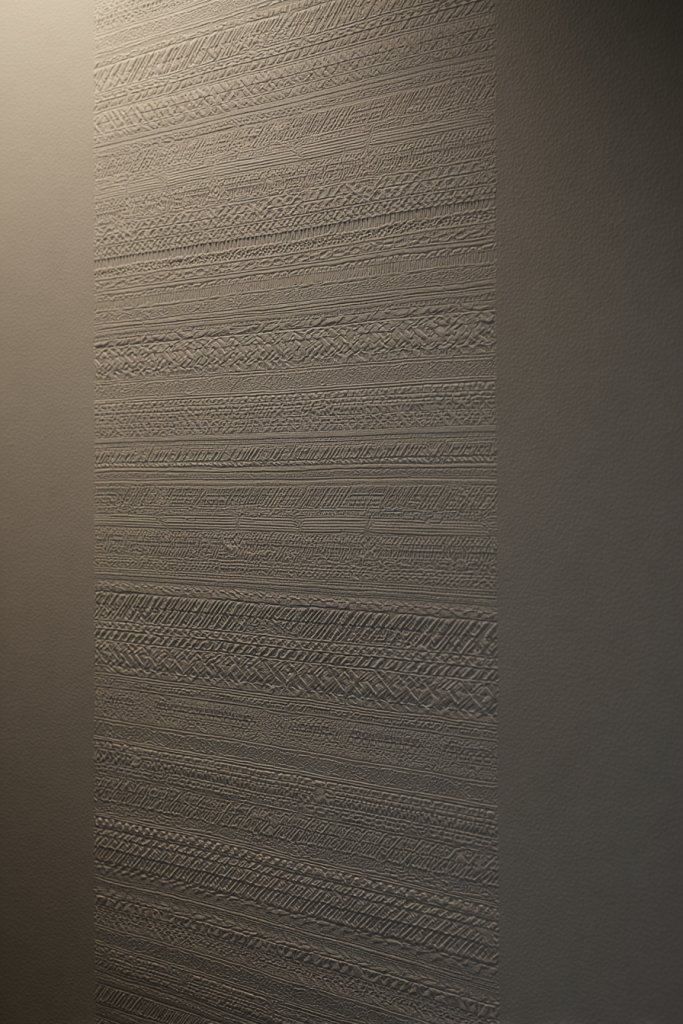
Feeling like your walls need a sophisticated upgrade? Monochrome schemes with textured patterns offer a sleek, elegant look that’s easy to coordinate and endlessly stylish. They bring depth and visual interest without overwhelming the space, perfect for modern minimalists.
Recommended Products to replicate this idea
| # | Preview | Product | |
|---|---|---|---|
| 1 |

|
A.S. Création Wallpaper Monochrome - Grey - Solid Color Wallpaper 395.99in x 20.87in Made in... | Check Latest Price |
| # | Preview | Product | |
|---|---|---|---|
| 1 |

|
Lcokin Black and White Striped Throw Pillow Covers 18x18 in Set of 2, Decorative Abstract Art Boho... | Check Latest Price |
Imagine a wall painted in shades of a single color—say, various grays or browns—with textured patterns like stamping, embossing, or raised stencils. The tactile surface adds dimension, making the wall feel alive under different lighting. Patterns can be geometric, organic, or abstract, depending on your mood. The subtle play of light and shadow highlights the textures beautifully.
Use different techniques like stamping, embossing, or applying textured wallpaper layered under paint for variety. Incorporate patterns that suit your space—bold geometric shapes for contemporary looks or soft, flowing motifs for a calmer effect. Seasonal tweaks can include adding metallic or pearl accents. This style fits well in living rooms, bedrooms, or hallways.
Choose a monochrome color palette and prepare your wall. Use textured stencils, stamps, or embossing tools to create patterns. Apply textured paint or use a textured primer under your topcoat. For embossing, press patterns into wet paint or use specialized tools. Finish with a protective matte sealant to enhance durability. Experiment on scrap before committing to the wall.
Incorporate metallic or pearl accents within the textures for a hint of shimmer. Mix different textures—such as matte, gloss, or embossed—to add richness. Use stencils to include subtle motifs or initials. Complement with monochrome decor and textiles for a unified, elegant look.
Monochrome textured walls bring a refined, understated elegance that elevates your decor game. They’re easy to customize and adapt, making them a great project for confident DIYers. Once done, you’ll have a sophisticated feature that feels both modern and timeless.
16. Colorful Dip-Dye Effect
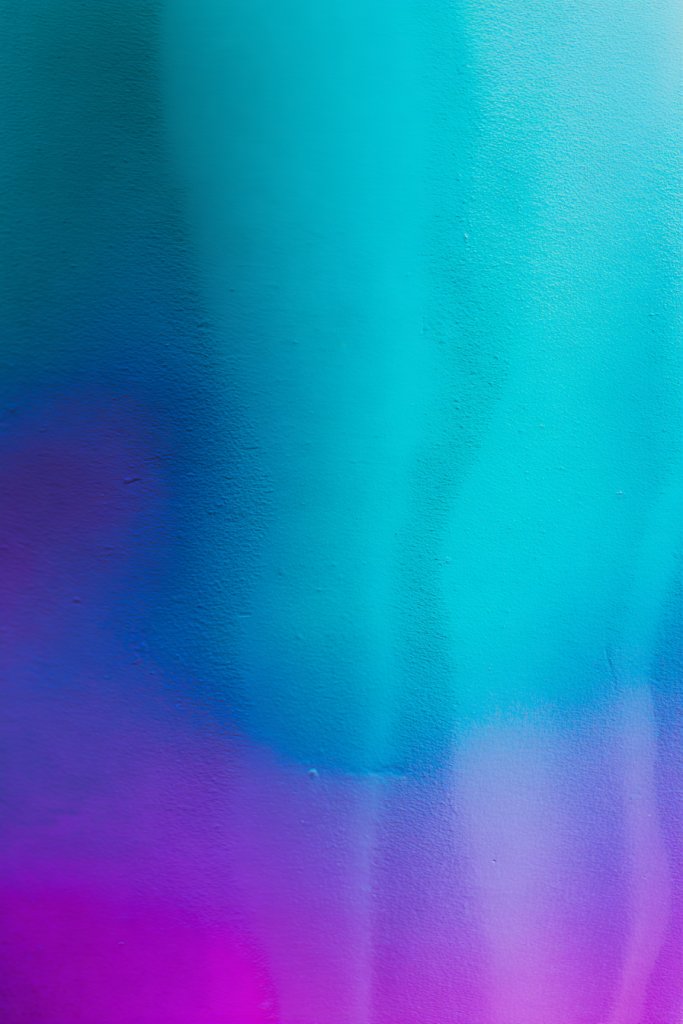
Wish your walls could have a soft, artistic fade that’s both vibrant and soothing? A dip-dye effect creates a seamless transition between colors, adding depth and personality. It’s like a watercolor painting come to life on your wall, perfect for creating a relaxing yet lively environment.
Recommended Products to replicate this idea
| # | Preview | Product | |
|---|---|---|---|
| 1 |

|
Viscosity Cup No. 1 to No. 5 Zahn Cup, Viscometer Dip Type 44ml Viscosity Cup Kit w/Bracket for... | Check Latest Price |
| # | Preview | Product | |
|---|---|---|---|
| 1 |
|
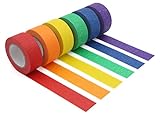
JONYEE Colored Masking Tape, Colored Painters Tape for Arts & Crafts, Labeling or Coding - Art... | Check Latest Price |
Visualize a wall where one corner is painted in a deep hue that gradually blends into a lighter shade towards the other end. The colors flow naturally, creating a gentle gradient that feels organic. The transition can be subtle or bold, depending on your palette and preferences. When light hits the surface, the color shift becomes even more dynamic.
Use multiple shades of the same color family for a monochromatic fade, or blend contrasting colors for a more dramatic effect. Techniques include dipping the wall in paint or using a sponge or brush to blend the edges. Seasonal updates might involve changing the color palette or intensities. This look suits bedrooms, living rooms, or creative spaces.
Start with a base coat of the lightest color. Apply the darker shade at the top or bottom, then blend with a sponge, brush, or roller, feathering the paint to create a seamless gradient. Keep a damp sponge or rag handy to soften harsh lines. Work in sections, blending as you go. Finish with a clear, matte or semi-gloss sealer to protect the finish.
Customize with metallic or pearl accents within the gradient for a luminous effect. Incorporate subtle patterns or motifs in the transition zones. Use complementary textiles or decor to enhance the gradient’s mood. Change color schemes seasonally to keep the space fresh and inspiring.
A dip-dye wall adds an artistic, calming touch to any room. It’s an easy project that yields high visual impact. Once you master the technique, you’ll confidently create beautiful, personalized murals that reflect your style and mood.
17. Retro Pop-Art Inspired Designs
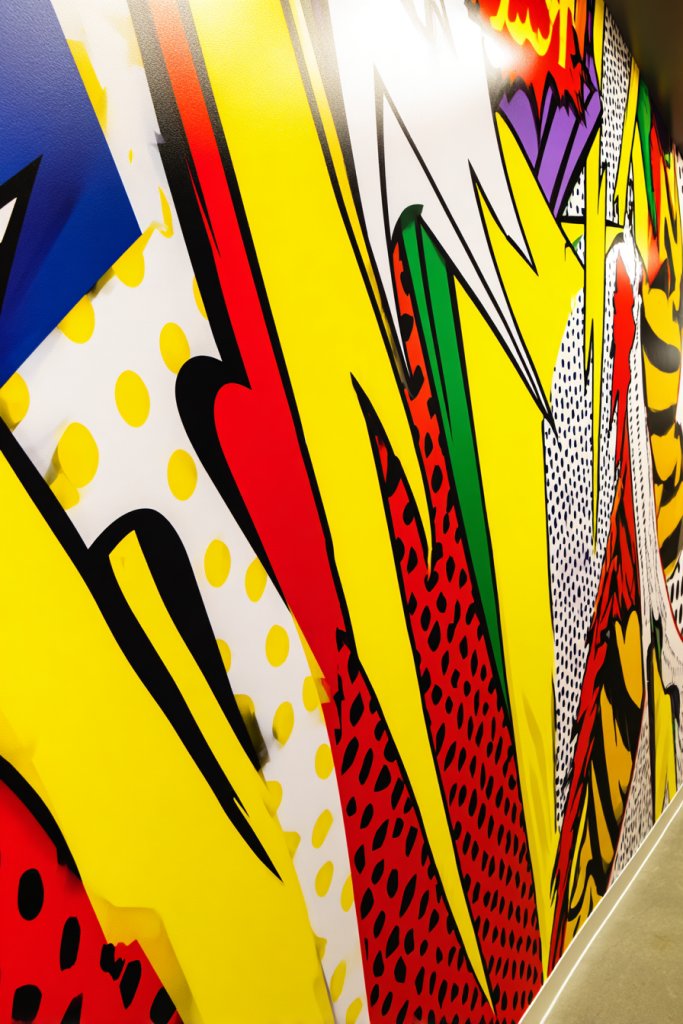
Craving a wall that’s fun, bold, and full of personality? Retro pop-art designs bring vibrant colors and comic-style patterns into your space. They’re perfect for making a playful statement and channeling vintage vibes with a modern twist. Ready to turn your walls into a pop culture tribute?
Recommended Products to replicate this idea
| # | Preview | Product | |
|---|---|---|---|
| 1 |

|
Biufo Banksy Canvas Wall Art Prints Pop Graffiti Street Art Pictures for Bedroom Living Room Wall... | Check Latest Price |
| # | Preview | Product | |
|---|---|---|---|
| 1 |
|
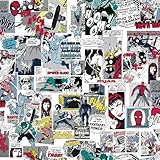
Marvel Classic Comics Peel and Stick Wallpaper by RoomMates, RMK12814PLW | Check Latest Price |
Imagine large, stylized comic panels or speech bubbles painted in bright reds, yellows, and blues. Bold outlines and halftone dots mimic vintage printing techniques, creating a lively, graphic look. The images can be abstract or inspired by favorite characters and icons, sparking nostalgia and joy. The high-contrast colors and playful motifs energize any room.
Use stencils or freehand techniques to create comic strips, speech bubbles, or pop icons. Incorporate metallic or glitter accents for extra sparkle. Seasonal themes can include holiday-inspired patterns or trending pop culture references. It works well in game rooms, kids’ bedrooms, or creative studios, adaptable to your favorite era or iconography.
Start with a smooth, primed wall surface. Sketch your design lightly with chalk or pencil. Use bold, high-quality paints in primary colors, applying with brushes or sponges. Outline with black or metallic liners for sharp edges. Use stencils for complex patterns or text. Seal with a clear protective coat for longevity. Have fun with it and don’t worry about perfection.
Add metallic or glow-in-the-dark details for extra impact. Mix in your own favorite symbols, words, or characters. Incorporate 3D elements like decals or textured stickers to add depth. Coordinate your decor, such as cushions or curtains, to match the pop-art palette for a cohesive look.
Pop-art walls are a lively, nostalgic way to infuse your space with personality. They’re a creative outlet and a conversation starter. Once you see how fun and straightforward they are, you’ll feel confident experimenting with bold colors and graphic styles to showcase your unique taste.
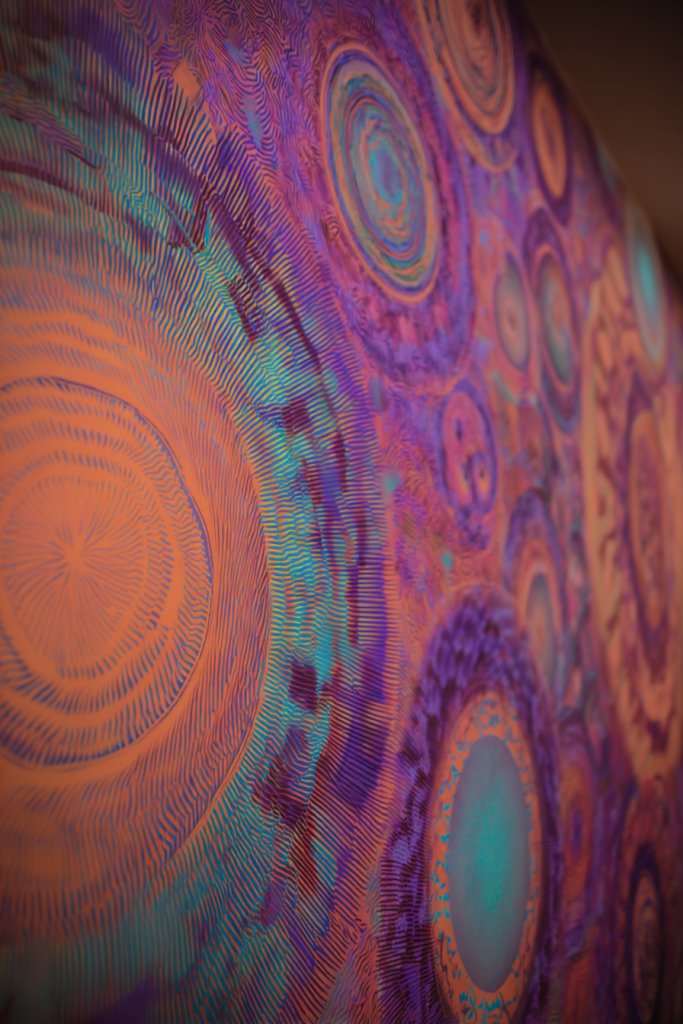
18. Psychedelic Swirls and Mandalas
Looking to create a mesmerizing focal point that captures attention and sparks curiosity? Psychedelic swirls and mandalas bring intricate, hypnotic patterns in vibrant hues that evoke a sense of wonder. They’re perfect for adding a spiritual or artistic touch to your space. Ready to turn your wall into a visual journey?
Recommended Products to replicate this idea
| # | Preview | Product | |
|---|---|---|---|
| 1 |

|
ANJANIYA Blue Green Wall Hanging Bohemian Psychedelic Peacock Tapestry, Psychedelic Hippie Mandala... | Check Latest Price |
| # | Preview | Product | |
|---|---|---|---|
| 1 |

|
3Pcs Boho Mandala Floral Canvas Wall Art Modern Plants Colorful Flowers Painting Decor Pictures... | Check Latest Price |
Visualize a wall filled with spiraling, swirling patterns that draw your gaze inward. Bright colors—think neon pinks, electric blues, and luminous yellows—pop against darker backgrounds. Mandalas with symmetrical, detailed designs radiate calm and focus, inviting meditation or deep thought. The patterns seem to pulse with energy, creating a dynamic, living artwork.
Use contrasting colors for maximum impact or blend shades for a softer, more harmonious look. Incorporate metallic or glow-in-the-dark paints for extra dimension. You can paint freehand or use stencils for symmetry. Seasonal or thematic updates include changing colors or adding gold accents. This style suits meditation rooms, creative corners, or any space craving a spiritual vibe.
Start with a blank wall and sketch your design lightly. Use a variety of brushes, sponges, or tools to create swirling or mandala patterns. Layer colors to add depth, starting with darker tones and adding highlights. Use stencils for intricate details or freehand for organic flow. Seal with a matte or gloss varnish to protect the artwork and enhance colors. Practice on paper first for confidence.
Add metallic or glow-in-the-dark paints for a luminous effect after dark. Incorporate personal symbols or motifs within the mandalas. Use textured paints or embossing techniques for raised effects. Match your decor with accessories that echo the color palette or theme for a cohesive space.
Psychedelic and mandala art can transform your wall into a hypnotic, calming centerpiece. They’re an artistic expression that invites mindfulness and creativity. With patience and practice, you’ll gain confidence in creating intricate, captivating designs that reflect your inner artist.
19. Minimalist Line Art in Bright Colors
Want a modern, sleek look that’s simple yet striking? Minimalist line art in bright colors offers a clean aesthetic with a pop of personality. It’s perfect for those who love understated elegance with a playful twist. Ready to make a bold statement with just a few confident strokes?
Recommended Products to replicate this idea
| # | Preview | Product | |
|---|---|---|---|
| 1 |

|
Bright Colorful Wall Art Abstract Wall Decor for Living Room Aesthetic Room Decor Pastel Colors... | Check Latest Price |
| # | Preview | Product | |
|---|---|---|---|
| 1 |

|
KUVIOKE Minimalist Abstract Boho Framed Wall Art Modern Mid-Century Bohemain Neutral Line Wall Decor... | Check Latest Price |
Imagine a wall adorned with continuous, flowing lines forming abstract shapes, faces, or geometric figures in vivid shades like turquoise, coral, or lemon yellow. The thin, clean lines contrast sharply against a neutral background, creating a sense of movement and sophistication. The artwork feels fresh, modern, and effortlessly stylish.
Use black, white, or metallic lines for a minimalist look, or go bold with bright colors for a lively vibe. Combine multiple line art pieces or large single designs to fill your space. Seasonal updates could involve switching colors or adding new motifs. This style works well in minimalist, contemporary, or eclectic interiors.
Sketch your design lightly using a pencil. Use painter’s tape to define the edges if needed. Apply a fine brush or paint pen with bright, high-quality paint for crisp, sharp lines. Keep your strokes confident—wobbly lines diminish the sleek look. For a more permanent feature, seal with a clear matte or gloss finish. Balance the artwork with simple, matching decor.
Add metallic or neon accents within the line work for extra vibrancy. Incorporate small, personalized symbols or initials into the design. Frame the artwork or create a series for a cohesive gallery wall. Change colors seasonally or according to your mood to keep the look fresh.
Minimalist line art proves that less is more, making your walls look modern and intentional. It’s a simple yet effective way to express creativity without clutter. Once you master clean lines and bold colors, you’ll confidently craft striking, contemporary decor pieces that elevate your space.
20. Two-Tone Diagonal or Chevron Patterns

Searching for a way to energize your walls with a dynamic pattern? Two-tone diagonal or chevron designs add movement and excitement, transforming a dull surface into a visual spectacle. They’re perfect for creating a lively, modern aesthetic that’s still classy. Ready to make your walls pop?
Recommended Products to replicate this idea
| # | Preview | Product | |
|---|---|---|---|
| 1 |

|
CrafTreat Chevron Wall Stencils for Painting Large Pattern - Chevron - 12x12 Inches - Reusable DIY... | Check Latest Price |
| # | Preview | Product | |
|---|---|---|---|
| 1 |

|
4 Rolls Premium Painters Tape, Blue Tape, Masking Tape, Paint Tape for Multi-Purpose, Painting,... | Check Latest Price |
Picture bold, V-shaped chevrons or diagonal stripes running across your wall in contrasting colors like black and white or navy and gold. The zigzag or diagonal lines guide your eye across the space, adding a sense of motion. The high contrast creates a striking, graphic effect that commands attention and adds depth.
Use painter’s tape to create precise chevron or diagonal lines, experimenting with different widths and angles. For a softer look, try muted or pastel shades; for maximum impact, opt for bold, saturated colors. Seasonal variations include swapping colors or adding metallic accents. This pattern works in bedrooms, hallways, or feature walls in any modern interior.
Start by planning your pattern layout and marking your lines with a pencil and level. Tape carefully along your lines to ensure crisp edges. Paint alternating sections with contrasting colors, applying multiple coats for even coverage. Remove the tape while the paint is still slightly tacky to prevent bleeding. Finish with a protective matte or semi-gloss sealer. Precision is key for a sharp, professional look.
Incorporate metallic or glitter paints into some chevrons or stripes for extra flair. Vary the widths or orientations for a custom, eclectic vibe. Use coordinating decor or textiles that match your color choices. Update the pattern seasonally or for special events to keep your space feeling fresh and lively.
Chevron and diagonal patterns are bold yet versatile, perfect for showcasing your design confidence. They turn a simple wall into an eye-catching feature that energizes your entire space. With patience and care, you’ll master this technique and enjoy creating dynamic, stylish interiors.
21. Colorful Dipped Edges or Borders

Want a subtle yet impactful way to frame your walls? Colorful dipped edges or borders provide a creative alternative to traditional trims or moldings. They add a splash of vibrancy without overwhelming the space, perfect for framing art, mirrors, or even plain walls. Ready to give your walls a fresh edge?
Recommended Products to replicate this idea
| # | Preview | Product | |
|---|---|---|---|
| 1 |
|
Pro Grade Paint Roller Kit, Brush & Roller,10 Piece Set, Wall Painting Naps for Professionals &... | Check Latest Price |
Imagine a room where the ceiling edges or the bottom of the wall are dipped in a bold or pastel hue, creating a visual frame. The contrast between the main wall color and the dipped border draws attention and adds a playful touch. The effect can be a clean, sharp line or a softer gradient, depending on your technique. When light hits the dipped edges, they subtly glow, enhancing the room’s depth.
Experiment with different colors or gradients for the borders. Use painter’s tape or stencils to create sharp, straight lines or soft, blended effects. Seasonal updates might involve swapping colors for holidays or moods. This technique works well in bedrooms, dining areas, or even bathrooms, adding a polished yet creative finish.
Start by measuring and marking your border areas. Tape off the sections carefully to ensure clean lines. Apply your chosen color with a high-quality brush or small roller, working steadily to avoid drips or uneven edges. Remove the tape while the paint is still wet for sharp lines. Finish with a clear sealant if needed for durability. For gradients, blend colors with a sponge or brush.
Use metallic or glitter paints within the dipped borders for a luxe effect. Add decorative elements like stenciled patterns or motifs inside the borders for extra flair. Coordinate your border colors with accessories or furniture for a harmonious look. Change the border colors seasonally or for a quick refresh.
Colorful dipped edges or borders are a subtle yet stylish way to frame your space creatively. They’re easy to execute and instantly elevate the room’s aesthetic. Once you see how a simple border can redefine your walls, you’ll gain confidence in experimenting with more creative painting techniques.
Conclusion
With a diverse array of funky wall paint ideas, you now have endless opportunities to make your walls stand out and express your individuality. Whether you opt for quirky patterns, vibrant hues, or artistic murals, these ideas can breathe new life into any room. Don’t hesitate to pick a design that excites you—your creative transformation awaits. Dare to be bold and turn your walls into a true reflection of your personality!