I have been, or can be if you click on a link and make a purchase, compensated via a cash payment, gift, or something else of value for writing this post. As an Amazon Associate, I earn from qualifying purchases. Please read my full Affiliate Disclosure for more information.
Imagine walking into a room that instantly sparks joy and creativity—sounds like a dream, right? DIY Room Decor Ideas have taken the design world by storm because they allow you to personalize your space while also being fun and budget-friendly. Whether you’re a seasoned crafter or just love adding unique touches, these projects make decorating an exciting adventure.
This article is packed with a variety of inspiring ideas that cater to different styles and skill levels. From simple wall art to clever furniture hacks, you’ll find countless ways to transform your space into a reflection of your personality. Get ready to unleash your creativity and make your home truly yours!
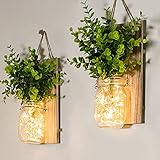
1. Upcycled Mason Jar Wall Sconces for a Rustic Glow

Ever wish your space had a cozy, warm glow without breaking the bank on fancy lighting? Sometimes, your walls just feel too plain or sterile, and adding charm seems impossible on a budget. The idea of transforming old jars into rustic light fixtures offers a simple, budget-friendly way to add warmth and personality. Who wouldn’t want a soft glow that’s both functional and stylish?
Recommended Products to replicate this idea
| # | Preview | Product | |
|---|---|---|---|
| 1 |
|
Rustic Wall Sconces, Mason Jar Sconces, Farmhouse Home Decor, LED Fairy Lights, Green Fake Plant,... | Check Latest Price |
| # | Preview | Product | |
|---|---|---|---|
| 1 |

|
Brightown 12 Pack LED Fairy Lights Battery Operated String Lights - 7ft 20LED Waterproof Silver Wire... | Check Latest Price |
Imagine hanging a row of vintage mason jars on your wall, each glowing softly with flickering battery-operated candles or fairy lights. The jars have a textured, slightly frosted appearance, contrasting beautifully against a reclaimed wood backdrop. The warm light filters through the glass, casting gentle patterns and creating a cozy ambiance. It’s like bringing a bit of countryside charm right into your urban apartment.
You can customize this look with different jar sizes, from small to large, or even add decorative elements like twine or lace around the necks. For a more modern vibe, spray paint the jars in metallic shades or matte black. Adjust the spacing and arrangement to suit your wall size—whether a subtle accent or a bold feature wall. Seasonal tweaks, like adding faux berries or greenery, can give it a fresh look for holidays or seasons.
Gather old mason jars, which you can find at thrift stores or your own kitchen. Mount small metal brackets or attach hooks directly to the jars’ lids, then secure them to the wall with screws or heavy-duty adhesive. Insert battery-operated candles or fairy lights inside, ensuring they’re securely placed. For safety and ease, opt for LED lights to prevent heat buildup. Use a level to keep everything straight and plan your layout before drilling.
Personalize your sconces by painting the jars in colors that match your decor or by adding decorative charms or labels. Incorporate different lighting effects, like flickering candles or color-changing LEDs, to set different moods. Pair the jars with rustic wooden shelves or a backdrop of reclaimed wood panels. You could even add small hooks underneath for hanging keys or jewelry, blending decor with utility.
This DIY project proves that with a little creativity, you can turn everyday items into charming decor. It’s a cost-effective way to add warmth and personality to any room. Once complete, your friends will be asking where you bought those gorgeous sconces. Ready to create a cozy, rustic glow that feels like home?
2. Colorful Washi Tape Geometric Wall Art
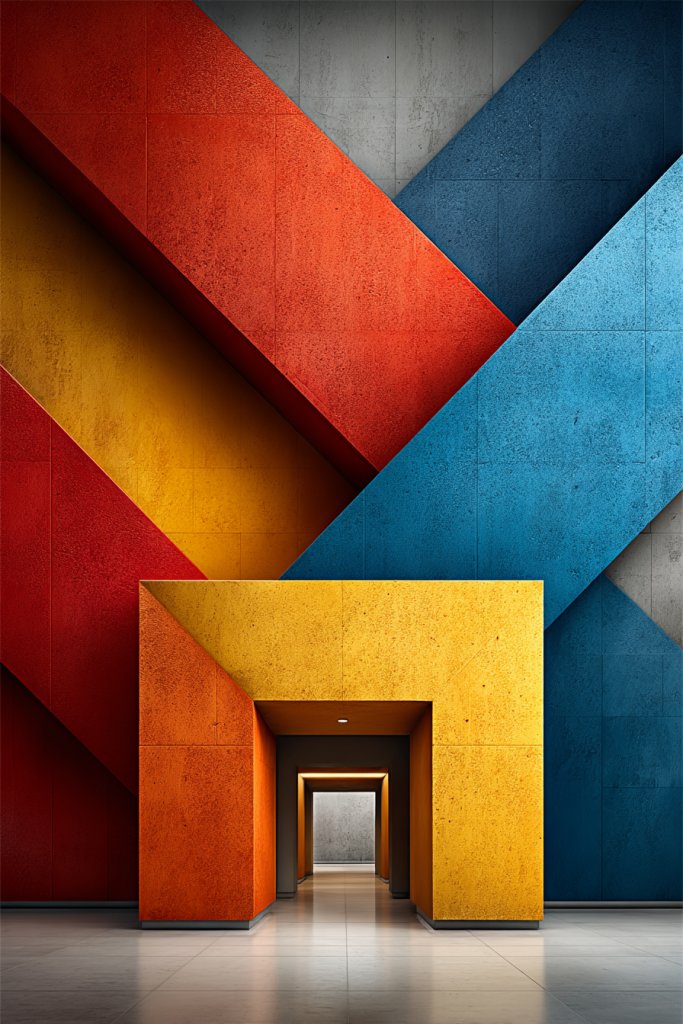
Feeling bored with your plain walls but don’t want to commit to expensive art? Maybe you crave a pop of color or a modern touch without the permanence of paint or frames. Washi tape is your secret weapon for quick, easy, and mess-free wall upgrades. Who knew sticky tape could be so versatile and stylish?
Recommended Products to replicate this idea
| # | Preview | Product | |
|---|---|---|---|
| 1 |

|
Phinus Washi Tape Set, 16 Pack Decorative Tape, Multicolor, 15mm x 5m, Reusable, Ideal for Gift... | Check Latest Price |
| # | Preview | Product | |
|---|---|---|---|
| 1 |

|
9Pcs Modern Geometric Wall Stencil Templates 11.8 x 11.8 Inch Reusable Plastic Simple Style Stencils... | Check Latest Price |
Visualize a wall adorned with bold, geometric shapes created from vibrant washi tapes in contrasting colors. The shapes are crisp and clean, with sharp edges that catch the eye. The tape’s matte finish adds a subtle texture, while the vivid hues energize your space. It’s like a modern art piece made with your own hands, instantly transforming dull walls into a playful canvas.
Choose washi tapes in different patterns and colors to match your decor theme—think pastels for a soft look or neon for a bold statement. Mix geometric shapes with abstract designs or stripes for variety. For seasonal updates, swap out color schemes or add themed shapes, like snowflakes or leaves. This method works well in small accent walls or large feature areas.
Start by sketching your design on paper or directly on the wall with a light pencil. Cut strips of washi tape to the desired lengths, then carefully place them along your sketch lines, ensuring clean edges. Use painter’s tape or a ruler for straight lines to improve precision. Layer different colors to create depth or shadow effects. Remove any pencil marks once the tape is firmly in place.
Create a custom gallery by combining geometric tape art with handwritten quotes or initials. Frame sections of your design with washi tape borders for added structure. Incorporate metallic or holographic tapes for a trendy, futuristic vibe. Regularly update your art by changing colors or shapes, keeping your decor fresh and engaging.
This technique shows that decorating can be fun, fast, and affordable. No artistic skills are needed—just some patience and creativity. It’s a perfect project for renters or those wary of permanent changes. Feel empowered to turn your walls into a playful, colorful masterpiece!
3. DIY Fabric Wall Hangings with Fringe Accents
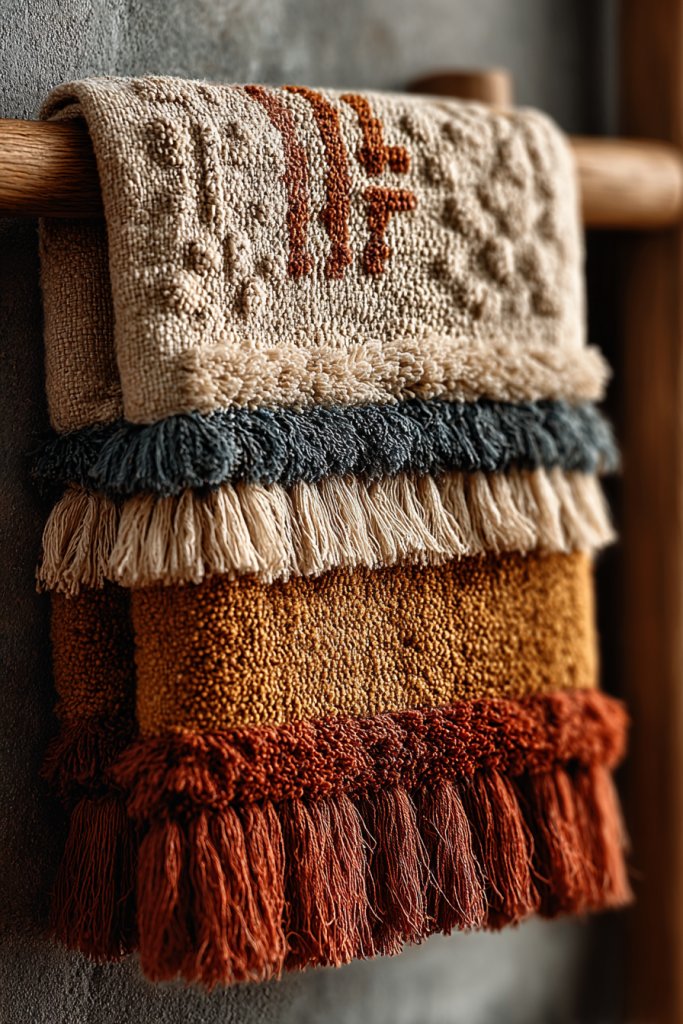
Ever feel like your walls are missing a touch of coziness or texture? Standard paintings or prints can be boring or hard to change frequently. A fabric wall hanging with fringe offers a warm, boho vibe that’s easy to customize. Plus, it’s a fun way to showcase your crafty side without breaking the bank.
Recommended Products to replicate this idea
| # | Preview | Product | |
|---|---|---|---|
| 1 |

|
FREEBLOSS DIY Macrame Leaf Wall Hanging Beginners Macrame Kit Leaf Woven Tapestry Feather Wall... | Check Latest Price |
| # | Preview | Product | |
|---|---|---|---|
| 1 |

|
10 Yards X 6cm Wide Cotton Tassel Fringe Trim Lace Fibre Tassel Fringe Trim for Clothes Accessories... | Check Latest Price |
Imagine a soft textile draped elegantly on your wall, with playful fringe dancing at the bottom. The fabric could be a vibrant patterned scarf or a textured linen piece, adding depth and softness. The fringe creates a lively, tactile element that invites touch and movement. The overall look feels relaxed yet thoughtfully curated, perfect for a cozy corner or above your bed.
Use different fabrics—think velvet for luxury, cotton for casual, or woven textiles for earthy tones. Fringe styles can vary from long, wispy strands to chunky, braided accents. You can hang the fabric with a wooden dowel, a metal rod, or even attach it directly to the wall with clips. Seasonal variations include adding tassels, beads, or embroidery for a personalized touch.
Select fabrics that match your decor and are easy to work with. Cut the fabric to your desired size, then finish the edges with a zigzag stitch or fabric glue to prevent fraying. Attach a sturdy rod or dowel at the top using fabric ties or rings, then hang on a hook or nail. For a more polished look, fold the top over the rod and sew or glue it for a clean finish. Keep the hanging straight and balanced for optimal effect.
Add embellishments like embroidery, metallic threads, or patches to make your wall hanging unique. Play with layering different fabrics for a textured, collage-like effect. Incorporate small decorative elements like beads or feathers into the fringe for extra flair. Change the fabric seasonally or whenever you want a fresh look.
This project is a fantastic way to add softness and personality to your space without complicated techniques. It’s easy to update or swap out fabrics whenever your style evolves. Your friends will love how effortlessly chic and cozy your walls look. Time to get crafty and make your space truly yours!
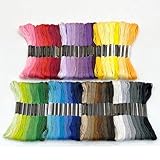
4. String Art with Nails and Colored Thread
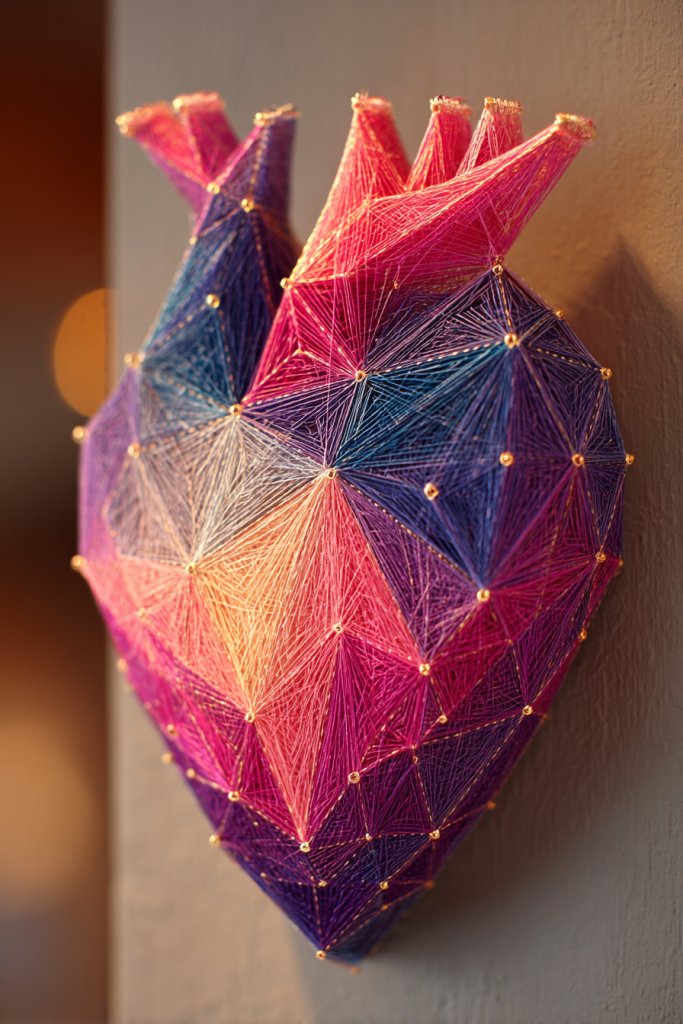
Ever wanted to add a touch of artistic flair to your walls but felt intimidated by traditional art projects? String art offers a creative, hands-on way to craft eye-catching designs that look professional. Plus, it’s surprisingly simple and customizable, making it perfect for DIY novices and pros alike. Ready to turn nails and thread into art?
Recommended Products to replicate this idea
| # | Preview | Product | |
|---|---|---|---|
| 1 |

|
GORGECRAFT Heart String Art Kit Craft Cupcake All Necessary Accessories and Frame for Adults Crafts... | Check Latest Price |
| # | Preview | Product | |
|---|---|---|---|
| 1 |
|
Zhenqing 8-Color Gradient Embroidery Floss Set | 7 Color Families (Red, Yellow, Blue, Green, Purple,... | Check Latest Price |
Envision a wooden board with a pattern outlined by small nails, forming an intricate design or word. Brightly colored thread weaves around the nails, creating vibrant, textured lines that pop against the background. The interplay of wood, metal, and thread gives a tactile, layered look that draws the eye. It’s a modern twist on a classic craft, adding personality and color to your space.
Choose simple geometric patterns for a minimalist vibe or detailed images for a more complex look. Use a variety of thread colors for a rainbow effect or stick to monochrome for sleek sophistication. Adjust the size of the design to fit your wall or make a series of smaller pieces for a gallery wall. Incorporate metallic or glow-in-the-dark threads for special effects.
Begin by sketching your design on paper or directly on the wood with a pencil. Hammer small nails into the outline points, ensuring they’re evenly spaced and secure. Wrap the thread around the nails, following your pattern, for a clean, tight finish. Tie off the thread securely at the start and end points. Use pliers for threading tight knots and maintaining tension. Seal the edges with a clear coat if desired.
Customize your string art by incorporating initials, favorite shapes, or meaningful symbols. Mix different thread textures like metallic, matte, or glossy to add dimension. Consider framing your piece in a sleek frame or mounting it directly on the wall for a seamless look. Change colors or patterns seasonally for fresh decor updates.
String art combines craftsmanship with creativity, proving you don’t need to be a master artist to produce stunning decor. It’s a conversation starter and a reflection of your personality. With simple tools and a bit of patience, you can craft something truly unique. Ready to nail your next DIY project?
5. Floating Shelves from Reclaimed Wood for Display
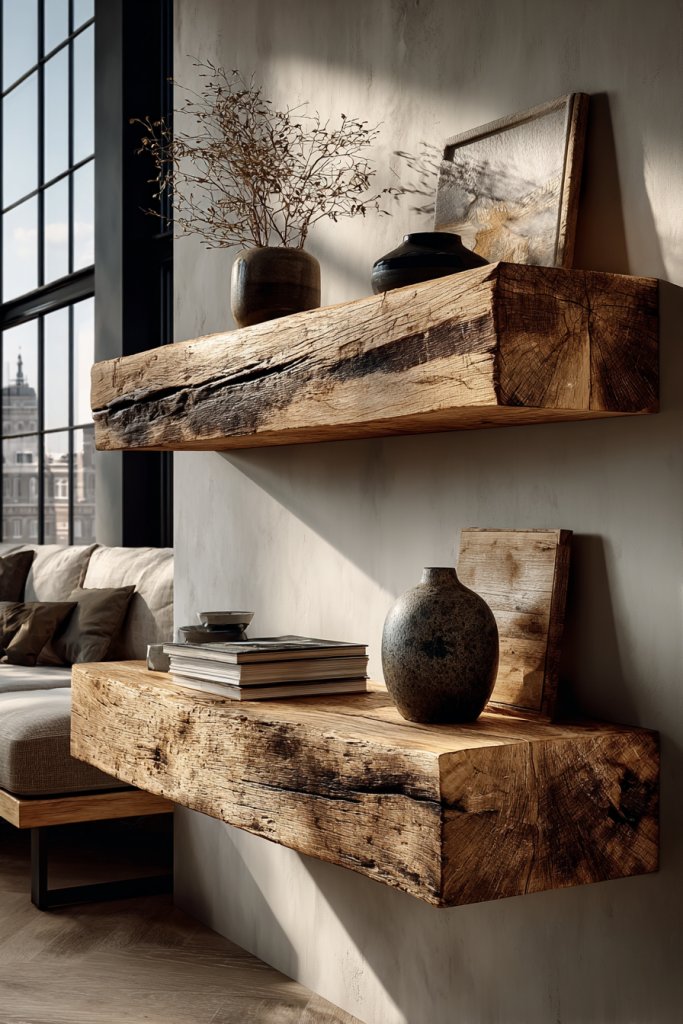
Do you find your space cluttered or lacking personality? Floating shelves are a sleek way to add storage and style without making your walls feel crowded. They’re perfect for displaying your favorite books, photos, or decorative objects, all while maintaining a minimalist aesthetic. Want an easy upgrade that’s both functional and gorgeous?
Recommended Products to replicate this idea
| # | Preview | Product | |
|---|---|---|---|
| 1 |

|
FLYJOE Floating Shelves | 8" Deep Rustic Reclaimed Barnwood Wall Hanging Shelves with Invisible... | Check Latest Price |
| # | Preview | Product | |
|---|---|---|---|
| 1 |

|
LEOPO 12-Pack 8 inch Floating Shelf Brackets, Hidden Shelf Bracket for Wood, Concealed Blind... | Check Latest Price |
Picture a wall with thin, unobtrusive shelves made from warm reclaimed wood, floating seamlessly without visible brackets. The shelves hold a curated collection of vintage books, small sculptures, and framed photos. The natural grain and imperfections of the wood add character, contrasting beautifully with smooth painted walls. The overall effect is clean, modern, yet cozy.
Vary the shelf lengths and heights to create visual interest. Use different wood stains or finishes to match your decor style—light, natural, or dark. For a more industrial look, incorporate metal brackets or pipe fittings. Seasonal touches, like small pumpkins or holiday ornaments, can be swapped in and out for a fresh look. Maximize vertical space by stacking shelves in a grid or staggered pattern.
Start by measuring your available wall space and choosing appropriate reclaimed wood planks. Sand and finish the wood as desired—oil, stain, or seal for protection. Use a level and measuring tape to mark mounting points, then drill holes for wall anchors. Install hidden brackets or floating shelf hardware according to manufacturer instructions. Carefully place the shelves onto the brackets, ensuring they’re secure and level. Finish by arranging your decor items.
Add small decorative elements like vintage trinkets or potted succulents (avoiding restricted items, of course). Mix and match wood tones or paint the shelves for a pop of color. Incorporate LED strip lighting underneath for subtle illumination. Change the arrangement seasonally or whenever inspiration strikes, keeping your space lively and personalized.
Reclaimed wood shelves bring warmth and authenticity to any room, proving that DIY can be both eco-friendly and stylish. They’re easy to install and adapt, making them a favorite among design enthusiasts. Once you see how much organization and charm they add, you’ll want to craft more. Your walls will thank you!
6. DIY Macrame Plant Hangers (Without Plants) for Visual Interest
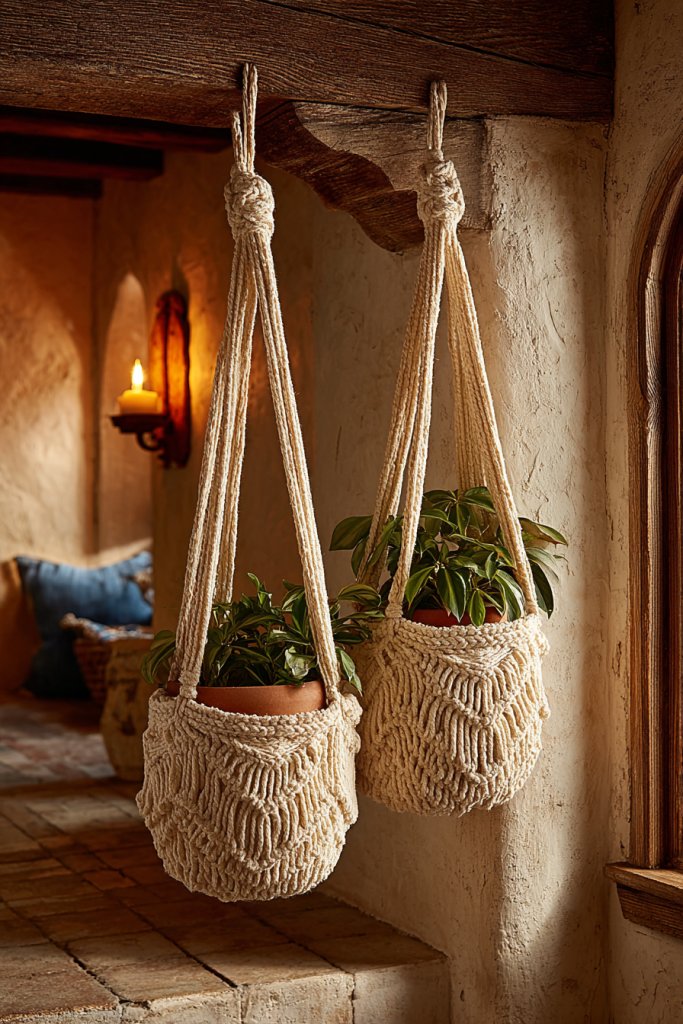
Looking to add texture and boho charm to your space but hate the idea of caring for real plants? Macrame plant hangers are a stylish alternative that creates visual interest without the upkeep. They work great in empty corners or above beds, adding a relaxed, artistic vibe. Ready to craft some textured decor magic?
Recommended Products to replicate this idea
| # | Preview | Product | |
|---|---|---|---|
| 1 |
|
FREEBLOSS DIY Macrame Leaf Wall Hanging Beginners Macrame Kit Leaf Woven Tapestry Feather Wall... | Check Latest Price |
| # | Preview | Product | |
|---|---|---|---|
| 1 |
|
3 Pack Adjustable Macrame Plant Hanger Extenders Connectable Rope Hanging Plant Extender Handmade... | Check Latest Price |
Imagine a series of knotted, intricate cords hanging from the ceiling, each holding a decorative pot or just serving as a decorative element themselves. The cords feature a variety of knots, tassels, and fringe, creating a layered, tactile effect. The neutral tones and textured knots add depth and softness, making your space feel cozy and curated. It’s like having a piece of wearable art on your walls or ceilings.
Use different cord thicknesses and knot styles to match your aesthetic—think boho, minimalist, or eclectic. You can hang multiple hangers at different heights for a dynamic look or keep it simple with one. For seasonal updates, switch out the cords or add beads and charms for extra flair. Mount the hangers on hooks in corners, above windows, or along wall brackets.
Cut lengths of cord based on your desired hanger size, then knot the cords in patterns like square knots or spiral knots. Attach the cords securely to a sturdy ring or wooden dowel at the top. Use hooks or ceiling anchors to hang the finished piece. For stability, double knot or add a bead at the end of each cord. Keep the knots tight and even for a professional look. No plants required—just your creativity!
Decorate with colorful beads, metallic accents, or painted wooden clips. Play with different knot styles to create unique textures or patterns. Add tassels or fringe to enhance the boho vibe. Change up the arrangement or color scheme seasonally for a fresh look that always fits your mood.
Macrame hangers are proof that DIY decor can be both trendy and simple. They’re a fantastic way to add handcrafted charm without the need to care for greenery. Once you master the knots, you can create a whole gallery of textured wall art. Get ready to impress friends and elevate your space!
7. Painted Mason Jars as Storage and Decor
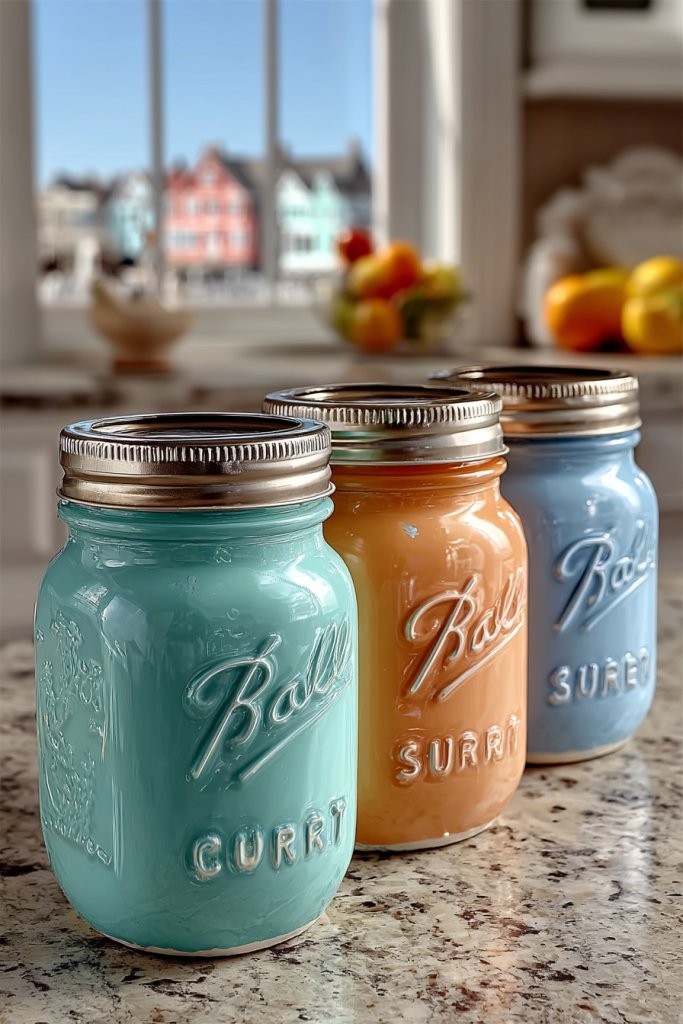
Tired of cluttered countertops and boring storage? Painted mason jars are a fun, inexpensive way to organize while adding a splash of color to your space. They’re perfect for holding everything from stationery to beauty supplies and can double as decorative accents. Want a quick upgrade that’s both practical and pretty?
Recommended Products to replicate this idea
| # | Preview | Product | |
|---|---|---|---|
| 1 |

|
Apple Barrel, Vibrant Spectrum Collection Acrylic Craft Paint, PROMOABIII, 2 fl oz each, 16 assorted... | Check Latest Price |
| # | Preview | Product | |
|---|---|---|---|
| 1 |

|
ComSaf Airtight Glass Jars with Lids 0.6 Gallon Set of 3, Food Storage Canister Square-Storage... | Check Latest Price |
Picture a row of mason jars painted in pastel shades or metallic finishes, sitting on a kitchen shelf or bathroom counter. The jars have a smooth, matte or glossy surface that catches the light beautifully. Filled with brushes, cotton swabs, or decorative pebbles, they add a fresh, personalized touch while keeping essentials handy. The coordinated colors create a cohesive look that elevates any room.
Experiment with different paint techniques—ombre effects, stenciled patterns, or chalkboard paint for labels. Use metallic paints for a luxe feel, or soft matte colors for a vintage vibe. Decorate the lids with fabric or washi tape for added flair. These jars work well in kitchens, bathrooms, or craft rooms, and you can easily update the colors to match seasons or trends.
Clean the jars thoroughly and remove any labels or residue. Use spray paint or brush-on paint, applying thin coats for smooth coverage. Let each coat dry completely before applying another. For labels, affix chalkboard or adhesive paper for customizable tags. Fill the jars with your supplies, then arrange them on shelves or in cabinets. For extra durability, seal with a clear topcoat.
Add decorative touches like hand-drawn patterns, decals, or metallic accents. Create themed sets for holidays or special occasions. Personalize lids with fabric, washi tape, or small knobs. Combine with other painted decor elements for a cohesive look. Changing the contents or colors keeps your organization fresh and inspiring.
Painting mason jars is a simple project that makes a big visual impact. It’s a perfect way to declutter creatively and add personality to your home. Once you see how easy it is, you’ll want to paint jars for every room. Your space will feel more organized and vibrant, all thanks to your DIY touch!
8. Decorative Tape Canvas Art for a Modern Look
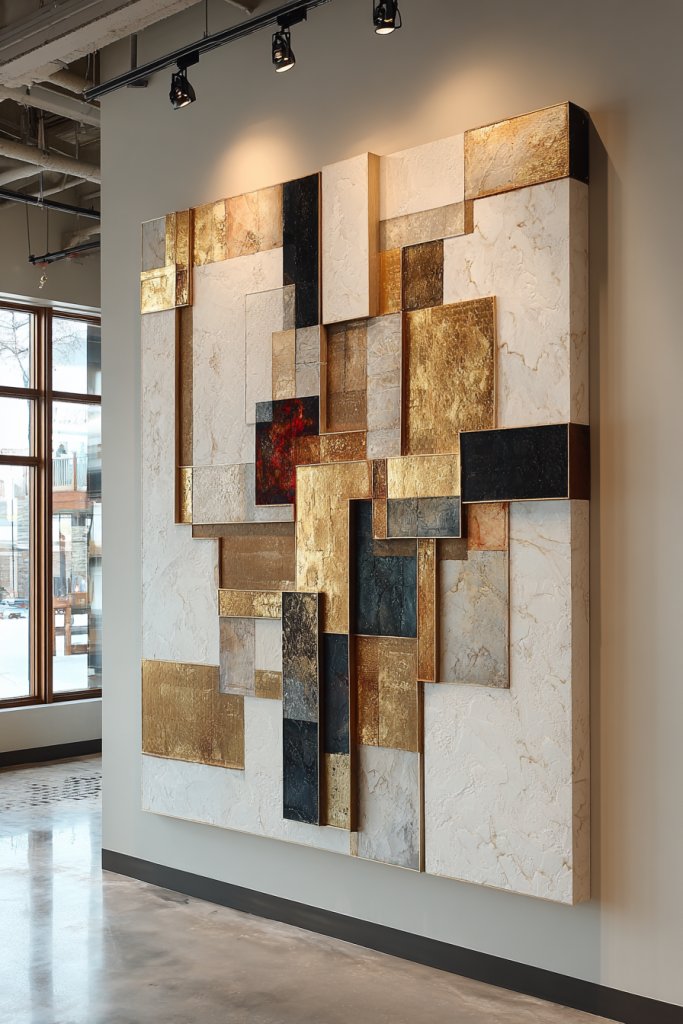
Want to create a stunning piece of wall art without the mess or expense of traditional painting? Using painter’s tape and acrylics is a quick way to craft modern, abstract designs that look professionally done. This technique is super flexible and lets you experiment with shapes and colors with zero stress.
Recommended Products to replicate this idea
| # | Preview | Product | |
|---|---|---|---|
| 1 |
|
DPDIAN Canvas Boards for Painting 40 Pack, 8 inch x 10 inch Super Value Pack, Artist Canvas Panels... | Check Latest Price |
| # | Preview | Product | |
|---|---|---|---|
| 1 |

|
FolkArt 16 Piece Multi Surface Acrylic Craft Paint Set Formulated to be Non-Toxic that is Perfect... | Check Latest Price |
Visualize a blank canvas transformed into a bold masterpiece with crisp lines and vibrant stripes or geometric shapes. The painter’s tape forms clean edges, while the acrylic paints fill in the spaces with lively colors. The final piece exudes contemporary flair, perfect for adding a pop of personality to your living room or bedroom. It’s like a customized art gallery within your home.
Mix and match patterns—think stripes, blocks, or abstract shapes—using different tape widths. For a more textured look, layer overlapping shapes or add metallic or glitter paints. Change your design based on seasons, moods, or trends. For smaller spaces, create mini canvases or a series of connected pieces for a cohesive display.
Start by sketching your design on the canvas lightly with a pencil. Tape off sections carefully, ensuring edges are pressed firmly to prevent paint bleed. Apply acrylic paint with brushes or sponges, working within the taped areas. Remove the tape slowly once the paint is dry to reveal sharp, clean lines. Touch up any imperfections with a fine brush.
Decorate your canvas with added textures, metallic accents, or personal symbols. Incorporate different color schemes to match your decor—go bold or keep it subtle. Frame your finished piece for a polished look or hang it as-is for a more casual vibe. Rotate or update the design seasonally for ongoing freshness.
This method empowers you to create eye-catching modern art without needing professional skills. It’s a playful, customizable way to showcase your style. Plus, it’s a budget-friendly project that results in gallery-worthy decor. Time to grab your tape and paints and make your walls pop!
9. Customizable Cork Board with Patterned Fabric Backing
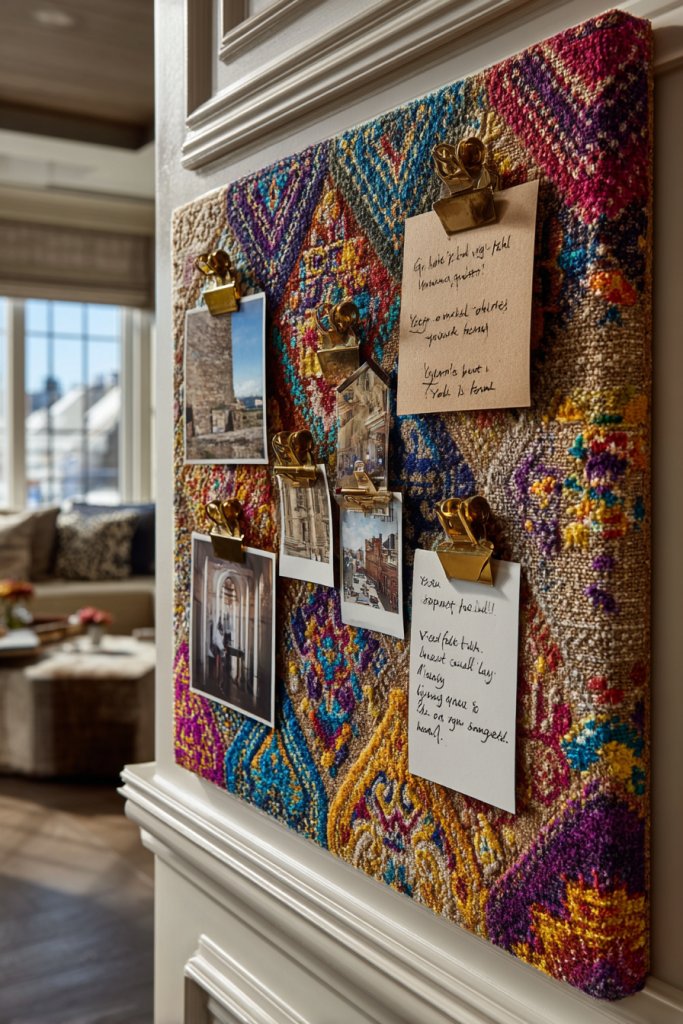
Ever feel overwhelmed by cluttered notes, photos, and reminders? A stylish cork board can help you organize and display everything attractively. But plain cork can look dull or uninspired. Customizing with patterned fabric backing elevates the look and makes your space more vibrant and personalized. Want a functional piece that also adds style?
Recommended Products to replicate this idea
| # | Preview | Product | |
|---|---|---|---|
| 1 |

|
Quartet Cork Board Bulletin Board, 23" x 35" Framed Corkboard, Oak Frame, Decorative Hanging Pin... | Check Latest Price |
| # | Preview | Product | |
|---|---|---|---|
| 1 |

|
AVKA Studio Hand Block Print Fabric by The Yard - PRECUT 1 Yard 42 Inch Width - 100% Cotton Material... | Check Latest Price |
Imagine a sleek cork board covered with a colorful, patterned fabric that complements your room’s decor. Pins hold notes, photos, and mementos, all framed by the lively fabric border. The contrast between the cork and fabric creates a layered, textured appearance that’s both functional and decorative. It’s like a piece of fabric art combined with smart organization.
Choose fabric patterns that match your style—floral, geometric, or abstract. Use contrasting colors for a bold statement or muted tones for subtle elegance. You can add decorative trim or paint the frame for extra flair. For seasonal updates, swap out the fabric or add themed embellishments. Large or small boards can fit any wall space or purpose.
Cut your fabric slightly larger than the cork board. Use spray adhesive or a staple gun to attach the fabric tightly to the back and edges of the cork frame. Smooth out wrinkles and ensure the fabric is taut. Secure the fabric neatly around the edges with staples or glue. Mount your board on the wall with appropriate hardware, then start pinning your items.
Add decorative elements like fabric rosettes or embroidered initials for a personalized touch. Use different fabrics for sections or borders to create a patchwork effect. Incorporate small clips or decorative push pins for a unique look. Change the fabric seasonally or when your mood shifts to keep the display fresh.
A fabric-backed cork board combines practicality with style, proving you don’t need to sacrifice aesthetics for organization. It’s an easy DIY upgrade that makes your space more inspiring. With a bit of fabric and some tools, you create a personalized hub for your ideas and memories. Time to get creative!
10. Repurposed Vintage Suitcase Side Tables

Looking for a unique, space-saving table that adds vintage charm? Old suitcases often sit unused, but they can be transformed into stylish side tables with a bit of DIY flair. They’re perfect for adding character and extra storage without cluttering your space. Want a statement piece that sparks conversation?
Recommended Products to replicate this idea
| # | Preview | Product | |
|---|---|---|---|
| 1 |

|
ELLDOO Vintage Wooden Storage Chest, Portable Decorative Luggage Suitcase, Treasure Chest Box with... | Check Latest Price |
| # | Preview | Product | |
|---|---|---|---|
| 1 |

|
SMARTSTANDARD 16" Hairpin Furniture Legs, Metal Home DIY Projects for Nightstand, Coffee Table,... | Check Latest Price |
Picture a vintage leather suitcase with metal clasps, opened on a sturdy set of legs or stacked with other suitcases. The interior can be left as-is or lined with fabric for a cozy feel. It sits beside your sofa or bed, holding books, magazines, or decorative items, while its worn texture adds rustic personality. The mix of old-world charm and modern function creates a captivating focal point.
Choose suitcases in different sizes, colors, and styles—think retro, boho, or industrial. Attach wooden or metal legs for stability, or stack multiple for a multi-tiered look. Decorate with vintage hardware or paint for a refreshed appearance. Seasonal decor, like fairy lights or fabric overlays, can customize their look for holidays or themes.
Select a sturdy suitcase and clean it thoroughly. Reinforce the bottom with a wooden or metal frame if needed for stability. Attach legs securely using brackets or screws, ensuring the table is level. Line the interior with fabric or padding if desired for a softer look. Use the suitcase as a functional table and storage unit, and decorate the exterior with paint, decals, or hardware for extra charm.
Personalize with painted designs, vintage labels, or decorative hardware. Use the interior for seasonal decor or hidden storage. Add a glass top for a more refined look or keep it open for a rustic vibe. Mix with other distressed furniture pieces for an eclectic, curated look.
Transforming vintage suitcases into tables combines creativity with practicality, making your space unique. It’s a great way to recycle and showcase your style. Once finished, your guests will admire your mix of vintage charm and modern practicality. Ready to give your space a storybook feel?
11. Minimalist Painted Plant Pots for a Cohesive Look
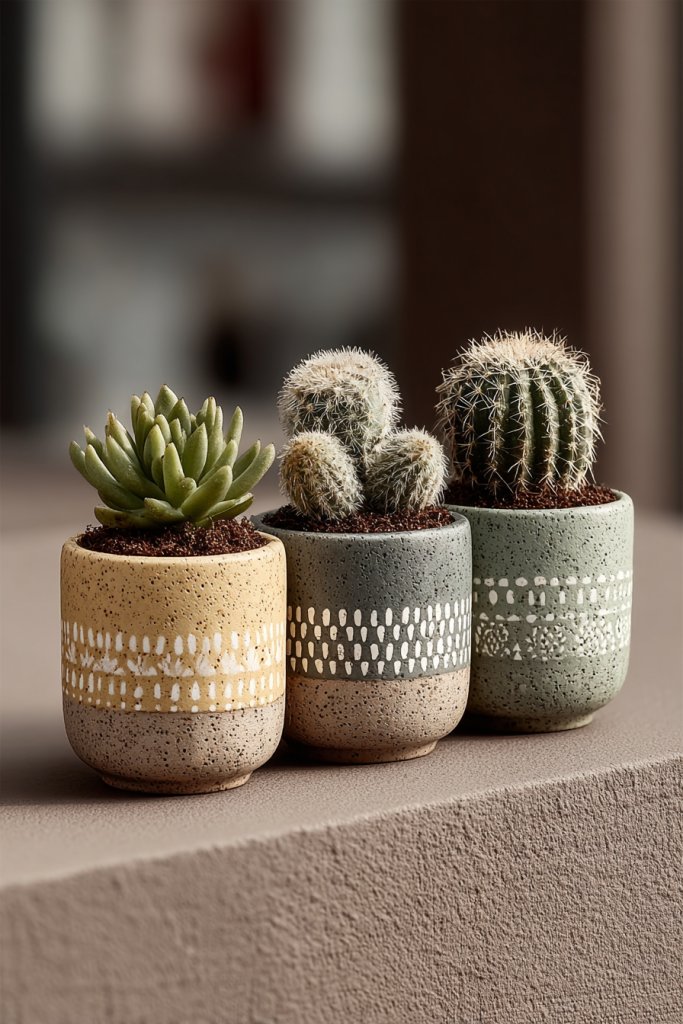
Are your plain plant pots making your space look dull or uninspired? Even if you’re not into gardening, stylish containers can elevate your decor. Minimalist painted pots are a chic, budget-friendly way to add uniformity and personality to your plant collection. Want to make your greenery stand out even more?
Recommended Products to replicate this idea
| # | Preview | Product | |
|---|---|---|---|
| 1 |
|
D'vine Dev Set of 2 Plants Pots, 6.5 Inch Ceramic Planter Pot for Plants with Drainage Hole and... | Check Latest Price |
| # | Preview | Product | |
|---|---|---|---|
| 1 |
|
Apple Barrel, Vibrant Spectrum Collection Acrylic Craft Paint, PROMOABIII, 2 fl oz each, 16 assorted... | Check Latest Price |
Visualize a series of sleek, monochrome pots with geometric or abstract painted designs. The matte black, white, or metallic finishes give a contemporary vibe, making your plants look like curated art pieces. The clean lines and simple patterns create a cohesive, modern aesthetic, whether on a shelf, windowsill, or tabletop. It’s like turning your plants into gallery exhibits.
Choose different monochrome shades or metallic paints for variety within a uniform theme. Experiment with simple shapes—triangles, stripes, or dots—to keep it minimal but interesting. For seasonal change, add subtle accents like gold leaf or metallic tape. Use different sizes for a dynamic display or keep them uniform for a streamlined look. Pair with textured textiles or sleek furniture for a complete modern setting.
Clean your pots thoroughly and sand any rough edges. Use painter’s tape to outline your design, then apply acrylic or spray paint in thin, even coats. Let each layer dry completely before removing the tape to ensure sharp edges. Seal the paint with a clear matte or gloss topcoat for durability. Fill with your favorite plants or faux greenery for low maintenance. Arrange them where they catch the light for maximum impact.
Add small metallic accents or hand-drawn patterns for extra flair. Create a matching set or mix styles for variety. Personalize with initials or symbols that have special meaning. Incorporate textured or patterned fabric sleeves or stands for added dimension. Regularly refresh the design to keep your space lively and coordinated.
Painting your own plant pots is a simple way to bring a personal touch to your green space. It’s easy, affordable, and instantly upgrades your decor. Plus, it’s a fun craft that shows how small details can make a big difference. Your plants will look even more stylish and intentional!
12. Decorated Pegboard Organizer for Style and Function
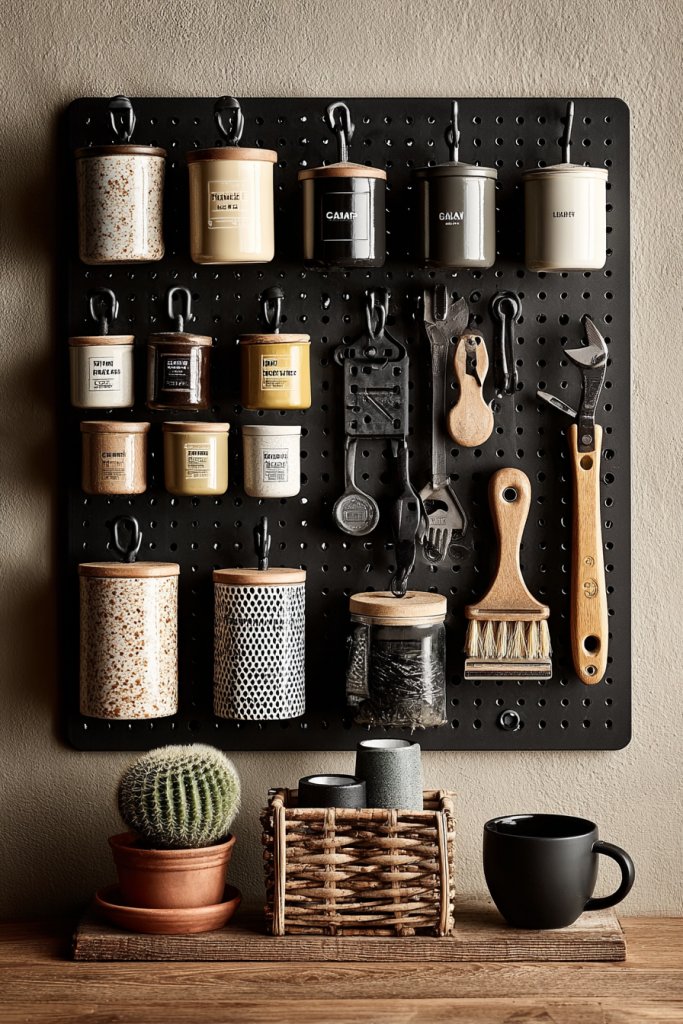
Are your cluttered drawers and countertops driving you crazy? A pegboard offers a flexible way to organize your supplies while adding a cool industrial touch. Decorating it turns a simple storage solution into a statement piece. Want a practical hack that’s also visually appealing?
Recommended Products to replicate this idea
| # | Preview | Product | |
|---|---|---|---|
| 1 |
|
Spampur Peg Board, 4 Pack Metal Pegboard Panels with 50 Hooks, Black Pegboards Wall Organizer, Heavy... | Check Latest Price |
| # | Preview | Product | |
|---|---|---|---|
| 1 |

|
114 pcs Pegboard Hooks Assortment with Metal Hooks Sets, Pegboard Bins, Peg Locks for Organizing... | Check Latest Price |
Imagine a sleek black or white pegboard mounted on your wall, with hooks, baskets, and shelves holding everything from jewelry to craft supplies. Add decorative elements like painted accents, patterned fabric pockets, or small hanging ornaments. The open, grid-like structure keeps everything accessible while looking curated and modern. It’s a perfect blend of utility and style.
Paint or stencil designs onto the pegboard for a personalized touch. Use colorful hooks or baskets for a playful look, or keep it monochrome for a minimalist aesthetic. Adjust the arrangement of accessories seasonally or based on your needs—swap out small containers or hooks for different items. Incorporate decorative knobs or elements that complement your decor theme.
Choose a sturdy pegboard size and material suited to your space. Mount it securely on the wall using appropriate hardware, ensuring it’s level. Arrange hooks, shelves, and containers to maximize storage and accessibility. Decorate the surface with paint, decals, or stencils for a customized look. Organize your items thoughtfully, grouping similar items together for efficiency. Regularly update the layout to reflect new needs or styles.
Decorate with decorative knobs, painted designs, or washi tape accents. Use themed or seasonal color schemes to keep it fresh. Add small decorative items or miniatures that match your interests. Incorporate lighting, such as fairy lights or small LED strips, behind or around the pegboard for extra flair. Make it a reflection of your personality through your organization style.
A decorated pegboard combines functionality with aesthetic appeal, proving that organization can be beautiful. It encourages a clutter-free and inspiring environment. Once you see how easily it transforms your space, you’ll be motivated to keep your surroundings stylish and tidy. Your workspace or craft area will become a favorite spot in your home!
13. Handmade Pom-Pom Rug with Soft Yarn
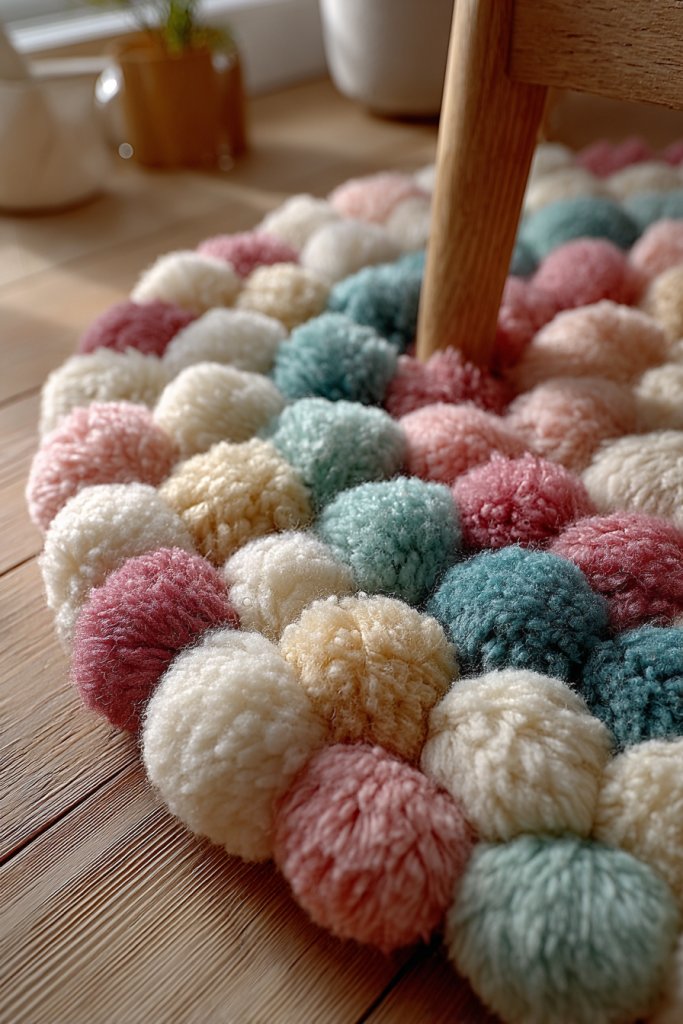
Looking for a cozy, handmade touch to soften up your floors? Store-bought rugs can be expensive or uninspired. A DIY pom-pom rug made with soft yarn is a fun, colorful way to add warmth and texture to any room. Want to walk barefoot on a fluffy, cheerful floor covering?
Recommended Products to replicate this idea
| # | Preview | Product | |
|---|---|---|---|
| 1 |

|
Cozyful Chunky Yarn for Hand Knitting - #10 Chunky Chenille Yarn, Jumbo Big Thick Chunky Yarns for... | Check Latest Price |
| # | Preview | Product | |
|---|---|---|---|
| 1 |
|
GORILLA GRIP Strong Rug Pad Gripper, US Designed, Grips Help Keep Area Rugs Safe and in Place, Slip... | Check Latest Price |
Picture a plush rug covered in tiny, colorful pom-poms arranged in a pattern or randomly for a playful look. The soft yarn creates a cloud-like surface under your feet, adding comfort and visual interest. Bright hues or pastel shades give the room a lively, welcoming vibe. It’s like a giant, wearable craft that turns your floor into a statement piece.
Use different yarn colors, thicknesses, and pom-pom sizes for variety. Create a patterned design or keep it uniform for a sleek look. Incorporate metallic or glittery yarn for a touch of glam. For larger spaces, sew or glue pom-poms onto a sturdy base like fabric or mesh. Change the color scheme seasonally or whenever you crave a fresh look.
Gather soft yarn, scissors, and a sturdy base or backing material. Cut yarn into strips and tie them around a central point or a mesh grid, creating pom-poms. Secure the pom-poms onto the base with glue or by sewing, ensuring they’re evenly spaced. Finish the edges neatly and trim any uneven strands. For durability, consider sealing or reinforcing the base. Place your rug in a high-traffic area for maximum coziness.
Add metallic or glitter yarn for extra sparkle. Create themed patterns—stars, hearts, or geometric shapes. Include different textures and sizes for added depth. Use the rug as a backdrop for styled furniture or as a playful accent in a kid’s room. Regularly refresh the pom-poms or add new colors for ongoing fun.
A pom-pom rug is proof that handmade decor can be both adorable and functional. It’s a project that’s easy to start and rewarding to finish. Once you see your soft, colorful floor covering, you’ll want to craft more textiles. Your space will feel warmer, more inviting, and totally unique.
14. DIY String Light Curtain for Ambient Illumination
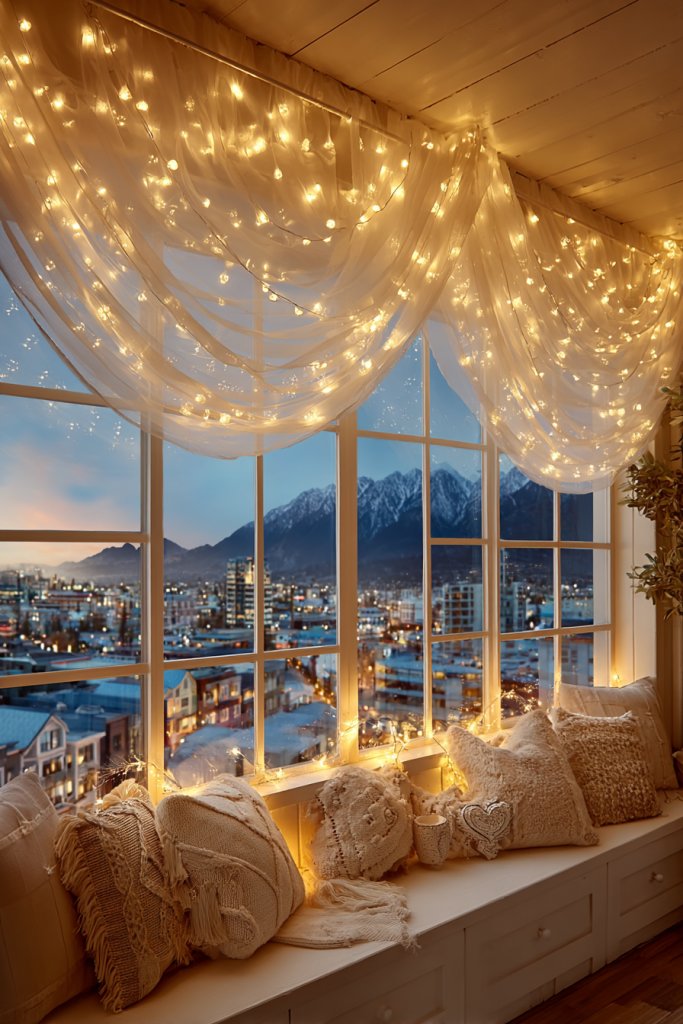
Are your rooms missing that warm, inviting glow perfect for relaxing or entertaining? Commercial string light curtains can be pricey or overly bright. Making your own creates a softer, more intimate ambiance, perfect for bedrooms, reading nooks, or cozy corners. Want to add a dreamy atmosphere with minimal effort?
Recommended Products to replicate this idea
| # | Preview | Product | |
|---|---|---|---|
| 1 |

|
Brightown 300 LED Fairy Curtain Lights, 9.8ft x 9.8ft Warm White Curtain String Lights, USB Plug in... | Check Latest Price |
| # | Preview | Product | |
|---|---|---|---|
| 1 |

|
Command Indoor Mini Light Clips, 45 Clear Clips and 54 Command Strips, Damage Free Hanging Christmas... | Check Latest Price |
Imagine delicate fairy lights hanging behind sheer fabric or draped along a wall, casting a gentle, flickering glow. The soft light filters through the fabric, creating a romantic, ethereal effect. The curtain gently sways with air currents, adding movement and life. It transforms a plain space into a cozy retreat, perfect for unwinding or hosting.
Use different types of fairy lights—warm white, color-changing, or vintage-style bulbs—depending on your mood. Drape the lights over a curtain rod, or attach them to a frame or ceiling with clips. Incorporate decorative fabrics, lace, or mesh for texture. Seasonal variations include adding tassels, fabric swags, or themed ornaments to the curtain.
Choose a length of string lights that fits your desired space. Attach them securely to a frame, wall, or ceiling using hooks, clips, or zip ties. Drape or arrange the lights in a pattern that emphasizes softness and flow. Cover the wires with fabric or decorative tape for a cleaner look. Plug in and adjust for the perfect glow, making sure all connections are safe and secure.
Add fabric or lace panels behind the lights for a textured, layered look. Incorporate themed ornaments, small lanterns, or decorative clips. Use remote-controlled or dimmable lights for adjustable ambiance. Change the fabric or arrangement seasonally to keep the look fresh and suited to different occasions.
This DIY creates a magical, calming atmosphere for any space, proving that easy projects can have a big impact. It’s a simple way to turn a room into a cozy sanctuary or a dreamy party setting. Once you see how charming and versatile it is, you’ll want to craft more personalized lighting ideas. Ready to make your space glow?
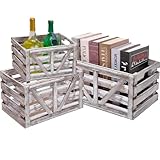
15. Painted Wooden Crates as Multi-Functional Storage
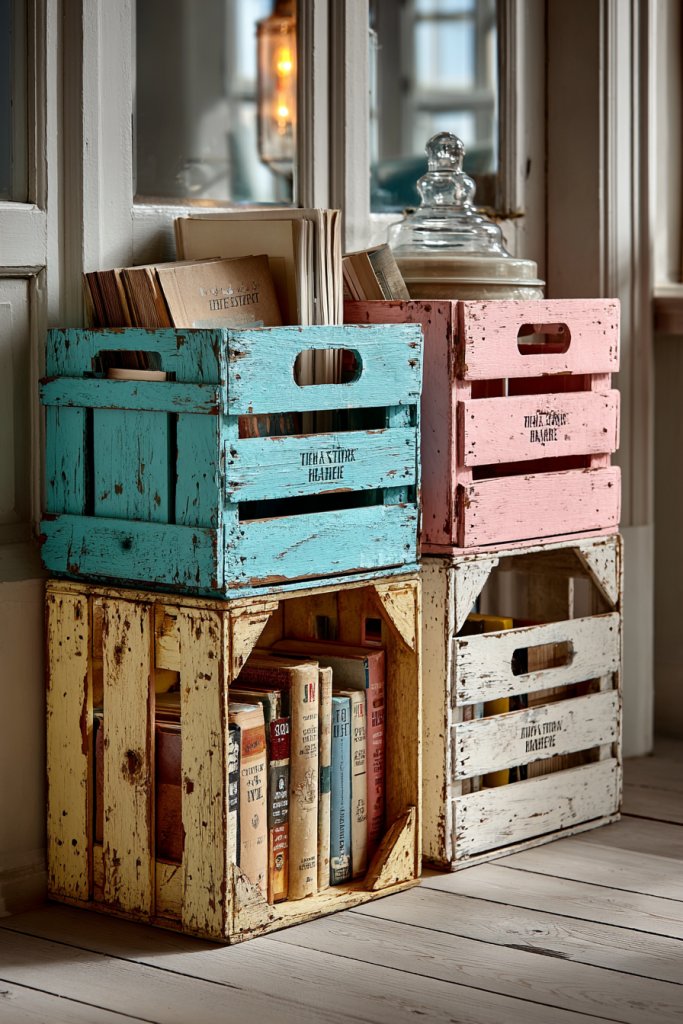
Struggling with clutter but tired of boring storage options? Painted wooden crates are a versatile, stylish solution that doubles as decor. They’re perfect for organizing books, toys, or accessories while adding a rustic or modern touch. Want to turn simple crates into statement pieces?
Recommended Products to replicate this idea
| # | Preview | Product | |
|---|---|---|---|
| 1 |
|
GDSIWA8 Storage Crate Nesting Wooden Crates with Handles,Set of 3 Rustic Farmhouse Decorative Wood... | Check Latest Price |
| # | Preview | Product | |
|---|---|---|---|
| 1 |

|
TIMRIS Set of 3 Rustic Distressed Wood Nesting Crates, Farmhouse Decorative Wooden Storage Boxes,... | Check Latest Price |
Picture a set of wooden crates painted in bold colors or distressed finishes, stacked or arranged in tiers. They hold all your essentials—magazines, craft supplies, or decorative objects—while contributing to your room’s aesthetic. The painted surfaces add personality, whether in a vintage, industrial, or shabby chic style. It’s like creating mini furniture pieces that are both functional and decorative.
Paint the crates in a monochrome palette for a sleek look or in multiple colors for a playful vibe. Use stencils, decals, or distressing techniques to add texture and interest. Stack or arrange the crates in different configurations—vertical towers, side-by-side, or staggered—for visual variety. Incorporate casters for mobility or line the interiors with fabric for a softer look.
Sand the crates lightly to remove rough edges, then paint with your chosen colors or finishes. Use brushes or spray paint for even coverage. Add decorative details like stenciled patterns or metallic accents once dry. Mount the crates on the wall or stack them for stability, securing with brackets or nails if needed. Fill them with your items, keeping everything tidy and accessible.
Decorate with additional painted designs, labels, or hardware for a personalized touch. Switch up the arrangement periodically to refresh your decor. Incorporate themed colors or motifs based on seasons or events. Use the crates to display plants, books, or collectibles, making your space functional and fun.
Repurposing wooden crates shows that you can create stylish storage with minimal cost and effort. They’re adaptable, customizable, and always in style. Once you see how much organization and charm they add, you might start collecting more vintage pieces. Your space will look curated, cozy, and uniquely yours!
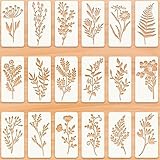
16. Wall Decal Art Using Stencils and Acrylics
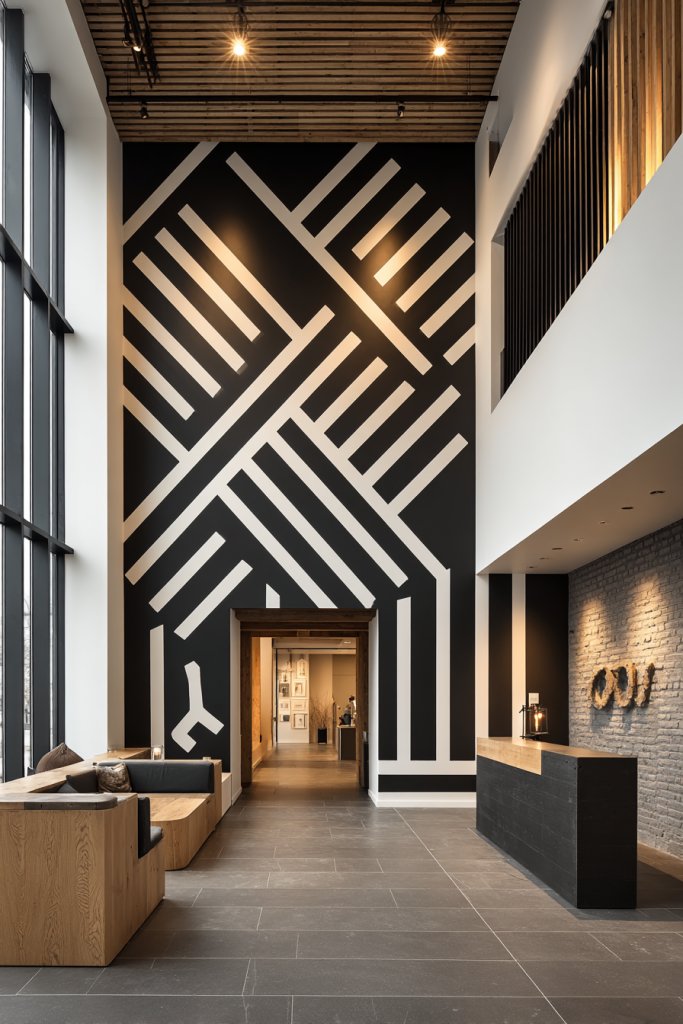
Ever wanted to personalize your space without breaking the bank or committing to permanent wall art? Wall decal art using stencils and acrylics offers a fun, affordable way to transform bland walls into expressive canvases. It’s perfect for renters or anyone craving a change that’s easy to remove or redo. Plus, it’s an opportunity to showcase your creativity without needing advanced art skills.
Recommended Products to replicate this idea
| # | Preview | Product | |
|---|---|---|---|
| 1 |
|
18 Sheet Reusable Flower Stencils for Painting,Stencils for Painting on Wood,Large Floral Stencil... | Check Latest Price |
| # | Preview | Product | |
|---|---|---|---|
| 1 |
|
Apple Barrel, Vibrant Spectrum Collection Acrylic Craft Paint, PROMOABIII, 2 fl oz each, 16 assorted... | Check Latest Price |
Imagine a blank wall suddenly bursting with bold geometric patterns or delicate floral motifs. The texture of the acrylic paint adds depth, while the stencil’s crisp edges keep it looking professional. Soft, matte finishes coat the wall, giving it a subtle, sophisticated vibe. Whether you choose vibrant colors or more muted tones, the design becomes a focal point that reflects your personality.
You can adapt this idea to suit any style—modern, boho, or even rustic. Use metallic paints for a luxe touch or pastel shades for a calming effect. Small, intricate designs fit well in a cozy nook, while large, expansive patterns work great in open living areas. Seasonal themes like snowflakes or floral motifs can be easily added or removed for a fresh look year-round.
Start by choosing a stencil pattern that resonates with your decor. Tape the stencil firmly onto the wall using painter’s tape to prevent shifting. Use acrylic paints in colors that complement your room’s palette. Apply the paint with a sponge or brush, dabbing gently to avoid bleeding underneath. For sharp edges, remove the stencil carefully before the paint dries. Clean your tools and touch up any uneven edges with a fine brush.
Add a personal touch by customizing stencils with your own designs or initials. Incorporate metallic or iridescent paints for added shine. Layer different stencil patterns for a textured, layered effect. Consider creating a mural or a quote by combining multiple stencils for a truly unique piece. Use painter’s tape to create borders or frames around your artwork for a polished finish.
This DIY approach makes wall art accessible for everyone, even those with minimal experience. It’s a great way to experiment and develop your artistic skills. Your space will feel more personal and vibrant, boosting your mood daily. Ready to turn a dull wall into your own masterpiece? Go ahead, grab some stencils and acrylics, and start creating!
17. Hand-Painted Canvas Pillows for a Personal Touch
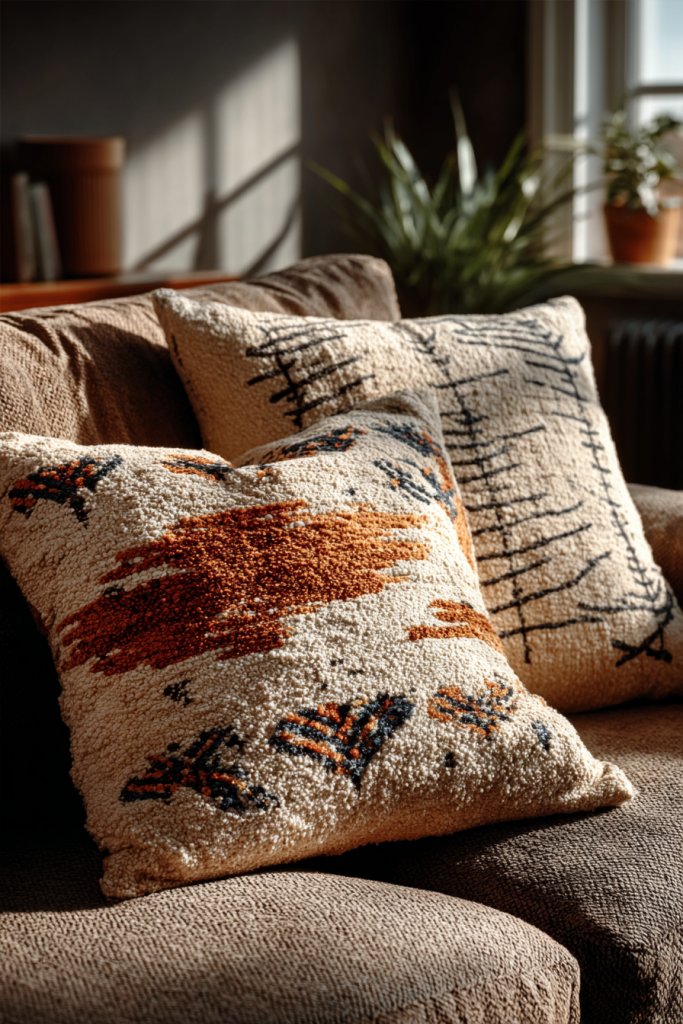
Tired of generic throw pillows that lack personality? Hand-painting your own canvas pillows allows you to inject your style directly into your decor. It’s a simple, inexpensive way to make your space feel more curated and cozy. Plus, it’s a fun project that combines creativity with practicality—who says decor can’t be playful?
Recommended Products to replicate this idea
| # | Preview | Product | |
|---|---|---|---|
| 1 |

|
Juvale Canvas Covers for Throw Pillows - 17 x 17 in, Cream, Pack of 4, Cotton - Hidden Zipper &... | Check Latest Price |
| # | Preview | Product | |
|---|---|---|---|
| 1 |

|
Shuttle Art Fabric Paint, 18 Colors Permanent Soft Fabric Paint in Bottles (60ml/2oz) with Brushes,... | Check Latest Price |
Picture a soft pillow with hand-painted abstract swirls or inspiring quotes in bold, contrasting colors. The textured canvas fabric takes paint beautifully, creating a tactile, artistic surface. When placed on your sofa or bed, these pillows instantly add a pop of color and personality. The painted designs look vibrant and crisp, standing out against neutral or patterned textiles.
This idea adapts well to different decor styles—go minimalist with monochrome patterns or boho with vibrant, layered motifs. Use fabric paints that are flexible and washable for durability. Create a set of matching or mismatched pillows for a playful vibe. Seasonal themes like holiday symbols or floral patterns can be easily swapped out.
Choose plain canvas or linen pillows in sizes that fit your furniture. Sketch your design lightly with pencil if needed. Use fabric paints in colors that complement your room’s palette. Apply the paint with fine brushes, layering for depth. Let each layer dry thoroughly before adding details or additional colors. Finish with a fabric sealant for durability and washability. Attach the painted cover securely to your pillow insert.
Personalize further by adding embroidered accents or textured elements with fabric glue. Experiment with metallic or glow-in-the-dark paints for extra flair. Create thematic designs for different seasons or moods. You can also write favorite quotes or song lyrics to make your pillows meaningful. Mix and match with plain pillows for a balanced look.
This DIY project unlocks your inner artist and helps create a home that truly reflects you. Hand-painted pillows are conversation starters and mood boosters. Plus, they’re easy to update or replace over time. Ready to add your personal touch to your living space? Grab some plain pillows and start painting your way to a cozier home!
18. DIY Paper Lanterns for Soft Overhead Lighting
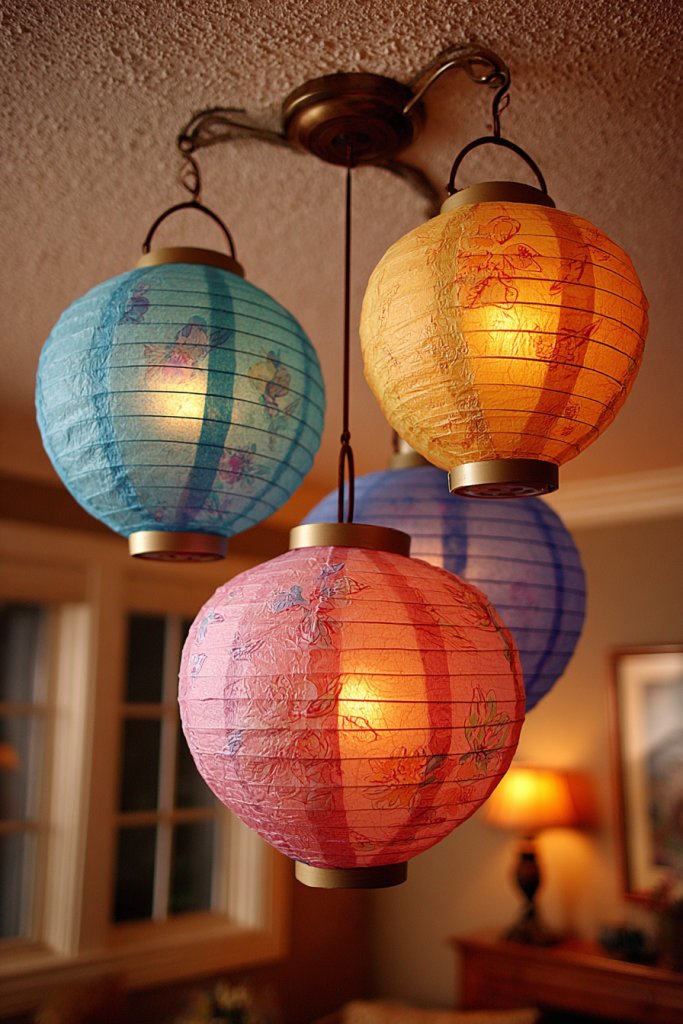
Looking for a way to add warm, inviting light to your space without investing in costly fixtures? DIY paper lanterns are your answer. They’re affordable, customizable, and perfect for creating a cozy ambiance during relaxing evenings or parties. Plus, you can design them to match any decor style—no electrician needed.
Recommended Products to replicate this idea
| # | Preview | Product | |
|---|---|---|---|
| 1 |

|
JACKYLED 20Ft UL Approval Extension Hanging Lantern Pendant Light Lamp Cord Cable 360W Suitable for... | Check Latest Price |
| # | Preview | Product | |
|---|---|---|---|
| 1 |
|
Brightever LED Outdoor String Lights 100FT Patio Lights with 52 Shatterproof ST38 Vintage Edison... | Check Latest Price |
Imagine soft, diffused light emanating from delicate paper spheres hanging overhead. The lanterns sway gently with the breeze, casting a warm glow across the room. You can choose from plain white, patterned, or painted designs to suit your mood. When lit with LED candles or string lights inside, they create a magical, festival-like atmosphere.
Mix sizes and shapes for visual interest—round, oval, or even hexagonal. Use different paper textures like rice paper, tissue, or kraft for varied effects. Hang them at different heights for a layered look or cluster several for a dramatic centerpiece. Seasonal themes like snowflakes or floral cutouts add a festive touch.
Start by choosing lightweight paper or fabric that can hold shape without sagging. Cut the paper into your desired shapes and decorate with markers, paint, or embellishments if desired. Use wire or sturdy string to form a frame, shaping the lantern. Secure the paper around the frame with glue or tape. Insert your lighting source—preferably LED for safety—and hang using hooks or adhesive strips.
Add extra details like hand-painted patterns or tassels made from yarn or fabric. Incorporate thematic elements for holidays or special occasions. Use colored paper or layered designs for a more elaborate look. You can even add scented candles or essential oils near the lanterns for a sensory experience.
Creating your own paper lanterns is a simple yet impressive way to elevate your decor. They’re perfect for both indoor and outdoor spaces, transforming any area into a cozy retreat. Plus, customizing designs makes the process even more fun and rewarding. Ready to light up your home with handmade charm? Grab your supplies and start crafting!
19. Custom Mirror Frames with Decorative Tape or Paint
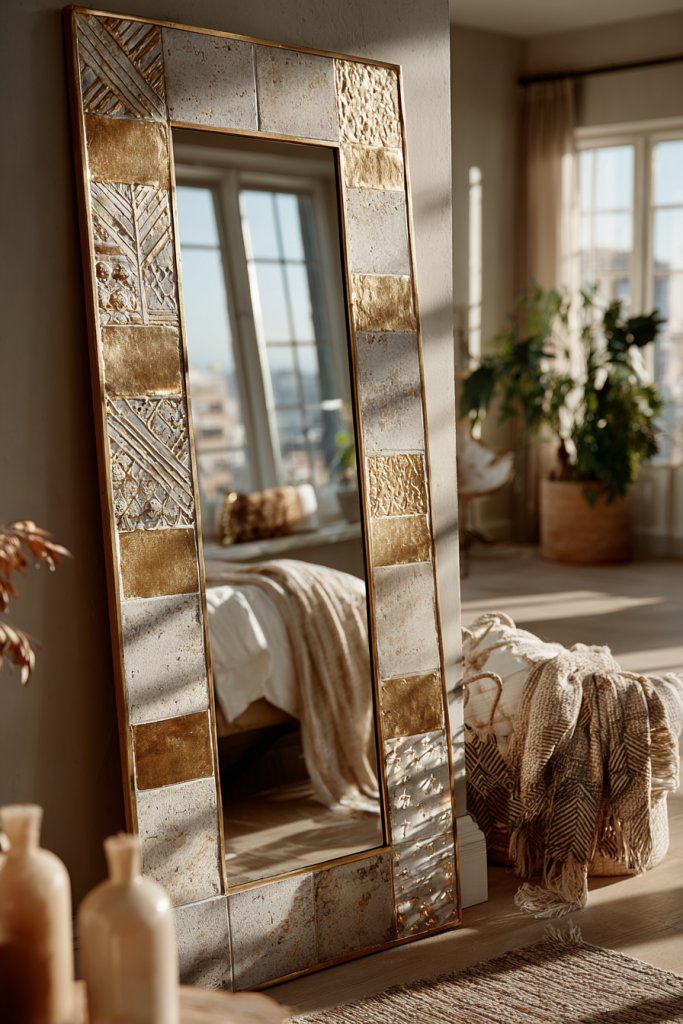
Tired of plain, boring mirrors that do nothing for your decor style? Customizing your mirror frames with decorative tape or paint gives them a fresh, fashionable upgrade without replacing the entire piece. It’s an easy way to add color, pattern, or texture that complements your room’s vibe. No handyman skills required—just a bit of tape or paint and some creativity.
Recommended Products to replicate this idea
| # | Preview | Product | |
|---|---|---|---|
| 1 |

|
55 Rolls Holiday Washi Tape Set - Decorative Tape Seasonal Bohemian Colored Tape, Cute Washi Tapes... | Check Latest Price |
| # | Preview | Product | |
|---|---|---|---|
| 1 |

|
Nicpro Metallic Gold Acrylic Paint, 8.45oz/250ml Large Gold Leaf Paint, Non Toxic, Non Fading Craft... | Check Latest Price |
Picture a sleek mirror framed with bold black and white geometric tape or hand-painted metallic accents. The frame becomes a statement piece that enhances the overall aesthetic. The reflective surface remains clear, but the new border transforms the look entirely. The combination of shiny, matte, or textured finishes adds dimension and interest.
Choose decorative tapes with patterns like florals, chevrons, or marble effects for a trendy look. Use contrasting colors for a modern feel or monochrome shades for elegance. Experiment with metallic paints or gilding for a luxe appearance. Frames can be wide or narrow, depending on the room’s proportions and style.
Remove the mirror from its current frame if possible for easier customization. Cover the edges with painter’s tape, ensuring clean lines. Apply paint or tape the decorative elements carefully, using a ruler or stencil for precision. Let everything dry completely before reassembling or hanging. For a more textured look, combine tape with painted accents.
Add small embellishments like metallic studs or decals for extra flair. Mix different tape patterns or paint techniques for a layered effect. Create themed frames for holidays or special occasions. Keep the design cohesive by choosing colors that match your room’s palette for a seamless look.
This simple project can dramatically change your space’s feel and make your mirror a true decor highlight. It’s a budget-friendly way to experiment with styles and colors. Plus, it’s a satisfying DIY that boosts your confidence in tackling other home upgrades. Ready to customize your mirror? Let’s get started!
20. Fabric-Covered Bulletin Boards for Colorful Inspiration
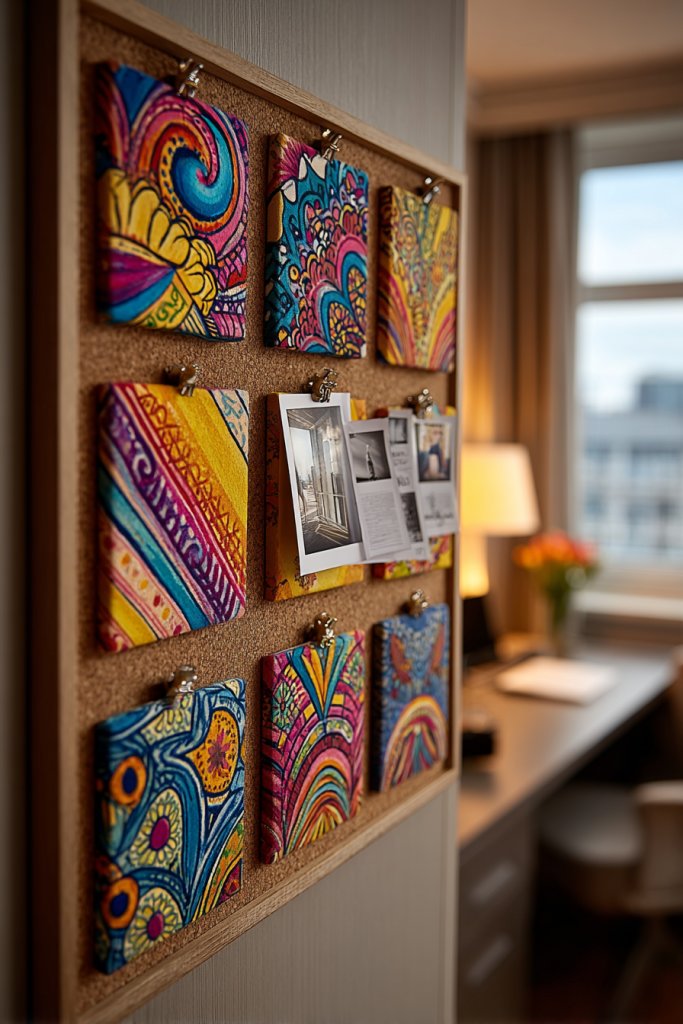
Do your ideas and notes feel cluttered and uninspired on plain cork boards? Covering a bulletin board with vibrant fabric transforms it into a colorful, stylish focal point. It’s a practical upgrade that adds personality and makes organizing your thoughts fun. Plus, it hides the boring cork surface behind a fabric that matches or complements your decor.
Recommended Products to replicate this idea
| # | Preview | Product | |
|---|---|---|---|
| 1 |

|
Lightomorrow Bulletin Board, 36 x 24 inches Felt Board - Decorative Pin Board, Cork Board... | Check Latest Price |
| # | Preview | Product | |
|---|---|---|---|
| 1 |

|
78 Pieces Push Pins Set Cute Thumb Tacks Decorative Flower Push Pins for Wall Cork Board Bulletin... | Check Latest Price |
Imagine a sleek fabric with bold patterns or textured weaves stretched smoothly over your board. The fabric adds softness and color, instantly brightening a workspace or kitchen area. Pins and clips stand out against the colorful background, making it easy to organize and display notes, photos, or mementos. The overall look is fresh, coordinated, and inviting.
Choose fabrics in different textures—linen, velvet, or canvas—to match your style. Opt for bright, cheerful prints or muted tones for a minimalist look. You can create a patchwork effect with different fabrics or add decorative trim around the edges. Seasonal fabrics like florals or plaids make it easy to update your space throughout the year.
Remove the cork board from its frame and lay it flat. Cut your fabric to size, ensuring extra margin around the edges. Use a staple gun or hot glue to attach the fabric tightly to the back of the board, smoothing out wrinkles as you go. Trim excess fabric and reassemble the board. Use decorative nails or clips to hold your notes and photos.
Add embellishments like ribbon borders, fabric flowers, or patches for a personalized touch. Incorporate magnetic strips or pockets for added functionality. Coordinate the fabric with other decor elements for a cohesive look. Use different fabrics to designate sections, such as one for work and another for personal notes.
A fabric-covered bulletin board makes your space more lively and organized, encouraging creativity. It’s a simple project that results in a big visual impact. Plus, it’s a great way to practice sewing or craft skills in a practical way. Ready to bring color and order to your notes? Get your fabric and tools, and go!
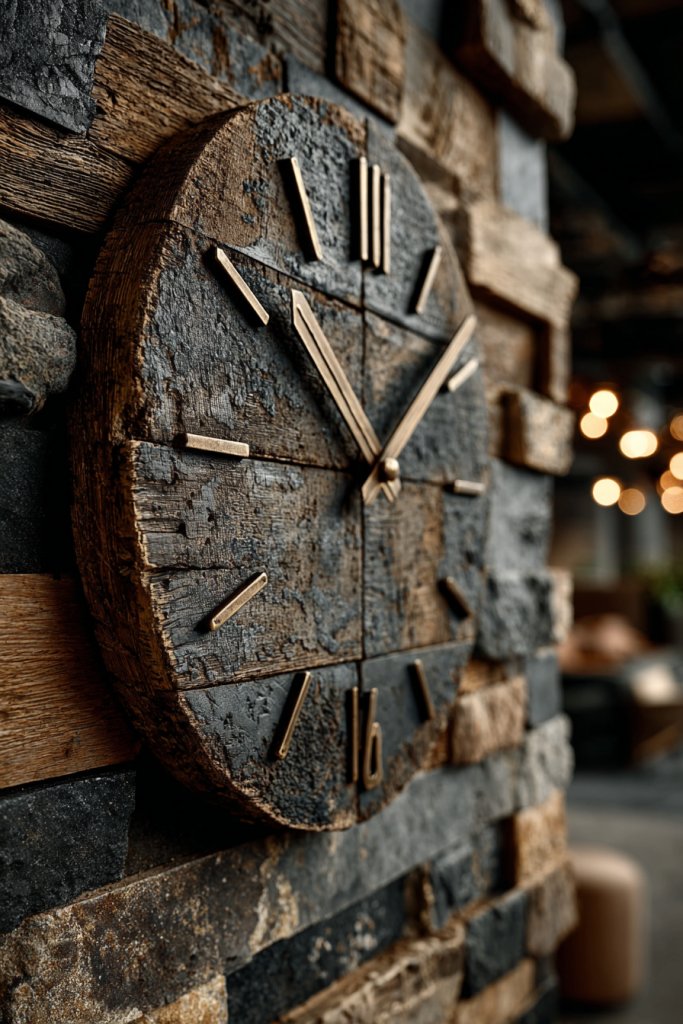
21. Handmade Wall Clocks from Recycled Materials
Ever wanted a unique, eco-friendly clock that doubles as art? Handmade wall clocks from recycled materials let you craft a functional statement piece while helping the planet. It’s a rewarding project that combines creativity with sustainability. Plus, it’s a conversation starter that shows off your eco-conscious vibe.
Recommended Products to replicate this idea
| # | Preview | Product | |
|---|---|---|---|
| 1 |

|
Vigorwise 12 Inch Wood Wall Clock, Retro Wooden Wall Clocks Battery Operated, Silent Wall Clock for... | Check Latest Price |
| # | Preview | Product | |
|---|---|---|---|
| 1 |
|
TIKROUND Include Hands Quartz DIY 12888 Wall Clock Movement Mechanism Battery Operated DIY Repair... | Check Latest Price |
Imagine a clock face made from reclaimed wood, with hands crafted from metal scraps or vintage spoons. The numbers could be painted directly onto a repurposed plate or stenciled onto a piece of cardboard. The result is rustic yet modern, with textures and colors that tell a story of reuse and originality. It’s a focal point that adds character to any room.
Use materials like old vinyl records, tin cans, or cardboard for different styles. Paint or stain the base to match your decor—weathered, colorful, or monochrome. Incorporate different sizes for a gallery wall effect or keep it simple for a minimalist feel. Add decorative elements like fabric patches or metallic accents for extra flair.
Start by sourcing recycled materials—think old picture frames, wood planks, or kitchenware. Cut or assemble these into a circular shape or other interesting forms. Drill a hole in the center for the clock mechanism. Paint, stain, or decorate your base as desired. Attach clock hands and set the time, then hang securely on your wall.
Personalize your clock with meaningful symbols, initials, or favorite colors. Combine different textures like rough wood with smooth metal for contrast. Use vintage finds to give it a nostalgic touch. Keep the design simple or go bold—whatever matches your style and space.
Creating a clock from recycled materials proves that sustainability can be stylish and functional. It’s a sustainable project that adds a personal, eco-friendly touch to your home. Plus, it’s a great conversation piece that reflects your values. Ready to craft your own eco-clock? Gather your recyclables and start designing!
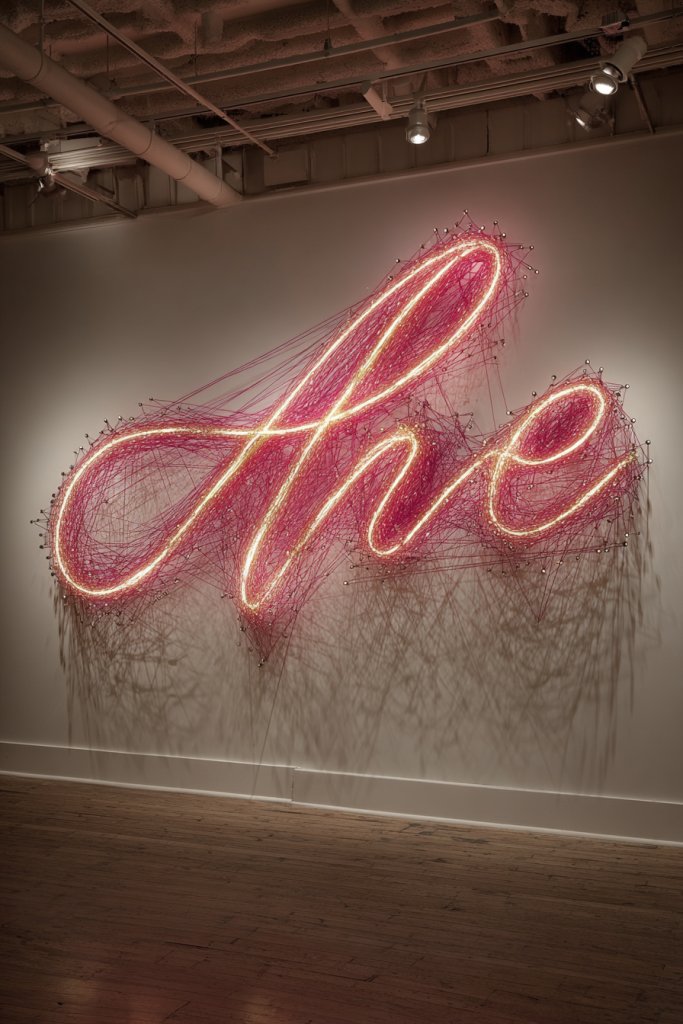
22. DIY String Art with Neon or Metallic Thread
Looking to add some modern, energetic decor to your space? DIY string art with neon or metallic thread offers a bold, eye-catching way to do it. It’s surprisingly simple and highly customizable, perfect for making a statement wall or accent piece. Plus, it’s a project that feels both artistic and fun—who doesn’t love a bit of sparkle?
Recommended Products to replicate this idea
| # | Preview | Product | |
|---|---|---|---|
| 1 |

|
DMC 317W-E980 Light Effects Polyster Embroidery Floss, 8.7-Yard, Neon Yellow | Check Latest Price |
| # | Preview | Product | |
|---|---|---|---|
| 1 |

|
Craft Crush DIY String Art Craft Kit - Floral Interior Design DIY Activity for Teens & Adults -... | Check Latest Price |
Picture a geometric pattern or a word spelled out with shiny, glowing threads against a neutral background. The metallic or neon thread catches the light and adds a sense of vibrancy and movement. The textured thread contrasts beautifully with smooth wooden or cardboard bases. It’s a lively focal point that instantly energizes your decor.
Choose simple shapes like triangles, hearts, or initials, or go for complex patterns like mandalas. Use bright neon colors for a playful vibe or metallic gold and silver for elegance. Mix different thread colors for a layered, textured look. Mount the finished piece on a contrasting background for maximum impact.
Start by hammering nails or pins into your base to outline your design. Tie the neon or metallic thread onto a starting nail and weave it around the nails according to your pattern. Keep tension even to avoid sagging. Tie off the thread securely at the end and trim excess. Frame or hang your artwork for display.
Add small LED lights behind the art for extra glow or incorporate glow-in-the-dark thread. Personalize with initials, quotes, or symbols that matter to you. Use different thread thicknesses or textures to create depth. Combine with other decor elements for a customized gallery wall.
String art with neon or metallic thread elevates your decor game effortlessly. It’s a modern craft that yields stunning results with minimal tools. Plus, you get to enjoy a creative process that’s both relaxing and rewarding. Ready to make your space pop? Grab your threads and nails, and start weaving!
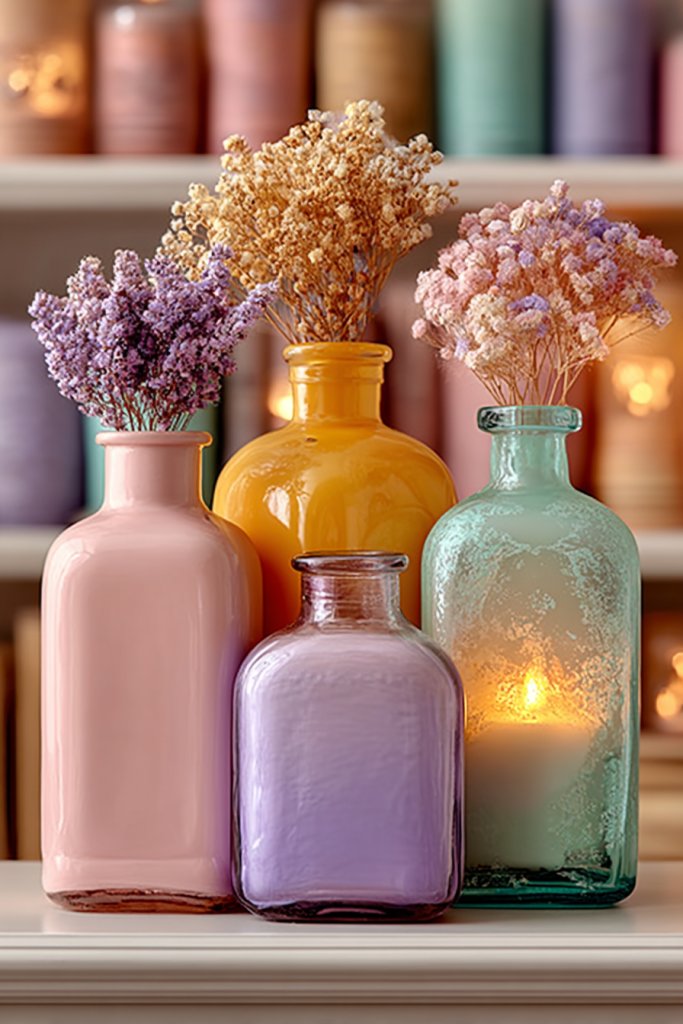
23. Painted Glass Bottles as Decorative Vases or Candleholders
Want stylish decor that’s budget-friendly and eco-conscious? Painted glass bottles serve as chic vases or candleholders that add a touch of artful elegance. They’re versatile, customizable, and perfect for repurposing bottles you might otherwise toss out. Plus, they create a subtle, sophisticated ambiance.
Recommended Products to replicate this idea
| # | Preview | Product | |
|---|---|---|---|
| 1 |

|
Nicpro 18 Colors Stained Glass Paint Set, 1oz / 30ml Waterproof Acrylic Enamel & Ceramic Glass... | Check Latest Price |
| # | Preview | Product | |
|---|---|---|---|
| 1 |

|
VINCIGANT Gold Wine Bottle Taper Candle Holder,Modern Candlestick Holder for Standard Votive... | Check Latest Price |
Imagine clear glass bottles painted with ombre gradients, geometric shapes, or delicate patterns. When lit with candles or filled with flowers, they cast beautiful reflections and shadows. Different colors and finishes—matte, metallic, or translucent—allow you to match or contrast with your room’s palette. They become understated yet impactful accents.
Use a variety of bottle shapes and sizes for a curated, eclectic look. Paint in monochrome for a sleek, modern vibe or go wild with multicolor patterns. Combine with textured fabrics or decorative twine to add more layers. Seasonal themes can be incorporated with festive colors or motifs.
Clean your bottles thoroughly and let them dry. Use glass paint or spray paint suitable for glass surfaces. Apply paint with brushes, sponges, or spray, layering for depth. For patterns, use painter’s tape or stencils for precision. Let dry completely before using as vases or candleholders. Seal with a clear topcoat if desired.
Add metallic accents or metallic leaf to create a luxe effect. Write names or quotes directly on the bottles with paint pens. Fill with faux flowers, LED fairy lights, or even small decorative objects. Mix different colors and finishes for an artistic, curated collection.
Transforming simple bottles into stylish decor proves that DIY can be both fun and elegant. These painted bottles are perfect for adding a personal touch to your space or gifting to friends. Plus, they’re a subtle way to introduce color and texture without cluttering your decor. Ready to upcycle and beautify? Grab some bottles and your preferred paints, and start creating!
Conclusion
With so many creative DIY room decor ideas to explore, there’s no reason to settle for a dull or uninspired space. These projects range from easy upgrades to more ambitious transformations, ensuring there’s something for everyone. Give these ideas a try and watch your home come to life with your personal touch. Your dream room is just a project away—start creating today!