I have been, or can be if you click on a link and make a purchase, compensated via a cash payment, gift, or something else of value for writing this post. As an Amazon Associate, I earn from qualifying purchases. Please read my full Affiliate Disclosure for more information.
Have you ever wanted to add a personal touch to your home without breaking the bank? DIY home decor ideas are not only budget-friendly but also incredibly rewarding, allowing you to craft unique pieces that truly reflect your style. The popularity of DIY projects has surged as more people seek ways to make their living spaces more cozy, stylish, and personalized.
In this article, you’ll find a variety of creative ideas that range from simple crafts to more detailed projects. Whether you’re into vintage accents, modern minimalism, or rustic charm, there’s something here to inspire your next home decor adventure. Get ready to transform your space with easy, fun, and impactful DIY touches that will make your house feel even more like home.
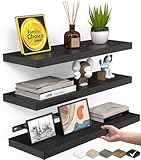
1. Customized Wall Shelves with Unique Brackets

Ever feel like your walls are just taking up space without serving any real purpose? Custom wall shelves are the perfect fix, giving you a chance to showcase your favorite small decor items while adding personality to your rooms. They turn blank walls into eye-catching focal points and help organize clutter. Plus, DIY options make it affordable and uniquely yours.
Recommended Products to replicate this idea
| # | Preview | Product | |
|---|---|---|---|
| 1 |
|
BAYKA Floating Shelves for Wall, Wall Mounted Rustic Wood Shelves for Bathroom, Bedroom, Living... | Check Latest Price |
| # | Preview | Product | |
|---|---|---|---|
| 1 |

|
MIUGO 6 Pack Heavy Duty Shelf Brackets 6 inch, Floating Shelf Brackets(1/5”-Thick), L-Shaped Wall... | Check Latest Price |
Imagine sleek wooden planks mounted with ornate, vintage-style brackets, creating a floating effect that draws the eye. The shelves are filled with colorful ceramics, tiny plants in decorative pots, or cherished trinkets. The texture of reclaimed wood contrasts beautifully with metallic or painted brackets, adding depth and charm to your space. When illuminated by soft lighting, the shelves seem to float effortlessly on the wall.
Choose minimalist metal brackets for an industrial look, or go for intricately carved wooden ones for a rustic vibe. Adjust the length and number of shelves depending on your wall size and storage needs. You can also paint the brackets in bold colors or metallic finishes to match your decor theme. Seasonal swaps, like adding fairy lights or decorative signs, keep the look fresh.
Start by measuring your wall space carefully and selecting sturdy brackets suited to your weight requirements. Use a level to ensure perfect alignment and mark drill holes precisely. Secure brackets into wall studs or use wall anchors for drywall. Cut your wood to size, sand smooth, and finish with stain or paint for a personalized touch. Mount the shelves securely, and arrange your decor items thoughtfully.
Add engraved initials or decorative motifs to the brackets for a custom touch. Incorporate mixed materials like glass jars or vintage boxes on the shelves to create visual interest. Use different shelf heights or staggered arrangements for a dynamic look. You can also create themed shelves for holidays or special occasions, making your decor versatile.
Customized wall shelves turn blank walls into personalized galleries, boosting your space’s style and functionality. They’re easy to adapt to any decor trend, from modern minimalism to shabby chic. With a little DIY effort, you can achieve a professional look and make your home truly reflect your personality.
2. Hand-Painted Mason Jar Candle Holders
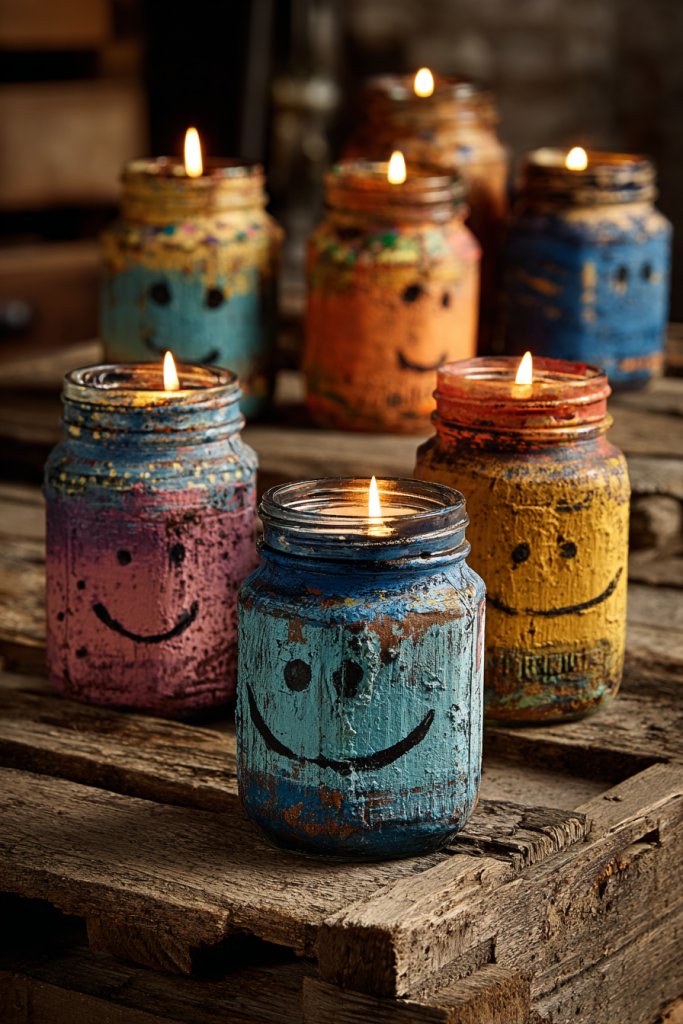
Ever wish you could add a cozy, personal touch to your lighting without investing in expensive fixtures? Hand-painted mason jar candle holders are the perfect DIY solution, creating warm ambiance and a charming, rustic vibe. They’re easy to make, customizable, and a fun project to showcase your creativity.
Recommended Products to replicate this idea
| # | Preview | Product | |
|---|---|---|---|
| 1 |

|
2 Pcs Mason Jar Candle Holder Farmhouse Hook Taper Candle Holder Insert Iron Vintage Rustic... | Check Latest Price |
| # | Preview | Product | |
|---|---|---|---|
| 1 |

|
Apple Barrel, Vibrant Spectrum Collection Acrylic Craft Paint, PROMOABIII, 2 fl oz each, 16 assorted... | Check Latest Price |
Picture a row of jars painted in soft pastel hues or metallic shades, each holding a flickering candle. The paint adds texture and color, transforming plain glass into decorative art. The warm glow filters through the painted surfaces, casting playful shadows on nearby walls. Dried flowers or lace accents can be glued to the exterior for extra charm.
Experiment with different painting techniques—ombre, polka dots, or geometric patterns—to match your decor style. Use waterproof paint or seal the paint with a clear coat for durability. These jars work well in both modern and vintage settings, and you can make them seasonal by switching up colors and motifs.
Gather empty mason jars, acrylic paints, brushes, and sealing spray. Clean the jars thoroughly and dry them well. Apply painter’s tape to create clean lines or patterns if desired. Paint in thin coats, allowing each layer to dry before adding details. Once dry, seal with a clear spray for waterproofing. Insert small candles or LED tealights inside for safe, flickering light.
Add personal touches by writing meaningful quotes or initials with a fine brush or paint marker. Attach decorative ribbons, twine, or lace around the neck of the jar for an extra rustic look. Mix and match painted jars with different patterns for an eclectic display. These holders make thoughtful handmade gifts, too.
Hand-painted mason jar candle holders are a simple way to infuse warmth and personality into any space. They allow you to showcase your artistic side and customize your lighting easily. Plus, they’re budget-friendly and perfect for cozy nights or outdoor gatherings.
3. Upcycled Picture Frame Collage Wall
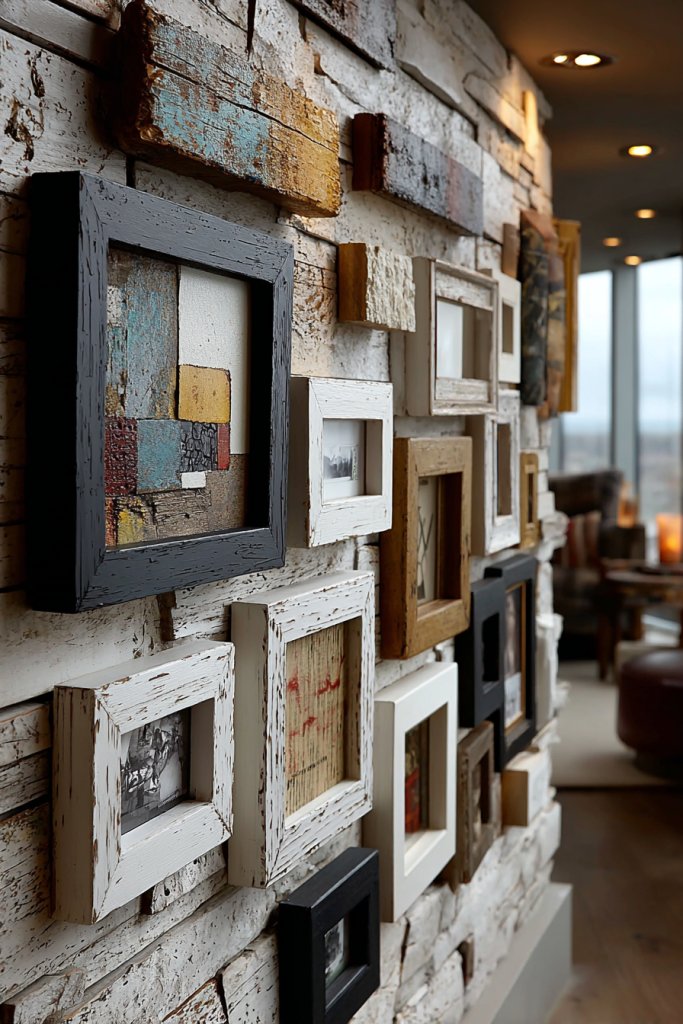
Do your walls look plain and uninspired? Creating an upcycled picture frame collage is a fantastic way to turn old, forgotten frames into a personalized art display. It adds character, tells your story, and transforms empty walls into a focal point. Best of all, it’s budget-friendly and eco-conscious.
Recommended Products to replicate this idea
| # | Preview | Product | |
|---|---|---|---|
| 1 |

|
10 Pack Vintage Picture Frames for Wall or Tabletop Display Ornate Vintage Picture Frames Vintage... | Check Latest Price |
| # | Preview | Product | |
|---|---|---|---|
| 1 |

|
KURUI 303Pcs Picture Hanging Kit, Picture Hangers Assorted Kit with Heavy Duty Picture Hanging... | Check Latest Price |
Visualize a collection of mismatched vintage and thrifted frames arranged in a dynamic cluster on your wall. Inside, you can display fabric swatches, handwritten notes, or photos (no need for actual artwork). The mix of frame styles and finishes adds eclectic charm, while the varied sizes create visual interest. The overall effect feels curated and meaningful.
Mix different frame styles—classic wood, distressed paint, or metallic—to match your decor theme. Arrange the frames in symmetrical patterns for a formal look or in a haphazard, organic layout for a boho vibe. You can also incorporate small shelves or hooks within the collage for added functionality.
Start gathering old frames from thrift stores, garage sales, or your own storage. Clean and repaint or distress the frames as desired. Decide on your arrangement, then use painter’s tape or paper templates to mark the layout on your wall. Attach the frames with nails, hooks, or adhesive strips, ensuring they’re level and secure. Fill each frame with your chosen fabric, paper, or mementos.
Personalize each frame with handwritten quotes, decorative paper, or fabric inserts that reflect your personality. You can also add small decorative elements like buttons or beads glued onto the frames. Rotate or update the contents seasonally to keep the display fresh. This project is a lovely way to showcase your memories and style.
A collage of upcycled frames makes your space feel more lived-in and personal. It’s a creative way to reuse old items and showcase your personality. With a little patience and creativity, you can craft a stunning focal point that sparks conversations and admiration.
4. Fabric-Covered Bulletin Boards
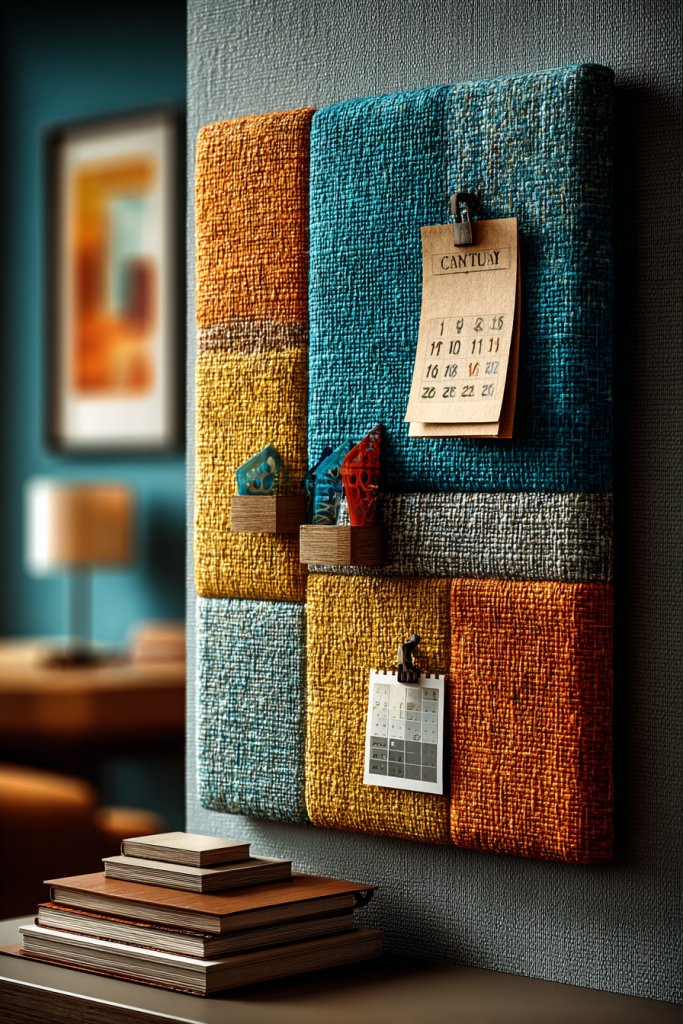
Tired of boring cork boards that don’t match your decor? Fabric-covered bulletin boards are a stylish upgrade that add color and texture while keeping your notes and reminders organized. They’re easy to customize, and DIY makes it affordable to get exactly the look you want.
Recommended Products to replicate this idea
| # | Preview | Product | |
|---|---|---|---|
| 1 |

|
Hahafelt 36"x 24" Linen Fabric Bulletin Board Pinboard for Walls Display Frameless Pinboard Display... | Check Latest Price |
| # | Preview | Product | |
|---|---|---|---|
| 1 |

|
78 Pieces Push Pins Set Cute Thumb Tacks Decorative Flower Push Pins for Wall Cork Board Bulletin... | Check Latest Price |
Imagine a large cork board wrapped in a vibrant, patterned fabric with decorative trim. Pins hold your memos, photos, or small accessories, all framed by soft textile edges. The fabric adds warmth and personality, turning functional organizers into decorative accents. The textures and colors can be tailored to any room’s vibe.
Choose fabrics that complement your existing decor—think linen for minimalist spaces or colorful prints for playful rooms. Add decorative borders or buttons to give it a finished look. Size and shape can vary—square, rectangular, or even circular—depending on your wall space and style preference.
Start by selecting a cork or foam board and your favorite fabric. Cut the fabric slightly larger than the board, then stretch and staple it securely around the edges with a heavy-duty stapler. Add decorative trim or piping if desired for a polished finish. Mount the board on your wall using appropriate hooks or nails. Use decorative pushpins that match your style.
Personalize with fabric patterns that reflect your personality—floral, geometric, or solid tones. Attach small fabric bows or embellishments for extra flair. You can also add labels or custom tags for organization. Layer different fabrics or add a painted border for added visual interest.
Fabric-covered bulletin boards combine function with style, making your space more inviting. They encourage organization without sacrificing aesthetic appeal. With a few simple supplies, you create a customized, beautiful piece that keeps your space tidy and inspiring.
5. Macramé Plant Hangers (Without Actual Plants)
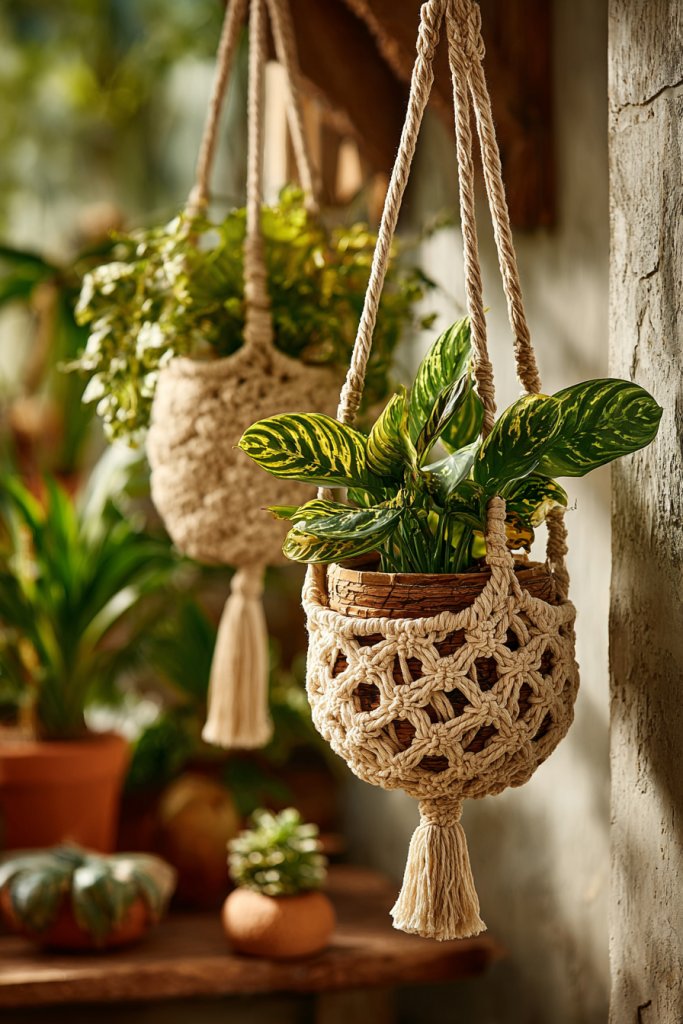
Looking to add a boho touch to your space but not a green thumb? Macramé plant hangers are the perfect solution, offering visual interest and textural appeal without the responsibility of actual plants. They’re stylish, versatile, and a fun craft project.
Recommended Products to replicate this idea
| # | Preview | Product | |
|---|---|---|---|
| 1 |

|
SFENNGPET Macrame Plant Hangers, 6Pack Hanging Planters for Indoor Plants w/ 6 Set Hangers Kit... | Check Latest Price |
| # | Preview | Product | |
|---|---|---|---|
| 1 |

|
Mkono Macrame Plant Hanger Indoor Hanging Planter Basket with Wood Beads Decorative Flower Pot... | Check Latest Price |
Picture intricate knotted cords hanging from the ceiling, with empty decorative pots or baskets suspended in mid-air. The textured knots and patterns add a tactile dimension to your decor. Use neutral tones or bold colors to match your aesthetic, and hang them in corners or above furniture for a layered, cozy effect.
Experiment with different knotting techniques—square, spiral, or diamond patterns—to create unique looks. Use colorful cords or metallic threads for a modern twist. Vary the lengths of hangers for visual interest, or cluster several for a dramatic display. They work well in small nooks or as part of a larger decorative setup.
Gather macramé cord, a few decorative or plain pots, and scissors. Decide on your knotting pattern and practice on scrap cord if you’re new. Cut cords to desired lengths, then knot and secure each section tightly. Attach the cords to a ring or dowel at the top and hang from ceiling hooks. Adjust the tension and length until you get the perfect drape.
Add beads, charms, or metallic accents to the cords for extra flair. Customize the color scheme to match your decor—think earthy tones or bright hues. Use decorative baskets or textured containers for the pots. You can even switch out the hanging elements seasonally for variety.
Macramé hangers without plants still bring warmth and texture, elevating your decor effortlessly. They’re a simple way to embrace boho trends and showcase your craftsmanship. Ready to knot your way to a more stylish home?
6. DIY Geometric Wall Art with Tape and Paint
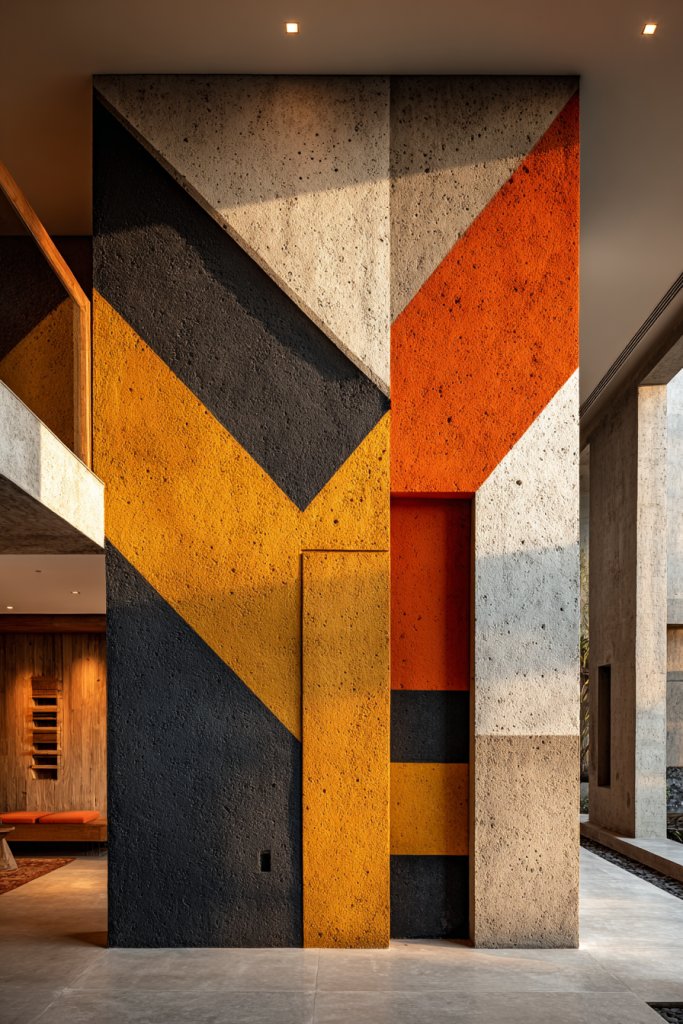
Tired of generic wall art that doesn’t reflect your style? Geometric wall art made with tape and paint offers a modern, customizable solution. It’s a fun project that results in bold, graphic statements without needing artistic skills or expensive supplies.
Recommended Products to replicate this idea
| # | Preview | Product | |
|---|---|---|---|
| 1 |

|
JINBING 8pcs Blue Pinstripe Tape Paper Masking Tape for DIY Nail Arts Drawing Pattern Making... | Check Latest Price |
| # | Preview | Product | |
|---|---|---|---|
| 1 |

|
Nicpro 14 Colors Large Bulk Acrylic Paint Set (16.9 oz,500 ml) Rich Art Painting Supplies, Non Toxic... | Check Latest Price |
Imagine a canvas or wall painted with sharp, clean lines forming triangles, hexagons, or abstract shapes in contrasting colors. The precision of painter’s tape creates crisp edges, while the colors add vibrancy or subtlety depending on your mood. The layered patterns add depth and a contemporary vibe, perfect for accent walls.
Choose a monochrome palette for minimalist decor or high-contrast combinations for a statement piece. Use painter’s tape in different widths to vary the line thickness. For a softer look, opt for pastel shades; for boldness, go for jewel tones. You can also create smaller geometric patterns on canvases for a gallery wall.
Start with a blank canvas or wall and plan your design using light pencil marks or digital sketches. Apply painter’s tape along the lines, pressing down firmly to prevent paint bleed. Use painter’s brushes or rollers to fill in the shapes with your chosen colors. Carefully remove the tape once the paint is dry to reveal sharp geometric patterns.
Add metallic accents or glitter to certain shapes for a touch of glam. Incorporate your favorite colors or seasonal hues to keep it fresh. Mix different geometric patterns and sizes for a dynamic look. Frame your artwork for a polished finish or hang as-is for a modern edge.
DIY geometric art allows you to create eye-catching decor that’s entirely personalized. It’s easy to adapt to any space or style, and no artistic talent is required—just a steady hand and patience. Your home will feel more curated and vibrant with minimal effort.
7. Personalized Wooden Coasters
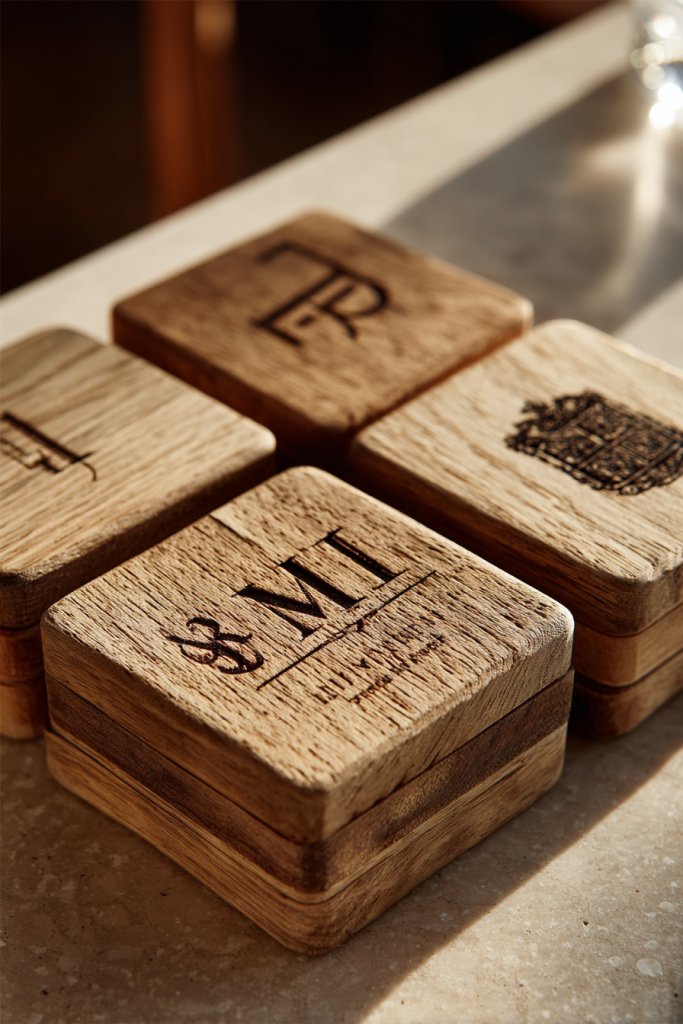
Tired of boring, generic coasters that don’t reflect your personality? Personalized wooden coasters are an easy and stylish way to add a personal touch to every coffee or cocktail hour. They’re practical, decorative, and perfect for gifting or treating yourself.
Recommended Products to replicate this idea
| # | Preview | Product | |
|---|---|---|---|
| 1 |

|
Personalized Coasters for Wedding Gifts, or Personalized Wooden Coaster Sets | Custom Coaster Set... | Check Latest Price |
| # | Preview | Product | |
|---|---|---|---|
| 1 |
|
Personalized Coasters for Wedding Gifts, or Personalized Wooden Coaster Sets | Custom Coaster Set... | Check Latest Price |
Picture smooth, circular slices of wood with engraved initials, patterns, or quotes. Some feature colorful painted accents or intricate carvings, making each piece unique. The natural wood grain adds warmth and character, transforming simple coasters into conversation starters. They sit elegantly on your coffee table, ready for any occasion.
Use different wood types—maple, cherry, or reclaimed pallet wood—for varied textures and colors. Combine engraved initials with painted designs for a layered look. Coordinate with your existing decor through color accents or keep it natural for a rustic appeal. Create sets with matching or contrasting styles for visual interest.
Start with clean, smooth wooden slices, either bought or sliced from larger pieces. Use a wood-burning tool or engraving machine to personalize each coaster. For painted designs, apply a base coat and add details with fine brushes. Seal with a clear, food-safe lacquer to protect from moisture and stains. Add felt pads underneath to prevent slipping.
Personalize with meaningful quotes, monograms, or symbols that reflect your interests. Incorporate color accents matching your decor palette. Bundle sets in decorative boxes or tie with a ribbon for gift-giving. You can also add small embellishments like metal charms or painted borders.
Custom wooden coasters are a simple yet impactful way to showcase your creativity. They elevate your table setting and make every drink feel special. With minimal tools, you can produce high-quality, personalized pieces that impress friends and family.
8. Customized Throw Pillow Covers

Are your plain throw pillows feeling uninspired? Customized covers let you easily update your decor with meaningful quotes, patterns, or initials. They’re a simple, cost-effective way to refresh your space and add a personal touch that’s all your own.
Recommended Products to replicate this idea
| # | Preview | Product | |
|---|---|---|---|
| 1 |

|
LYNLIN Personalized Throw Pillow Covers Custom Pillow Case with Photo Text Image, Pillowcase Cushion... | Check Latest Price |
| # | Preview | Product | |
|---|---|---|---|
| 1 |

|
Create Your Own Embroidered Throw Pillow – Personalized with Name, Quote, Monogram, Logo or Shape... | Check Latest Price |
Visualize a soft fabric pillow adorned with stenciled words or painted designs that reflect your personality. Think bold monograms, floral patterns, or inspirational quotes in your favorite fonts. The covers can feature textured fabrics like linen or velvet, adding depth and tactile interest. These pillows instantly elevate your sofa or bed with their bespoke look.
Use fabric paints, stencils, or iron-on transfers for a DIY approach. Mix different fabrics and colors to match seasons or moods. Create a set with coordinated designs or individual statements for an eclectic vibe. Swap covers seasonally for a fresh update without buying new pillows.
Start with plain pillow covers made from your preferred fabric. Sketch your design lightly with pencil, then paint or stencil carefully. Use fabric paints suited for textiles and let dry completely. For a professional look, heat-set the paint with an iron. Insert the covers onto your pillows and secure with zippers or ties.
Personalize with embroidered initials or hand-painted motifs that reflect your style. Add decorative elements like tassels or trim to edges for extra flair. Coordinate with your other decor accents for a cohesive look. These covers can also be customized as gifts for friends and family.
Customized throw pillow covers are a quick way to inject personality into your living space. They give you creative freedom and help your decor feel more intentional. Plus, they’re super easy to swap out whenever you want a new look.
9. Repurposed Ladder as a Decor Shelf
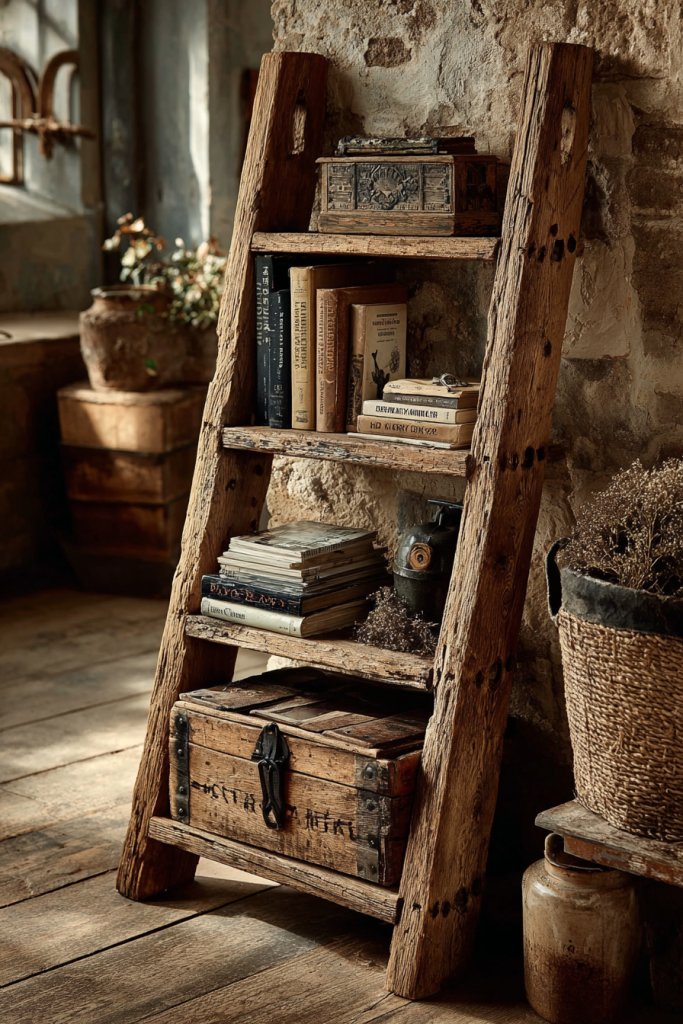
Does your home need a unique display solution that’s both functional and stylish? Repurposing an old ladder as a decor shelf offers a quirky, space-saving answer. It’s perfect for showcasing books, accessories, or decorative items without cluttering surfaces. Plus, it’s a great way to upcycle and give new life to something old.
Recommended Products to replicate this idea
| # | Preview | Product | |
|---|---|---|---|
| 1 |

|
Amazon Basics 5-Tier Ladder Bookshelf Storage Organizer, Solid Rubberwood Frame, Space-Saving... | Check Latest Price |
| # | Preview | Product | |
|---|---|---|---|
| 1 |

|
Honest Blanket Ladders for The Living Room, 5-Tier Blanket Holder, Wall-Leaning Blanket Rack, Ladder... | Check Latest Price |
Picture a rustic wooden ladder leaning against a wall, with the rungs holding baskets, framed photos, or folded textiles. The uneven texture and weathered paint add charm and character. When styled with carefully chosen objects, the ladder becomes a focal point that blends practicality with aesthetic appeal. It creates a layered, boho vibe in any room.
Paint or stain the ladder to match your decor, or leave it distressed for a vintage look. Use it in kitchens for hanging utensils or towels, or in living rooms for displaying decorative baskets or throws. You can also mount it horizontally for a different effect. Adjust the spacing and number of rungs to suit your needs.
Start by sourcing a sturdy wooden ladder—antique stores or thrift shops are great places to look. Clean and sand it thoroughly, then apply paint or stain if desired. Position it against the wall securely, using wall anchors or brackets for stability. Decorate by arranging items on the rungs or shelves, balancing form and function. Regularly update with seasonal or new decor pieces.
Personalize with stenciled words, quotes, or patterns on the ladder for a custom touch. Hang small decorative signs or add fairy lights for a cozy glow. Use baskets or fabric-lined boxes to keep smaller items organized. This DIY project makes your space more inviting and functional.
A repurposed ladder is a statement piece that adds rustic charm and personality. It’s an easy project that transforms space and provides extra storage or display options. With a little creativity, you can turn old into new and make your decor truly one-of-a-kind.
10. DIY Textured Wall Panels with Cardboard
Looking for a cost-effective way to add depth and interest to your walls? DIY textured wall panels made from cardboard are an inventive solution that’s both affordable and eco-friendly. They let you experiment with patterns and textures without breaking the bank.
Recommended Products to replicate this idea
| # | Preview | Product | |
|---|---|---|---|
| 1 |

|
RLAVBL 50 Pack 8.5x11 Corrugated Cardboard Sheets, Flat Cardboard Inserts for Shipping, Mailing,... | Check Latest Price |
| # | Preview | Product | |
|---|---|---|---|
| 1 |
|
Loctite Power Grab Express Heavy Duty Construction Adhesive, 9 fl oz Cartridge, 1 Pack - Versatile... | Check Latest Price |
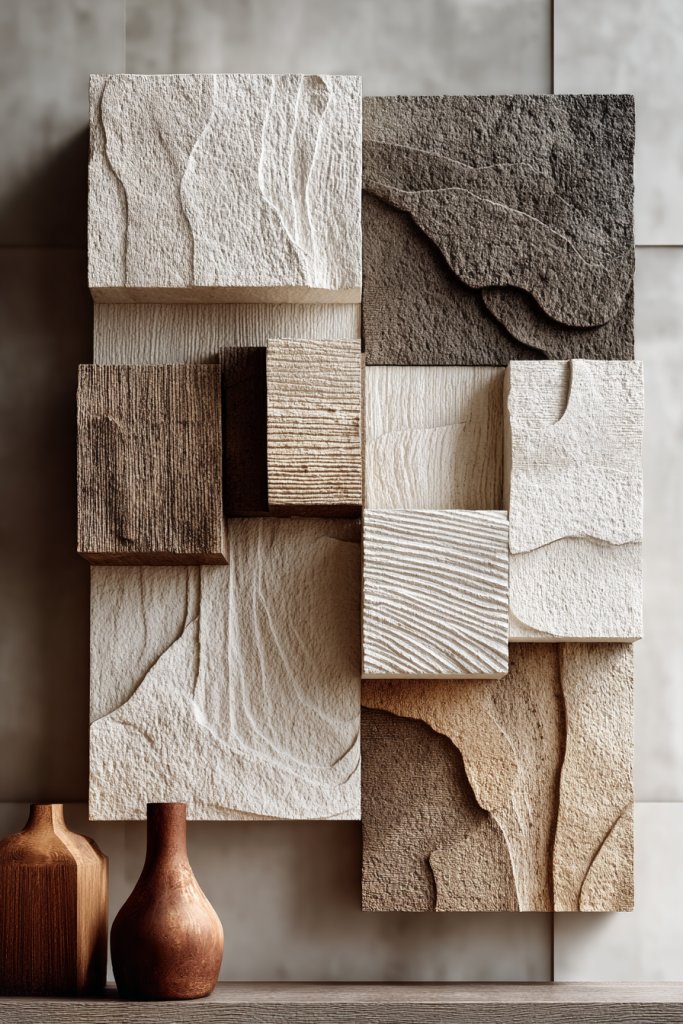
Imagine layered cardboard cutouts arranged in geometric or organic patterns, painted in coordinating or contrasting colors. The panels create a tactile surface that catches light and shadow, adding dimension to your wall. The rough edges and layered textures evoke an artistic, handcrafted feel that elevates your decor.
Use different cardboard thicknesses and shapes—triangles, squares, or abstract forms—to create custom designs. Paint or cover the panels with decorative paper or fabric to match your style. Arrange them in a grid, staggered, or freeform layout for variety. This approach works well in modern, eclectic, or industrial interiors.
Cut cardboard into your chosen shapes using a craft knife and ruler. Glue or tape the pieces together to form panels, then paint or decorate as desired. Mount the panels on your wall with double-sided tape or adhesive strips, ensuring they’re level. For additional texture, apply layers of paint or plaster for a faux 3D effect. Experiment with different arrangements until satisfied.
Add metallic accents or metallic paint for a luxe look. Incorporate small mirrors or decorative elements into the panels for visual interest. Change the color schemes seasonally or for special events. Keep the panels lightweight for easy rearrangement or removal when updating your decor.
DIY textured cardboard panels offer a creative way to boost your interior design skills while making a statement wall. They’re adaptable, inexpensive, and eco-conscious. With some imagination, you can craft a stunning focal point that’s uniquely yours.
11. Hand-Painted Canvas Art with Abstract Designs
Tired of mass-produced wall art that feels impersonal? Creating your own abstract canvas art allows you to inject personality and originality into your space. It’s surprisingly easy and yields professional-looking results that can match any decor style.
Recommended Products to replicate this idea
| # | Preview | Product | |
|---|---|---|---|
| 1 |
|
FIXSMITH Stretched White Blank Canvas - 11x14 Inch, 8 Pack, Primed,100% Cotton,5/8 Inch Profile of... | Check Latest Price |
| # | Preview | Product | |
|---|---|---|---|
| 1 |
|
Apple Barrel, Vibrant Spectrum Collection Acrylic Craft Paint, PROMOABIII, 2 fl oz each, 16 assorted... | Check Latest Price |
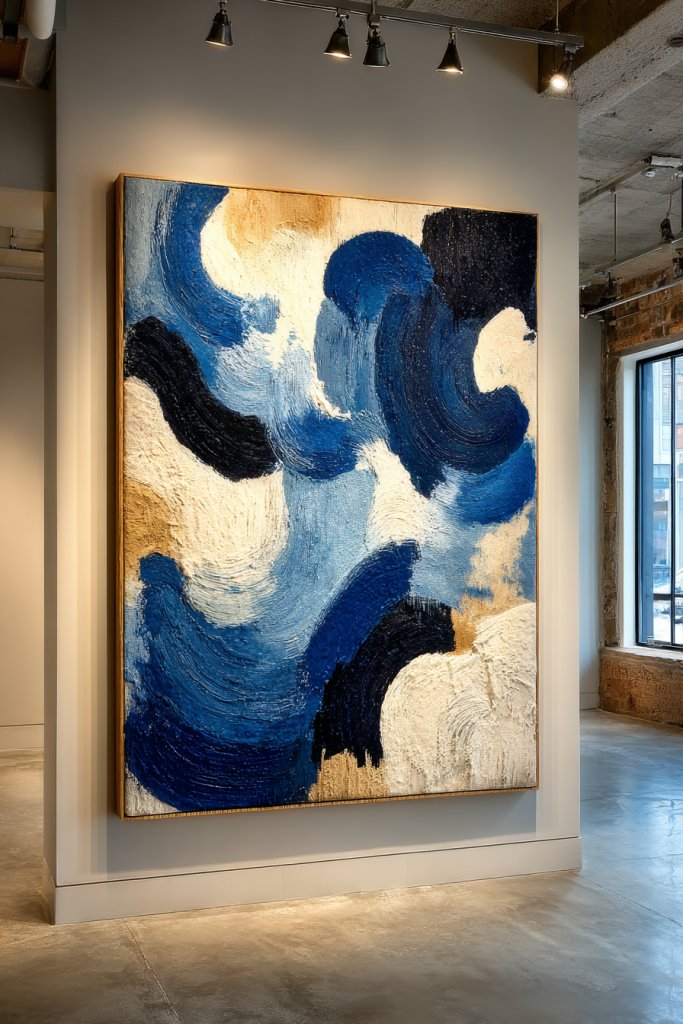
Picture a large canvas covered in bold, sweeping brushstrokes or geometric shapes in vibrant or muted tones. The layered paint creates depth, inviting viewers to explore the abstract forms. When hung on a blank wall, it instantly becomes a conversation piece, reflecting your taste and mood.
Use acrylics for quick drying and easy layering, or experiment with mixed media for texture. Play with color schemes—monochrome, pastels, or contrasting hues—to suit your room’s vibe. Size matters: large pieces make a statement, while smaller canvases work well in groups or as accents. Incorporate metallic or glitter accents for added flair.
Select a canvas and sketch your abstract design lightly with pencil. Use bold brushes or palette knives to apply paint in sweeping motions, blending or layering colors as you go. Let each layer dry before adding new strokes. For a professional touch, varnish the finished piece for gloss or matte finish. Hang using simple hooks or wire for a clean presentation.
Add metallic leaf or glitter accents for a luxe effect. Incorporate your favorite colors or themes, like ocean blues or sunset oranges. Create a series of smaller artworks for a gallery wall. Personalize with initials or symbols subtly integrated into the design.
Hand-painted abstract art is a flexible, creative outlet that elevates your interior. No artistic degree needed—just your intuition and a few supplies. It’s a rewarding way to showcase your style and craft a professional-looking piece at home.
12. Customizable Mason Jar Wall Sconces (No Plants)
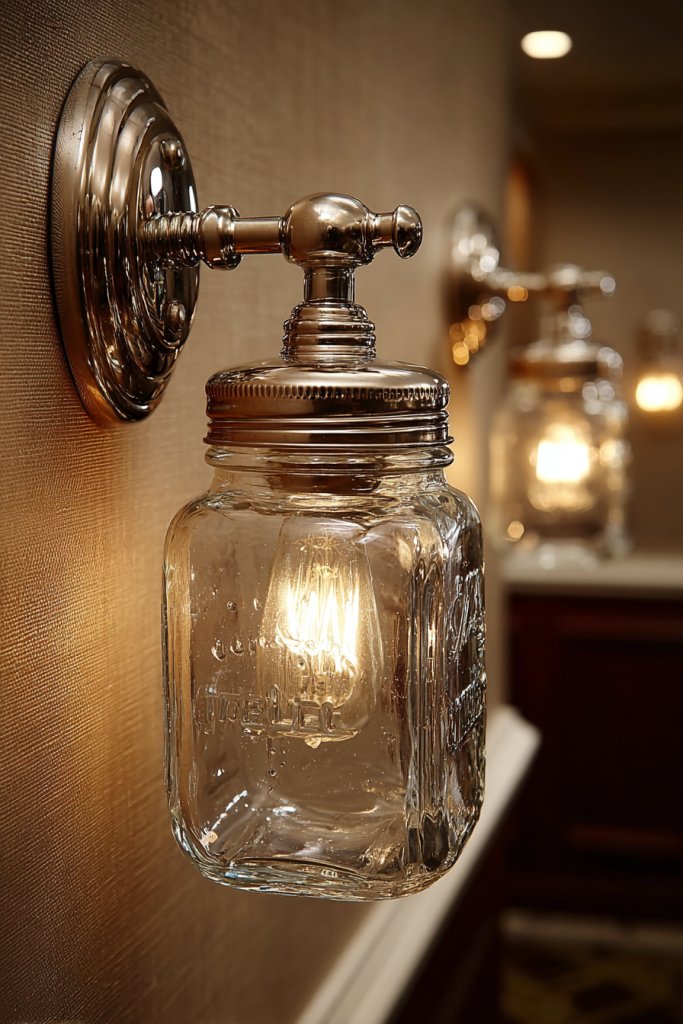
Looking for a charming, functional lighting solution that’s easy to customize? Mason jar wall sconces are a DIY favorite, offering a cozy glow without the fuss of actual plants. They’re versatile, affordable, and perfect for adding warmth to hallways, bedrooms, or living spaces.
Recommended Products to replicate this idea
| # | Preview | Product | |
|---|---|---|---|
| 1 |
|
Rustic Wall Sconces, Mason Jar Sconces, Farmhouse Home Decor, LED Fairy Lights, Green Fake Plant,... | Check Latest Price |
| # | Preview | Product | |
|---|---|---|---|
| 1 |

|
Brightown 12 Pack LED Fairy Lights Battery Operated String Lights - 7ft 20LED Waterproof Silver Wire... | Check Latest Price |
Visualize a series of jars mounted on a wood or metal backing, with candles or LED lights inside. The jars can be painted or decorated with twine, lace, or washi tape, creating a rustic or shabby chic vibe. The glow through the glass casts flickering patterns, making your wall come alive with inviting ambiance.
Paint or decorate the jars in different colors or patterns to match your decor. Use battery-operated fairy lights or flameless candles for safety and convenience. Mount multiple sconces at varying heights for visual interest or create a symmetrical arrangement for a balanced look. You can also add hooks or chains for a vintage touch.
Start with clean mason jars and chosen decorating supplies. Paint or embellish the jars as desired, then attach a metal or wooden backing to hold the jars securely. Install wall anchors or screws, then hang the sconces at your preferred height. Insert candles or lights, and arrange around your space for a warm glow.
Add embellishments like stamped initials, decorative ribbons, or metallic accents. Personalize the jars with etched designs or painted motifs. Use different sizes or shapes of jars for variety. Change the lighting seasonally or for special occasions to keep the look fresh.
DIY mason jar sconces are a charming way to add functional decor without overdoing it. They’re easy to customize and perfect for creating a cozy atmosphere. With a few simple steps, you can craft a warm, inviting space that feels uniquely yours.
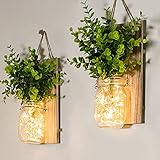
13. Decorate Plain Vases with Fabric or Twine
Are your plain vases missing personality? Decorating simple glass or ceramic vases with fabric or twine is an easy, inexpensive way to add rustic charm and individuality. It’s perfect for updating existing decor or creating personalized gift items.
Recommended Products to replicate this idea
| # | Preview | Product | |
|---|---|---|---|
| 1 |

|
PerkHomy Natural Jute Twine 600 Feet Long Twine String for Crafts Gift Wrapping Packing Gardening... | Check Latest Price |
| # | Preview | Product | |
|---|---|---|---|
| 1 |

|
VGOODALL 9 Rolls Jute Ribbons Lace Craft Ribbon 18 Meters for Crafts Wraping Gifts Party Holiday and... | Check Latest Price |
Imagine a clear glass vase wrapped in burlap or linen fabric, tied with a jute twine bow. The textured materials contrast beautifully with smooth surfaces, creating a tactile, layered look. Without relying on flowers, these vases become decorative accents that add warmth and a handmade feel to any room.
Vary the wrapping techniques—try ribbon, lace, or colorful twine for different styles. Embellish with charms, buttons, or painted patterns for extra detail. Use seasonal fabrics or colors to keep the look fresh. These decorated vases work well as standalone decor or as part of a centerpiece.
Start with clean, dry vases and choose your fabric or twine. Wrap the material around the vase, securing with hot glue or double-sided tape. Add decorative bows, charms, or painted designs as desired. For a polished look, trim excess fabric or twine neatly. Fill with faux or real flowers, or leave empty to serve as standalone decor.
Create themed designs for holidays or special events using themed fabrics or embellishments. Personalize with initials, names, or meaningful symbols painted or glued onto the surface. Mix textures—combine rough twine with smooth satin ribbons for a layered effect. These vases make thoughtful, handmade gifts.
Decorated plain vases are a simple craft that adds a cozy, personalized touch to your decor. They’re versatile, affordable, and easy to customize to match any style. Embrace your creativity and turn everyday objects into charming statement pieces.
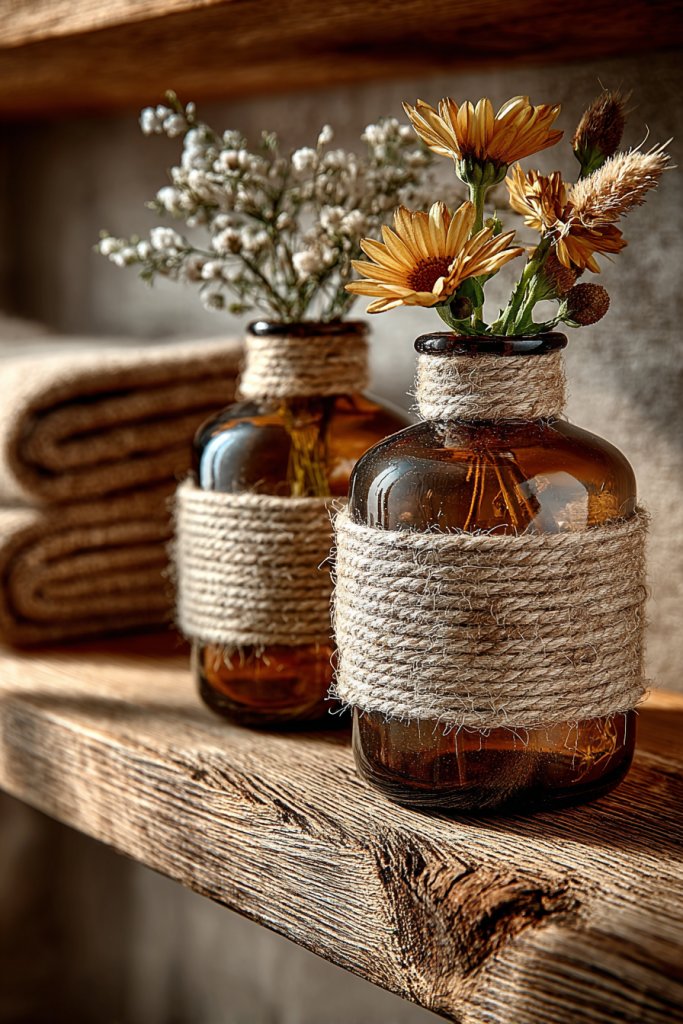
14. Painted Wooden Letters or Words
Ever wanted to spell out a favorite quote or phrase but couldn’t find the right wall decor? Painted wooden letters or words are an affordable, customizable option that lets you add a personal message to any space. They’re fun to make and instantly impactful.
Recommended Products to replicate this idea
| # | Preview | Product | |
|---|---|---|---|
| 1 |

|
124 Pcs Wooden Letters 2 Inch for Crafts Unfinished Capital Wooden Alphabet Letters and Numbers... | Check Latest Price |
| # | Preview | Product | |
|---|---|---|---|
| 1 |
|
Apple Barrel, Vibrant Spectrum Collection Acrylic Craft Paint, PROMOABIII, 2 fl oz each, 16 assorted... | Check Latest Price |
Imagine large wooden letters painted in bold colors or metallic finishes spelling out ‘HOME’ or ‘LOVE’ on your wall. The simple, chunky shapes draw attention and can be styled with patterns or textures like stripes or polka dots. They add a playful yet meaningful element to your decor, making your message clear and stylish.
Paint the letters in your favorite colors or add decorative details like glitter or decals. Mix different font styles—block, script, or vintage—to match your decor theme. Arrange the letters in a straight line, staggered, or in a creative shape for visual interest. You can also combine with other decorative elements for a personalized gallery.
Purchase or cut wooden letters from craft stores or plywood. Sand smooth and paint with acrylic or spray paints, layering for depth. Add patterns, quotes, or symbols with brushes or stencils. Seal with a clear varnish for durability. Mount on the wall using nails, adhesive strips, or picture hooks, ensuring they are level and spaced evenly.
Personalize with your own handwriting, favorite sayings, or initials. Mix painted letters with decorative elements like ribbons or fabric accents. Change the message seasonally or for special occasions to keep your decor fresh. Use different sizes and finishes to create a dynamic display.
Painted wooden words are a bold, meaningful addition that can inspire or comfort daily. They’re a simple DIY project that adds personality and style. With a little effort, you can craft a striking statement piece that makes your space uniquely yours.
15. Handmade Fabric Wall Hangings
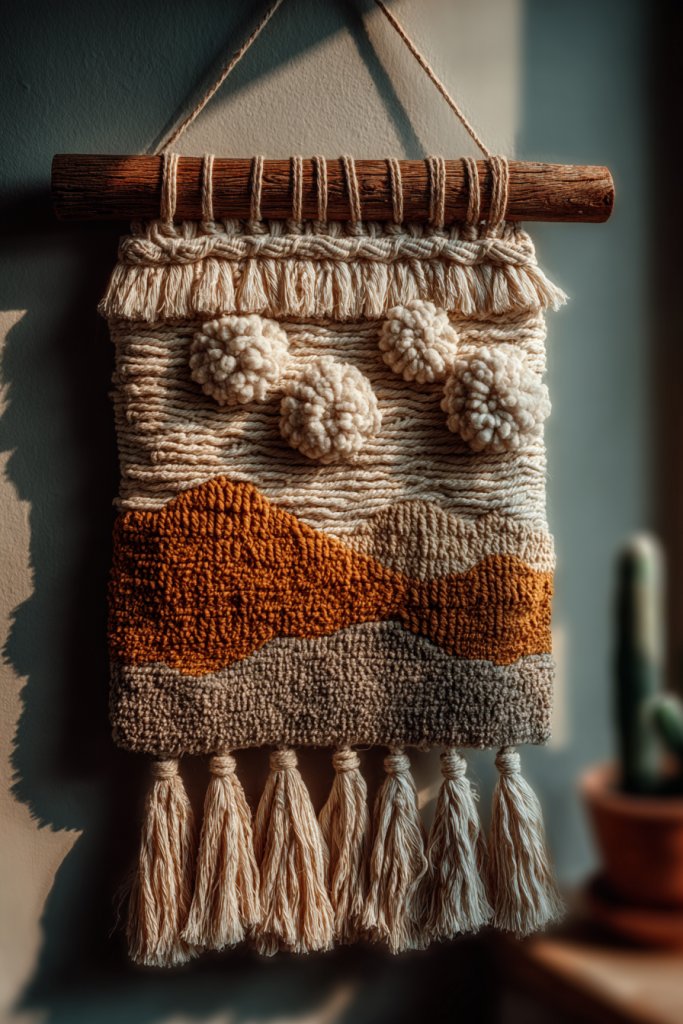
Looking to add softness, texture, and a touch of boho charm to your decor? Handmade fabric wall hangings are a cozy, creative way to elevate any space. They’re easy to customize and can become the centerpiece of your wall decor.
Recommended Products to replicate this idea
| # | Preview | Product | |
|---|---|---|---|
| 1 |

|
guzhiou large macrame wall hanging - Boho Tapestry Macrame Wall Decor Art- Chic Bohemian Handmade... | Check Latest Price |
| # | Preview | Product | |
|---|---|---|---|
| 1 |

|
Flber Macrame Wall Hanging Macrame Wall Decor Large-Scale Tie-Dye Tapestry Living Home Room Wall... | Check Latest Price |
Picture a textured tapestry made from woven or knotted fabrics in neutral or vibrant hues. Ribbons, tassels, or yarns hang from a wooden dowel or metal rod, creating a layered, tactile effect. The mix of textures and colors adds warmth and personality, transforming bare walls into inviting retreats.
Use different fabrics—cotton, linen, velvet—for varied textures. Incorporate decorative elements like beads, feathers, or embroidery for a personalized touch. Experiment with shapes—square, circular, or abstract—to match your decor style. Vary the length and density of the layers for visual interest.
Cut fabric strips or shapes, then knot or weave them onto a dowel or branch. Use a hot glue gun or sewing to attach decorative elements like tassels or beads. Mount the finished piece on the wall using hooks or nails. Keep the hanging lightweight for easy installation and removal. Play with symmetry or asymmetry depending on your aesthetic.
Add embroidered or painted details to your fabric pieces for extra flair. Incorporate meaningful colors or motifs that reflect your personality. Swap out or update the hanging seasonally, or create themed wall hangings for holidays. Layer different textiles for a rich, textured gallery.
Handmade fabric wall hangings bring a cozy, artistic vibe that’s easy to implement. They allow you to showcase your craft skills and personal style. With a few supplies, you can craft a unique focal point that warms your home.
16. Customized Coiled Rope Trivet or Mat
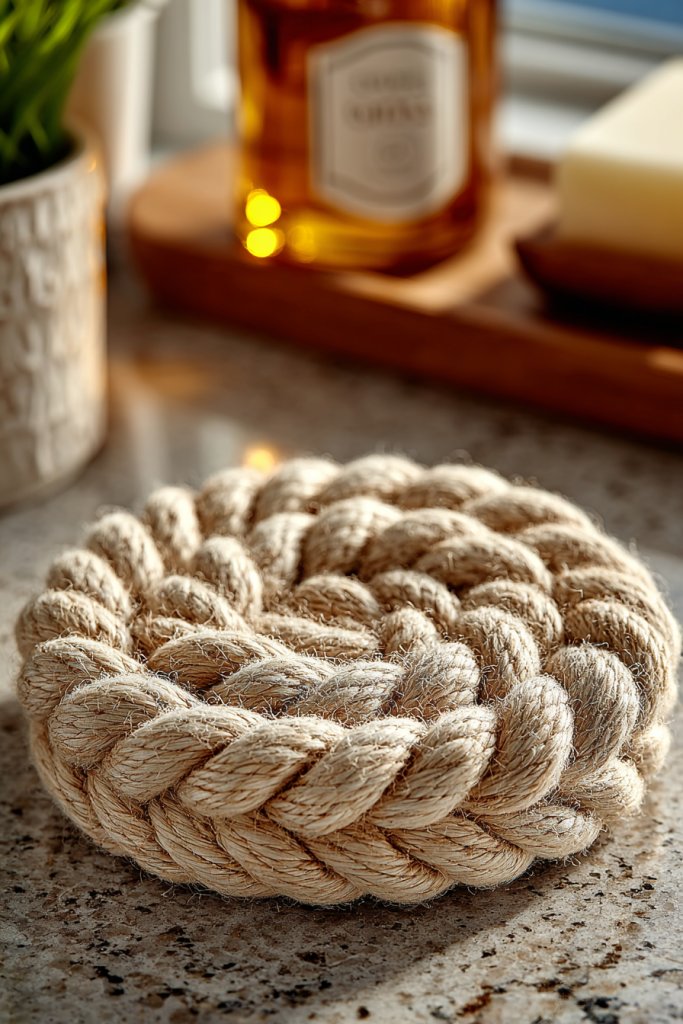
Tired of boring trivets or mats that don’t match your kitchen style? A custom coiled rope trivet or mat combines functionality with handmade charm. It’s an easy DIY project that adds texture and personality to your countertops or table.
Recommended Products to replicate this idea
| # | Preview | Product | |
|---|---|---|---|
| 1 |

|
Household Essentials All-Purpose Cotton Clothesline Rope, 100, Off White | Check Latest Price |
| # | Preview | Product | |
|---|---|---|---|
| 1 |

|
Walfos Silicone Trivet Mats - 4 Heat Resistant Pot Holders, Multipurpose Non-Slip Hot Pads for... | Check Latest Price |
Imagine a circular or square mat made from tightly coiled jute or cotton rope, with a decorative center or border. The coiled texture creates a rustic, artisanal feel that elevates your serving or prep area. It looks both sturdy and stylish, introducing natural elements into your decor.
Use different colors of rope for a layered or striped effect. Mix materials like jute, hemp, or nylon for varied textures. Shape the mat as a circle, square, or abstract form to suit your space. Add decorative accents like beads or metallic thread for extra detail.
Start by coiling the rope tightly and securing it with hot glue or strong adhesive as you go. Build up layers until reaching desired thickness. Finish the edges with a decorative or reinforced border. Seal the bottom with a non-slip material or felt pads for stability. Use as a trivet, placemat, or decorative piece.
Personalize with painted initials, patterns, or color blocks. Create sets with different sizes or shapes for versatility. Incorporate your favorite color schemes or themes for holidays. These pieces make thoughtful, handmade gifts for friends and family.
A coiled rope trivet is both functional and artistic, giving your space a handcrafted touch. It’s a simple project that yields practical, decorative results. With a bit of creativity, you can craft versatile pieces that enhance your home’s style.
17. DIY Framed Fabric or Paper Art
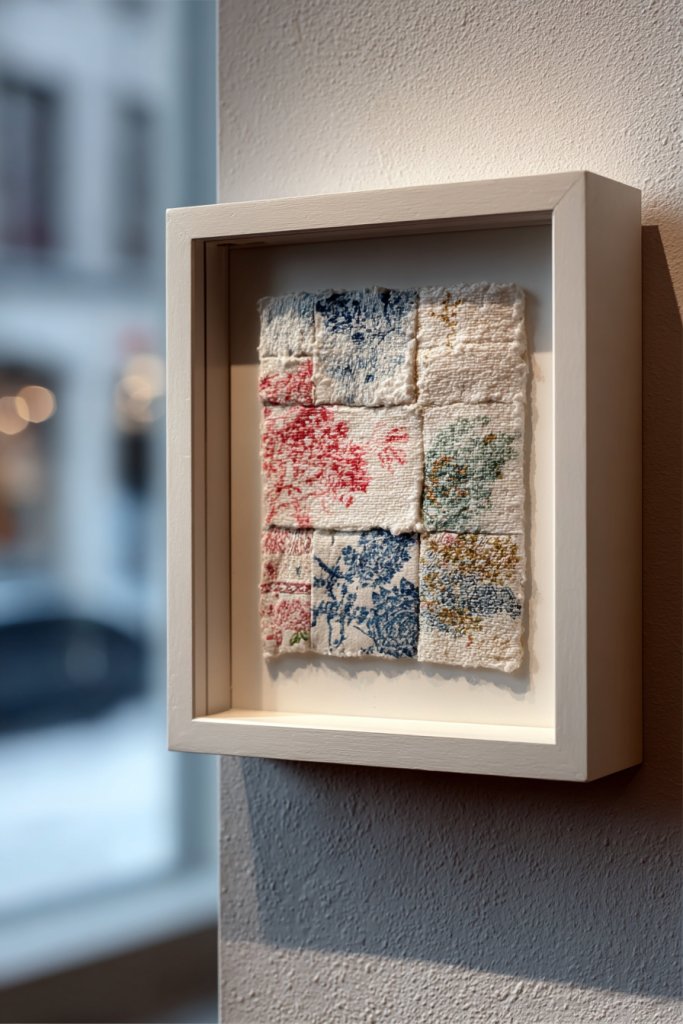
Looking for an affordable way to add color and texture to your walls? DIY framed fabric or paper art offers a versatile, personalized solution. It’s a simple craft that transforms ordinary materials into striking decor pieces that reflect your style.
Recommended Products to replicate this idea
| # | Preview | Product | |
|---|---|---|---|
| 1 |

|
Califortree 8x8 Shadow Box Frame with Soft Linen Back - Push Pins Included, Memory Box Display Case... | Check Latest Price |
| # | Preview | Product | |
|---|---|---|---|
| 1 |
|
24 Sheets 12 Designs Scrapbook Paper Pad,6"×6” Single-Sided Decopodge Craft Cardstock... | Check Latest Price |
Visualize a frame filled with textured fabric featuring embroidery, quilting, or bold printed patterns. Alternatively, use handmade or decorative paper with embossed, painted, or collaged elements. The framed art adds visual interest and depth, making your walls look curated and intentional. The mix of textures and colors brings energy and personality.
Choose fabrics or papers that complement your decor—think floral prints, geometric patterns, or solid colors. Use different frame styles—vintage, modern, or distressed—to match your aesthetic. Arrange multiple pieces for a gallery wall or display singular impactful pieces. Change the content seasonally for variety.
Cut your fabric or paper to fit the frame, then attach with double-sided tape or glue for a smooth finish. Use acid-free adhesive for paper to prevent deterioration. Mount the framed pieces on your wall with appropriate hardware. For extra flair, add decorative mats or borders inside the frame. Ensure everything is level and secure.
Personalize with hand-painted designs, stitched patterns, or collaged elements. Incorporate your favorite colors or themes—botanical, abstract, or sentimental. Mix textures by combining fabric and paper within a single frame. Rotate or update artwork seasonally to keep your decor fresh.
DIY fabric or paper framed art is an accessible way to boost your interior style with personal touches. It’s budget-friendly, customizable, and an enjoyable craft. You’ll feel proud showcasing your creative efforts in your home.
18. Personal Touch with Handwritten Quotes on Chalkboards or Boards
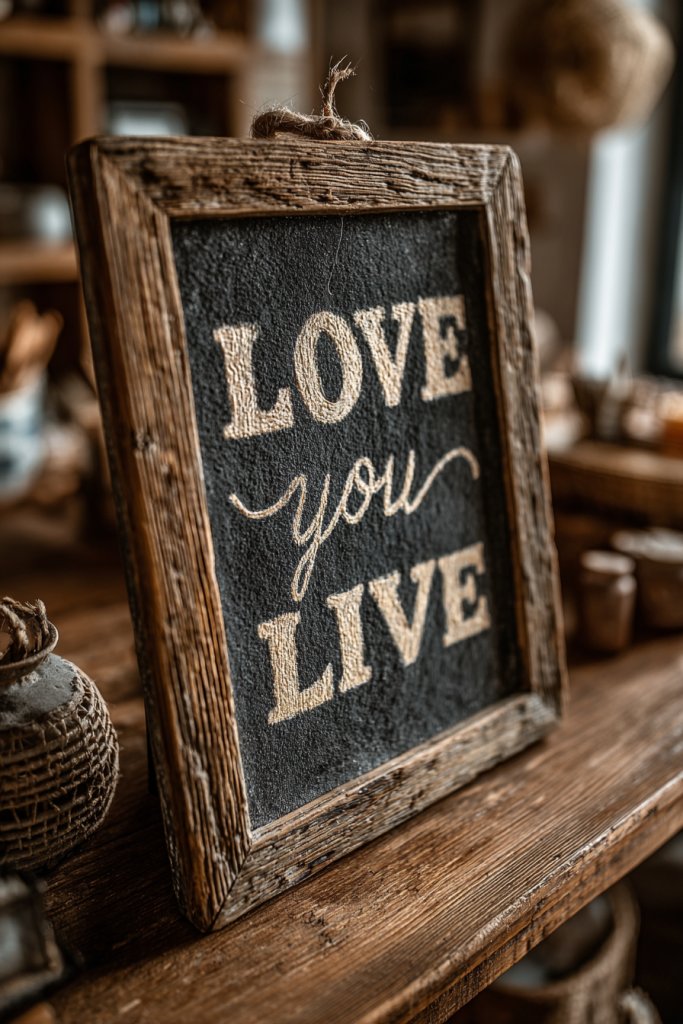
Want a quick, impactful way to inspire yourself and guests? Handwritten quotes on chalkboards or decorative boards are a classic DIY that adds personality and motivation to any space. They’re easy to update and perfect for daily affirmations or funny sayings.
Recommended Products to replicate this idea
| # | Preview | Product | |
|---|---|---|---|
| 1 |

|
Better Office Products Framed Tabletop Chalkboard Sign, 9.5" x 14", Rustic Wood Frame, Small... | Check Latest Price |
| # | Preview | Product | |
|---|---|---|---|
| 1 |

|
Bandle B. Chalk Markers - 8 Vibrant, Erasable, Non-Toxic, Water-Based, Reversible Tips. For Glass or... | Check Latest Price |
Imagine a sleek black chalkboard or painted wooden board with elegant script or bold lettering featuring your favorite quote. The handwritten style adds a personal, authentic touch that feels warm and inviting. Surround it with simple decor like framed photos or decorative accents to complete the look. The result is an inspiring focal point.
Use different fonts, colors, and lettering styles—calligraphy, block, or cursive—to match your mood. Incorporate decorative elements like borders, doodles, or illustrations for extra flair. Change the message regularly, or create seasonal or motivational themes. You can also use magnetic boards for interchangeable quotes.
Choose a chalkboard or paint a wooden surface with chalkboard paint or chalk-friendly paint. Use chalk markers or regular chalk for lettering, practicing your style beforehand. Add decorative borders or embellishments with paint or stickers. Mount on the wall securely and write your quote, using stencils if needed for precision. Clean and update regularly.
Personalize with handwriting, decorative fonts, or color accents. Incorporate your favorite sayings, affirmations, or humorous quotes. Frame the board for a polished look or leave it rustic. Use themed messages for holidays or special occasions. It’s a simple way to keep your decor fresh and meaningful.
A handwritten quote on a chalkboard adds a personal, motivational touch that can uplift your daily mood. It’s an easy DIY that combines creativity with functionality. With just a few supplies, you craft a versatile piece that inspires and delights.
Conclusion
These DIY home decor ideas showcase a wide spectrum of styles and techniques, providing you with plenty of inspiration to personalize your living space. From charming wall art to cozy accents, each idea is designed to help you create a home that reflects your personality. Don’t hesitate to try these projects and infuse your space with your own creative flair. Your dream home is just a DIY project away—start crafting today and make every corner uniquely yours!