I have been, or can be if you click on a link and make a purchase, compensated via a cash payment, gift, or something else of value for writing this post. As an Amazon Associate, I earn from qualifying purchases. Please read my full Affiliate Disclosure for more information.
Imagine walking into a room that instantly sparks joy and creativity—that’s the magic of a beautifully painted wall. Creative wall painting ideas have gained immense popularity because they allow homeowners to showcase their personality and artistic flair, turning blank walls into captivating focal points.
In this article, you’ll find a diverse array of innovative ideas that can transform any space. Whether you’re into bold patterns, subtle textures, or inspiring murals, these concepts will inspire you to craft a truly unique environment that reflects your style and creativity.
1. Geometric Tape Art for Modern Minimalism
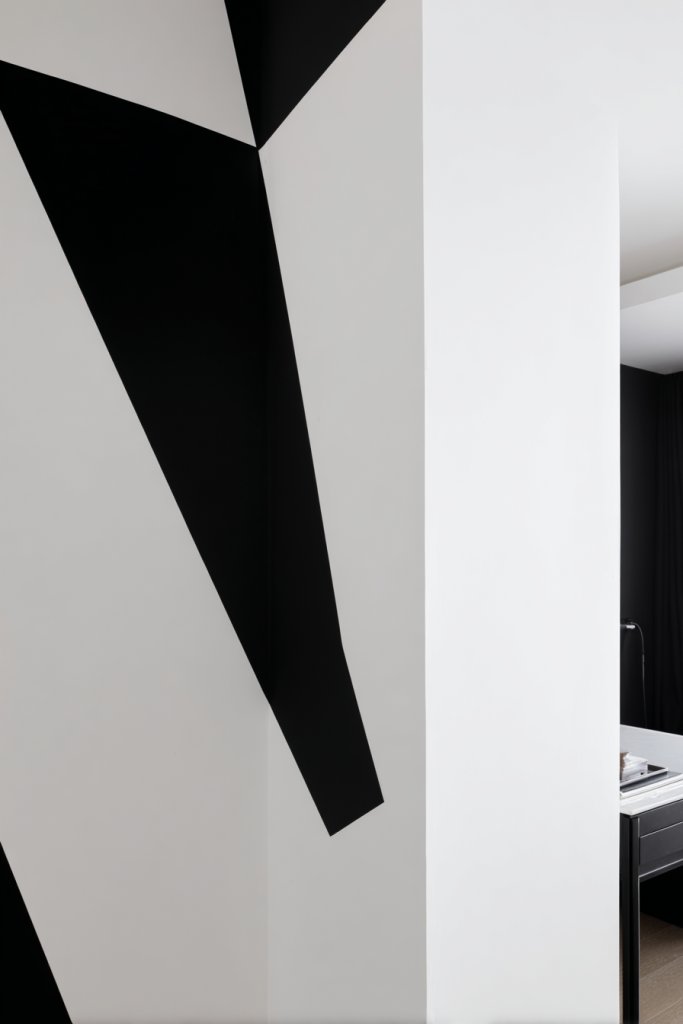
Ever stared at a blank wall and felt like it’s just screaming for a little personality? Maybe you want something bold but not over the top, something that screams modern chic. Sometimes, plain walls just don’t cut it when you’re trying to impress guests or boost your own mood. Geometric tape art offers a clean, sophisticated way to add visual interest without a full repaint.
Recommended Products to replicate this idea
| # | Preview | Product | |
|---|---|---|---|
| 1 |

|
Mr. Pen- Washi Tape Set, 8 Rolls, Geo Labyrinth, Decorative Tape, Washi Tapes, Scrapbook Tape,... | Check Latest Price |
| # | Preview | Product | |
|---|---|---|---|
| 1 |

|
4 Rolls Premium Painters Tape, Blue Tape, Masking Tape, Paint Tape for Multi-Purpose, Painting,... | Check Latest Price |
Imagine crisp, sharp lines forming striking shapes across a neutral background. Bright colors or metallic shades pop against matte walls, creating an eye-catching contrast. The tape forms perfect angles and intricate patterns, giving your space an artful, almost gallery-like feel. As light hits the textured edges, it creates subtle shadows that make the design come alive.
You can go for monochrome minimalism or mix bold colors for a playful vibe. Small spaces benefit from subtle lines, while large walls can handle larger, more complex patterns. For a seasonal twist, incorporate metallic or glitter tape in the holidays. Even vertical or horizontal stripes work if you want a more subdued look. It’s all about matching your style and space.
Grab painter’s tape in your favorite colors and start by sketching out your pattern with a pencil. Use a level to ensure straight lines—nobody wants crooked geometry! Stick the tape carefully, pressing down to prevent bleed-through. Then, apply your chosen paint or spray in sections, waiting for each layer to dry before removing the tape. Finish with a clear sealant if you want extra durability. This DIY project is surprisingly quick and budget-friendly.
Add metallic or glow-in-the-dark tape for a fun twist at night. Customize your pattern with your initials or favorite symbols for a personal touch. Incorporate textured paint within the geometric shapes for extra depth. Even layering multiple colors can create a 3D effect that makes your wall a conversation piece.
This look keeps your space modern and fresh with minimal fuss. It’s a bold statement that’s easy to change whenever your style evolves. With a little patience, you can transform a blank wall into a focal point that feels uniquely yours. Ready to tape your way to a stunning upgrade?
2. Ombre Gradient Walls with Sponging Technique
Has your wall ever looked dull and flat, making the whole room feel uninspired? An ombre gradient can create a stunning visual impact without the need for complex art. It’s perfect if you want a sophisticated backdrop that adds depth and dimension effortlessly. Plus, it’s a technique that even beginners can master with a bit of practice.
Recommended Products to replicate this idea
| # | Preview | Product | |
|---|---|---|---|
| 1 |

|
WAFJAMF 30 Pcs Assorted Size Round Sponges Brush Set 4 Sizes DIY Painting Tools- Yellow | Check Latest Price |
| # | Preview | Product | |
|---|---|---|---|
| 1 |

|
Rust-Oleum Coastal Blue Chalked All-in-One Ultra Matte Paint | One Coat Coverage | No Primer,... | Check Latest Price |
Picture a wall transitioning smoothly from soft blush pink at the top to deep berry at the bottom. The gradient feels almost velvety, inviting your eyes to wander across it. The sponge application creates a slightly textured surface that catches light differently throughout the day. It’s like a watercolor painting brought to life on your wall, transforming space into a calming oasis.
Choose warm hues for cozy spaces or cool tones for a calming effect. You can also do a horizontal gradient for a different vibe or layer multiple shades in between for a richer effect. Seasonal colors, like autumn oranges or winter blues, make it easy to refresh your decor. Smaller accent walls can feature a subtle ombre, while large walls become dramatic focal points.
Start by selecting your color palette, ideally with shades that blend seamlessly. Use a sponge or a rag to dab on the paint in overlapping circular motions, working from the lightest to darkest shade. Keep a damp sponge handy to blend the colors smoothly and prevent harsh lines. Work in sections, blending as you go for a natural transition. Finish with a clear matte topcoat to lock in the colors and reduce sheen.
Add metallic or pearl accents within the gradient for a shimmering effect. Incorporate textured paints or glitter for extra sparkle. Personalize with a subtle pattern or stenciled motifs in certain areas to break the gradient smoothly. Pair with textured textiles or soft furnishings to complement the wall’s visual softness.
An ombre wall is a timeless choice that elevates any space with minimal effort. It’s a chic way to play with color and create an atmosphere of tranquility or vibrancy. When done right, it looks professionally painted, even if you’re a DIY novice. Go ahead, embrace the gradient for a wall that whispers elegance.
3. Metallic Accent Stripes with Painter’s Tape
Looking to add a touch of glam to your room without overdoing it? Metallic accent stripes are a fabulous way to bring a luxe vibe into your space. They’re bold enough to make a statement but simple enough to do yourself. If your current decor feels a bit flat, these shiny lines could be your quick fix.
Recommended Products to replicate this idea
| # | Preview | Product | |
|---|---|---|---|
| 1 |

|
ABEIER Metallic Acrylic Paint, Set of 24 Metallic Colors in 2oz/60ml Bottle, Rich Pigments, Non... | Check Latest Price |
| # | Preview | Product | |
|---|---|---|---|
| 1 |
|
4 Rolls Premium Painters Tape, Blue Tape, Masking Tape, Paint Tape for Multi-Purpose, Painting,... | Check Latest Price |
Imagine broad horizontal or vertical stripes shimmering in gold, silver, or rose gold against a matte background. The metallic finish catches the light from different angles, creating a dynamic glow that changes throughout the day. These stripes add a modern edge, making even a plain wall look high-end and polished. The reflective quality instantly elevates the ambiance.
You can opt for thick or thin stripes depending on how dramatic you want the effect. Try alternating metallic with matte paints or pair with bold colors like navy or emerald for extra contrast. For a more subtle look, use metallic accents only on one part of the wall or in a corner. Seasonal color choices, such as copper for fall, can also refresh the vibe.
Start by marking your stripe lines with a pencil and a level for accuracy. Tape off the edges carefully, ensuring the tape adheres firmly to prevent paint bleed. Use a foam roller or brush to apply metallic paint, applying multiple thin coats for a smooth, shiny finish. Carefully remove the tape before the paint dries completely to keep lines crisp. For even more shine, finish with a clear gloss sealer.
Incorporate textured or patterned metallic tapes for added visual interest. Mix in matte stripes for a layered look or add small metallic accents like dots or borders. Use contrasting colors in adjacent areas to make the stripes stand out even more. This approach works well in both modern and eclectic spaces, adding just the right amount of luxury.
Metallic stripes are surprisingly versatile and can suit almost any decor style. They’re an instant upgrade that feels sophisticated without a hefty price tag. With a steady hand and patience, you can achieve a perfectly aligned, high-gloss finish that looks like it came from a pro. Ready to add some shine to your walls?
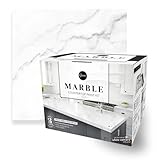
4. Faux Marble Effect with Sponging and Strokes
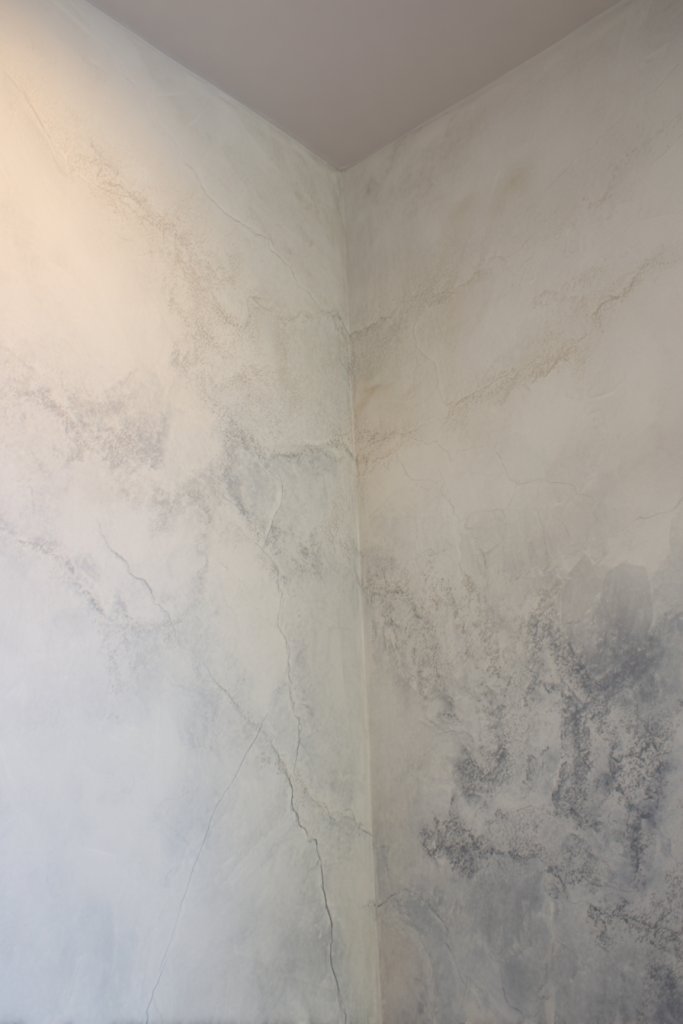
Ever wished your walls could look as luxurious as real marble without the hefty price or heavy installation? Faux marble wall techniques give you that high-end look with a DIY twist. It’s perfect if you want elegance but don’t want to commit to actual stone or tile. Plus, it’s a fun project that adds texture and depth.
Recommended Products to replicate this idea
| # | Preview | Product | |
|---|---|---|---|
| 1 |
|
Giani Marble Easy Epoxy Countertop Paint Kit (Carrara White) | Check Latest Price |
| # | Preview | Product | |
|---|---|---|---|
| 1 |

|
NAROA Artist Natural Sea Sponges for Painting 8 Pack | Unbleached Unique Art Tool Set | Suitable for... | Check Latest Price |
Picture swirling veins of white, gray, and soft gold running through a polished-looking surface. The textured strokes mimic the natural patterns found in real marble, giving your wall a rich, layered feel. The subtle variations in color and veining make it impossible to distinguish from the genuine article. The overall effect is sophisticated, timeless, and perfect for creating a statement wall.
Choose classic white and gray for a modern look or go for bold black with gold veins for dramatic impact. You can also customize the veining—thinner for subtle elegance or thick for a more striking appearance. This technique works well in bathrooms, kitchens, or even entryways. Adjust the intensity of the veining depending on whether you want a subtle or bold marble effect.
Begin by painting your wall with a base color, usually white or light gray. Use a sponge or stippling brush to dab darker shades in vein-like patterns, blending lightly for realism. Use a fine brush or a rag to add fine veins and details, layering as needed. To finish, apply a clear glossy sealer or varnish for a polished surface. Practice on scrap material first to perfect your veining technique. This project requires patience but yields a stunning result.
Integrate metallic or shimmer paints within the veining for extra luxury. Add subtle highlights with a dry brush to create depth. Pair this wall with sleek, modern furniture and minimal decor to let the marble effect stand out. Personal touches like gold accents or textured wall panels can further elevate this look.
Faux marble is a clever way to upgrade your space with a classic touch. It makes a room look expensive and stylish without the cost. With some practice and patience, you’ll have a gorgeous feature wall that rivals real marble. Who knew painting could look this luxe?
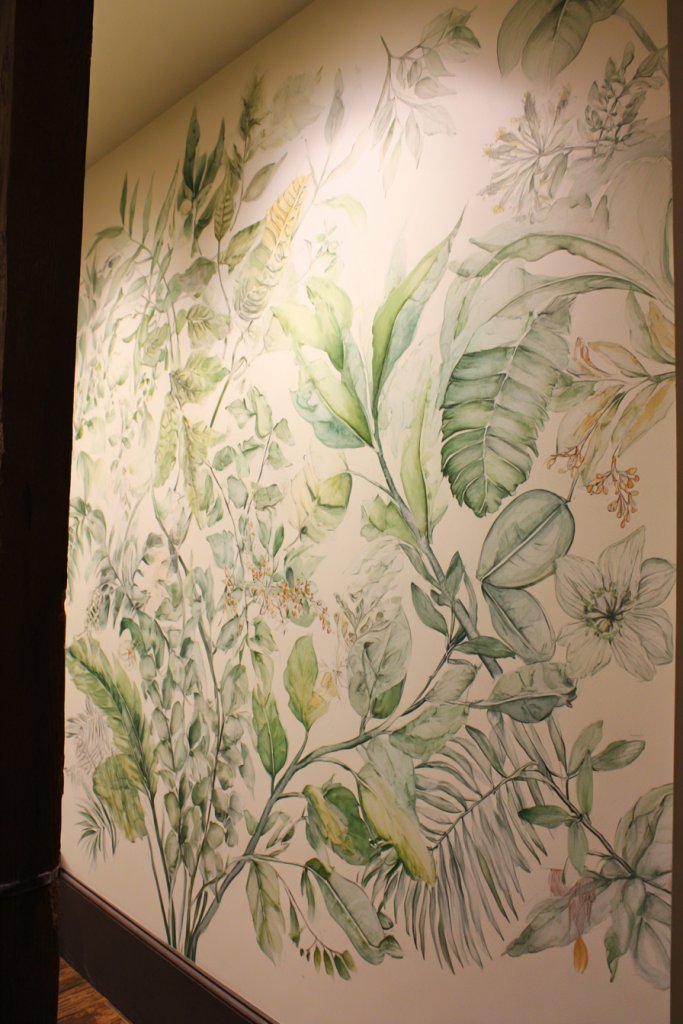
5. Hand-Painted Botanical Mural for a Nature-Inspired Touch
Does your space feel a little lifeless or sterile? Adding a touch of nature can completely transform a room’s vibe. A hand-painted botanical mural brings the outdoors inside, creating a fresh, organic ambiance. It’s an artistic way to personalize your space without buying mass-produced decor.
Recommended Products to replicate this idea
| # | Preview | Product | |
|---|---|---|---|
| 1 |

|
Livelynine 17.5x276 Gold Leaf Vintage Floral Wallpaper Peel and Stick Green Gold Black White... | Check Latest Price |
| # | Preview | Product | |
|---|---|---|---|
| 1 |

|
Nicpro 14 Colors Large Bulk Acrylic Paint Set (16.9 oz,500 ml) Rich Art Painting Supplies, Non Toxic... | Check Latest Price |
Visualize lush leaves, delicate flowers, and twisting vines sprawling across your wall. The colors are vibrant yet natural, mimicking the beauty of a garden in full bloom. The brushstrokes add a handcrafted charm, making your wall a living canvas. This mural invites tranquility and a connection to nature in your everyday environment.
Choose your favorite plants, from tropical palms to wildflowers, depending on your style. You can keep it monochrome for a minimalist look or go full color for a lively, energetic feel. For small spaces, a single branch or flower cluster works well; larger walls can accommodate sprawling landscapes. Seasonal themes, like autumn leaves or spring blossoms, keep the mural feeling fresh.
Start by sketching your design lightly with a pencil or chalk. Use a variety of brushes to add detail and texture, layering colors gradually. Practice your leaves and flowers on paper first to get a feel for the strokes. Use high-quality paints suitable for walls, and seal your mural with a clear protective coat. Take your time, and don’t rush the process; this is art you’ll live with.
Incorporate personal touches such as initials or symbols within the foliage. Use metallic or iridescent paints for a subtle shimmer. Frame sections with painted borders or faux wood effects for added depth. This mural can evolve over time—add new plants or flowers as your style changes.
A botanical mural connects you to nature and adds a calming, beautiful focal point. It’s a creative project that results in a truly unique feature wall. With patience and a bit of practice, you’ll create a masterpiece that feels personal and inspiring. Time to get your inner artist blooming!
6. Color Block Walls with Painter’s Tape for Bold Contrast

Feeling overwhelmed by a space that lacks definition or personality? Color blocking can turn a dull wall into a bold statement piece. It’s a simple, impactful technique that creates visual separation and modern flair. Plus, it’s a DIY-friendly project that can be customized endlessly.
Recommended Products to replicate this idea
| # | Preview | Product | |
|---|---|---|---|
| 1 |
|
4 Rolls Premium Painters Tape, Blue Tape, Masking Tape, Paint Tape for Multi-Purpose, Painting,... | Check Latest Price |
| # | Preview | Product | |
|---|---|---|---|
| 1 |

|
Chroma Mural Paint, Assorted Primary Colors, Pints, Set of 6 | Check Latest Price |
Imagine a wall divided into bright, contrasting blocks of color—deep blues next to vibrant yellows, or soft pastels paired with rich hues. The sharp edges and clean lines give a crisp, contemporary look. The blocks catch the light differently, adding depth and vibrancy to the room. It’s like a giant, abstract piece of art that energizes your space.
Use two to four colors for a balanced look or go wild with multiple shades for more complexity. Vertical blocks can elongate a ceiling, while horizontal ones can make a room feel wider. For a softer aesthetic, choose pastel tones; for drama, opt for jewel tones. Seasonal color palettes, such as warm autumn shades, can refresh your decor.
Start by sketching your layout and marking sections with painter’s tape. Use a level to keep your lines straight and tape carefully, pressing down firmly. Apply your chosen paint with a roller or brush, working within each taped section. Remove the tape while the paint is still slightly wet to ensure crisp edges. Touch up any imperfections once dry. This method is quick and offers a big visual payoff.
Add metallic or glitter accents within some blocks for a luxe touch. Incorporate textured paints for a tactile element. Use different finishes—matte for some blocks, gloss for others—to add visual interest. Coordinate the color blocks with your furniture and accessories for a cohesive look.
Color blocking is a versatile way to showcase your style boldly and confidently. It’s a fun project that instantly modernizes any room. With a steady hand and patience, you can achieve a professional-looking, vibrant wall that reflects your personality. Time to block out some creativity!
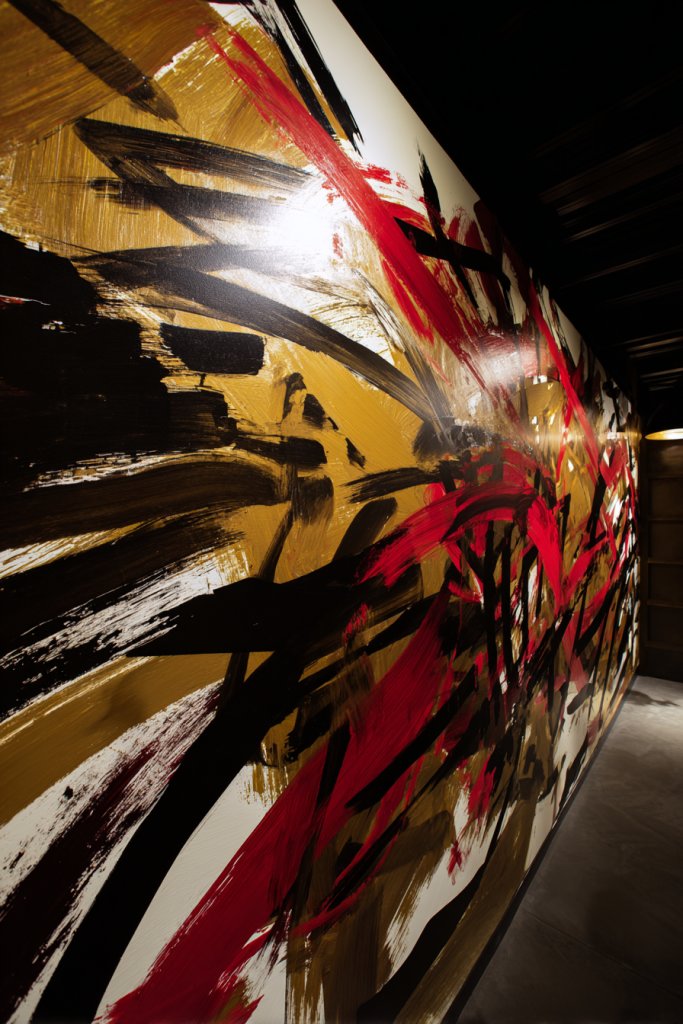
7. Abstract Expressionist Art with Freeform Brushstrokes
Do you want to add an artistic, energetic vibe to your walls without the constraints of perfect symmetry? Abstract expressionist art lets you unleash your creativity with spontaneous brushstrokes and splatters. It’s a way to make your space feel alive and dynamic, perfect for those who love a bit of chaos with style.
Recommended Products to replicate this idea
| # | Preview | Product | |
|---|---|---|---|
| 1 |

|
Large Framed Black and White Abstract Wall Art for Living Room, 3 Piece Big Canvas Prints Paintings... | Check Latest Price |
| # | Preview | Product | |
|---|---|---|---|
| 1 |
|
Nicpro 14 Colors Large Bulk Acrylic Paint Set (16.9 oz,500 ml) Rich Art Painting Supplies, Non Toxic... | Check Latest Price |
Imagine bold, sweeping strokes in vivid colors layered randomly across your wall. Drips and splatters add an element of unpredictability, mimicking an artist’s wild studio. The overlapping textures and colors create a sense of movement and emotion. This style turns your wall into a piece of modern art that’s full of personality and energy.
Choose a monochrome palette for a more subdued look, or go for a riot of contrasting colors for maximum impact. You can focus on a single large canvas or extend the design across an entire wall. Incorporate metallic or iridescent paints for added shimmer. This technique suits eclectic, boho, or contemporary interiors.
Start by preparing your wall with a neutral base color. Use wide brushes, sponges, or even your hands to apply paint freely. Layer different shades, allowing some to drip or splatter for texture. Use a palette knife or toothbrush to flick paint onto the surface for splatters. Keep a rag nearby to clean up drips and mistakes. Let each layer dry before adding more details.
Add metallic accents or glitter in some of the splatters for extra flair. Incorporate stenciled shapes or symbols to add contrast to the chaos. Personalize the colors based on your mood or room theme. Pair this wall with minimalist furniture to keep the focus on the art.
Abstract expressionist art is all about embracing imperfection and spontaneity. It’s a liberating way to create a statement wall that truly reflects your personality. With a bit of boldness and practice, you’ll produce a lively, engaging feature that’s uniquely yours. Get ready to make some beautiful messes!
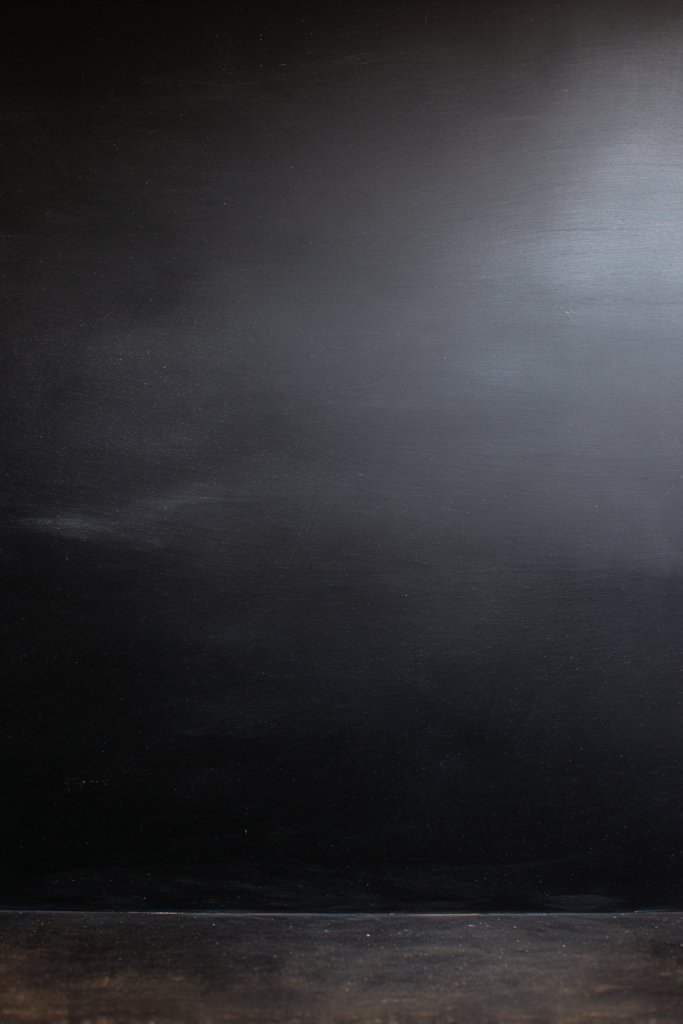
8. Chalkboard Wall for Dynamic, Changeable Messages
Ever wish you had a space to jot down ideas, reminders, or doodles that’s not cluttering your fridge? A chalkboard wall offers a functional yet stylish way to keep your space interactive. It’s perfect for families, creatives, or anyone who loves to change things up regularly. Plus, it’s a fun DIY project that transforms a boring wall into a versatile canvas.
Recommended Products to replicate this idea
| # | Preview | Product | |
|---|---|---|---|
| 1 |

|
Rust-Oleum 206540 Chalkboard Brush-On Paint, 30 oz, Black | Check Latest Price |
| # | Preview | Product | |
|---|---|---|---|
| 1 |

|
Extra Large Chalkboard Peel and Stick Paper 9 Feet roll (108 inches) + (5) Color Chalk Included - by... | Check Latest Price |
Visualize a wall painted in matte black or dark gray with chalk drawings of quotes, calendars, or whimsical sketches. The chalk creates a vivid contrast, and you can easily erase or add new designs whenever inspiration strikes. The textured surface invites playful interactions and personal expression. It’s a dynamic backdrop that evolves with your daily life.
Choose bright, bold chalk colors or soft pastel shades depending on your decor style. Cover an entire wall or create a dedicated section for notes and art. Frame the chalkboard with decorative molding or paint a border for a finished look. Seasonal or themed drawings keep the space lively and engaging.
Start by priming your wall with a chalkboard paint, applying multiple coats for a smooth, durable surface. Use painter’s tape to define clean edges and corners. Once dry, start with simple sketches or quotes, using chalk or chalk markers. To ensure longevity, seal the surface with a clear topcoat designed for chalkboard paint. Regular cleaning and touch-ups keep it looking fresh.
Add decorative elements like colorful borders or stencil patterns around the chalkboard area. Incorporate magnetic paint beneath for extra functionality. Use different chalk styles—thick for bold statements, fine for details. Change the messages seasonally or for special occasions to keep the space interesting.
A chalkboard wall turns your space into an ever-changing hub of creativity and organization. It’s a fun way to express yourself and stay inspired daily. With minimal effort, you create a feature that’s both practical and artistic. Ready to make your wall your new favorite spot?
9. Vintage Distressed Wall Finish with Faux Techniques
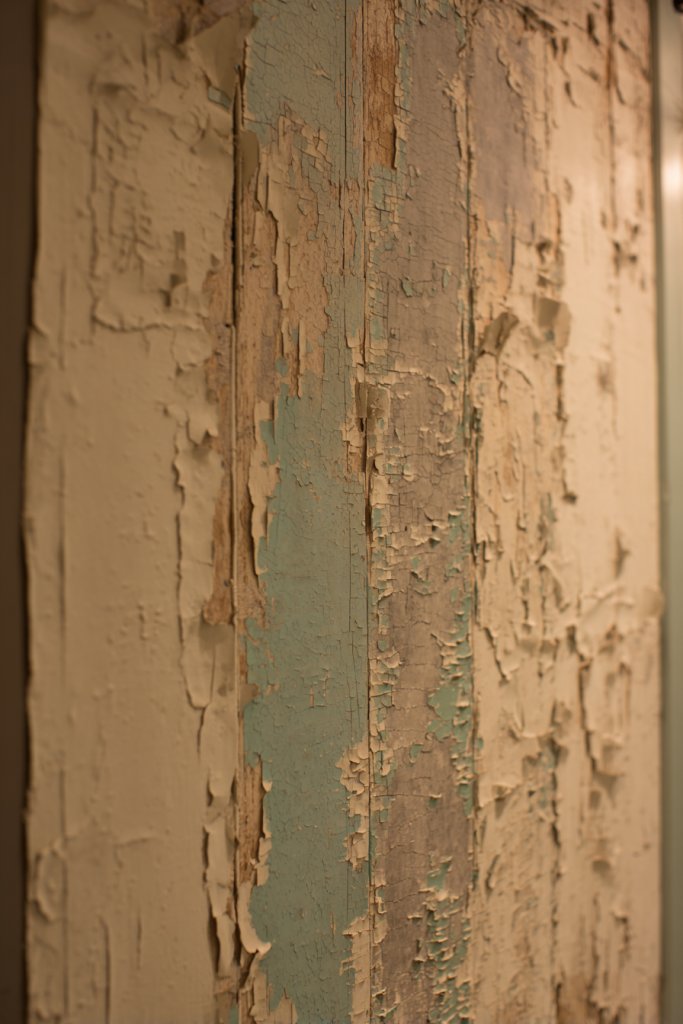
Are you craving a cozy, rustic charm that feels like it’s been loved for decades? A vintage distressed wall finish offers that worn-in, nostalgic look without the need for actual aging. It’s perfect for creating a warm, inviting atmosphere that adds character and history. Plus, it’s a creative way to hide imperfections.
Recommended Products to replicate this idea
| # | Preview | Product | |
|---|---|---|---|
| 1 |
|
Giani Wood Look Paint Kit for Front & Interior Doors (English Oak) | Check Latest Price |
| # | Preview | Product | |
|---|---|---|---|
| 1 |

|
Ranger TDA46967 Tim Holtz Distress Micro Glaze,Watercolor, 1 oz | Check Latest Price |
Imagine a wall with layers of muted pastel or earthy tones peeking through cracks and worn patches. The textured surface looks like a piece of old plaster or weathered paint, telling a story of time and history. Subtle distressing techniques reveal glimpses of underlying colors or materials, adding depth and authenticity. The overall effect is charmingly imperfect, yet elegant.
Choose lighter, neutral shades for a shabby chic look or darker tones for a more dramatic, antique feel. Combine with vintage furniture, distressed wood, or wrought iron accents. You can also incorporate faux wallpaper or painted patterns that look aged and cracked. Seasonal accents like cozy textiles or candles enhance the warm, vintage vibe.
Start with a base coat of your chosen color. Use a sponge or brush to add layers of contrasting shades, focusing on areas you want to appear distressed. Employ tools like a putty knife or sandpaper to gently scrape or chip away paint. For authenticity, add crackle medium or glaze to create an aged appearance. Seal with matte varnish to protect your work.
Add peel-and-stick faux wallpaper or stencil antique motifs for extra detail. Incorporate decorative hardware or fixtures that look vintage. Use waxes or glazes to highlight textured areas and create a worn effect. Mix and match distressed finishes with modern elements for a balanced, eclectic style.
A vintage distressed wall can transform your space into a storybook setting full of charm. It’s a cost-effective way to add depth and warmth, making your home uniquely yours. With patience and a little creativity, you’ll craft a timeless backdrop that invites admiration. Ready to embrace the aged elegance?
10. Tropical Sunset with Blended Colors and Silhouettes
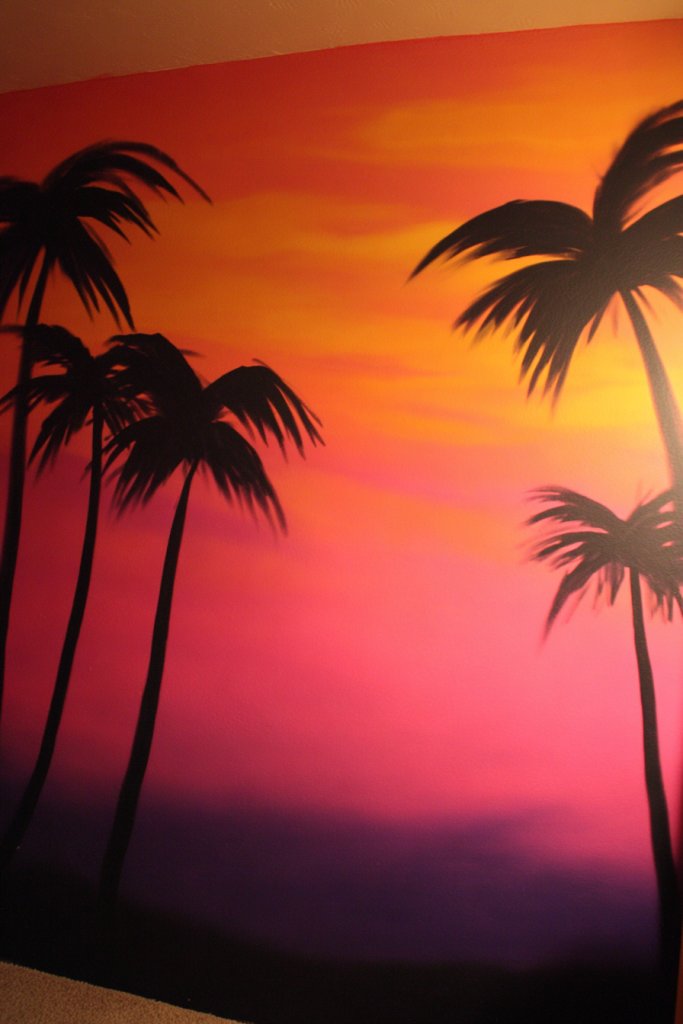
Craving a warm, relaxing vibe that transports you to a tropical paradise? A sunset-inspired wall with blended hues can make your room feel like a vacation. It’s an eye-catching focal point that brings serenity and warmth, perfect for living rooms or bedrooms. Plus, it’s easier than you might think to recreate that stunning horizon.
Recommended Products to replicate this idea
| # | Preview | Product | |
|---|---|---|---|
| 1 |
|
Fightal - Beach Wall murals at Dusk Peel and Stick self Adhesive Sunset Wallpaper for Bedroom Living... | Check Latest Price |
| # | Preview | Product | |
|---|---|---|---|
| 1 |

|
wondever Boho Palm Tree Wall Stickers Large Tropical Tree Sunset Peel and Stick Wall Art Decals for... | Check Latest Price |
Picture a gradient of vibrant oranges, pinks, and purples fading into deep blues or black silhouettes of palm trees, birds, or islands. The smooth blending mimics a real sunset, creating a calming, picturesque scene. The contrast between the vibrant sky and the dark silhouettes adds depth and drama to your space. It’s like capturing a fleeting moment of natural beauty.
Use warm hues for a cozy, intimate feel or cooler shades for a tranquil atmosphere. You can opt for a full wall mural or a smaller accent area. Incorporate metallic or iridescent paints for a shimmering sky effect. Seasonal themes, such as a winter sunset with icy tones, can refresh your decor.
Start with a neutral or light-colored base coat. Use sponges or brushes to blend colors seamlessly—begin with the lightest shade and gradually add darker tones, working from top to bottom. For silhouettes, lightly sketch your design first, then fill in with matte black or dark brown paint. Blend the edges of your silhouettes slightly into the sky for realism. Finish with a matte sealant for longevity.
Add metallic accents or glitter in the sky for a magical glow. Incorporate small, painted details like stars or clouds for extra dimension. Personalize with your favorite tropical motifs or symbols. Pair with textured fabrics or light-colored furniture to complement the sunset scene.
A tropical sunset wall creates a warm, inviting retreat that feels both peaceful and lively. It’s a statement of escapism and joy, perfect for inspiring daily positivity. With a little patience and creativity, you’ll craft a stunning, personalized scene that transports you every day. Time to bring the tropics home!
11. Monochrome Doodle Wall for Playful, Artistic Flair
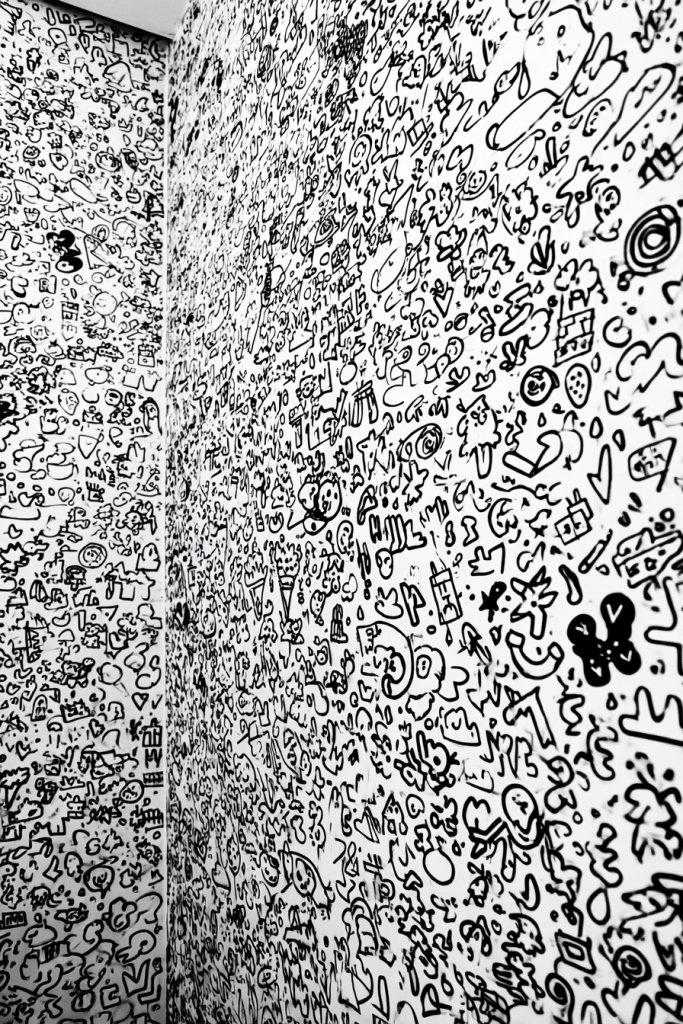
Looking for a fun way to add personality to a plain wall without committing to a full mural? A monochrome doodle wall offers a playful, artistic touch that can be both whimsical and sophisticated. It’s perfect for creative spaces or kids’ rooms, and it’s surprisingly easy to do yourself. Who says walls have to be boring?
Recommended Products to replicate this idea
| # | Preview | Product | |
|---|---|---|---|
| 1 |

|
Peeking Black Goldendoodle Sticker - for Water Bottle Car Tumbler Laptop - Doodle Dog Decal -... | Check Latest Price |
| # | Preview | Product | |
|---|---|---|---|
| 1 |

|
Artecho Acrylic Paint Markers 48 Colors, Acrylic Paint Pens with Brush Tip and Fine Tip for Stone,... | Check Latest Price |
Visualize a wall filled with quirky sketches, abstract patterns, or inspirational quotes all in one color—black, white, or a bold hue. The drawings can be spontaneous or carefully planned, depending on your mood. The result is a lively, textured surface that invites curiosity and conversation. It’s like having your own art studio right at home.
Use a single color for a clean, modern look or mix shades for more depth. Incorporate different styles, from minimalist line art to detailed illustrations. Combine with colorful accessories or keep it monochrome for a sleek aesthetic. This technique adapts well to small areas or full feature walls.
Begin by sketching your designs lightly with a pencil or chalk. Use fine-tipped markers or paint pens to create detailed drawings, or a brush for larger areas. Vary your line thickness for visual interest. Keep a steady hand and take breaks to step back and review your progress. Seal with a clear matte spray if desired for protection.
Add doodles that reflect your personality, such as favorite quotes, symbols, or abstract shapes. Incorporate metallic or neon accents to make certain elements pop. Frame sections with painted borders or add small shelf accents for added fun. It’s your personal art playground.
A doodle wall turns your space into a creative hub and shows off your artistic side. It’s a playful, approachable way to decorate and express yourself. With patience and a little practice, you’ll have a unique wall that sparks joy and inspiration every day. Ready to doodle your way to a cool space?
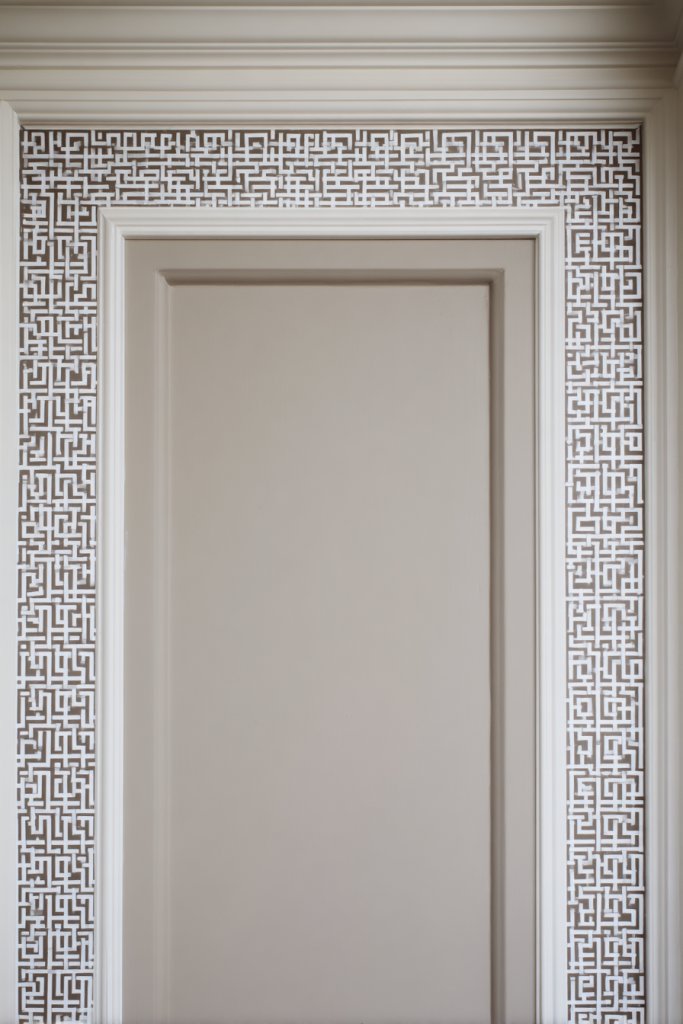
12. Stenciled Geometric Patterns for Precision and Style

Want a patterned wall that looks intricate but is actually easy to execute? Stenciled geometric designs combine style with precision, giving your space a tailored, modern edge. They’re perfect for adding visual interest without the chaos of freehand painting. The best part? You can customize the pattern and colors to match your vibe.
Recommended Products to replicate this idea
| # | Preview | Product | |
|---|---|---|---|
| 1 |

|
SHYJSHYJ 6 Pack 14'' Modern Herringbone Geometric Brick Hexagon Boho Lines Wall Stencils for... | Check Latest Price |
| # | Preview | Product | |
|---|---|---|---|
| 1 |
|
Auhoahsil Stencil Brushes Set, 5 Pcs Natural Bristle Wooden Handle Template Brushes for Wood Wall... | Check Latest Price |
Picture a repeating pattern of triangles, hexagons, or diamonds in contrasting shades—say, black and white or navy and gold. The crisp lines and symmetrical shapes create a sense of order and sophistication. When you step back, the pattern forms a mesmerizing, cohesive design that anchors the room. It’s like having a custom wallpaper but with more control and flexibility.
Mix and match different geometric shapes or scale up the pattern for a bold statement. Use metallic or matte paints depending on your aesthetic. For smaller spaces, a single accent wall with a repeating pattern works well; larger rooms can handle full coverage. You can also layer patterns for a more eclectic look.
Choose your stencil pattern and secure it to the wall with painter’s tape or low-tack adhesive. Use a dense brush or sponge to apply paint, dabbing lightly to avoid bleeding. Repeat the pattern across the wall, ensuring alignment and level placement. For precision, use a level or grid lines to keep the pattern consistent. Seal with a clear protective coat if desired.
Customize your pattern with metallic or glow-in-the-dark paints for extra flair. Incorporate accent colors in certain shapes for a layered effect. Mix different patterns or scales within the same wall for a unique look. Coordinate with other decor elements for a harmonious design.
Stenciled geometric patterns bring a sleek, professional touch with DIY ease. They’re a surefire way to elevate your decor and showcase your style. With patience and attention to detail, you can achieve a clean, modern look that impresses. Ready to stencil your way to style?
13. Color Wash Technique for Soft, Dreamy Backdrops

Looking for a subtle, calming backdrop that’s less about patterns and more about atmosphere? The color wash technique creates soft, watercolor-like effects that evoke serenity. It’s ideal for bedrooms, meditation spaces, or any area where you want a tranquil vibe. Plus, it’s surprisingly simple to achieve with minimal tools.
Recommended Products to replicate this idea
| # | Preview | Product | |
|---|---|---|---|
| 1 |

|
Transon 8pcs Round Watercolor Paint Brush Set Goat Hair for Watercolors,Acrylics,Inks,Gouache,Oil... | Check Latest Price |
| # | Preview | Product | |
|---|---|---|---|
| 1 |

|
Golden Acrylic Medium, Glazing Liquid, 32 Oz, Satin | Check Latest Price |
Imagine a gentle blend of pastel shades—lavender melting into pale pink or mint fading into sky blue—creating a seamless flow. The textured, layered look adds depth and softness, making your wall feel like a living watercolor painting. The gentle transitions catch light beautifully, enhancing the room’s warmth and comfort. It’s a dreamy, ethereal effect that soothes every visitor.
Choose colors that complement your existing decor or evoke specific moods—calm, happiness, or nostalgia. You can do a full wall or just a section for a subtle accent. Layer different shades for more complexity or keep it simple with two tones. Seasonal palettes, such as warm earth tones or icy blues, can give your space a fresh feel.
Dilute your paint with water to achieve transparency. Use a large brush, sponge, or rag to apply the wash, starting with the lightest color and gradually adding darker shades. Work quickly for blending, and overlap areas for a seamless gradient. Use a dry brush or sponge to soften harsh edges. Finish with a matte or semi-matte clear coat to protect the delicate finish.
Add metallic or pearl accents within the wash for a subtle shimmer. Incorporate textured fabrics or soft lighting to enhance the dreamy effect. Personalize by adding faint stenciled motifs or abstract shapes. Pair with airy curtains and plush textiles for a cozy, calming space.
This technique transforms plain walls into calming works of art that invite you to unwind. It’s a flexible, forgiving method that allows for artistic expression without strict rules. With patience, you’ll create a serene backdrop perfect for relaxation or inspiration. Ready to wash your worries away?
14. Artistic Splatter and Drip Effects for Dynamic Energy
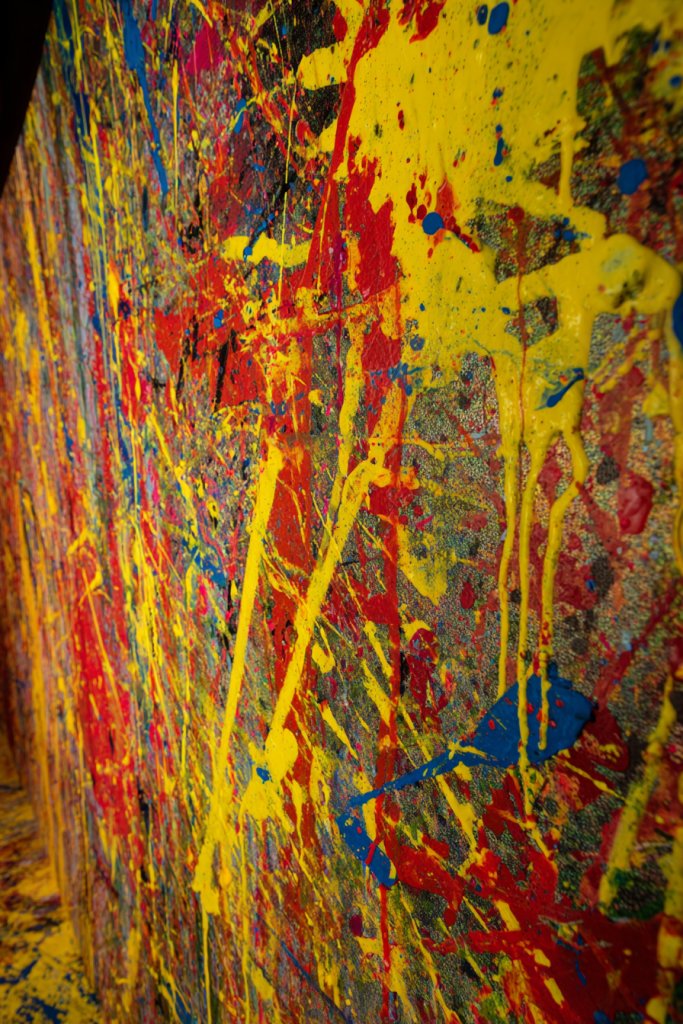
Want a wall that screams energy and spontaneity? Splatter and drip effects inject a burst of movement into any space, making it feel alive and expressive. They’re perfect for creative studios, kids’ rooms, or anyone who loves a bit of controlled chaos. Plus, it’s an easy technique that can be wildly fun.
Recommended Products to replicate this idea
| # | Preview | Product | |
|---|---|---|---|
| 1 |

|
FolkArt Drizzle Blower and Splatter Set, Durable Tools Perfect for DIY Paint Pouring Arts and Crafts... | Check Latest Price |
| # | Preview | Product | |
|---|---|---|---|
| 1 |

|
Canvas Painters Drop Cloth (Size 6 x 9 Feet - Pack of 2) - Pure Cotton Paint Drop Cloth for... | Check Latest Price |
Visualize a wall covered in vibrant, multicolored splashes and drips that seem to explode outward. The randomness creates an abstract, energetic pattern that draws the eye. Thick drips and splatters give the illusion of motion, making the wall appear dynamic and unrestrained. It’s a modern, rebellious form of art that energizes your entire room.
Use bold, contrasting colors for maximum impact or stick with a monochrome palette for a more subtle effect. Layer different sizes of splatters and drips for added texture. Incorporate metallic or neon paints to make certain splashes pop. This technique suits eclectic, boho, or contemporary aesthetics.
Prepare your wall with a neutral base or a contrasting color. Use stiff brushes, toothbrushes, or even old clothes to flick or splatter paint randomly across the surface. Practice on paper first to control the amount and size of splashes. For drips, dilute the paint slightly and let it flow down naturally. Use protective coverings and gloves for easy cleanup. Layering different colors enhances depth.
Add metallic or glow-in-the-dark paints to some splashes for extra flair. Incorporate stencil shapes or patterns within the splatters for contrast. Use different textures or finishes to highlight certain areas. Pair with minimal furniture to let the wall be the focal point.
Splatter art is all about embracing imperfection and spontaneity. It’s a bold way to showcase your personality and creativity. With a steady hand and some practice, you can craft a lively, eye-catching feature that energizes your space. Ready to splash some color?
15. Faux Brick or Stone Texture with Paint Techniques
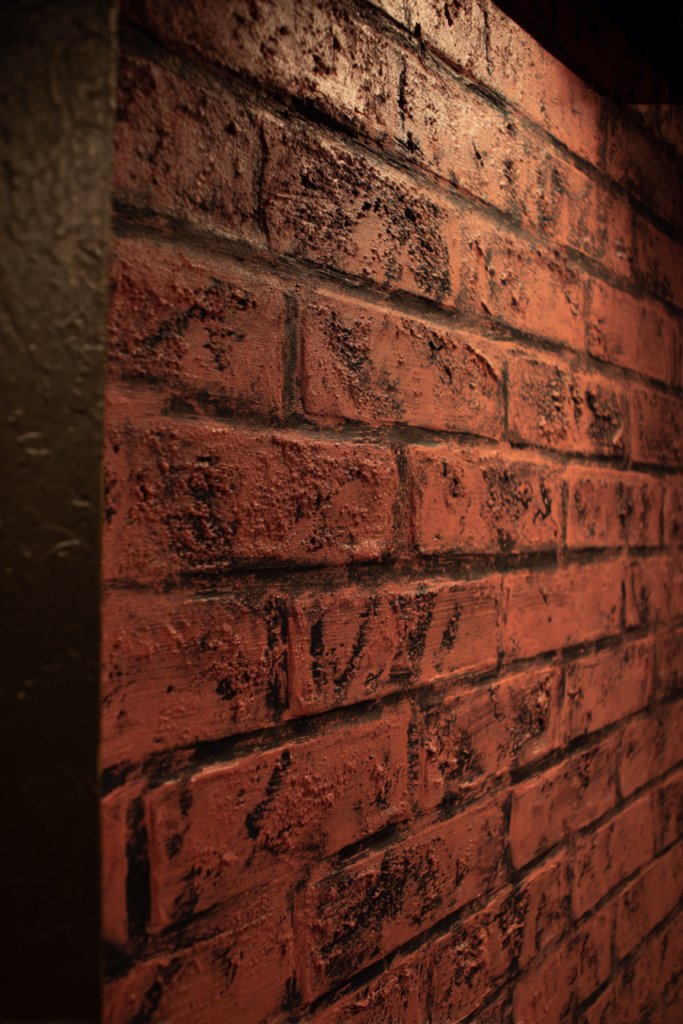
Dreaming of an industrial loft or rustic cabin vibe but not keen on heavy construction? Faux brick or stone finishes provide that textured, rugged look without the mess or cost. It’s a practical way to add depth and character to bland walls, transforming them into architectural features. Plus, it’s a fun DIY challenge.
Recommended Products to replicate this idea
| # | Preview | Product | |
|---|---|---|---|
| 1 |

|
Art3d 20-Pack 105 Sq.Ft Faux Brick 3D Wall Panels Peel and Stick in Red Brown, Self Adhesive... | Check Latest Price |
| # | Preview | Product | |
|---|---|---|---|
| 1 |

|
Nichiyo 7'' Texture Roller DIY Decorative Art Pattern Paint Roller Rubber Roller for Walls,... | Check Latest Price |
Picture a wall with painted bricks in warm reds or cool grays, each brick subtly textured with stippling or sponging. The layered paint mimics the uneven surface and natural imperfections of real stone or brickwork. The textured surface adds tactile interest, inviting you to touch and explore the wall. It creates a cozy, authentic backdrop that makes your space feel rooted in history.
Choose classic red bricks for a traditional look or go for whitewashed or painted stone for a modern twist. Incorporate grout lines with darker or lighter shades for contrast. Use stippling, sponging, or dry brushing techniques to simulate mortar and surface texture. This method works well in accent walls, fireplaces, or feature areas.
Start with a base coat of your wall color. Use a stencil or freehand paint the outline of bricks or stones. Apply multiple layers of paint using stippling brushes or sponges, varying the shades to add dimension. Use darker colors for grout lines and lighter shades for surface highlights. Add texture with a toothbrush flicking paint or a stippling brush for uneven surfaces. Seal with a matte or semi-gloss varnish for durability.
Incorporate faux mortar lines or cracks painted in with darker shades for realism. Mix in metallic or iridescent paints for a modern twist. Add small sculptural elements or faux aged details for extra authenticity. Pair with industrial or vintage furniture to complete the look.
A faux brick or stone wall brings rustic charm or urban edge without the renovation hassle. It’s a creative way to add texture and depth, making your space more inviting. With patience and the right techniques, you’ll craft a convincing, stylish feature that looks like a pro did it. Ready to build your own brick wall?
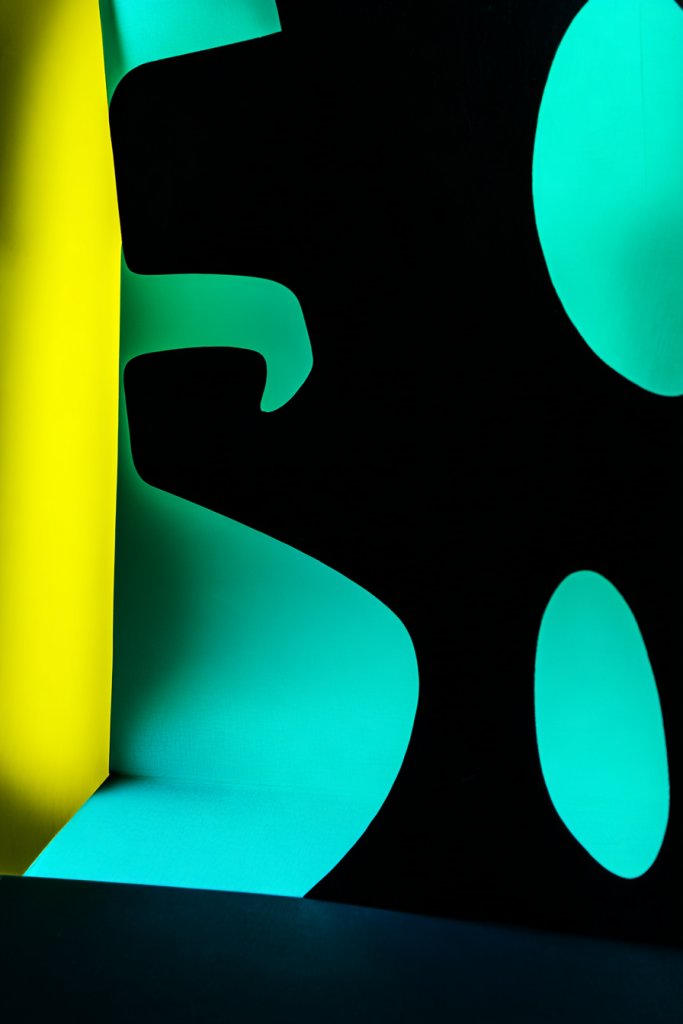
16. Silhouette Wall Art with Contrast Colors
Want to make a bold statement without cluttering your space with busy artwork? Silhouette wall art offers a sleek, graphic look that’s both modern and striking. It’s an easy way to add visual interest and personality to any room, especially if you prefer minimalist decor. Plus, it’s super customizable.
Recommended Products to replicate this idea
| # | Preview | Product | |
|---|---|---|---|
| 1 |

|
Minimalist Line Wall Art Woman Body Outline Wall Art Prints Women Figure Drawing Painting Body Line... | Check Latest Price |
| # | Preview | Product | |
|---|---|---|---|
| 1 |

|
Black and White Brush Stroke Wall Art Modern Abstract Minimalist Ink Line Painting Picture Mid... | Check Latest Price |
Imagine stark black or dark-colored silhouettes of cityscapes, trees, or abstract shapes set against a bright or neutral background. The high contrast creates a dramatic focal point that instantly draws the eye. The simple shapes tell stories or evoke feelings without the need for detailed images. It’s like a window into a different world.
Use bold black silhouettes for a high-impact look or experiment with metallic shades for a touch of glam. Incorporate different shapes—geometric, natural, or abstract—for variety. For small spaces, a single large silhouette can serve as a feature; in bigger rooms, create a mural or repeated pattern. Match the silhouette theme to your interests or decor style.
Start by sketching your silhouette design lightly with pencil. Use painter’s tape to outline the shapes or freehand with a steady hand. Fill in with high-quality, matte or gloss paint, depending on the look you want. For crisp edges, use fine brushes or stencils. Ensure the paint dries fully before removing tape to avoid smudges. Seal with a clear topcoat if needed.
Incorporate metallic accents or textured paints within the silhouettes for added depth. Add subtle background patterns or gradients to enhance contrast. Personalize with motifs that reflect your personality—favorite animals, symbols, or initials. Pair with minimal furniture to keep the focus sharp.
Silhouette art is a timeless, impactful style that can transform your wall into a piece of modern design. It’s simple yet sophisticated, allowing your personality to shine through. With patience and precision, you can create a professional-looking feature that elevates your decor. Ready to silhouette your space?
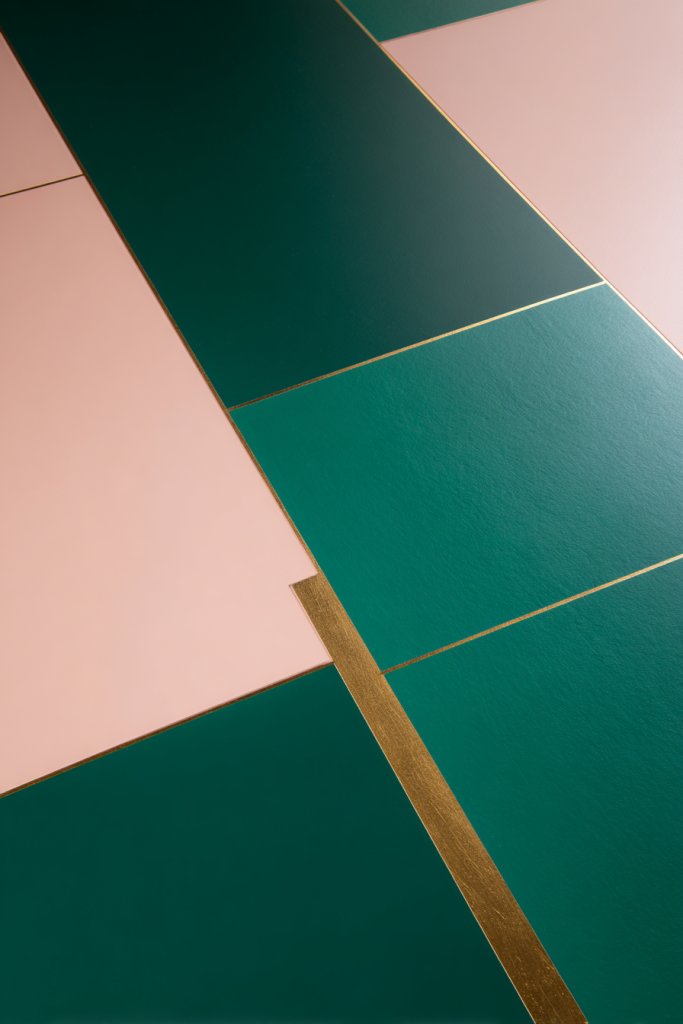
17. Color Blocking with Metallic Accents for Glamour
Looking to add a touch of glamour and sophistication without a full renovation? Color blocking with metallic accents is your answer. It’s a bold yet elegant way to define spaces and create a luxurious atmosphere. Perfect for accent walls or entire rooms, it instantly upgrades your decor. Who says you need to be a pro?
Recommended Products to replicate this idea
| # | Preview | Product | |
|---|---|---|---|
| 1 |
![Shabby Chic Chalk Furniture Paint: Luxurious Metallic Paint, Craft Paint for Home Decor, DIY, Wood Cabinets - All-in-One Paints with Shiny Metallic Finish [Antique Gold] - (8.5 oz Covers 32 sf)](https://m.media-amazon.com/images/I/4168YQQi4nL._SL160_.jpg)
|
Shabby Chic Chalk Furniture Paint: Luxurious Metallic Paint, Craft Paint for Home Decor, DIY, Wood... | Check Latest Price |
| # | Preview | Product | |
|---|---|---|---|
| 1 |

|
YUBBAEX 10 Rolls Geometric Washi Tape Set Gold Foil Masking Modern Arts Decorative Tapes for Arts,... | Check Latest Price |
Imagine large blocks of rich jewel tones combined with shimmering metallic borders or details. The contrast between matte paint and reflective metallics creates a layered, textured look. The metallic accents catch and reflect light, adding depth and a touch of opulence. It’s a striking visual that commands attention and exudes style.
Use contrasting colors for maximum drama or keep the palette monochrome with metallic touches for a more subtle effect. Try pairing deep navy with gold or emerald with silver. Incorporate metallic borders, corners, or geometric shapes for added visual interest. Seasonal themes, like gold for fall or silver for winter, help refresh the look.
Outline your design with painter’s tape, marking off sections precisely. Apply your matte base colors first, then add metallic accents with a small brush or foam roller. Use a metallic or shimmer paint for borders or shapes, applying thin coats for a smooth finish. Carefully remove tape once dry to keep clean edges. Seal with a clear protective topcoat to preserve the shine.
Mix metallic finishes—matte, gloss, or textured—to add variety. Incorporate small geometric shapes or abstract patterns within the blocks. Pair with plush textiles or reflective accessories to amplify the glamour. Customize the color palette to match your room’s decor or mood.
Color blocking with metallic accents instantly elevates any space, making it feel upscale and trendy. It’s a versatile technique that adapts to many styles, from modern to eclectic. With patience and a steady hand, you’ll achieve a stunning, luxurious feature wall that turns heads. Ready to block out some style?
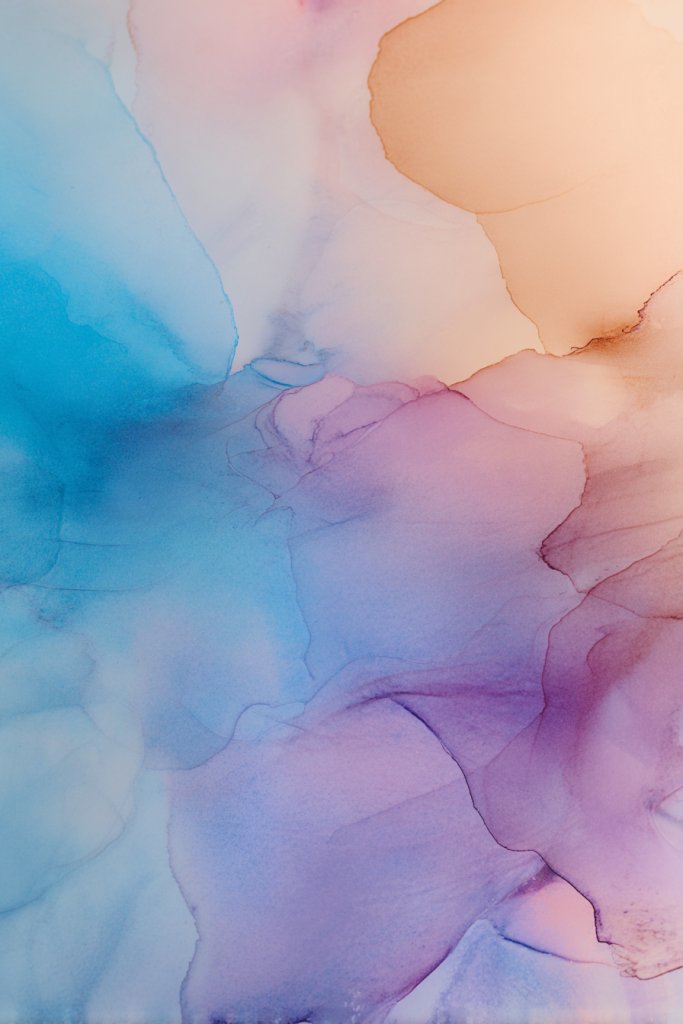
18. Watercolor-Inspired Abstract Art with Soft Bleeds
Want to add an artistic, calming backdrop that feels both modern and timeless? Watercolor-inspired abstract art creates a serene, flowing aesthetic that suits any space. It’s perfect for bedrooms, lounges, or creative corners. Plus, it’s surprisingly easy to mimic the delicate, translucent effects of watercolor paints.
Recommended Products to replicate this idea
| # | Preview | Product | |
|---|---|---|---|
| 1 |

|
Colorful Abstract Wall Art Multi Color Graffiti Canvas Pictures Bedroom Wall Decor Watercolor... | Check Latest Price |
| # | Preview | Product | |
|---|---|---|---|
| 1 |

|
Grabie 50 Colors Watercolor Paint Set, Detail Paint Brush Included, Watercolor Paints, Painting... | Check Latest Price |
Imagine gentle washes of pastel or jewel tones blending seamlessly across the wall. The soft bleeds and layered transparencies evoke a sense of calm and creativity. The subtle transitions look like a watercolor painting, adding depth and a dreamy atmosphere. This effect invites relaxation and inspiration every time you enter the room.
Choose cool tones like blues and purples for tranquility or warm hues like reds and oranges for energy. Use a large brush, sponge, or even a wet cloth to create the flowing, layered look. Incorporate subtle textures or metallic accents for extra dimension. Small-scale versions work as feature walls, while larger areas immerse the space in color.
Start with a light base coat in a neutral tone. Use diluted paints, applying with a wet brush or sponge to create soft, overlapping washes. Layer different colors, letting each dry before adding more. Use a clean, damp brush to blend edges and soften transitions. Finish with a matte or satin sealant to preserve the watercolor effect. Practice on scrap beforehand to master the bleeding technique.
Add metallic or pearl highlights within the washes for a luminous touch. Incorporate faint stenciled shapes or abstract motifs to customize the background. Pair with airy textiles, light furniture, and minimal decor to enhance the watercolor serenity. Adjust the color intensity based on your mood or room lighting.
Watercolor effects turn simple walls into calming works of art that radiate elegance. It’s a forgiving, fluid technique that produces stunning results with patience. Once finished, you’ll have a dreamy backdrop that feels both personal and artistic. Ready to paint your own watercolor wonder?
19. Patterned Borders or Frames with Painter’s Tape
Feeling like your walls are missing that polished, finished look? Patterned borders or frames add a decorative touch that elevates the simplest walls. It’s an easy way to define spaces, highlight artwork or create a visual boundary. Plus, it’s a fun project that can be customized to match your style.
Recommended Products to replicate this idea
| # | Preview | Product | |
|---|---|---|---|
| 1 |
|
6-Piece Wildflower Stencil for Painting - Large Reusable Floral Design for DIY Furniture Decor |... | Check Latest Price |
Picture a delicate painted border with intricate patterns or a bold frame outlining a feature wall. The contrast between the border and the wall color creates a sense of structure and elegance. It draws your eye inward or outward, depending on placement. When done right, it looks like a custom detail from a boutique hotel or vintage home.
Choose classic patterns like scallops, geometric motifs, or floral designs. Use metallic or contrasting colors for added impact. For a contemporary look, go for clean, straight lines; for vintage charm, incorporate ornate details. Update the border seasonally with different colors or motifs. It’s adaptable to almost any decor theme.
Use painter’s tape to mark the border’s outline, ensuring straight, even lines with a level. Sketch your pattern lightly with a pencil first. Apply your paint carefully, using a small brush for details. Remove the tape while the paint is still slightly wet to keep edges crisp. For a layered effect, add multiple borders in different colors or patterns.
Incorporate metallic or glitter paints into the border for a luxe touch. Add tiny painted motifs or accents within the border for extra detail. Use stencils for intricate designs or apply a textured finish for a tactile element. Coordinate the border with your furniture and accessories for cohesive decor.
Patterned borders or frames give your walls a custom, boutique feel without major renovations. They’re a simple yet impactful way to add style and personality. With patience and a steady hand, you can achieve a professional look that elevates your entire room. Ready to frame your space beautifully?
20. Personal Quote or Message with Hand Lettering and Bright Colors
Ever wanted a daily dose of motivation or a personal touch on your wall? Hand-lettered quotes or messages in vibrant hues can inspire, amuse, or simply remind you of what matters. It’s a highly customizable decor element that reflects your personality. Plus, it’s a fun way to practice your artistic skills.
Recommended Products to replicate this idea
| # | Preview | Product | |
|---|---|---|---|
| 1 |
|
Hethrone Black Markers for Drawing - Brush Pens with Felt Tips for Artists - Calligraphy Pens, 12... | Check Latest Price |
| # | Preview | Product | |
|---|---|---|---|
| 1 |

|
ESRICH Canvas Boards for Painting, 5 Pack Canvases for Painting 8x10 Cotton Primed Acid Free Blank... | Check Latest Price |
Imagine a bold, colorful quote painted in lively fonts across a plain wall, surrounded by decorative flourishes or simple doodles. The bright colors energize the room, making the message stand out. The hand-lettering style adds a personal, heartfelt touch that feels authentic and warm. It’s like having your own motivational poster, but more unique.
Experiment with different fonts, sizes, and colors to match your mood or decor. Incorporate decorative elements like banners, swirls, or icons to complement the message. Use metallic or neon paints for extra vibrancy. For a more subtle approach, opt for a monochrome palette or minimalist fonts. Change the quote seasonally or for special occasions.
Start by sketching your quote lightly with a pencil or chalk. Use stencils or freehand with high-quality paint pens or brushes. Choose bright, durable paints that resist fading. Work carefully to maintain consistent letter spacing and clean lines. Once dry, seal with a clear topcoat for longevity. Practice on scrap paper or small sections first.
Add decorative accents like banners, arrows, or icons that relate to your message. Incorporate metallic or glitter highlights for extra sparkle. Frame or border your quote with painted patterns or motifs. Change the message regularly to keep your space fresh and inspiring. It’s your personal daily mantra.
A hand-lettered quote transforms a plain wall into a source of daily motivation and personality. It’s an affordable, creative way to make your space truly yours. With some practice, you’ll develop your own style and create a visually appealing, uplifting feature. Ready to write your story on your wall?
Conclusion
Exploring these creative wall painting ideas opens up endless possibilities to personalize and energize your home. From intricate murals to simple geometric designs, there’s something for every taste and skill level. Don’t hesitate—pick your favorite idea, gather your supplies, and start transforming your space into a masterpiece that truly speaks to you. Your dream wall is just a brushstroke away!