I have been, or can be if you click on a link and make a purchase, compensated via a cash payment, gift, or something else of value for writing this post. As an Amazon Associate, I earn from qualifying purchases. Please read my full Affiliate Disclosure for more information.
There’s nothing quite like the festive feeling that fills a home during Christmas, and decorating your space is a wonderful way to embrace the holiday spirit. Christmas room decor ideas are immensely popular because they allow you to infuse warmth, joy, and a touch of magic into every corner of your home.
In this article, you’ll find a delightful array of decorating ideas that cater to various styles and preferences. Whether you love classic reds and greens, rustic charm, or modern minimalism, these ideas will inspire you to create a cozy, festive atmosphere that welcomes friends and family alike.
1. Festive Garland Over the Mantel with Pinecones and Berries
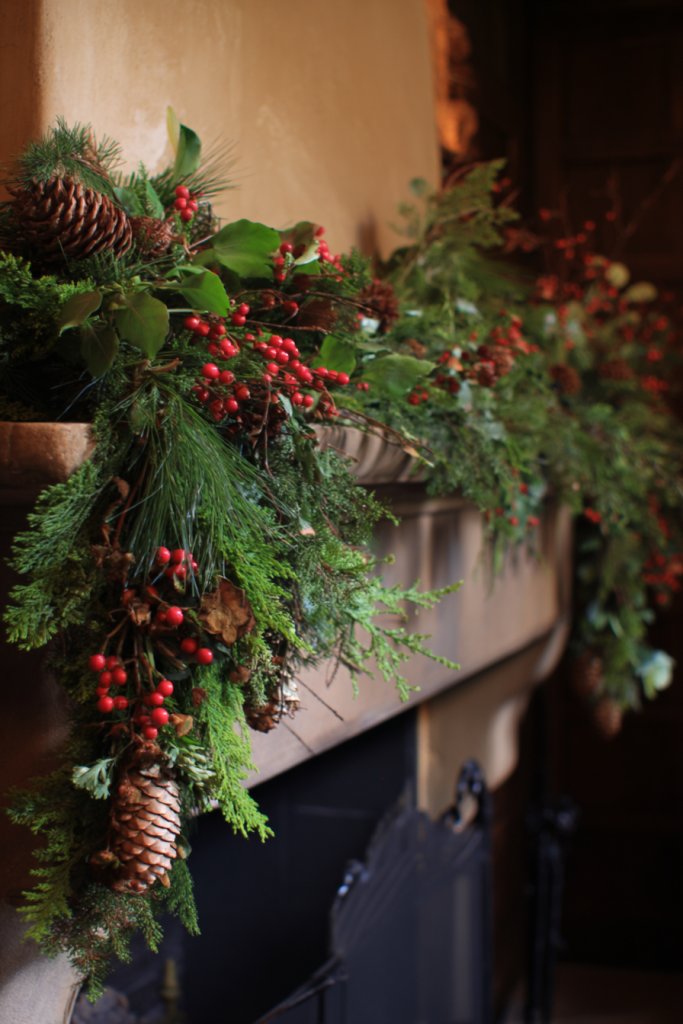
Ever wish your fireplace mantle could scream holiday cheer without looking like a Christmas store exploded? A lush, natural-looking garland can transform a plain mantle into a festive focal point. It’s the easiest way to bring in warmth and charm, especially if you’re not into over-the-top decorations. Plus, it makes your living room feel cozier instantly.
Recommended Products to replicate this idea
| # | Preview | Product | |
|---|---|---|---|
| 1 |

|
Winter Garland Christmas Decoration of Red Berries, Pine Cones, Holly & Evergreen Pine Needle –... | Check Latest Price |
| # | Preview | Product | |
|---|---|---|---|
| 1 |
|
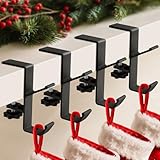
ANOEPUY 4 Pack Stocking Holders for Mantle for Christmas Decorations,2 in 1 Mantle Garland Holder... | Check Latest Price |
Imagine a dense greenery garland draping over your mantel, intertwined with faux pinecones and bright red berries. Tiny fairy lights cast a gentle glow, highlighting the textures and colors. The scent of pine and cinnamon seems to fill the air, even if it’s just in your imagination. It’s like a winter forest came indoors, wrapped in soft fabric and twinkling lights.
You can opt for real or faux greenery depending on your patience and budget. Add or remove elements like faux snow or velvet ribbons for seasonal updates. For a minimalist look, choose a simple pinecone and berry arrangement, or go full-on lush with multiple layers and textures. Adjust the size of the garland based on your mantle’s width or go vertical on a narrow wall. The key is balancing natural elements with your existing decor style.
Start with a base of faux or real garland—mine usually comes from the craft store or garden center. Secure it with floral wire or zip ties, making sure it hangs evenly. Next, tuck in pinecones, berries, and fairy lights, securing everything tightly. If using real greenery, spritz it with water daily to keep it fresh. For a more polished look, attach some elements with hot glue before arranging. Hang the garland at eye level for maximum impact and add a few extra lights for sparkle.
Personalize your garland with small ornaments, mini stockings, or seasonal ribbons. You could also weave in some faux holly or snow-dusted accents for extra flair. For a more rustic vibe, include burlap or twine accents. Changing out berries or pinecones with different colors or textures each year keeps it fresh. Add a personalized touch like a monogrammed wooden sign nestled into the greenery.
A well-decorated mantel boosts your holiday spirit and impresses guests effortlessly. It’s simple yet impactful, and you don’t need to be a floral expert to pull it off. With a little patience, your home can look like a cozy winter wonderland. Ready to give your mantle that festive wow factor?
2. DIY Painted Christmas Mason Jars as Centerpieces

Want to add a touch of holiday magic to your tables without spending a fortune? DIY painted mason jars are your new best friend. They’re versatile, charming, and perfect for creating cozy, personalized centerpieces. Plus, they’re a fun craft project that even beginners can tackle.
Recommended Products to replicate this idea
| # | Preview | Product | |
|---|---|---|---|
| 1 |

|
Ball Wide Mouth Glass Mason Jars with Lids and Bands, Used for Canning, Pickling, Juice, Jam, Jelly,... | Check Latest Price |
| # | Preview | Product | |
|---|---|---|---|
| 1 |

|
Apple Barrel, Vibrant Spectrum Collection Acrylic Craft Paint, PROMOABIII, 2 fl oz each, 16 assorted... | Check Latest Price |
Picture a row of mason jars painted in soft whites, reds, and golds, glowing with flickering candles or fairy lights inside. The jars sit atop a rustic wooden table, surrounded by sprigs of greenery or cinnamon sticks. The paint has a matte or frosted finish, giving them a frosty, wintery appearance. It’s like capturing a snow globe’s charm in glass.
You can customize the jars with different paint techniques like stenciling, ombre effects, or glitter accents. Change the colors to match your theme, from traditional reds and greens to metallics or pastel hues. Use them as standalone centerpieces or group them with candles, pinecones, or small ornaments. For a more elegant look, tie a ribbon or twine around the neck of each jar.
Start by cleaning your mason jars thoroughly. Use chalk paint or acrylic for easy coverage, applying multiple thin coats for an even finish. Add holiday designs such as snowflakes, Christmas trees, or reindeer using stencils or freehand painting. Let each coat dry completely before adding a second layer. Fill the jars with tea lights, fairy lights, or small ornaments. Place them on your dining table or sideboard for an instant holiday upgrade.
Personalize your jars further with custom labels or handwritten messages. Incorporate natural elements like cinnamon sticks or dried orange slices inside for a fragrant touch. Switch out the fill seasonally—think mini pumpkins or faux berries after Christmas. For a more rustic vibe, use burlap or lace ribbons to decorate around the jars.
These painted mason jars are a budget-friendly way to elevate any holiday setting. They’re easy, customizable, and add a warm glow that’s perfect for holiday dinners. Even if you’re not a craft pro, you’ll impress everyone with your DIY skills. Time to get painting and make your table truly festive!
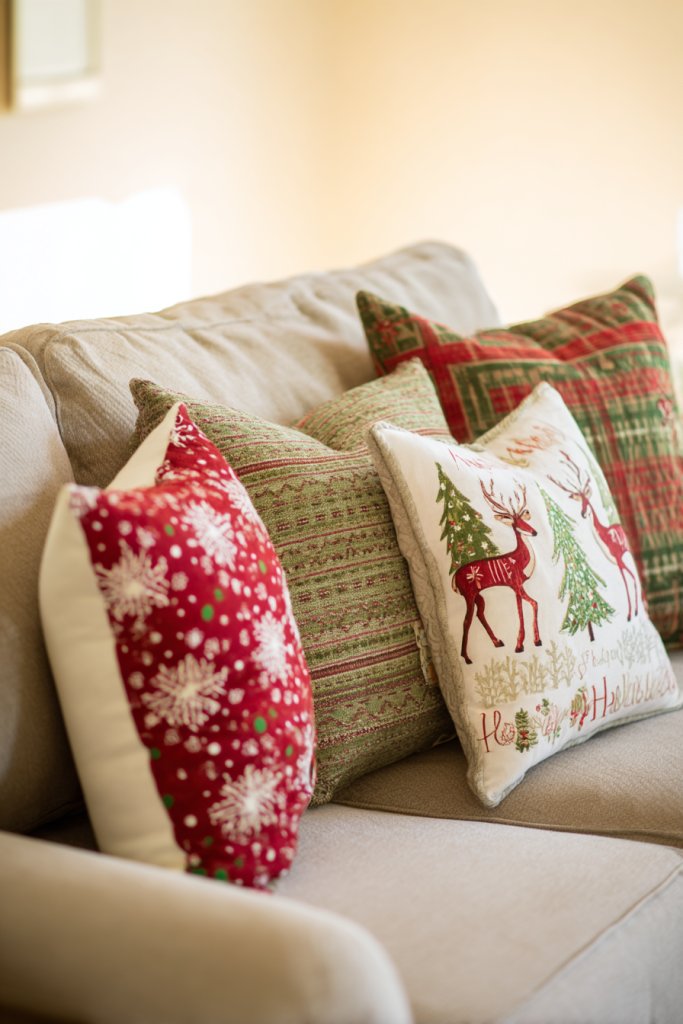
3. Cozy Christmas Throw Pillows with Seasonal Prints
Looking to instantly cozy up your living space for the holidays? Swapping out regular cushions for festive throw pillows can do wonders. They add color, comfort, and a dash of holiday spirit without much effort or expense. Who doesn’t love sinking into a plush pillow decorated with seasonal motifs?
Recommended Products to replicate this idea
| # | Preview | Product | |
|---|---|---|---|
| 1 |

|
ASPMIZ Christmas Pillow Covers 18 x 18 Inch Set of 4, Winter Christmas Tree Holiday Throw... | Check Latest Price |
| # | Preview | Product | |
|---|---|---|---|
| 1 |

|
Jartinle Boho Floral Christmas Outdoor Pillow Covers 18x18 Waterproof Christmas Tree Festive Holiday... | Check Latest Price |
Imagine plush pillows with snowflakes, reindeer, or plaid patterns nestled on your sofa and armchairs. The textures range from soft velvets to chunky knits, inviting you to relax and enjoy the season. Bright reds, greens, and metallic accents elevate the holiday mood. The pillows create a layered, inviting look that makes your space feel warm and welcoming.
Choose pillows that match your existing decor, whether modern, rustic, or traditional. Mix and match different shapes and sizes to add visual interest. For a quick seasonal switch, use pillow covers that can be swapped out as easily as changing your outfit. During winter, add faux fur or quilted textures for extra warmth and texture.
Start by selecting pillow covers with festive prints or textures that suit your style. Use inserts that match the size of your covers for a full, plush look. You can find ready-made covers or sew your own if you’re feeling crafty. For a personal touch, add embroidered initials, holiday patches, or decorative buttons. Toss them on your sofa, bed, or reading nook to instantly upgrade the space.
Create a cohesive look by choosing a color palette that complements your overall decor. Switch out covers each season—think tartan for winter, floral for spring. Use different textures to layer comfort, like a velvet pillow paired with a chunky knit. Add small decorative elements like mini ornaments sewn onto the covers for extra fun.
Decorative pillows are an easy way to add instant holiday charm. They’re versatile, affordable, and can be changed out year-round. Plus, customizing your own covers adds a personal touch that reflects your style. Ready to make your sofa the star of your holiday decor?
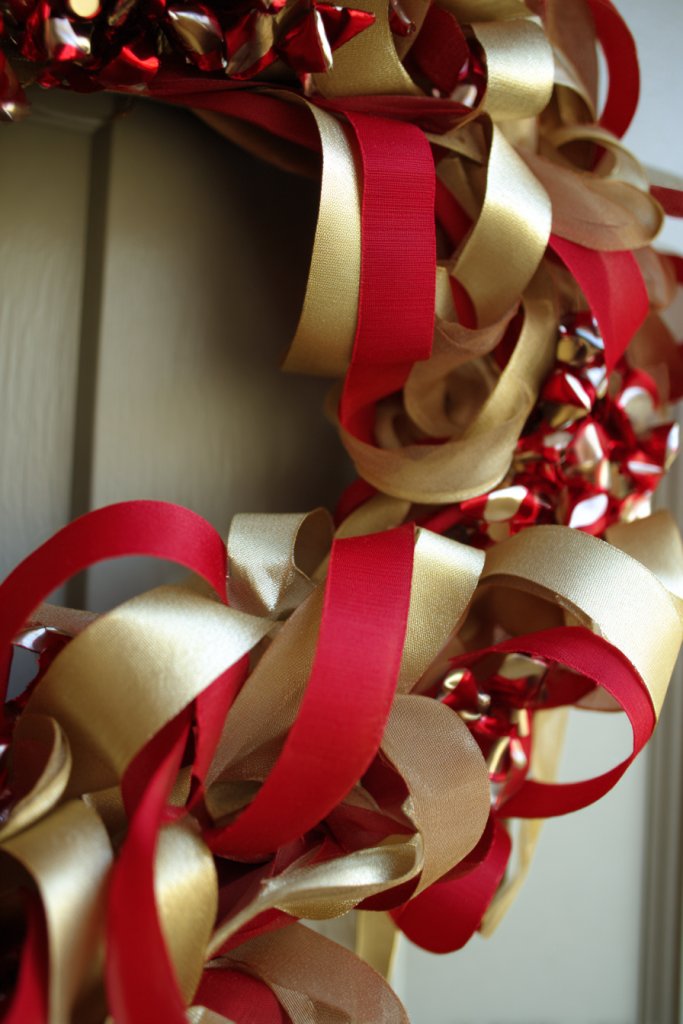
4. Reimagined Christmas Wreaths Made from Ribbons and Ornaments
Tired of the same old wreath on your door? Want something that screams holiday cheer but with a personal twist? Ribbons and mini ornaments can turn a basic wreath into a show-stopping piece. It’s a fun DIY project that lets you showcase your style and creativity.
Recommended Products to replicate this idea
| # | Preview | Product | |
|---|---|---|---|
| 1 |

|
POPETPOP Grapevine Wreath Forms Natural Wreath: Wicker Woven DIY for DIY Crafts Wedding Parties Home... | Check Latest Price |
| # | Preview | Product | |
|---|---|---|---|
| 1 |

|
YUJUN 36pcs Mini Resin Ornaments Set - Christmas Tree Decoration, Small Miniature Figurines for... | Check Latest Price |
Visualize a vibrant wreath made from layered satin ribbons in deep reds and golds, accented with tiny ornaments and faux pinecones. It hangs proudly on your front door, catching the light and inviting guests inside. The textures play off each other—smooth ribbons contrasting with shiny ornaments—creating a festive, textured masterpiece. It’s a bold statement that radiates holiday joy.
Choose ribbons in different widths and finishes, from velvet to metallic. Incorporate themed ornaments—snowflakes, stars, or mini baubles—matching your overall decor. For a minimalist look, stick to a monochrome palette or natural tones. Adapt the wreath size to your door or wall space, and personalize it with a handmade bow or monogram.
Start with a basic wire or foam wreath base. Attach ribbons with hot glue or wire, layering for fullness. Tuck in mini ornaments and secure with glue or floral picks. Use a combination of satin, velvet, and burlap ribbons for variety. Add a few decorative picks or sprigs of faux holly if allowed, or stick solely to ribbons and ornaments for a cleaner look. Finish with a large bow at the bottom.
Personalize by adding a family name or holiday message on a small wooden plaque or fabric banner. Mix in seasonal elements like faux berries or snow-dusted pinecones if they fit your style. Use different ribbon styles to reflect your personality—rustic jute for farmhouse or sleek satin for modern. Change the ornament colors each year to keep it fresh.
A ribbon-and-ornament wreath is a customizable centerpiece that adds personality to your holiday decor. It’s easier than it looks and allows for endless creative variations. Your door will look uniquely festive, and guests will ask where you bought it. Ready to craft your own show-stopper?
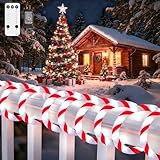
5. Candy Cane-Shaped Light Strips for a Playful Accent

Ever want to add a whimsical, playful touch to your holiday decor without going overboard? Candy cane-shaped light strips bring fun and brightness to any corner of your home. They’re perfect for those who love a dash of humor with their festive flair. Plus, they’re easy to install and sure to make everyone smile.
Recommended Products to replicate this idea
| # | Preview | Product | |
|---|---|---|---|
| 1 |

|
Shine Decor LED Rope Light, Outdoor Candy Cane Rope Lighting -4F Cold Resistant IP65 Waterproof,... | Check Latest Price |
| # | Preview | Product | |
|---|---|---|---|
| 1 |
|
HELESIN 164FT 1000LED Candy Canes Rope Lights with 8 Lighting Modes, Candy Cane Christmas Lights... | Check Latest Price |
Imagine red and white LED strips curled into candy cane shapes, glowing softly against a dark wall or window. The lights cast a cheerful, striped pattern that instantly lifts the room’s mood. They can be hung from ceiling hooks, draped along the walls, or wrapped around furniture for a whimsical effect. The glow creates a cozy, playful atmosphere perfect for holiday gatherings.
Use different lengths and shapes to suit your space—large displays in the living room or smaller accents in the kids’ play area. Mix the candy cane strips with other themed lights like snowflakes or stars for a layered look. You can also integrate them into outdoor decor, like wrapping around porch columns or fences. Switch colors or add blinking modes for extra fun.
Purchase flexible LED light strips with adhesive backing. Shape them into candy canes and secure with removable hooks or clips. Use a power source with a timer to automate lighting times. For safety, avoid overloading circuits or placing lights near water sources. You can add clear tubing or wireframes to help keep the shape if needed. Layer multiple strips for a more dramatic display.
Customize by adding small ornaments or bows at the top of each candy cane. For a more interactive display, sync the lights with your holiday playlist. Incorporate different colors or blinking modes to match your overall theme. Use these lights to frame windows, doorways, or as a fun centerpiece on a side table.
Candy cane-shaped light strips bring a playful twist to your holiday decor that everyone will love. They’re simple to install, inexpensive, and highly customizable. Plus, they add a touch of whimsy that sets your home apart. Ready to make your space sparkle with a little holiday fun?
6. Minimalist Christmas Tree Using Wooden Slats or Book Stack

Ever feel like traditional Christmas trees take up too much space or clash with your modern decor? A minimalist tree crafted from wooden slats or stacked books offers a sleek, space-saving alternative. It’s a chic way to celebrate without sacrificing style or cluttering your living room.
Recommended Products to replicate this idea
| # | Preview | Product | |
|---|---|---|---|
| 1 |

|
VAIPI 60 in Wall Hanging Christmas Tree with Lighted Christmas Wall Decor Wooden Flat Hanging Xmas... | Check Latest Price |
| # | Preview | Product | |
|---|---|---|---|
| 1 |
|
1DOT2 Aesthetic Decorative Books -Set of 3 Minimalist Linen Hardcover Faux/Fake Books for Coffee... | Check Latest Price |
Visualize a simple triangle made from horizontal wooden slats or a stack of neatly arranged books forming a tree silhouette. String tiny fairy lights or LED strips along the edges for a subtle glow. Decorate with a few small ornaments or fabric bows for a festive touch. The design is clean, contemporary, and perfect for small apartments or modern interiors.
Use different materials like reclaimed wood, painted slats, or artfully arranged books of varied sizes and colors. For a winter theme, add faux snow or metallic accents. Change the height and width to fit your space—smaller for a desk or large for a corner display. Customize with a star or angel made from paper or fabric at the top.
Construct the tree by stacking or mounting the wooden slats in a triangular shape, securing with nails or brackets. Ensure stability, especially if free-standing. Alternatively, for a book tree, create a stable base and layer books from largest at the bottom to smallest at the top. Wrap string lights around the structure for added warmth. Keep the arrangement balanced to prevent tipping.
Decorate your minimalist tree with small, meaningful ornaments, or drape a decorative garland around it. Use themed books or paint the slats in your favorite holiday colors. For a whimsical touch, add paper snowflakes or miniature figurines. Change the decor seasonally for a versatile centerpiece.
A minimalist tree proves that elegance doesn’t require excess. It’s a statement of simplicity and creativity, perfect for modern homes. Show off your design skills with a unique, personalized holiday centerpiece that everyone will admire. Ready to create your own sleek holiday statement?
7. Holiday-Themed Table Runners and Cloths
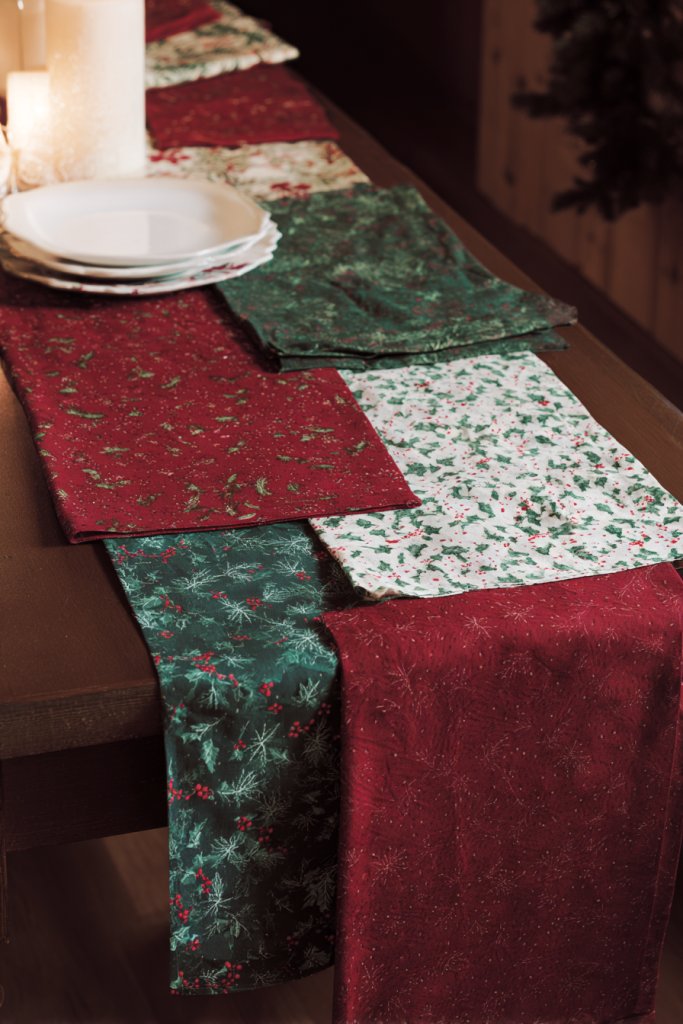
Want to instantly dress up your dining table for the holidays? A themed table runner or cloth can be your secret weapon. It’s a simple swap that sets the tone and elevates your entire table setting. Plus, it’s an easy way to add seasonal charm without overhauling your decor.
Recommended Products to replicate this idea
| # | Preview | Product | |
|---|---|---|---|
| 1 |

|
Christmas Table Runner - Red Snowman Snowflake Winter Holiday Decorative Farmhouse Table Decorations... | Check Latest Price |
| # | Preview | Product | |
|---|---|---|---|
| 1 |

|
Romanstile Jacquard Rectangle Tablecloth - Waterproof Damask Floral Decorative Table Cloths Heavy... | Check Latest Price |
Imagine a table covered with a deep red plaid runner, accented with embroidered snowflakes or holly leaves. Complement it with matching cloth napkins and centerpiece accents like pinecones or candles. The textures and patterns create a cozy, festive atmosphere, perfect for family dinners or holiday parties. The runner ties the whole look together, making your table look professionally styled.
Choose fabrics in seasonal colors—reds, greens, golds, or silvers—and incorporate textures like velvet, burlap, or quilted patterns. Use a long, narrow runner for a sleek look or layered cloths for a more luxurious feel. Change your table decor style to match your theme—rustic, elegant, or whimsical. You can also switch between seasonal motifs like snowflakes, reindeer, or Christmas trees.
Select a table runner that fits your table size, ensuring it drapes evenly on all sides. For a classic look, fold the fabric in half lengthwise and lay it down the center. Secure with decorative pins or clips if needed. Layer with matching placemats and cloth napkins for a cohesive look. Add candles or small ornaments along the length for extra sparkle. Wash and store the fabric carefully after the season.
Personalize with embroidered initials, custom patches, or fabric paint to add a personal touch. Mix and match patterns—like stripes with snowflakes—for a playful, eclectic style. Incorporate faux fur or velvet trims for added luxury. Use seasonal colors that reflect your personal style or family traditions for a truly unique look.
A themed table runner instantly transforms your dining space into a festive feast for the eyes. It’s an affordable upgrade that makes every meal feel special. Plus, it’s easy to swap out for different holidays or seasons, ensuring your table always looks fresh. Ready to dress your dinner table like a holiday magazine?
8. DIY Snowflake Ornaments from Paper or Felt
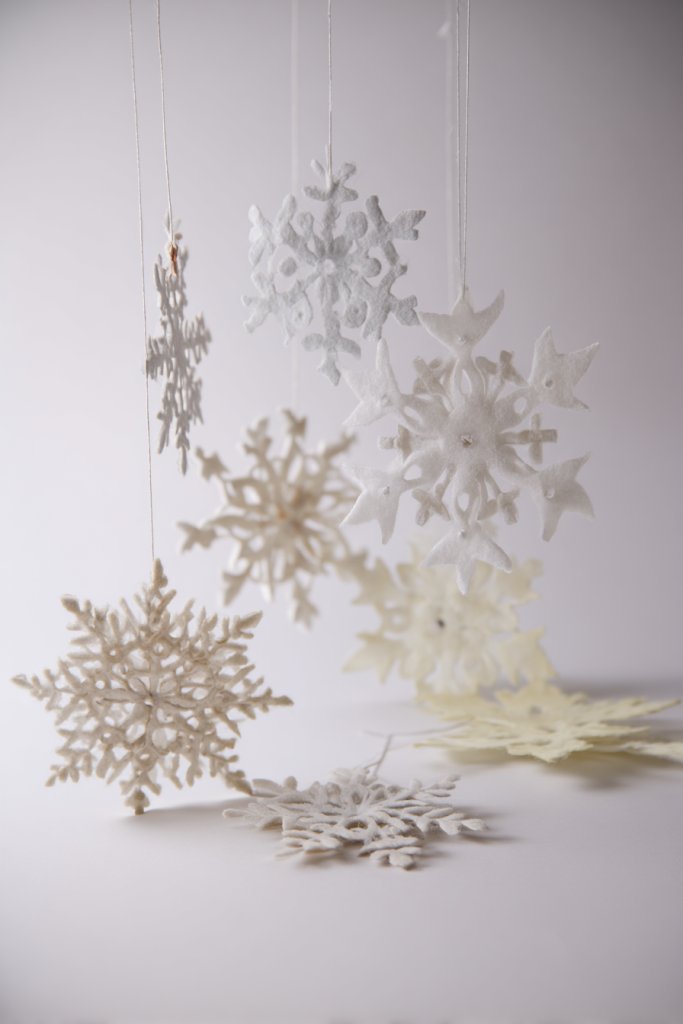
Looking for a charming, handmade touch to your holiday decor? DIY snowflake ornaments are perfect for adding a winter wonderland vibe with minimal effort. Whether you prefer paper or felt, these ornaments bring a cozy, crafty feel to your space. Plus, they’re a fun activity to do with family or friends.
Recommended Products to replicate this idea
| # | Preview | Product | |
|---|---|---|---|
| 1 |

|
KaKaPops Thin Felt Fabric Sheets, Assorted Colors Stiff Felt Sheets for Crafts DIY Patchwork Sewing... | Check Latest Price |
| # | Preview | Product | |
|---|---|---|---|
| 1 |

|
Astrobrights/Neenah Bright White Cardstock, 8.5" x 11", 65 lb/176 gsm, White, 75 Sheets (90905-02) -... | Check Latest Price |
Picture delicate snowflakes cut from white paper with intricate patterns, hanging from your ceiling or window frames. Felt snowflakes in soft textures and simple shapes add warmth and depth. They catch the light softly, creating a shimmering winter scene inside your home. Dangle a variety of sizes at different heights for a dynamic, layered effect.
Experiment with different materials—glitter paper, metallic foil, or soft felt—to match your decor style. Use metallic or pastel colors for a modern look, or stick to traditional white and silver for classic elegance. Attach them to clear fishing line or ribbon for hanging. Mix and match shapes—stars, intricate snowflakes, or geometric designs—to add variety.
For paper snowflakes, fold paper accordion-style, cut out patterns, and unfold carefully. Use scissors or craft knives for precision. For felt, cut out snowflake shapes using templates and sew or glue the pieces together. Hang with clear string or attach a loop of ribbon. Cluster them in window corners or from ceiling hooks for a snowy effect. Make a bunch to create a snowstorm indoors.
Add a touch of sparkle with glitter glue or metallic paint on the edges. Personalize with initials or small messages for family members. Incorporate small beads or sequins for extra shine. Change designs each year or create themed sets for different rooms—kids’ rooms, entryways, or the tree.
These snowflake ornaments are budget-friendly and endlessly customizable. They add a magical, handcrafted touch that everyone appreciates. Plus, they’re lightweight and easy to store for reuse year after year. Ready to craft your own winter wonderland?
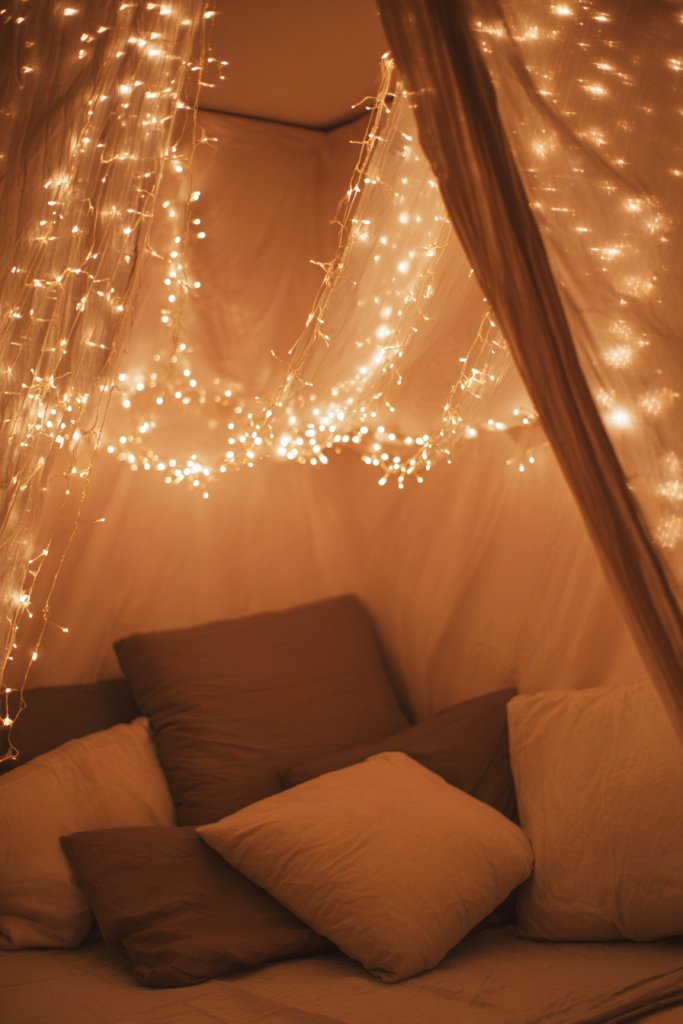
9. Warm String Light Canopy Over Bed or Reading Nook
Ever dream of transforming your bedroom into a cozy holiday retreat? A string light canopy can make your space feel magical and inviting. It’s a simple upgrade that turns any corner into a dreamy sanctuary perfect for winter nights. Who doesn’t want to feel wrapped in a warm glow?
Recommended Products to replicate this idea
| # | Preview | Product | |
|---|---|---|---|
| 1 |

|
Minetom Fairy Lights Plug in, 33Ft 100 LEDs Waterproof Silver Wire Firefly Lights, Adaptor Included,... | Check Latest Price |
| # | Preview | Product | |
|---|---|---|---|
| 1 |

|
AIKASY Princess Canopy Bed Curtains with Top Ties - Windproof & Lightproof for Girls' Adult Bedroom... | Check Latest Price |
Imagine strings of warm white fairy lights draped across the ceiling, forming a canopy over your bed or reading nook. The soft glow creates a starry sky effect, perfect for curling up with a book or enjoying a quiet evening. The gentle twinkle adds a sense of calm and intimacy, making your space feel like a holiday escape.
Use different lengths and number of light strands to suit your space. For a more dramatic look, drape the lights in flowing loops or create a tent-like structure. Incorporate fabric drapes or sheer curtains underneath for added softness. Change the bulb colors for different moods—warm white, soft amber, or even multicolor for kids’ spaces. Secure the lights with removable hooks or adhesive clips.
Start by measuring your ceiling and choosing the right length of fairy lights. Attach hooks or mounting strips along the perimeter of your ceiling. Drape the lights evenly, securing them at strategic points. Connect to a power source with a timer for automatic on/off. For extra safety, avoid overloading circuits and use LED lights for energy efficiency. Add a few decorative elements like paper lanterns or fabric swags for extra flair.
Personalize the canopy with small ornaments or fabric accents that match your decor theme. Use color-changing or dimmable lights for versatile ambiance. Layer the canopy with textured fabrics or faux fur throws on your bed or chair below. Change the arrangement seasonally—add holly or faux snow for a wintery effect. It’s a cozy, customizable retreat.
A string light canopy transforms a plain space into a dreamy haven that’s perfect for winter nights or holiday mornings. It’s an easy DIY project that makes a big impact. Plus, it creates a magical atmosphere that everyone will love. Ready to cozy up your space?
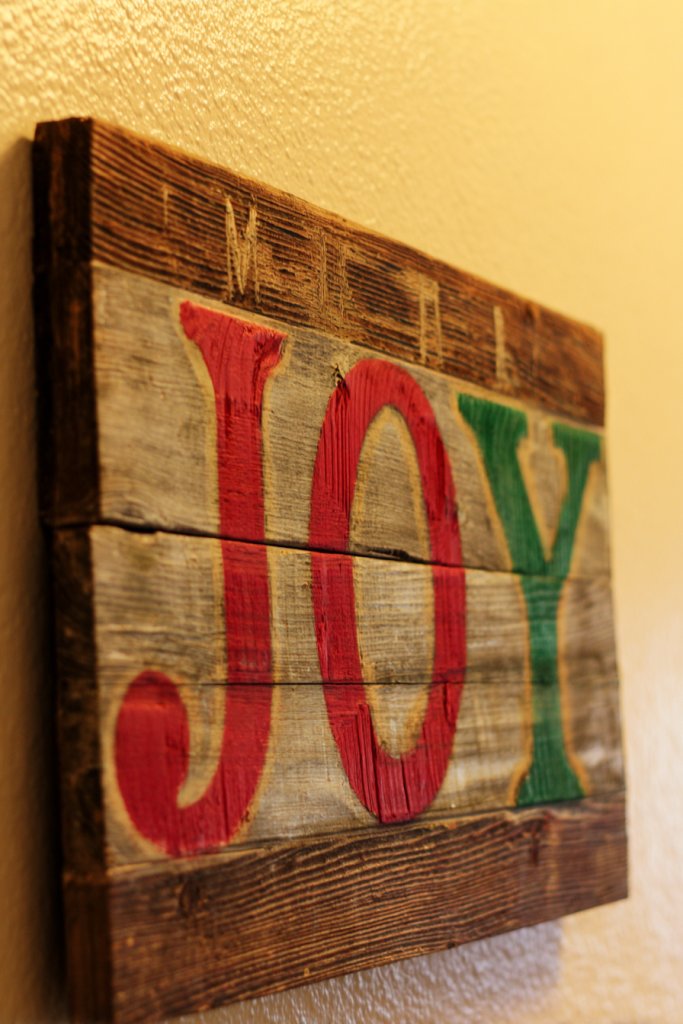
10. Rustic Wooden Signage with Festive Greetings
Looking for a charming way to greet guests and set a festive mood? Rustic wooden signs with holiday greetings do just that. They add warmth and personality to your entryway or living room without overwhelming your decor. Plus, they’re easy to DIY or find at craft stores.
Recommended Products to replicate this idea
| # | Preview | Product | |
|---|---|---|---|
| 1 |

|
Yousoontic 4 Pcs Christmas Wooden Table Decorations Red Truck Rustic Block Signs Centerpiece Tiered... | Check Latest Price |
| # | Preview | Product | |
|---|---|---|---|
| 1 |
|
Interchangeable Welcome Sign for Front Door with 4 Seasonal Wreaths and 21 Changeable Icons,... | Check Latest Price |
Picture weathered wood planks painted with cheerful messages like “Joy,” “Merry & Bright,” or “Peace on Earth.” The paint might be rustic white or metallic, contrasting beautifully with the natural grain of the wood. They hang from jute twine or metal hooks, adding a handcrafted, welcoming vibe. These signs instantly evoke cozy holiday traditions and rustic charm.
Use different wood types—pallet boards, reclaimed wood, or painted MDF—to match your style. Incorporate seasonal motifs like stars, holly, or snowflakes painted or carved into the wood. For a more modern look, use sleek fonts and minimal designs. Change the message seasonally or add a small wreath or bow for extra flair.
Start with a piece of reclaimed or craft wood, sanding it smooth. Use stencils or freehand paint your message in holiday colors—red, green, or gold. Seal with a clear coat to protect it from seasonal humidity. Attach hanging hardware or a sawtooth hanger on the back. Place it on your door, above the fireplace, or on a feature wall for maximum impact.
Add small decorative elements like mini pinecones, faux berries, or fabric banners. Personalize with your family name or a favorite quote. Use different fonts or paint techniques—brush strokes, stamping, or distressing—to give it character. Change the sign based on the holiday or occasion for year-round versatility.
A rustic wooden sign is a timeless way to greet guests and spread holiday cheer. It’s simple to make, customizable, and adds a personal touch to your decor. Your home will radiate warmth and welcoming vibes. Ready to craft your own festive message?
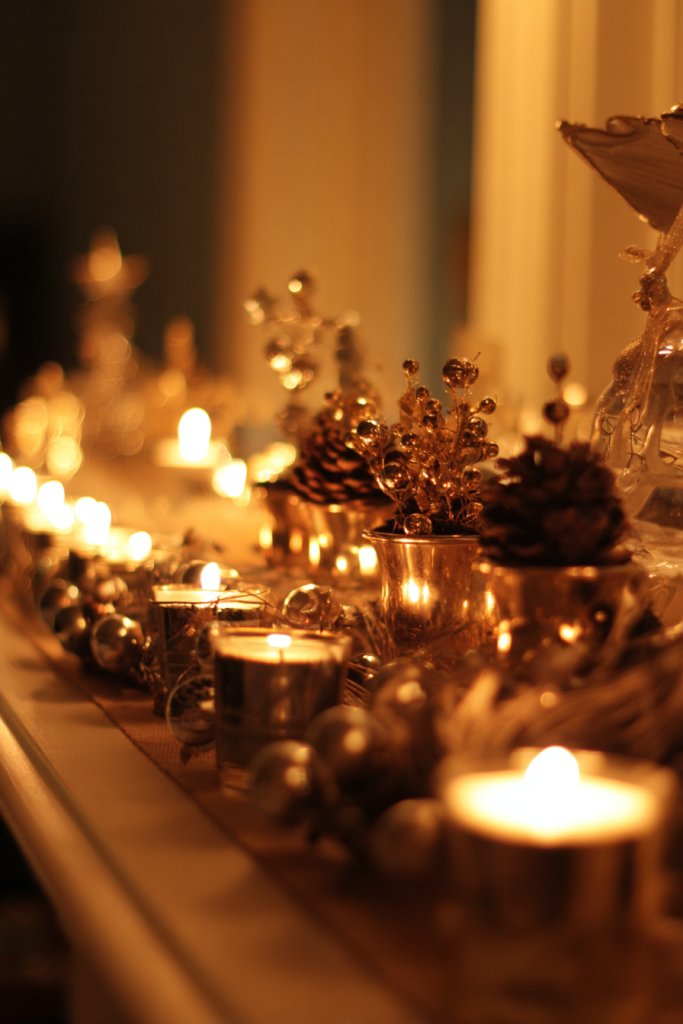
11. Seasonal Scented Candles in Decorative Holders
Want to make your home smell like the holidays without any fuss? Seasonal scented candles in decorative holders create an inviting atmosphere that engages the senses. They’re a simple way to add warmth and ambiance, making every room feel cozy and festive. Who doesn’t love a fragrant home?
Recommended Products to replicate this idea
| # | Preview | Product | |
|---|---|---|---|
| 1 |

|
Holiday Candle Set, Scented Candle for Home, 4 Pack Soy Candles for Home Scented, Valentine's Day... | Check Latest Price |
| # | Preview | Product | |
|---|---|---|---|
| 1 |

|
Deco 79 Metal Indoor Outdoor Candle Lantern Cutout Tree Branch Lantern Candle Holder with Gold... | Check Latest Price |
Picture candles in elegant glass jars or vintage tins, glowing softly on a side table or mantle. Scents like cinnamon, pine, vanilla, or peppermint fill the air, subtly enhancing your decor. Decorative holders—metal, ceramic, or etched glass—add visual interest, complementing your theme. The flickering flames cast dancing shadows, creating a warm, inviting glow.
Choose candles with labels or holders that match your decor style—rustic, modern, or traditional. Incorporate seasonal motifs like holly or snowflakes into the holders’ design. Use different heights and sizes to create a layered look on your coffee table or mantel. Light a few candles in different rooms for a continuous festive scent.
Select candles with holiday-inspired scents and burn times. Place them in decorative holders that suit your style—think metallic, ceramic, or etched glass. Position them away from drafts or flammable objects. Light them before gatherings to set the mood and blow them out afterward. For added safety, use LED flameless candles if children or pets are around. Rotate scents throughout the season for variety.
Add decorative touches such as faux holly, pinecones, or ribbons around the holders. Customize labels with handwritten holiday messages or family names. Mix different scents and holder styles for a curated look. Use candles as part of your tablescape or as gift ideas for friends and family.
Scented candles create a sensory experience that elevates your holiday decor. They’re simple, affordable, and versatile, perfect for any space. When your home smells as good as it looks, everyone feels more at ease. Ready to light up your holiday season?
12. Reversible Christmas Banners for Versatile Decor
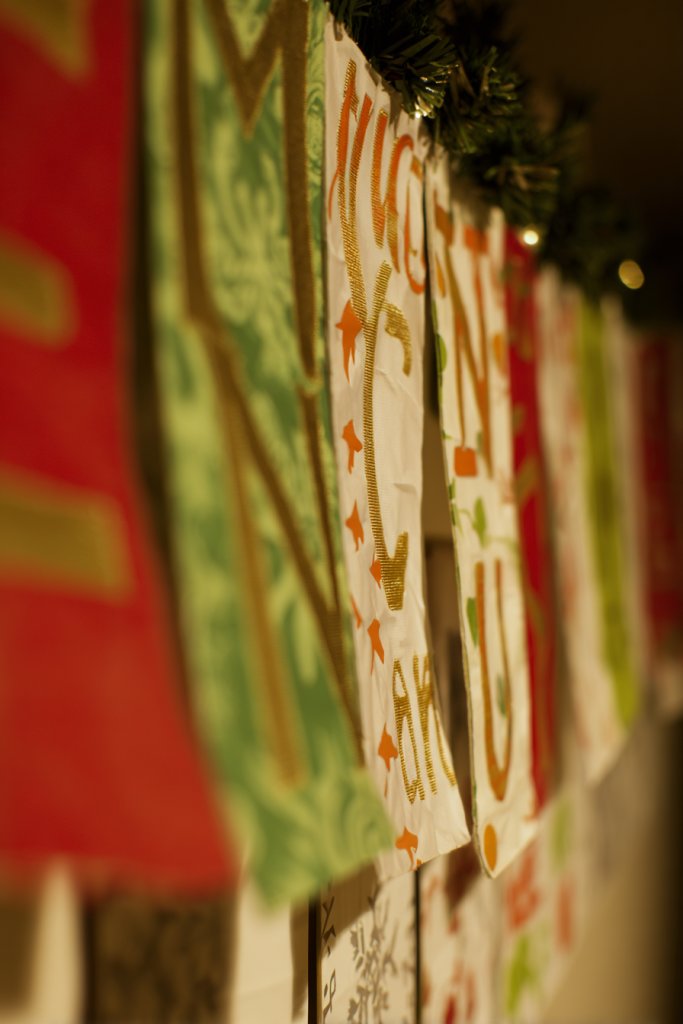
Searching for decor that offers variety without clutter? Reversible Christmas banners provide a flexible solution, allowing you to change your look easily. They’re perfect for small spaces or renters who want to keep their options open. Plus, they add a festive touch with minimal effort.
Recommended Products to replicate this idea
| # | Preview | Product | |
|---|---|---|---|
| 1 |

|
2pcs Reversible Christmas Banner and Door Sign - Double-Sided, Merry Christmas and Happy New Year -... | Check Latest Price |
| # | Preview | Product | |
|---|---|---|---|
| 1 |

|
CLEANGOR 2Pcs 6FT Norfolk Pine Garlands Realistic, Real Touch Winter Xmas Garland, Christmas... | Check Latest Price |
Imagine a fabric banner with a cheerful “Merry Christmas” message on one side and a snowflake pattern on the other. Hung across a doorway or wall, it instantly transforms your space. The fabric’s texture and vibrant colors add warmth, while the reversible design offers two looks in one. It’s like getting two decorations in one package.
Choose banners with different motifs—classic, rustic, or modern—to match your decor. Use different fabrics like burlap, velvet, or cotton for texture variety. Hang them with clips or ribbons, and switch sides depending on your mood or event. Incorporate tassels or fringe for extra personality. Change the message or pattern seasonally.
Select a banner with sturdy, washable fabric for durability. Attach it to walls or doorways using removable hooks or clips. To flip the banner, simply unclip and rotate it to display the other side. For added flair, pair with string lights or greenery around the banner. Store it flat or rolled after the season to prevent creases. Making your own is simple with fabric paint or iron-on transfers.
Add small embellishments like pom-pom trims or embroidered accents. Create custom messages for different rooms or occasions. Use different fabric patterns to suit your style—classic plaid, elegant velvet, or playful prints. You can also sew in pockets for small gift cards or notes.
A reversible banner is a smart, space-efficient way to keep your decor fresh and versatile. It’s easy to switch up for different holidays or moods and adds a personal, handmade touch. Your home will feel thoughtfully decorated without cluttering your space. Ready to craft your own versatile holiday banner?
13. Festive Window Clings and Snow Effect Sprays
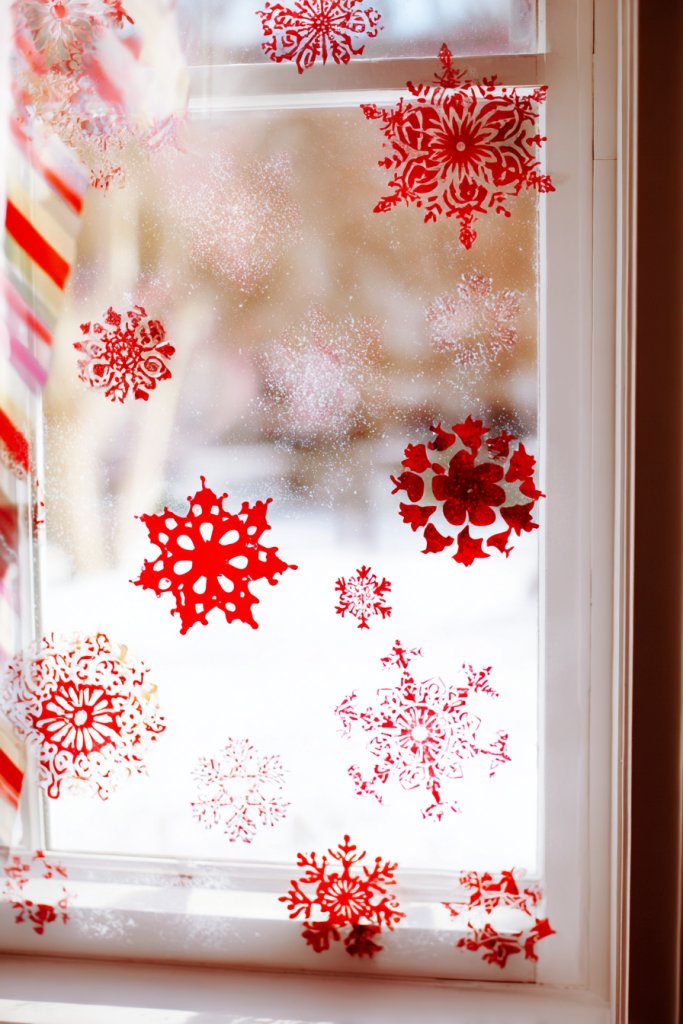
Want to add holiday magic to your windows without permanent alterations? Festive window clings and snow sprays are your go-to options. They’re mess-free, removable, and instantly festive. Perfect for adding a wintery touch that can be changed or removed when needed.
Recommended Products to replicate this idea
| # | Preview | Product | |
|---|---|---|---|
| 1 |

|
186PCS Christmas Decor, Christmas Window Clings, 9 Sheets Snowflake Window Stickers Decals with... | Check Latest Price |
| # | Preview | Product | |
|---|---|---|---|
| 1 |

|
Santa Christmas Tree, Wreath, Glass and Mirror Snow Spray - 13 Ounces | Check Latest Price |
Picture colorful snowflake and holly decals adorning your windows, catching the light and creating a cheerful scene inside and outside. The frosted snow sprays can be applied to glass surfaces for a shimmering, icy effect. Together, they evoke a cozy winter landscape, brightening up your home and street view. The reflectivity and translucence add depth to your decor.
Combine clear, colorful, or metallic decals for different effects. Use snow sprays on the outside of windows for an authentic snowed-in look, or inside for a more controlled design. Layer decals for a multi-dimensional scene, or create custom shapes and messages. Change your window decor weekly to keep things fresh.
Clean glass thoroughly before application. Peel decals carefully and stick to smooth, clean surfaces—avoid textured glass for best results. Spray snow in light, even coats, and build up for a denser effect. Use painter’s tape or stencils to create patterns or borders. Remove decals easily after the season and clean off residual spray with glass cleaner.
Create custom messages or shapes with decals, or combine with string lights for extra sparkle. Use metallic sprays or glitter for a festive shimmer. Place decals in strategic locations—above sinks, on mirrors, or in front of curtains. Incorporate themed decals matching your overall decor for a cohesive look.
Window clings and snow sprays are a quick, affordable way to make your home feel festive. They’re fun to apply and easy to switch out, perfect for renters or temporary decor needs. Your windows will become a winter wonderland, inviting holiday cheer from inside and out. Ready to transform your glass surfaces?
14. Holiday-Themed Wall Art with Printable Prints or DIY Paintings
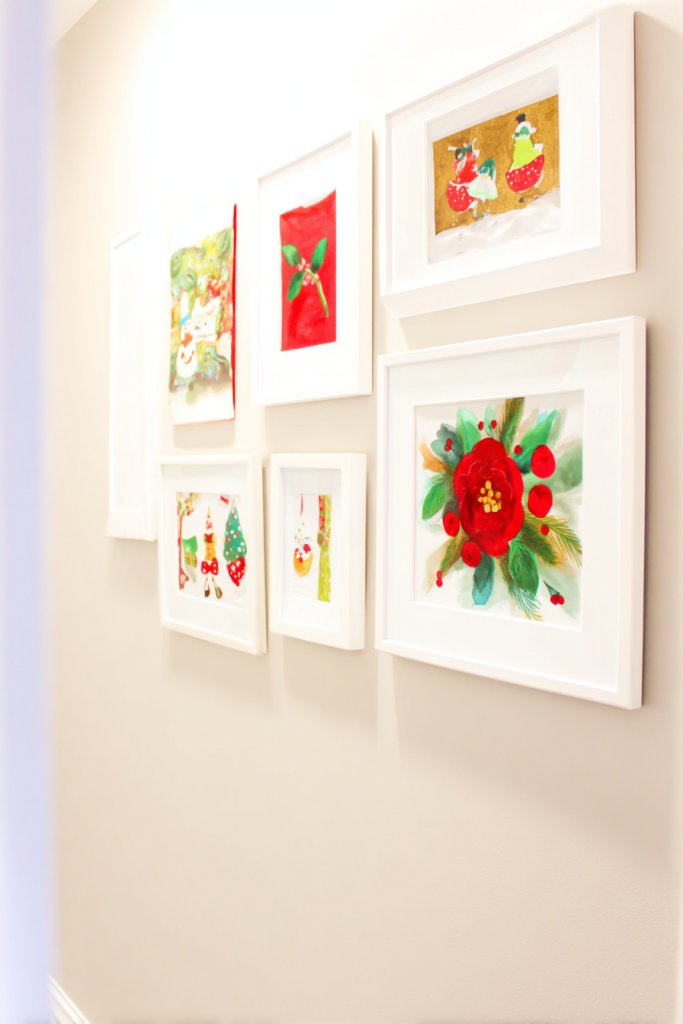
Want to add a personal touch to your holiday decor without breaking the bank? Holiday-themed wall art, whether printable or DIY painted, allows you to showcase your style and spread cheer. It’s an affordable way to fill blank walls with festive spirit and personality.
Recommended Products to replicate this idea
| # | Preview | Product | |
|---|---|---|---|
| 1 |
|
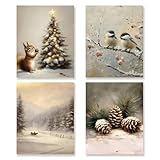
KSDUT Vintage Christmas Wall Art Decor Set of 4 - Retro Winter Holiday Xmas Artwork Poster Squirrel... | Check Latest Price |
| # | Preview | Product | |
|---|---|---|---|
| 1 |

|
Crafts 4 All Acrylic Paint Set for Adults and Artists - 24 Pack of 12mL Paints with 3 Art Brushes,... | Check Latest Price |
Visualize a gallery wall with printable art featuring cheerful messages, snowflakes, or Christmas scenes, all in matching frames. Alternatively, create your own paintings or hand-lettered signs with holiday quotes. The colors—reds, greens, golds—pop against neutral backgrounds, creating a vibrant focal point. It’s a fun, creative project that instantly brightens your space.
Mix printable and DIY artwork for a layered look. Use different frame styles and sizes to add visual interest. Change the art seasonally or for different celebrations—think snowmen, reindeer, or festive quotes. For a more cohesive theme, stick to a specific color palette or style. Hang them in a prominent spot—above the fireplace, in the entryway, or on a large blank wall.
Download or create printable art files from trusted sources or design your own with graphic software. Print on high-quality paper or canvas, then frame with inexpensive or vintage frames. For DIY paintings, sketch your design lightly, then fill in with acrylic or watercolor paints. Use painter’s tape to create clean borders or lines. Hang with wall hooks or Command strips for damage-free mounting.
Add personal touches like family photos with holiday frames or hand-lettered messages. Incorporate metallic or glitter accents in your DIY art for extra sparkle. Use thematic color schemes—reds, greens, silvers—to unify the look. Change the art monthly to keep your decor fresh and engaging.
Custom wall art is a creative way to celebrate the season while showcasing your personality. It’s budget-friendly, easy to change, and highly impactful. Your home will radiate holiday cheer with just a few simple prints or paintings. Ready to create your own festive gallery?
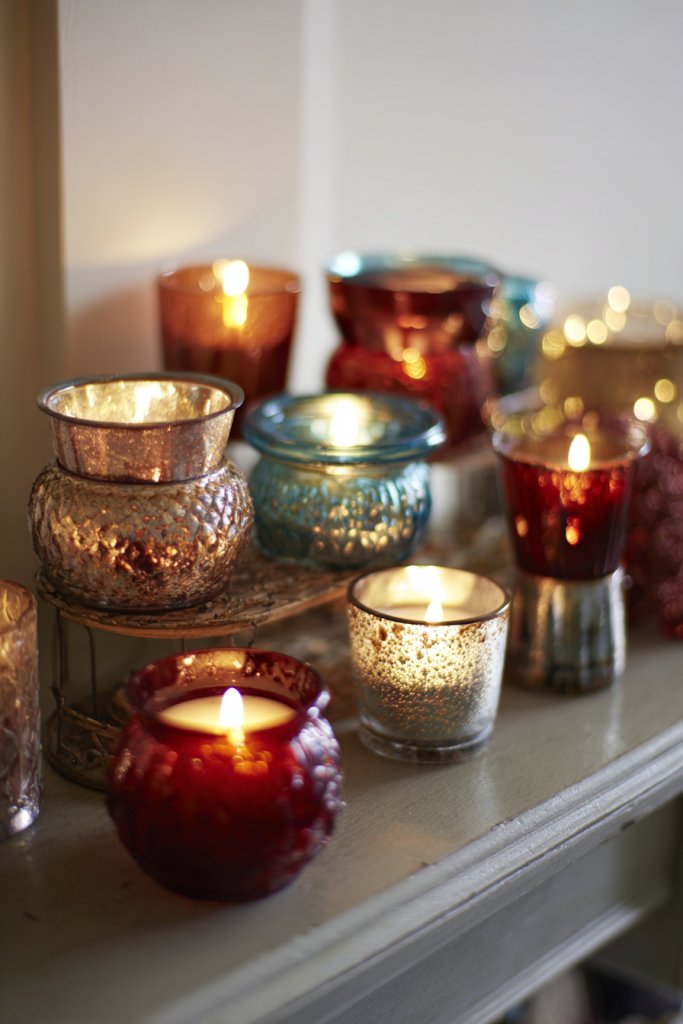
15. Festive Tea Light Holders with Seasonal Decorations
Want to add subtle, charming lighting to your holiday decor? Festive tea light holders decorated with seasonal touches can do just that. They create a warm, inviting glow on tables, mantels, or windowsills. Plus, they’re inexpensive and easy to customize.
Recommended Products to replicate this idea
| # | Preview | Product | |
|---|---|---|---|
| 1 |

|
Glasseam Christmas Votive Candle Holders: Glass Tealight Candle Holder Set of 6 Tea Candle Holder... | Check Latest Price |
| # | Preview | Product | |
|---|---|---|---|
| 1 |

|
Homemory 12Pcs Flickering Flameless Candle Battery Operated, 200+Hours Fake Electric LED Tea Lights... | Check Latest Price |
Picture small glass or ceramic holders decorated with faux holly, pinecones, or miniature Christmas figurines. When lit, they cast flickering shadows, creating a cozy atmosphere. Grouped together or spread out, they add a festive sparkle that enhances your overall decor. The soft light makes everything feel more intimate and welcoming.
Choose holders in metallic, matte, or clear finishes to match your theme. Decorate the outside with paint, stickers, or glued-on embellishments like faux berries or glitter. Use varying sizes and shapes to add visual interest. For outdoor settings, opt for weatherproof holders. Change decorations seasonally for ongoing versatility.
Arrange tea lights in holders on your tables or shelves. Decorate the exterior with small accents—ribbons, faux holly, or snowflakes—using hot glue or double-sided tape. For safety, use flameless LED tea lights if children or pets are around. Light them just before your gathering for a flickering, festive effect. Store extra decorations with your seasonal decor.
Personalize with handwritten tags, family initials, or holiday messages. Mix different decor elements—mini wreaths, faux snow, or glitter—to match your decor style. Create a themed set—winter forest, cozy cabin, or classic Christmas—to complement your overall look. Change the decorations each year for variety.
Tea light holders are a simple way to add ambiance and charm to any space. They’re versatile, affordable, and easy to update each season. Your home will glow with warmth and festive spirit, perfect for cozy nights or holiday dinners. Ready to light up your home?
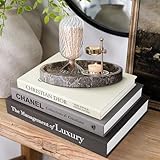
16. Reimagined Bookcase Decor with Holiday Accents
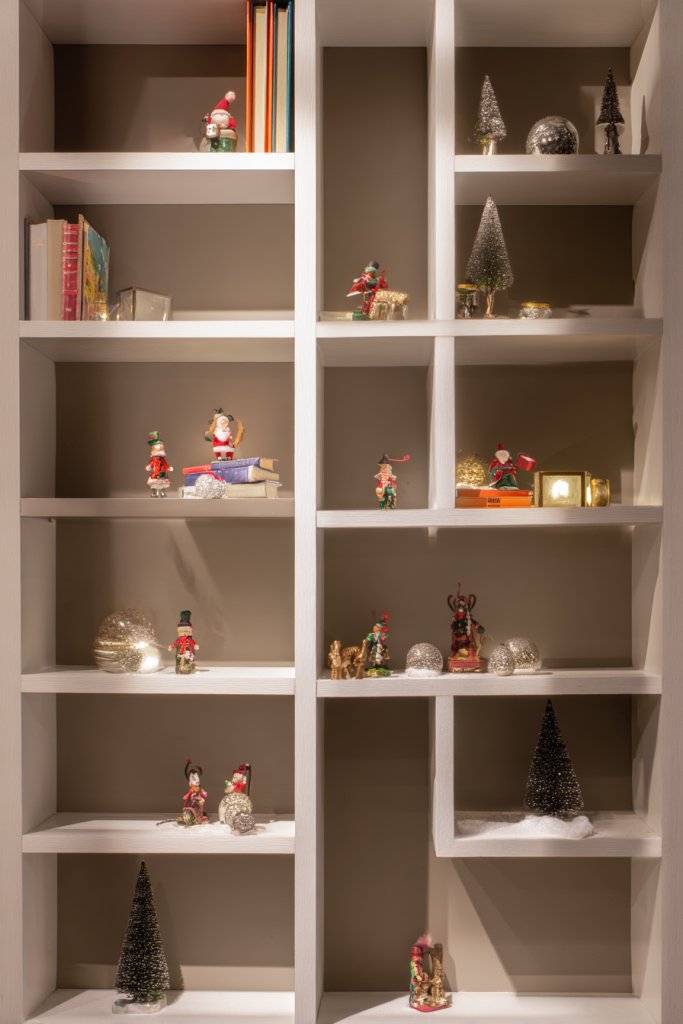
Want to make your bookcase a festive focal point? Reimagining your bookcase with seasonal accents adds personality and holiday cheer to your everyday decor. It’s a clever way to incorporate the season into your home without extra clutter. Plus, it’s an easy project anyone can do.
Recommended Products to replicate this idea
| # | Preview | Product | |
|---|---|---|---|
| 1 |

|
Yuxung 16.4ft Mini Dollhouse Christmas Fake Lights, Dollhouse Garland with Golden Wire, Trimmable... | Check Latest Price |
| # | Preview | Product | |
|---|---|---|---|
| 1 |

|
Book Ornament, Book Ornaments for Christmas Tree, Hanging Christmas Ornaments 2026, Book Lovers... | Check Latest Price |
Picture a neatly styled bookcase with holiday-themed covers, small ornaments, or decorative boxes. Incorporate seasonal colors like red, green, and gold with fabric or paper accents. Some shelves feature mini trees, snowflakes, or faux presents, while others display your favorite books. The overall look is warm, inviting, and personalized.
Use themed book covers or wrap books with holiday paper or fabric for a cohesive look. Add small decorative objects—mini lanterns, faux berries, or seasonal figurines—on some shelves. Change the arrangement each season—swap out holiday accents or rearrange books for freshness. Incorporate different heights and textures to add visual interest.
Start by decluttering and organizing your books. Wrap some in holiday-themed paper or fabric. Place decorative items strategically among the books—preferably at different heights for visual flow. Use small stands or boxes to elevate some objects. Keep the decor balanced, not overcrowded, and ensure easy access to your favorite reads. Rearrange periodically for a fresh look.
Add personalized touches like family photos in holiday frames or custom name tags. Use seasonal colors for the books and accents. Incorporate DIY elements like painted figurines or handmade garlands for a personal touch. You can also add fairy lights in a safe manner to highlight your display.
Your bookcase can become a festive showcase that reflects your personality. It’s simple, stylish, and budget-friendly, making your entire home feel more thoughtfully decorated. It’s also a functional way to celebrate the season daily. Ready to style your shelves?
17. DIY Advent Calendar with Small Gift Pockets
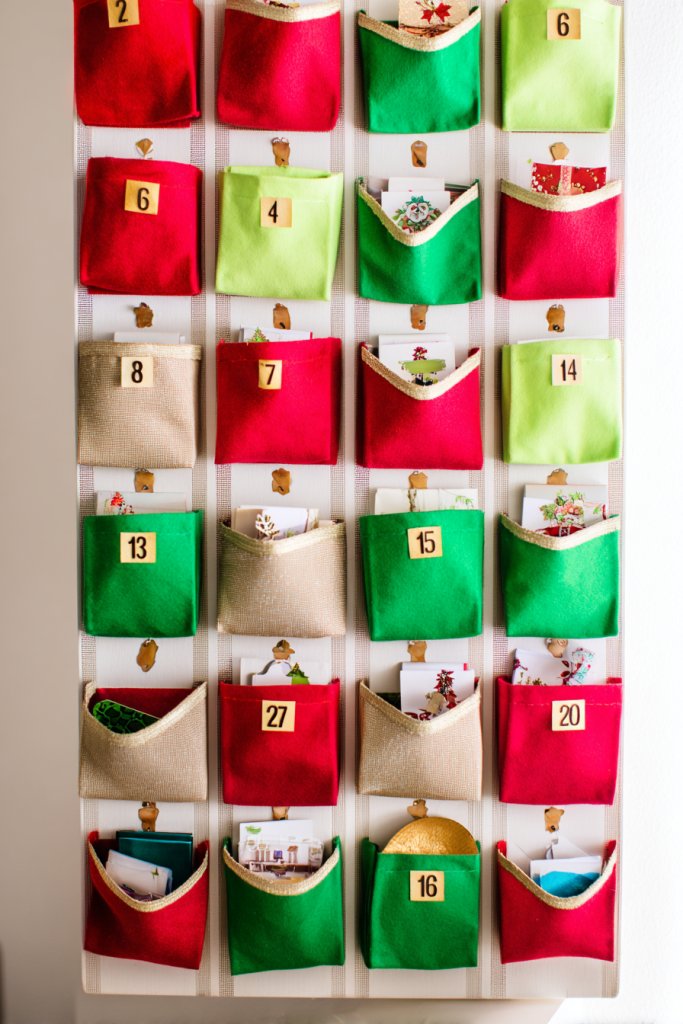
Looking for a fun, interactive way to count down to Christmas? A DIY advent calendar filled with small gifts or notes adds excitement and anticipation. It’s a personalized tradition that can be tailored to your family’s style and interests. Plus, it’s a rewarding project to craft and enjoy.
Recommended Products to replicate this idea
| # | Preview | Product | |
|---|---|---|---|
| 1 |

|
Merry Christmas Green Tree Advent Calendar by Pockets of Learning | Festive Holiday Décor, Seasonal... | Check Latest Price |
| # | Preview | Product | |
|---|---|---|---|
| 1 |

|
WLUSEAXI 12Pack Small Gift Boxes with Lids, 4.5''x4.5''x2'' Small Boxes for Gifts with Ribbons,... | Check Latest Price |
Imagine a fabric or cardboard calendar with 24 small pockets or boxes, each labeled with a date. Fill each with tiny treats, notes, or ornaments. Decorate the calendar with wrapping paper, paint, or fabric to match your decor theme. Hang it on a wall or place it on a table, creating a colorful, festive display. Each day, a new surprise awaits.
Use different materials—felt, wood, or paper—to craft your calendar. Personalize each pocket with names or themed images. Incorporate small toys, candies, or handwritten notes for variety. Change the design each year—use fabric pockets, paper envelopes, or miniature boxes. Hang with ribbons or attach to a wall with clips.
Create or buy a base—fabric, wood, or cardboard—and add small pockets or boxes. Decorate with paint, markers, or fabric for a cohesive look. Fill each pocket with surprises—candies, small toys, or heartfelt notes. Attach the pockets securely with glue or string. Hang or display in a prominent spot, making sure each day’s item is accessible.
Personalize by adding family photos, names, or themed decorations. Incorporate meaningful gifts or handwritten messages that reflect your family traditions. Use seasonal accents—faux snow, glitter, or mini wreaths—to enhance the design. Rotate or update the contents each year for ongoing excitement.
A DIY advent calendar is more than just a countdown—it’s a cherished family tradition. It’s customizable, meaningful, and fun to craft. It creates joyful anticipation and lasting memories. Ready to start your holiday countdown?
18. Festive Kitchen Decor with Holiday-Themed Dish Towels and Mugs
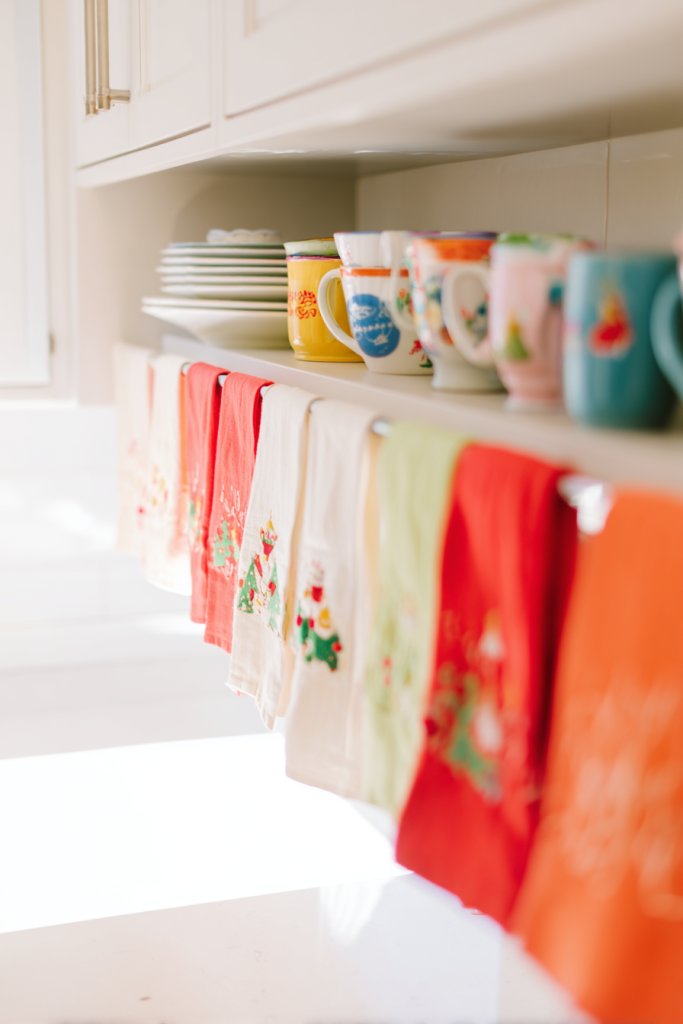
Want to bring holiday cheer into your kitchen effortlessly? Festive dish towels and mugs are small touches that make a big impact. They add color and personality to your cooking space and are perfect for holiday mornings or gift-giving. Plus, they’re practical and easy to swap out.
Recommended Products to replicate this idea
| # | Preview | Product | |
|---|---|---|---|
| 1 |
|
FuWeave 20 Pcs Holiday Kitchen Towels Seasonal Decorative Hand Towels Set Christmas Dish Cloths... | Check Latest Price |
| # | Preview | Product | |
|---|---|---|---|
| 1 |

|
Spode Christmas Tree Collection Holly Mugs, Set of 4-9 Oz. Fine Earthenware Cups with Festive Holly... | Check Latest Price |
Imagine your kitchen filled with cheerful red, green, and plaid dish towels hanging from oven handles and towel racks. Holiday-themed mugs with reindeer, snowflakes, or Christmas trees sit ready for coffee or cocoa. The coordinated patterns and colors create a festive, inviting atmosphere that spreads joy every time you cook or sip.
Mix and match different patterns—stripes, polka dots, or seasonal prints—to keep things lively. Incorporate embroidered or appliqued designs for a personalized touch. Change out the towels and mugs seasonally—gingham and tartan for winter, floral for spring. Use decorative hooks or racks to display them prominently.
Choose high-quality, machine-washable fabrics for the towels. Hang or fold them in accessible spots—oven handles, hooks, or open shelves. Select mugs in various sizes and designs, and display them on open shelves or in cabinets. Coordinate your color scheme across all items for a cohesive look. After the season, store or gift your favorite pieces.
Add custom embroidery or appliqué with family names or festive messages. Incorporate small decorative accents like mini pinecones or faux holly to enhance the look. Gift personalized mugs or create DIY towel decorations for extra charm. Rotate your decor to match holidays or seasons.
Holiday-themed kitchen decor makes every meal feel special. It’s an easy, affordable way to celebrate the season daily. Your kitchen will radiate festive spirit, making cooking and entertaining more fun. Ready to brighten your space?
Conclusion
From traditional accents to contemporary twists, these Christmas room decor ideas showcase a variety of ways to make your home festive and inviting. Don’t hesitate to try out different themes and decorations to find what truly makes your space feel merry and bright. Let these ideas spark your creativity and turn your home into a winter wonderland that celebrates the joy of the season!