I have been, or can be if you click on a link and make a purchase, compensated via a cash payment, gift, or something else of value for writing this post. As an Amazon Associate, I earn from qualifying purchases. Please read my full Affiliate Disclosure for more information.
Imagine transforming a simple bedroom into a magical world where your little boy’s imagination can run wild! Designing a fun and functional space for 3-year-old boys is incredibly popular because it sparks creativity, encourages independence, and makes bedtime something to look forward to.
In this article, you’ll find a variety of inspiring ideas that combine playful themes with practical solutions, ensuring the room is both entertaining and easy to keep organized. From adventurous decor to clever storage tricks, these ideas will help you create a space that your child will love and that will grow with them.
1. Cozy Cabin Bed with Built-In Storage Drawers
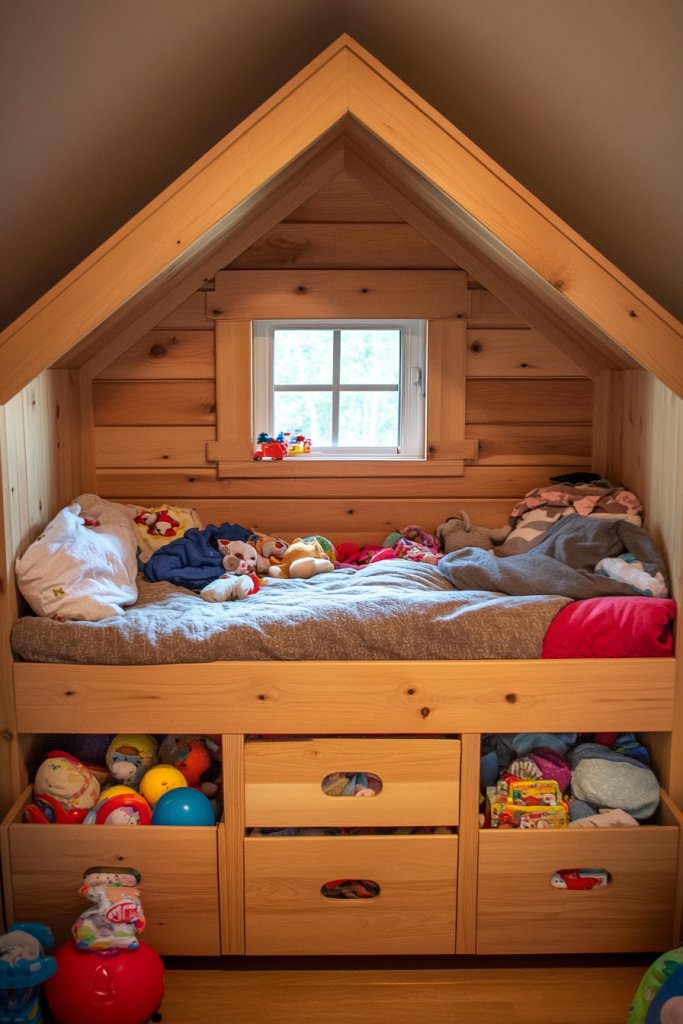
Ever tried to fit a mountain of toys, clothes, and bedding into a tiny kid’s room without it turning into chaos? Kids love adventure, but they also need order, right? A cozy cabin bed with built-in storage promises both fun and functionality, making bedtime feel like a mini adventure. Who wouldn’t want a bed that feels like a secret hideaway?
Recommended Products to replicate this idea
| # | Preview | Product | |
|---|---|---|---|
| 1 |

|
Low Loft Bed Twin Size with 7 Storage Drawers, Desk and LED Lights, Heavy Duty Metal Kids Loft Bed... | Check Latest Price |
| # | Preview | Product | |
|---|---|---|---|
| 1 |

|
Budding Joy 90L Under Bed Storage Containers, Closet Organizers and Storage Bins, Foldable Underbed... | Check Latest Price |
Picture a charming wooden bed frame painted in soft, muted tones, resembling a tiny mountain cabin. Underneath, pull-out drawers hide away stuffed animals, pajamas, or even extra blankets. The textured wood, combined with colorful textiles and a few decorative pillows, creates a cozy nook that invites kids to imagine stories. Soft lighting from a wall-mounted sconce adds a warm glow, making the space inviting.
This concept works well with rustic themes or modern minimalist decor, depending on your style. For a more whimsical look, add playful decals on the walls or themed bedding. You can also customize the storage drawers with labels or colorful knobs to match the child’s favorite colors or characters. Seasonal touches like fairy lights or themed bedding can refresh the look year-round.
Start with a sturdy wooden bed frame designed for kids, ensuring it has space underneath for drawers or storage bins. Use lightweight but durable materials like MDF or plywood to build or modify the drawers. Attach handles or knobs for easy access, and consider adding a safety rail for security. You can buy pre-made drawers or DIY with fabric or plastic containers that slide in and out smoothly. Finish with non-toxic paint or sealant to keep it safe for kids.
Add personalized touches like a name plaque on the headboard or themed decals that match your child’s favorite stories. Incorporate soft textiles like a cozy throw blanket or a plush rug nearby. Consider installing a small shelf above for books or toys, or even a custom canopy to create a magical hideaway. These details make the space unique and truly theirs.
A cabin bed with built-in storage turns a simple sleeping area into a playful retreat. It encourages independence as kids learn to organize their belongings. Plus, it makes tidying up easier—less mess, less stress. Ready to transform your little one’s room into an adventure land? It’s easier than you think and looks adorable too!
2. Themed Wall Murals Featuring Favorite Characters or Vehicles
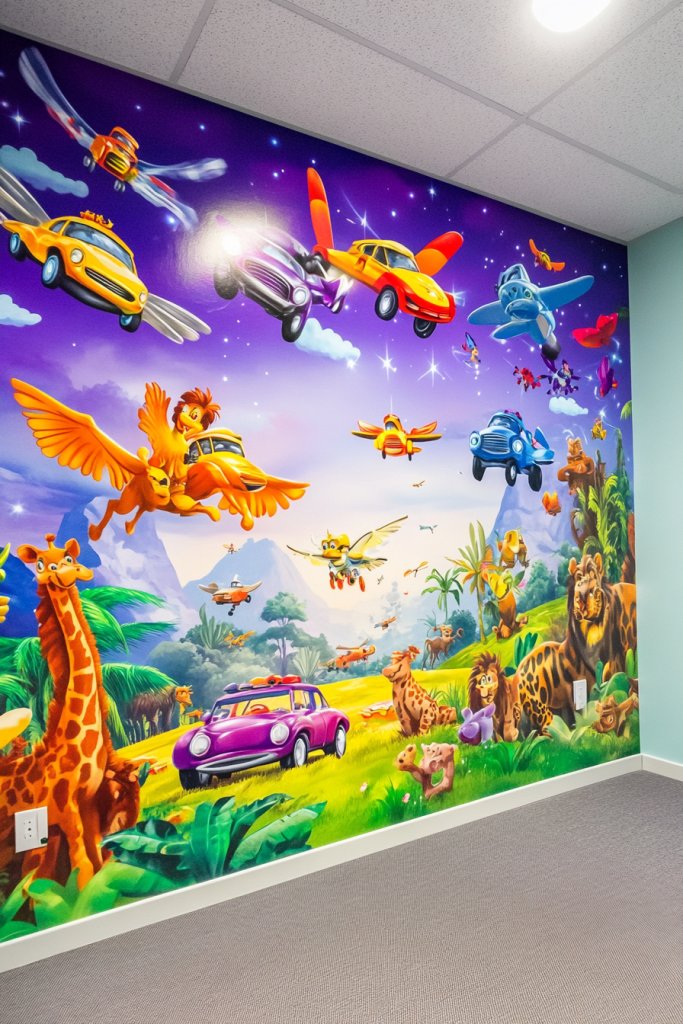
Does your child dream of flying cars, brave firefighters, or jungle adventures? Walls are prime real estate for sparking imagination, but painting murals can seem daunting. Luckily, themed wall murals are an easy way to bring their favorite worlds into their room without a permanent commitment. Who wouldn’t want a room that feels like stepping into their favorite story?
Recommended Products to replicate this idea
| # | Preview | Product | |
|---|---|---|---|
| 1 |

|
Roman’s E-Z Hang Peel & Stick Wallpaper Helper, Clear, Non-Staining, 32 Fluid Ounces | Check Latest Price |
| # | Preview | Product | |
|---|---|---|---|
| 1 |

|
decalmile Car Road Wall Stickers Transports Vehicles Construction Truck Wall Decals Baby Nursery... | Check Latest Price |
Imagine a vibrant wall with a playful mural of a bustling cityscape filled with colorful vehicles or a lush jungle scene with friendly animals peeking out. Removable decals or painted murals can cover entire walls, transforming plain walls into scenes bursting with activity. Bright colors and playful characters create an immersive environment that invites kids to invent stories. The textures of painted elements or decals add depth, making the room lively and engaging.
Murals can be tailored to your child’s current favorites—think space ships, dinosaurs, or princess castles—easily changeable as tastes evolve. For a more subtle look, opt for a painted border or accent wall with themed patterns. Seasonal or special occasion murals, like holiday scenes, can add variety. Use removable decals if you want flexibility, or hire a mural artist for a custom masterpiece.
Decide whether to paint or use decals—painted murals require some artistic skill or a professional, while decals are straightforward to apply. For painted murals, prep the wall by cleaning and priming; sketch out your design lightly with pencil before painting with child-safe, washable paints. For decals, buy high-quality, removable stickers designed for walls, and carefully position them to avoid bubbles. Seal with a clear, washable top coat if painted for durability. Remember, a little planning makes a big difference in a smooth application.
Involve your child in choosing the theme or colors—it makes the room feel truly theirs. Add small decorative elements like themed cushions, rugs, or curtains to complement the mural. Use glow-in-the-dark stars or accents to add a magical touch at night. Custom decals with your child’s name or favorite phrases can make the mural even more special.
A themed mural transforms an ordinary room into an extraordinary adventure zone. It boosts your child’s creativity and sense of wonder, making the space a favorite retreat. Plus, it’s a fantastic way to showcase their personality and interests. Ready to turn blank walls into storybook scenes? It’s easier and more affordable than you think—and totally worth the wow factor!
3. Multi-Functional Loft Bed with Play Area Below
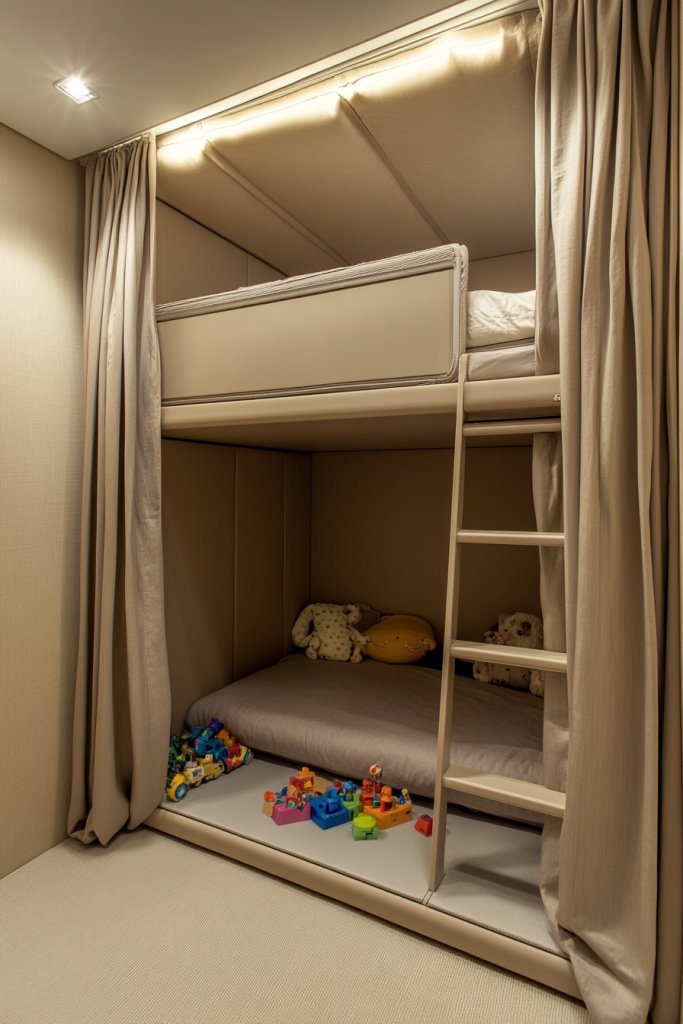
Limited space in small bedrooms makes it tough to fit a bed, play zone, and storage. Every parent’s nightmare is a cluttered, cramped room that stifles a kid’s imagination. Enter the multi-functional loft bed with a play area underneath—an efficient way to maximize vertical space. It turns a simple bed into a mini playground and study spot all in one.
Recommended Products to replicate this idea
| # | Preview | Product | |
|---|---|---|---|
| 1 |

|
DICTAC Low Loft Bed with Slide,Storage Stairway and Led Lights Metal Twin Size Loft Bed with... | Check Latest Price |
| # | Preview | Product | |
|---|---|---|---|
| 1 |

|
Spider-Man Loft Bed Tent - Curtain Set for Low Twin Loft Bed (Bed Sold Separately) by Delta Children | Check Latest Price |
Picture a sturdy wooden or metal loft with a cozy sleeping nook perched above, leaving a spacious play zone below. The underside can feature a mini tent, foam mats, or themed cushions, creating an inviting play area. Bright, cheerful colors and soft textiles make it feel like a personal clubhouse. The space underneath is open, allowing for easy access to toys, books, or even a small desk for homework.
This setup suits a range of styles—from sleek modern metal frames to rustic wood finishes. You can customize the play area with themed fabrics or removable wall decals that match your child’s interests. For shared rooms, add curtains or screens for privacy. Seasonal variations could include cozy blankets for winter or lighter, airy fabrics for summer.
Start with a durable, safety-certified loft bed kit or custom build one if you’re handy. Ensure the structure is sturdy and well-secured to the wall or floor. Use soft mats or foam tiles underneath for safety and comfort. Decorate with themed cushions, hanging storage pockets, or small shelves for books and toys—just avoid clutter. For extra fun, attach a small climbing ladder or slide for added excitement. Remember, safety first—check weight limits and stability regularly.
Decorate with your child’s favorite colors, patterns, or themed accessories like space, dinosaurs, or princess motifs. Add a small chalkboard or whiteboard for drawing and notes. Personal touches like a framed photo or a custom name banner above the bed can make it feel special. Incorporate flexible storage solutions to keep the play area neat.
A loft bed with a dedicated play zone turns a small room into a versatile fun hub. It encourages independence and organization, as kids learn to keep their space tidy. Plus, it saves space for other activities or furniture. It’s a clever, stylish way to make the most of limited room and boost your child’s creativity. Are you ready to elevate your child’s room game? It’s a win-win for everyone!
4. Bright Color Blocked Walls for Visual Stimulation
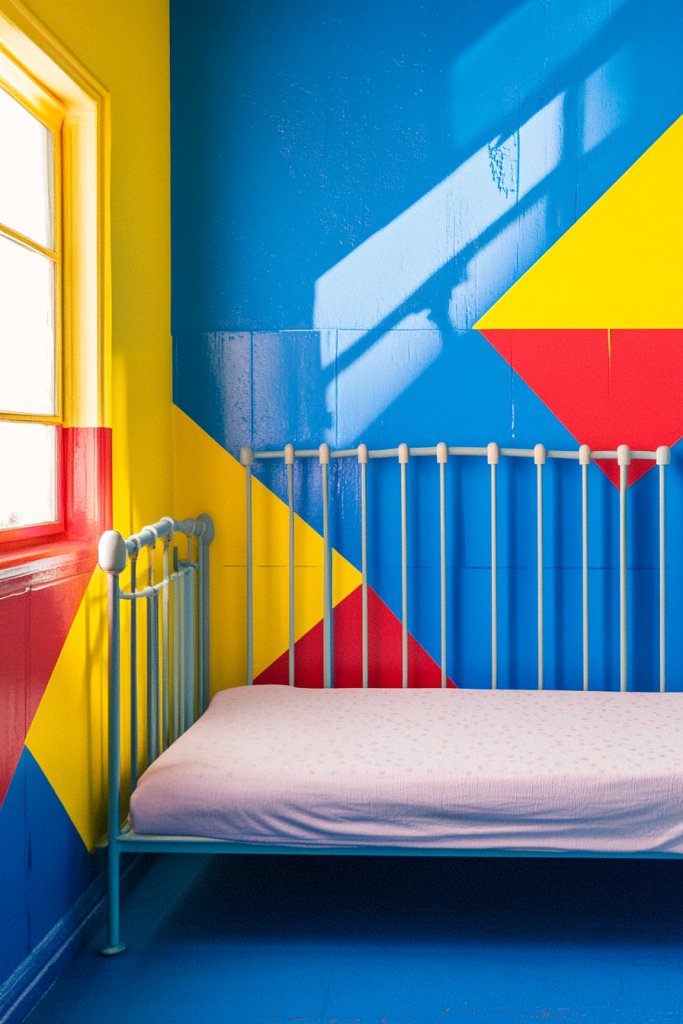
Boring, monochrome walls can make a room feel dull and uninspiring, especially for energetic little boys. Bright color blocking injects life and energy into the space, stimulating their senses and creativity. Who says walls can’t be fun and functional at the same time? Bright blocks are a simple way to transform any room instantly.
Recommended Products to replicate this idea
| # | Preview | Product | |
|---|---|---|---|
| 1 |

|
Scotch Rough Surface Extra Strength Painter's Tape, 0.94 in x 60.1 yd, Tape Protects Surfaces and... | Check Latest Price |
| # | Preview | Product | |
|---|---|---|---|
| 1 |

|
Pro Grade Paint Roller Kit, Brush & Roller,10 Piece Set, Wall Painting Naps for Professionals &... | Check Latest Price |
Imagine walls painted with bold, contrasting blocks of primary colors—reds, blues, and yellows—forming geometric patterns that catch the eye. The sharp lines and vivid hues create a lively backdrop for the room’s other elements. Textured finishes or matte paints can add depth, while color-blocked zones define different areas—like a reading corner or play zone. The visual impact energizes the room and sparks imagination.
Use softer pastel blocks for a calmer vibe or metallic accents for a modern edge. Incorporate patterns like stripes, chevrons, or irregular shapes to suit your style. Seasonal accessories, such as themed decals or textiles, can complement the color blocks. For smaller spaces, vertical blocks can create an illusion of height, making the room feel larger.
Start by sketching your design with painter’s tape to ensure crisp edges. Choose non-toxic, washable paints for easy cleaning and safety. Tape off sections carefully, ensuring straight lines and corner accuracy. Apply multiple coats if needed for vibrant coverage. For a more polished look, consider using painter’s level or laser guides. Once dry, remove tape slowly to reveal sharp, clean lines. Finish with a clear, washable top coat for durability.
Add different textures within blocks—such as a matte finish on one section and gloss on another—for visual interest. Incorporate removable wall decals or stickers that match the color scheme for extra fun. Use textiles like curtains or cushions in matching tones to tie the room together. Personal touches like a custom name or initials can be painted directly into a blank space.
Color blocking is a bold, creative way to energize a room and reflect a child’s lively personality. It’s an affordable, customizable DIY project that makes a big impact. Your little one will love their vibrant, cheerful space. Ready to add some punch to your child’s room? It’s easier than you think and always a crowd-pleaser!
5. Interactive Chalkboard or Whiteboard Wall
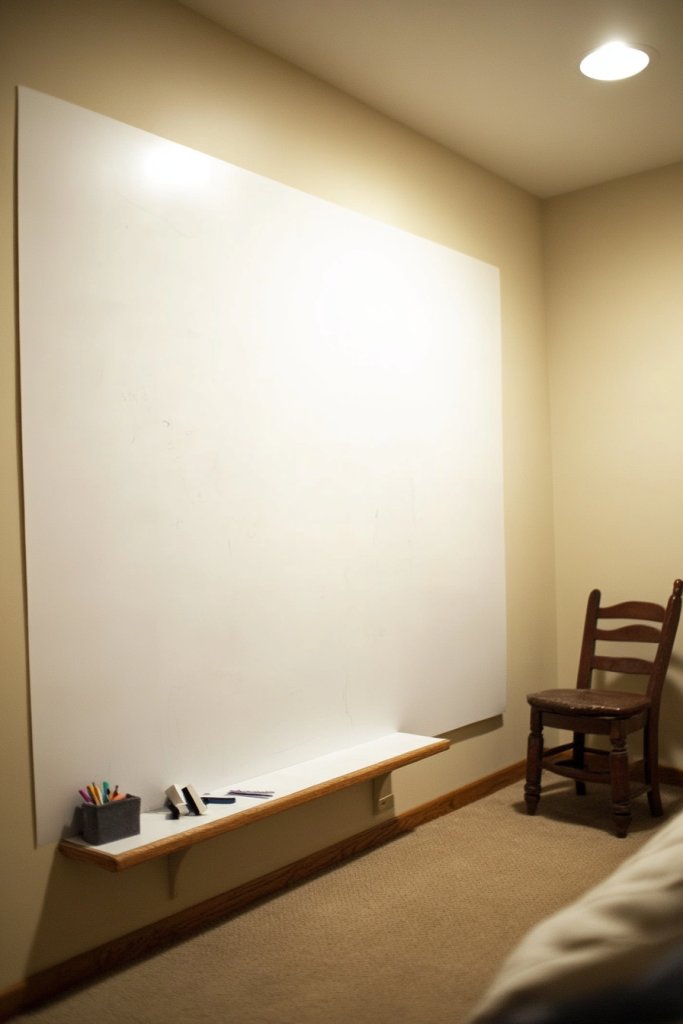
Kids love to draw, doodle, and express themselves, but constantly changing artwork can clutter up a room. A dedicated chalkboard or whiteboard wall turns a blank space into an endless canvas for creativity. It keeps mess contained and encourages learning through play. Who wouldn’t want a wall that actually invites them to create?
Recommended Products to replicate this idea
| # | Preview | Product | |
|---|---|---|---|
| 1 |

|
Rust-Oleum 206540 Chalkboard Brush-On Paint, 30 oz, Black | Check Latest Price |
| # | Preview | Product | |
|---|---|---|---|
| 1 |

|
HAMIGAR Whiteboard Sticker for Wall 18" x 79" Dry Erase Board Wallpaper Peel and Stick, White Board... | Check Latest Price |
Imagine a large wall painted with chalkboard or whiteboard paint, ready for endless scribbles and masterpieces. The surface is perfect for drawing cars, animals, or spelling practice. Surround it with colorful shelves or ledges for chalk, markers, and erasers—organized and accessible. Kids can leave messages, practice writing, or just have fun expressing themselves in a space that’s all theirs. The textures of the chalkboard surface add a tactile element that’s both fun and functional.
Choose between traditional chalkboard paint or modern whiteboard surfaces depending on your preference. Frame the area with colorful tape or trim for a polished look. For older kids, add magnetic paint beneath the surface for attaching notes or artwork. The wall can be positioned near a study corner or in a play zone, adapting to the room’s layout. Removable decals or borders can add extra personality.
Start with high-quality chalkboard or whiteboard paint, applying multiple thin coats with a roller for smoothness. Allow ample drying time between coats. For whiteboards, choose a smooth, non-porous surface and attach with adhesive strips or paint directly on a prepared wall. Add a small ledge or tray at the bottom for accessories. Regular cleaning with appropriate cleaners keeps the surface fresh and functional. Consider adding a corkboard or fabric panel nearby for additional organization.
Personalize the space with your child’s name or favorite colors on the frame or border. Incorporate themed stickers or decals that can be easily removed or changed. Use colorful chalk or markers to add vibrancy. You can also create a small gallery of their artwork or writing samples beside the wall for motivation and pride.
A chalkboard or whiteboard wall makes learning fun and accessible, boosting confidence as kids see their progress. It encourages open-ended play and skill development in a playful environment. Plus, it keeps the room organized by containing creative messes in one dedicated spot. Ready to turn a plain wall into a hub of imagination? It’s a simple upgrade with big rewards!
6. Customizable Storage Cubes with Bins
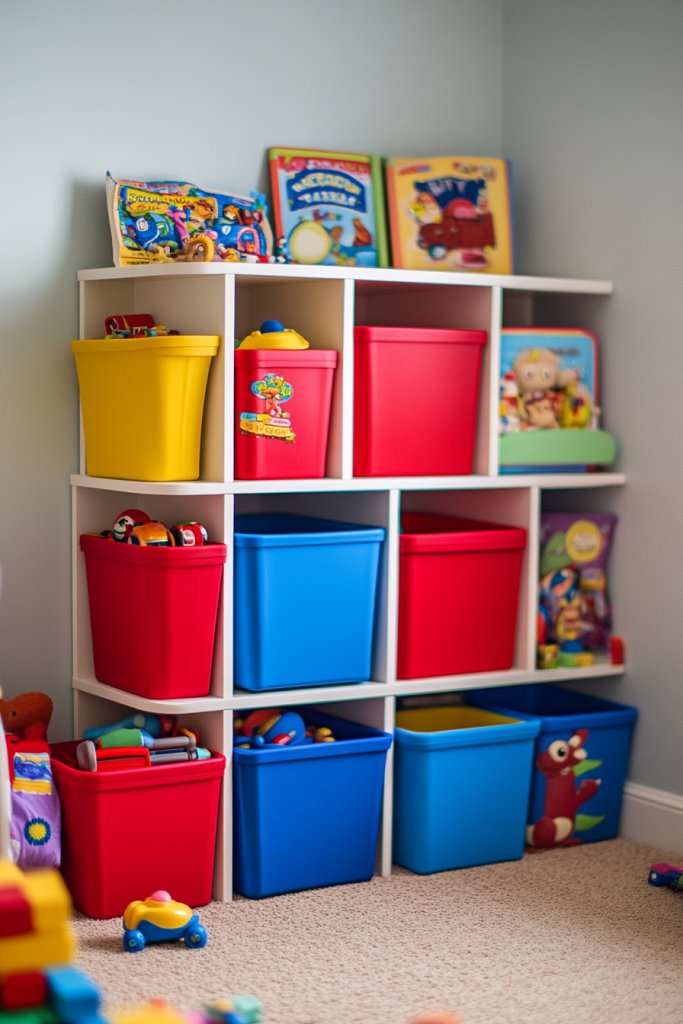
Ever feel overwhelmed by a mountain of toys, books, and clothes scattering all over your child’s room? Finding things quickly becomes a treasure hunt, leading to frustration. Customizable storage cubes with bins offer an easy, flexible way to tame chaos and teach kids about tidiness. Who wouldn’t want an organized space they can actually keep clean?
Recommended Products to replicate this idea
| # | Preview | Product | |
|---|---|---|---|
| 1 |
|
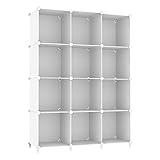
AWTATOS Cube Storage Organizer Storage 12 Cube Bookshelf DIY Plastic Closet Clothes Storage Shelves... | Check Latest Price |
| # | Preview | Product | |
|---|---|---|---|
| 1 |
|
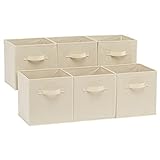
Amazon Basics Collapsible Fabric Storage Cubes Organizer with Handles, Sturdy, Beige,... | Check Latest Price |
Visualize a set of sleek, modular cubes stacked neatly against the wall, each with labeled fabric bins or baskets. Bright colors or patterns make it easy for kids to identify where their favorite toys or books go. The open design allows for quick access, and the labels help them learn responsibility. The cubes can be arranged in different configurations to fit any space, creating a tidy, cheerful corner that invites kids to put things away.
Choose from a variety of materials—wood, plastic, or fabric-covered units—to match your decor style. Label bins with words or pictures to aid early reading skills. Use different sizes for different items—smaller bins for tiny toys, larger ones for bigger items. For seasonal updates, swap out bins with themed or seasonal designs. The modular nature allows you to grow and reconfigure as your child’s needs change.
Start by measuring your space and selecting storage cube units that fit. Assemble the cubes following the manufacturer’s instructions, ensuring stability. Choose bins that are easy for small hands to open and close; fabric bins are usually best. Label each bin with a picture or word for easy recognition. Place frequently used items at eye level, and store less-used items higher or lower. Encourage your child to participate in sorting and organizing, making it a fun routine.
Personalize bins with your child’s name or favorite themes—superheroes, animals, or space motifs. Mix and match colors to create a vibrant, playful vibe. Use decorative stickers or fabric covers to add a touch of personality. Incorporate a small chalkboard label for easy updates or to teach sorting skills. This system grows with your child and can be adapted for new interests.
A well-organized space helps children develop responsibility and independence. It’s a visual reward for good habits and makes cleaning up less of a chore. Plus, it creates a cheerful environment that kids love to spend time in. Can you imagine how much easier your life will be with everything in its place? It’s a simple, effective way to boost your child’s confidence and organizational skills.
7. Themed Bedding Sets with Coordinated Accessories
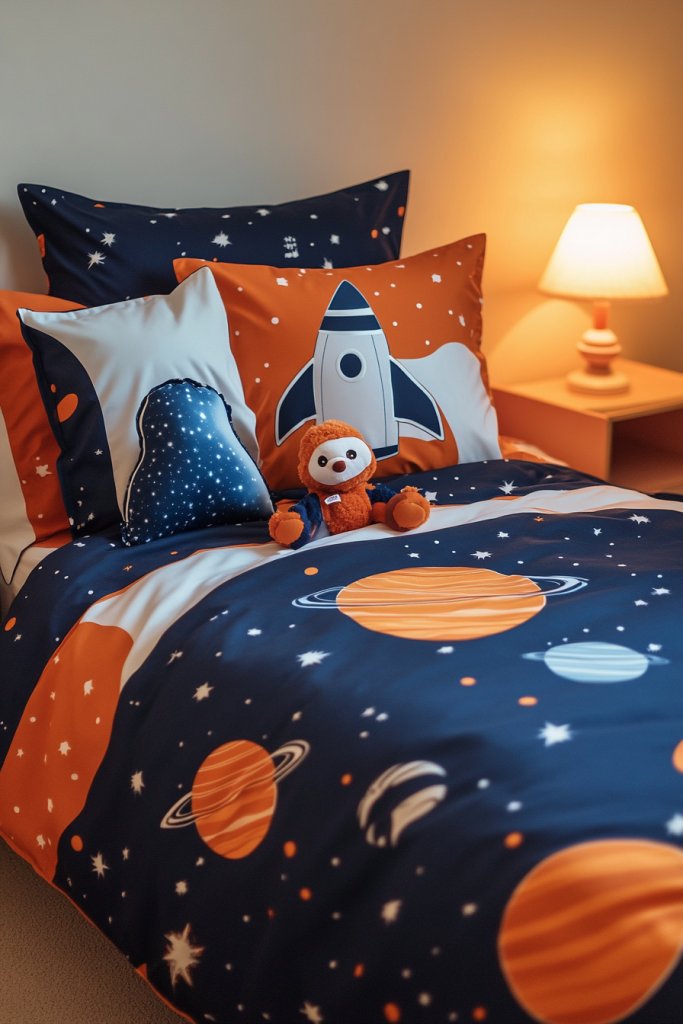
Does your kiddo have a favorite theme—trucks, animals, or outer space—that you wish you could incorporate into their room? Bedding sets are a quick way to bring a room’s personality to life, but they often feel disconnected from the overall decor. Coordinated accessories make the theme pop without overwhelming the space. Who wouldn’t want a room that feels just right?
Recommended Products to replicate this idea
| # | Preview | Product | |
|---|---|---|---|
| 1 |

|
Twin Kids Comforter Set - 5 Pieces Twin Bedding Sets for Boys, Glow in The Dark Space Bed in A Bag... | Check Latest Price |
| # | Preview | Product | |
|---|---|---|---|
| 1 |

|
Blanket & Throw Pillow Covers Set - Dual-Sided Faux Fur Fluffy Blanket (50" x 60"), 2 Pcs Cozy Plush... | Check Latest Price |
Visualize a bedding set featuring bold prints of racing cars or cuddly animals, paired with matching curtains, rugs, and pillowcases. The coordinated look makes the theme feel intentional and complete. Textured fabrics like soft cotton or plush fleece add comfort, while vibrant colors energize the room. Small accessories like themed plush toys or decorative cushions reinforce the look and invite kids to engage with their space.
Mix and match different sets or add seasonal layers like lightweight quilts or heavier blankets. For a more subtle look, choose bedding with smaller, repeating patterns and complement with plain accessories. You can update the look easily by changing out accessories or adding themed wall decals that match the bedding. For older kids, choose more mature designs or sleek patterns that grow with them.
Start with a fun theme your child loves—think about colors and motifs. Choose bedding that’s machine washable and durable. Pair it with matching curtains or a rug to create a cohesive look. Use decorative cushions or small throws to add layers and texture. Swap accessories seasonally or as your child’s interests evolve, keeping the room fresh and engaging. The goal is a balanced, themed space that feels lively yet harmonious.
Add personalized touches like embroidered names or initials on the bedding. Incorporate your child’s artwork into pillowcases or wall decals for a custom feel. Use textured fabrics or embroidery for added richness. Consider small themed accessories like a nightlight or wall hooks shaped like stars or animals to complement the bedding theme. It’s all about creating a space your child loves and feels proud of.
Themed bedding sets make the room feel put-together and inviting. They help children express their interests and develop a sense of ownership. A coordinated look also teaches kids about matching and design principles. It’s a simple way to boost their confidence and make bedtime more fun. Ready to create a cohesive, themed retreat? It’s easier than you think and endlessly customizable!
8. Playful Rug Zones for Active Fun
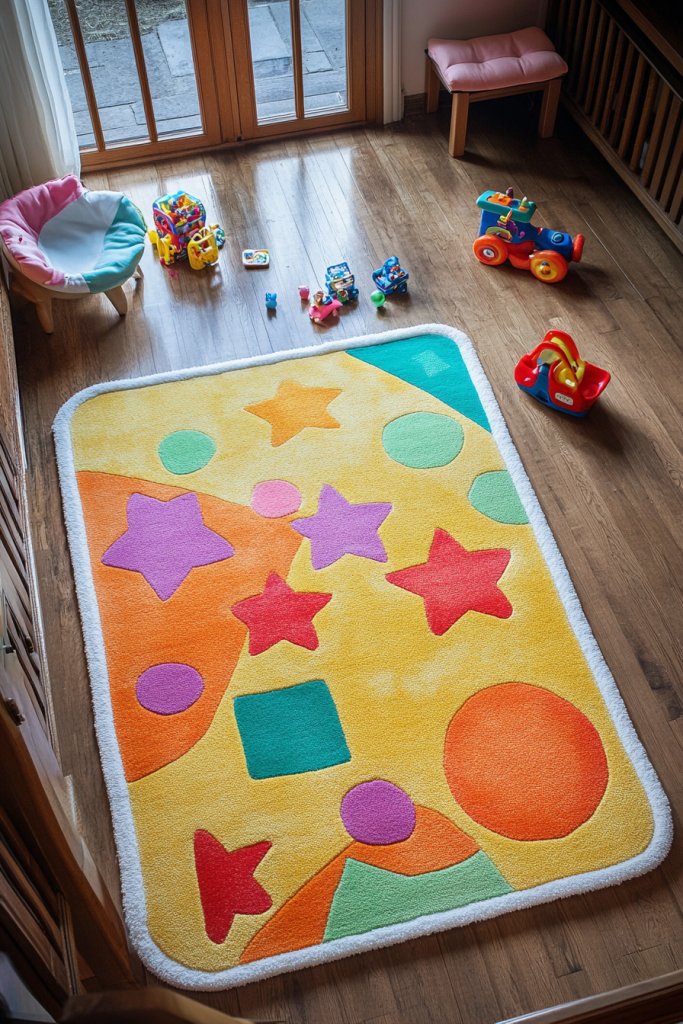
Hard floors are great for cleaning but terrible for little ones who love to run, jump, and tumble. A soft, playful rug creates a designated zone for active play while adding warmth and comfort. It transforms a dull room into a lively playground where kids can move freely without squealing on a cold surface. Who wouldn’t want a cozy zone for all their adventures?
Recommended Products to replicate this idea
| # | Preview | Product | |
|---|---|---|---|
| 1 |
|
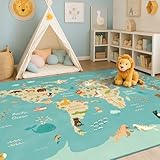
Washable Kids Playroom Rug – 5x7 Play Rug for Preschool Toddlers, Baby Girls, Educational with... | Check Latest Price |
| # | Preview | Product | |
|---|---|---|---|
| 1 |
|
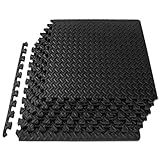
ProsourceFit Puzzle Exercise Mat ½ in, EVA Interlocking Foam Floor Tiles for Home Gym, Mat for Home... | Check Latest Price |
Imagine a large rug with vibrant patterns—like a road map, a jungle scene, or geometric shapes—that sparks creative play. Bright colors and fun shapes make the space inviting and energetic. The plush surface cushions falls and provides a soft landing for energetic kids. Surrounding the rug with small cushions or bean bags creates a cozy corner for reading or relaxing after playtime.
Choose rugs with themes matching your child’s interests—cars, animals, or abstract art. Opt for washable, durable materials that withstand spills and rough play. Use different shapes—round, square, or animal-shaped rugs—to add variety. Layer rugs for a textured look or to define multiple zones within the room. Seasonal updates can include lighter fabrics in summer or plush textures for winter warmth.
Start by measuring the space and selecting a rug large enough for active play. Look for high-pile, non-slip backing for safety and comfort. Lay the rug flat on the floor, and add cushions or small furniture around it for extra fun zones. Spot clean or vacuum regularly to keep it fresh. For added fun, incorporate rugs with interactive features like textured patches or hidden compartments.
Customize the rug with your child’s name or favorite characters via embroidery or patches. Add themed cushions, stuffed animals, or toys to make the zone inviting. Use matching textiles like curtains or bedding to create a cohesive look. Personal touches turn a simple rug into a favorite spot for active afternoons or cozy reading sessions.
A designated play rug makes room for active fun while keeping the space organized. It encourages movement and gross motor development in a safe environment. Plus, it visually separates play areas from sleeping zones, helping kids learn boundaries. Ready to add a splash of color and fun? It’s simple, affordable, and instantly energizes the room!
9. Wall-Mounted Book Nooks for Easy Access
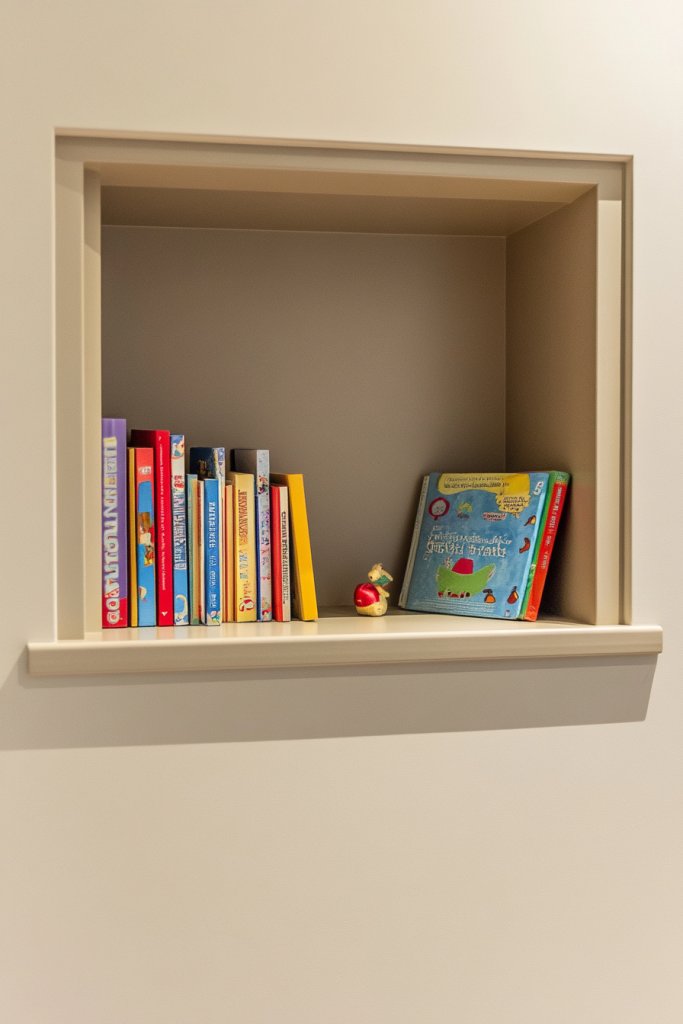
Kids love books, but finding a way to store and display them without clutter is tricky. Floor stacks topple, and traditional shelves can be a pain to reach. Wall-mounted book nooks turn books into decor and make reading materials easily accessible. Who wouldn’t want a dedicated spot that encourages kids to pick up a book anytime?
Recommended Products to replicate this idea
| # | Preview | Product | |
|---|---|---|---|
| 1 |

|
Harwaya Floating Shelves for Wall 36 Inches Long 8 Inch Deep, Large Wall Book Shelves for Bedroom,... | Check Latest Price |
| # | Preview | Product | |
|---|---|---|---|
| 1 |

|
Humble Crew 4-Tier Kids Bookshelf, Natural Wood/White - Premium Book Shelf for Kids Rooms with Four... | Check Latest Price |
Imagine a series of floating shelves or pockets mounted at a kid-friendly height, filled with colorful books and storytime treasures. The design can be playful—shaped like clouds, trees, or geometric shapes—to add visual interest. The books are on display, inviting curiosity and making them easy to grab. Bright colors and creative arrangements create a welcoming, library-like atmosphere that sparks a love for reading.
Choose between open shelves, fabric pockets, or cubbies depending on your decor style and space. Incorporate labels or picture icons for early readers to identify their favorites. Position the shelves near the bed or play area to foster independent browsing. Change the arrangement as your child’s interests evolve or add seasonal-themed books for variety. Mixing different sizes and shapes keeps the display fresh.
Start with sturdy wall anchors and choose a location at a comfortable height for your child. Install floating shelves with appropriate brackets or fabric pockets using strong adhesive or screws. Arrange books by size, theme, or color for visual appeal. Keep the shelves low and accessible for independent browsing. Regularly rotate books to maintain interest and promote ongoing reading habits. Make sure the setup is stable and safe for active kids.
Add decorative elements like framed quotes or themed decals around the book nook. Incorporate a small reading lamp or a cozy cushion nearby to create a mini reading corner. Let your child help choose the books and arrange them—this fosters independence. Use labels with their name or favorite characters for a personal touch.
A wall-mounted book nook makes reading a daily joy and reduces clutter. It encourages kids to explore stories independently and develop literacy skills early. The display boosts confidence as children see their favorite books right at eye level. Ready to make reading fun and accessible? It’s a simple upgrade that makes a big difference!
10. Under-Bed Storage Solutions for Clutter-Free Floors
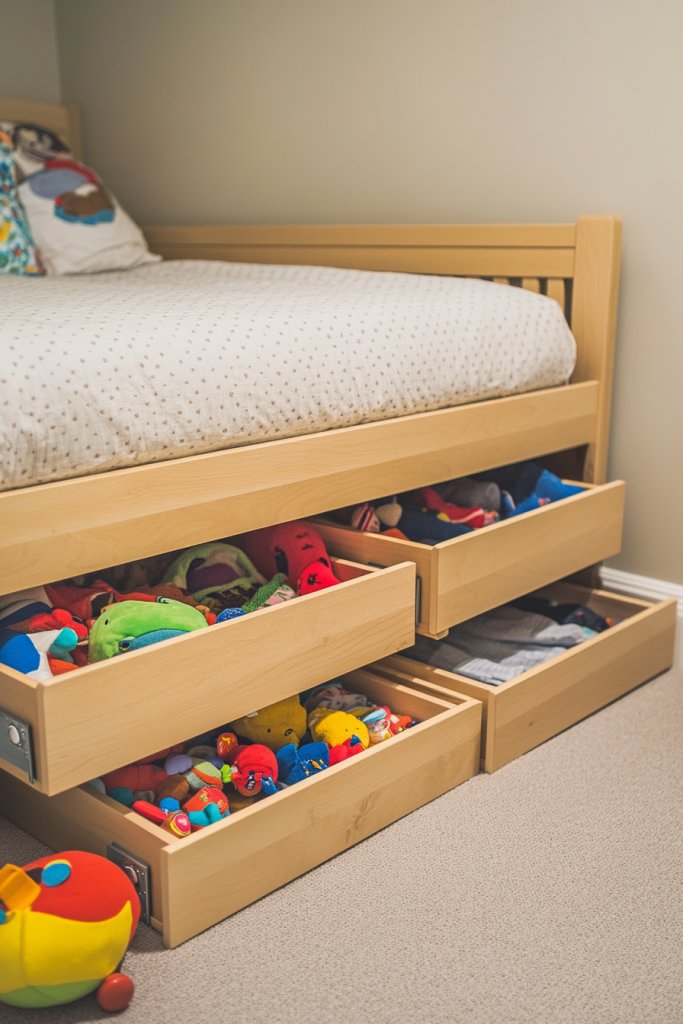
Clutter piles up fast, especially when space is tight. Toys, clothes, and bedding tend to spill out everywhere, turning the room into a chaos zone. Under-bed storage is the perfect solution to hide away bulky or out-of-season items, freeing up precious floor space. Who wouldn’t want a tidy room with everything neatly tucked out of sight?
Recommended Products to replicate this idea
| # | Preview | Product | |
|---|---|---|---|
| 1 |

|
Sterilite 4-Pack 56 Quart Wheeled Latching Box, Underbed Clear Plastic Storage Organizer - Under Bed... | Check Latest Price |
| # | Preview | Product | |
|---|---|---|---|
| 1 |

|
Yecaye Under Bed Storage with Wheels, 2Pack Under Bed Storage Containers, Underbed Shoe Storage... | Check Latest Price |
Imagine sleek, low-profile storage bins or drawers sliding smoothly under a child’s bed. These containers can be clear or colorful, making it easy for kids to see what’s inside. When neatly arranged, they create a clean line beneath the bed, hiding clutter from view. Some storage options even feature fun designs or labels, turning organization into a game.
Choose between fabric bins, plastic drawers, or rolling carts depending on your needs and style. For a seamless look, opt for matching colors or a coordinated set. Label each bin with words or pictures to help kids learn organization skills. Use dividers or smaller containers inside for separating different items like socks, toys, or craft supplies. Seasonal or special occasion storage can be swapped out easily.
Measure the space under the bed to select appropriately sized containers. Ensure the bins or drawers have easy-to-grip handles or wheels for effortless access. Clear containers help you see contents at a glance, making tidying a breeze. Regularly review and declutter to keep the system working smoothly. For added convenience, install a small step stool nearby for easy reach. Label everything clearly to promote independence.
Use decorative labels or stickers to personalize each bin. Incorporate your child’s favorite colors or themes to make the storage fun. Consider adding a small mat or rug beside the bed for a cozy nook. Encourage your child to help organize, making it a routine that teaches responsibility. This setup keeps the room neat and fosters a sense of ownership.
Under-bed storage transforms chaos into order, making tidying up easier and less stressful. It teaches kids organization skills early and boosts their independence. The space looks cleaner and more inviting, encouraging a calm, clutter-free environment. Are you ready to reclaim your floor space? It’s simple and highly effective!
11. Creative DIY Wall Art Using Recycled Materials
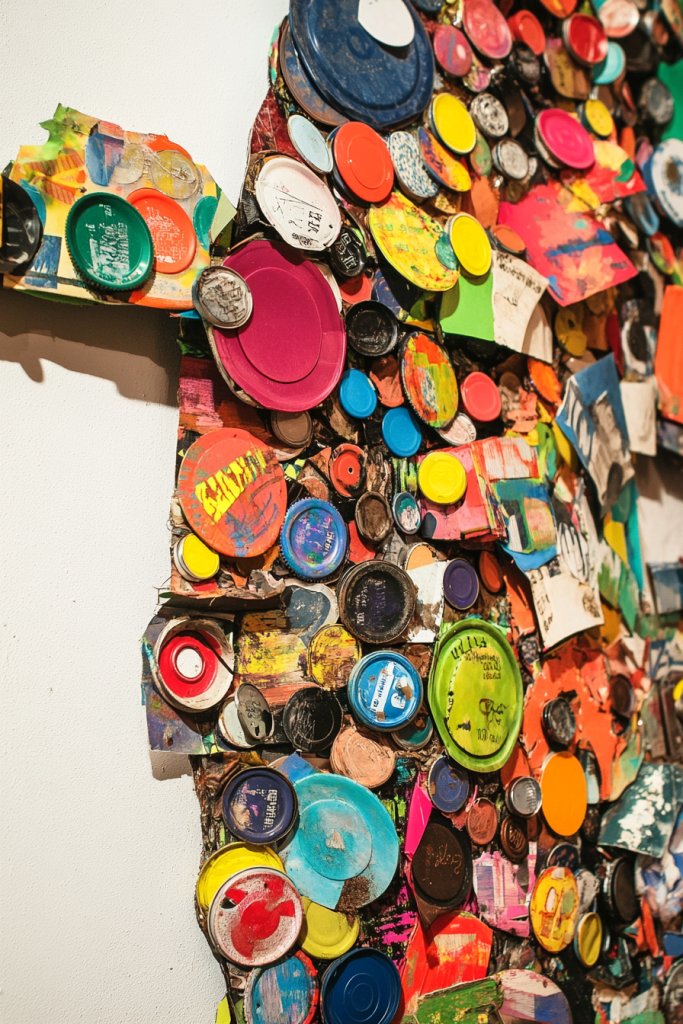
Decorating a child’s room can get expensive fast, especially when you want unique, personalized touches. DIY wall art using recycled materials offers a budget-friendly way to add personality and flair. Plus, it’s eco-friendly and a fun craft project to do with your kid. Who wouldn’t want art that’s both meaningful and sustainable?
Recommended Products to replicate this idea
| # | Preview | Product | |
|---|---|---|---|
| 1 |
|
Dan&Darci Arts and Crafts Vault - Craft Supplies Kit in a Box - Easter Gift for Kids Ages 4 5 6 7 8... | Check Latest Price |
| # | Preview | Product | |
|---|---|---|---|
| 1 |

|
SONGMICS Picture Frames, Collage Picture Frames Set of 10, Two 8x10, Four 5x7, Four 4x6, Photo Frame... | Check Latest Price |
Visualize colorful art pieces made from painted wooden shapes, collaged fabric scraps, or even upcycled cardboard boxes. These creations can be arranged in playful patterns or abstract arrangements to add vibrancy. Texture comes from layering materials, while bright colors make the wall pop. Displaying these handmade pieces gives the room a warm, personal touch, reflecting your child’s personality.
Use a variety of recyclable items—bottle caps, fabric remnants, paper cutouts—to match your style and your child’s interests. Create themed collages, like space scenes, animals, or abstract designs, that can be easily updated. Incorporate natural elements like twigs or stones for a rustic look. Use non-toxic paints or markers for coloring and decorating. Change or add new art pieces seasonally to keep the decor fresh.
Gather recyclable materials and clean them thoroughly. Use non-toxic paints, glue, and sealants to decorate and preserve your artwork. Arrange the pieces on a canvas or directly on the wall using removable adhesive hooks or strips. For more durability, consider framing the art with inexpensive recycled frames. Hang the pieces at a child-friendly height, encouraging their participation. Regularly update or add new creations to keep the display lively.
Add your child’s name or favorite quotes with painted wooden letters or fabric banners. Incorporate themes they love—dinosaurs, princesses, or cars—using themed cutouts. Use bright colors and playful shapes to make it engaging. Encourage your child to create their own art, fostering a sense of pride and ownership. Personal touches make the space uniquely theirs.
Creating DIY art fosters creativity, responsibility, and environmental consciousness. It turns simple recycled items into meaningful decor, reinforcing the value of sustainability. Plus, it’s a wonderful bonding activity and boosts your child’s confidence in their artistic skills. Ready to craft some eco-friendly masterpieces? It’s fun, affordable, and impactful!
12. Space-Themed Glow-in-the-Dark Accents
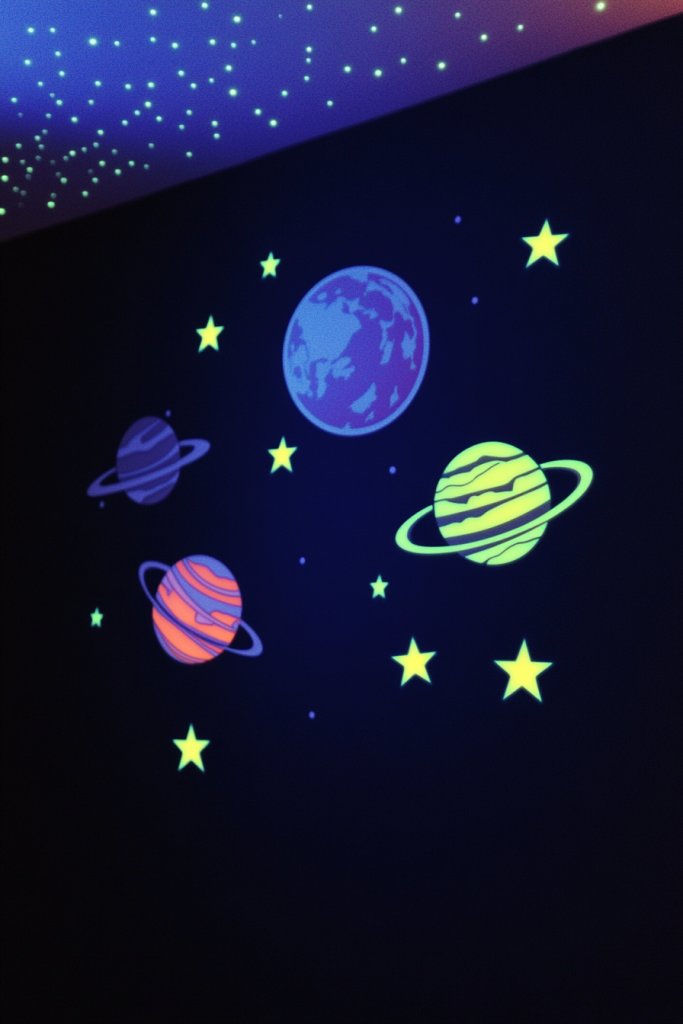
Bedtime can be a struggle when kids are afraid of the dark or restless in the night. Space-themed glow-in-the-dark accents turn bedtime into an adventure rather than a chore. They create a calming, magical environment that encourages curiosity and eases fears. Who wouldn’t want stars and planets twinkling overhead?
Recommended Products to replicate this idea
| # | Preview | Product | |
|---|---|---|---|
| 1 |

|
Glow in The Dark Stars - Includes Installation Material and Star map, 200 Glowstars, Only Glow Stars... | Check Latest Price |
| # | Preview | Product | |
|---|---|---|---|
| 1 |

|
Solar System Wall Decals Glow in The Dark Stars 780 PCS, Glowing Planets Stickers for Ceiling,... | Check Latest Price |
Imagine a ceiling dotted with glow-in-the-dark stars and planets, casting a gentle, otherworldly glow. Walls decorated with luminous decals of rockets, moons, or aliens add to the cosmic vibe. The soft glow is enough to comfort without disturbing sleep, creating a dreamy space scene. Textured wall decals or painted murals with glow-in-the-dark paint add depth and wonder, transforming the room into a mini galaxy.
Use glow-in-the-dark accents sparingly or extensively, depending on your child’s preference. Combine with blackout curtains or light-blocking shades for optimal sleep conditions. The accents can be in the form of wall decals, ceiling stickers, or painted elements. For older kids, incorporate glow-in-the-dark stars that can be repositioned or added over time. The theme can evolve from space to stars or planets for a layered look.
Apply glow-in-the-dark decals or paint on walls or ceiling, following manufacturer instructions. Use a flashlight or UV light to ‘charge’ the glow, ensuring it shines bright during the night. For decals, peel and stick carefully, avoiding air bubbles. For painted designs, use a stencil or freehand with glow-in-the-dark paint, then seal with a clear topcoat. Test the glow before bedtime to ensure it’s strong enough. Keep the room dark after, so the glow can shine its brightest.
Add custom touches like a glow-in-the-dark name or constellation map on the wall. Incorporate themed bedding and accessories that match the space motif. Use small LED or star-shaped nightlights as supplementary lighting options. Encourage your child to add their own glow-in-the-dark stickers or drawings over time, personalizing their galaxy.
Glow-in-the-dark accents turn a night fright into a nightly wonder. They foster curiosity about space and science, encouraging learning through play. The soft illumination creates a peaceful sleep environment while stimulating imagination. Ready to blast off into a dreamy, starry night? It’s easier than you think and makes bedtime a magical moment!
13. Adjustable Lighting with Fun Lamps and Nightlights
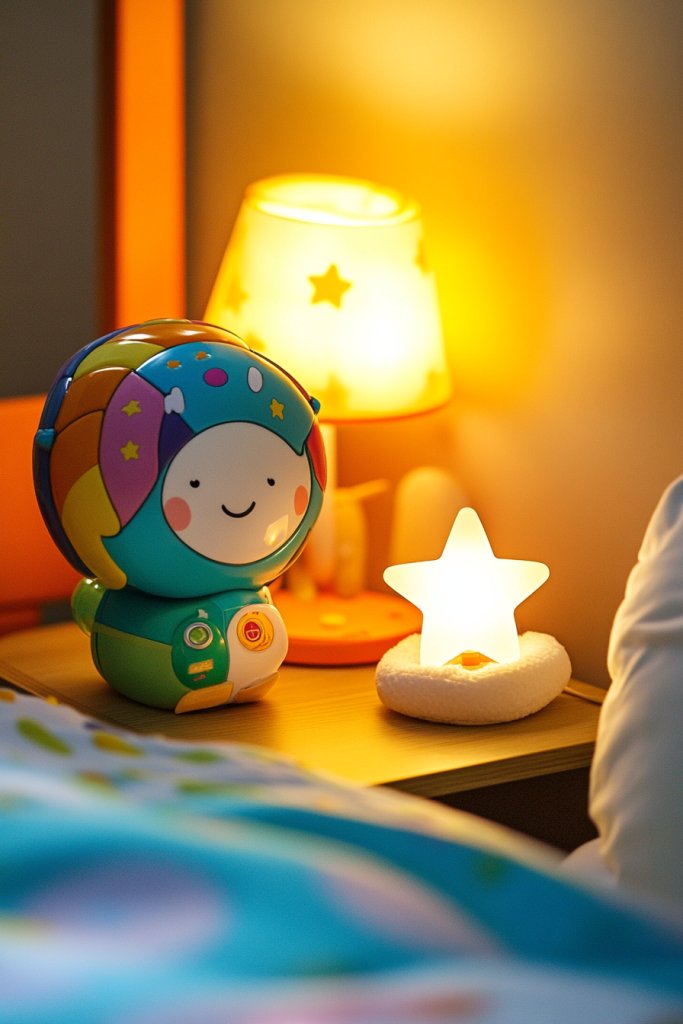
Bright overhead lights can be harsh and disruptive during bedtime routines, making kids resistant to sleep. Adjustable lighting with fun lamps and nightlights offers a cozy, customizable glow that eases transition from playtime to sleep. It helps establish a calming environment and gives kids a sense of control over their space. Who wouldn’t want a room that adapts to their mood?
Recommended Products to replicate this idea
| # | Preview | Product | |
|---|---|---|---|
| 1 |

|
Dicoool Touch Bedside Table Lamp with USB - 3 Way Dimmable Wood Lamp for Bedroom Nightstand, Desk... | Check Latest Price |
| # | Preview | Product | |
|---|---|---|---|
| 1 |

|
GE Color Changing LED Night Light for Kids, Dusk to Dawn Sensor, Home Decor Apartment Essentials,... | Check Latest Price |
Picture a whimsical lamp shaped like a rocket, animal, or cloud that casts a warm, gentle light. Dimmer switches allow the brightness to be tailored for reading, relaxing, or sleeping. Soft-colored nightlights provide a reassuring glow, highlighting favorite plush toys or bedtime stories on shelves. The lighting adds a playful touch, creating an inviting atmosphere that transitions smoothly from activity to rest.
Choose from a variety of fun shapes and themes—superheroes, animals, or space—to match your decor and your child’s interests. Incorporate dimmable LED lamps, which are energy-efficient and adjustable. For a minimalist look, opt for sleek, modern designs in bright or neutral colors. Use removable or rechargeable lights for flexibility. Seasonal decor can be integrated through themed covers or shades.
Select lamps with adjustable brightness and safe, low-heat bulbs. Place lamps on bedside tables, shelves, or attach clip-on models for versatility. Use dimmer switches or smart plugs to control brightness easily. For nightlights, pick options with automatic shut-off or remote controls for convenience. Keep the cords tidy and out of reach of little hands. Test different lighting levels to find what’s most soothing.
Personalize lamps with your child’s favorite colors or characters. Add decorative lamp shades or covers that can be swapped seasonally. Use string lights or fairy lights for a magical ambiance in addition to functional lamps. Incorporate small, themed nightlights that can be moved around or turned on independently. This setup makes bedtime routines smoother and more engaging.
Adjustable lighting creates a soothing environment that promotes better sleep and independence. Kids learn to control their space, reducing bedtime resistance. It also sparks imagination—who says a lamp can’t be a rocket or a friendly animal? Ready to light up your child’s room with fun and functional options? It’s simple, safe, and totally customizable!
14. Personalized Name Signs and Monogram Decor
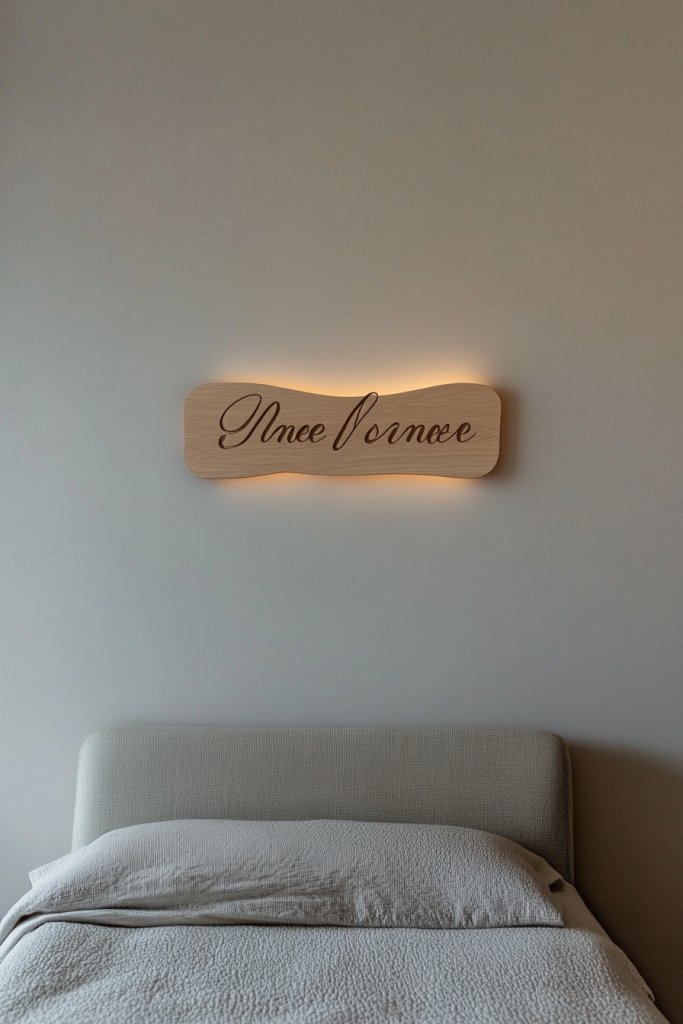
Want to make your child’s room feel truly theirs? Generic decor can feel impersonal and uninspired. Personalized name signs and monogram decor add a special touch that celebrates your child’s identity. It helps foster a sense of ownership and pride in their space. Who wouldn’t love a room that literally has their name on it?
Recommended Products to replicate this idea
| # | Preview | Product | |
|---|---|---|---|
| 1 |

|
Personalized Wood Sign, Laser Cut. Select Favorite Font, Size and up to 3 Lines per Size. Live... | Check Latest Price |
| # | Preview | Product | |
|---|---|---|---|
| 1 |

|
Custom Metal Name Sign | Metal Wall Art | Split Letter Monogram Wall Decor | Personalized Wedding... | Check Latest Price |
Envision a handcrafted wooden plaque with your child’s name painted in bright, cheerful colors hanging above the bed or door. Alternatively, a large monogram initial framed with decorative elements becomes a focal point. The textures of wood, fabric, or metal add depth, while bright paint or embroidery makes it stand out. Integrate the sign into the overall decor with matching colors or themes for a cohesive look.
Choose between wood, acrylic, or fabric for durability and style. Add glitter, beads, or painted motifs to match your child’s personality. Incorporate themed elements—stars, animals, or vehicles—around the sign for extra flair. Hang the sign at eye level for immediate recognition or above a bed or closet for a focal point. Change styles as your child’s tastes evolve.
Order a custom sign from a craft store or DIY with paint, wood, or fabric. Use hooks, adhesive strips, or picture hangers for easy mounting. Ensure the sign is lightweight and securely attached. For a DIY project, personalize with your child’s favorite colors, patterns, or motifs. Keep it positioned where it’s visible and balanced within the room’s design. Regularly update or add new signs as interests change.
Layer with additional decor like themed decals, banners, or framed photos. Incorporate your child’s favorite symbols or characters around the sign. Use bright, cheerful colors or metallic finishes for a luxe feel. Personal touches like a hand-painted message or a small plush mascot nearby make it special. These details turn a simple sign into a cherished keepsake.
A personalized sign creates a sense of belonging and pride, encouraging independence. It visually affirms their space as theirs, boosting confidence. Plus, it’s a quick DIY project that adds character and fun to any room. Ready to give your child’s room a personal touch? It’s simple, meaningful, and makes a big impact!
15. Portable Toy Storage Trolley for Easy Clean-Ups
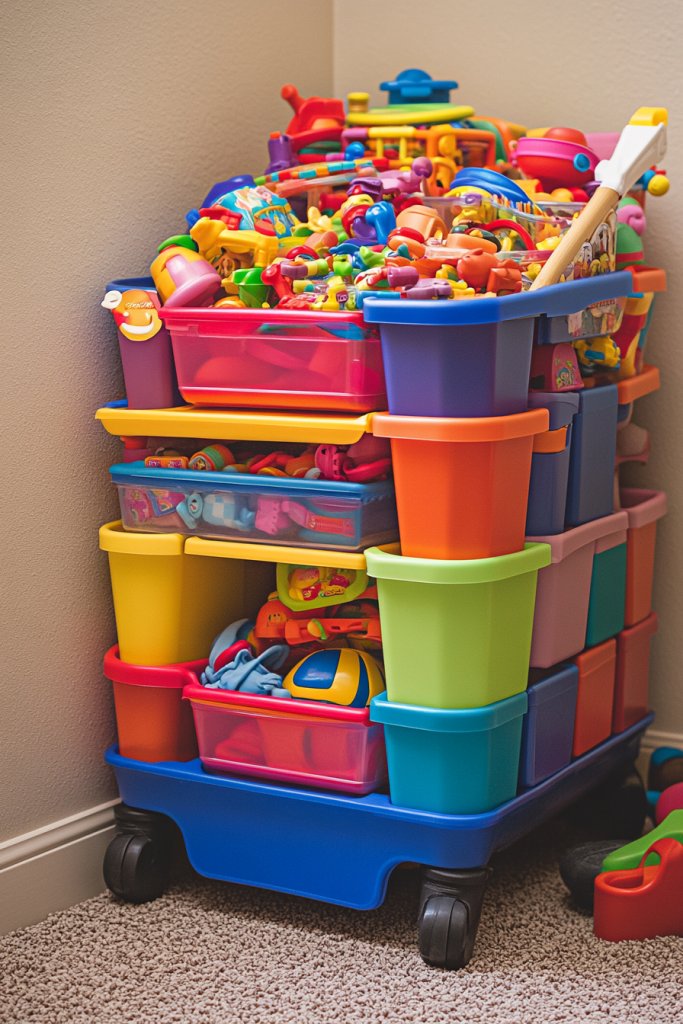
Toy clutter can turn a room into a battlefield, making quick clean-ups a nightmare. A portable toy storage trolley offers a flexible solution that keeps toys organized and accessible. It promotes independence and makes tidying up less of a chore. Who wouldn’t want a clean room with toys neatly corralled on wheels?
Recommended Products to replicate this idea
| # | Preview | Product | |
|---|---|---|---|
| 1 |

|
kids Toy Storage Organizer with Wheels, Utility Rolling Cart with Large Storage Capacity for... | Check Latest Price |
| # | Preview | Product | |
|---|---|---|---|
| 1 |

|
DTK Toy Box Storage with Wheels, Large Toy Chest for Kids Organizer, Baby Toy Box for Boys, Girls,... | Check Latest Price |
Imagine a sturdy rolling cart with multiple levels, filled with colorful bins or baskets labeled by toy type—cars, dolls, puzzles. The bright, cheerful design invites kids to grab and go, encouraging them to tidy up after play. The wheels glide smoothly over different floor surfaces, making it easy for little hands to move the entire system. It turns cleanup into a fun, game-like activity.
Choose from metal, plastic, or wood carts depending on style and durability needs. Use labeled bins with pictures or words for early learners. Some carts feature removable trays or adjustable heights for customization. Match the colors to the room’s theme or opt for neutral tones for versatility. You can also add a small mat or cushion on top for a quick seating spot.
Select a lightweight, sturdy trolley that fits your space and budget. Fill the bins with toys, and label or color-code them for easy sorting. Place the trolley in a central location or near the play area for convenience. Teach your child to put toys back after use—making cleanup a routine. Regularly review and declutter to keep the system working smoothly. Consider safety—ensure wheels lock when stationary.
Decorate the trolley with stickers or themed labels that your child loves. Add a small chalkboard or writable surface for quick notes or reminders. Incorporate a fun handle or color accents to match the room decor. Encourage your kid to decorate or personalize their own trolley, fostering ownership. It’s a practical, fun way to keep their space tidy and engaging.
A portable toy trolley makes tidying up quick and easy, reducing stress for parents and kids alike. It teaches responsibility and organization from an early age. Kids learn to take pride in keeping their space neat, which can translate into lifelong habits. Ready to make cleanup time a breeze? It’s simple, effective, and totally kid-friendly.
16. Minimalist Floating Shelves for Display and Storage
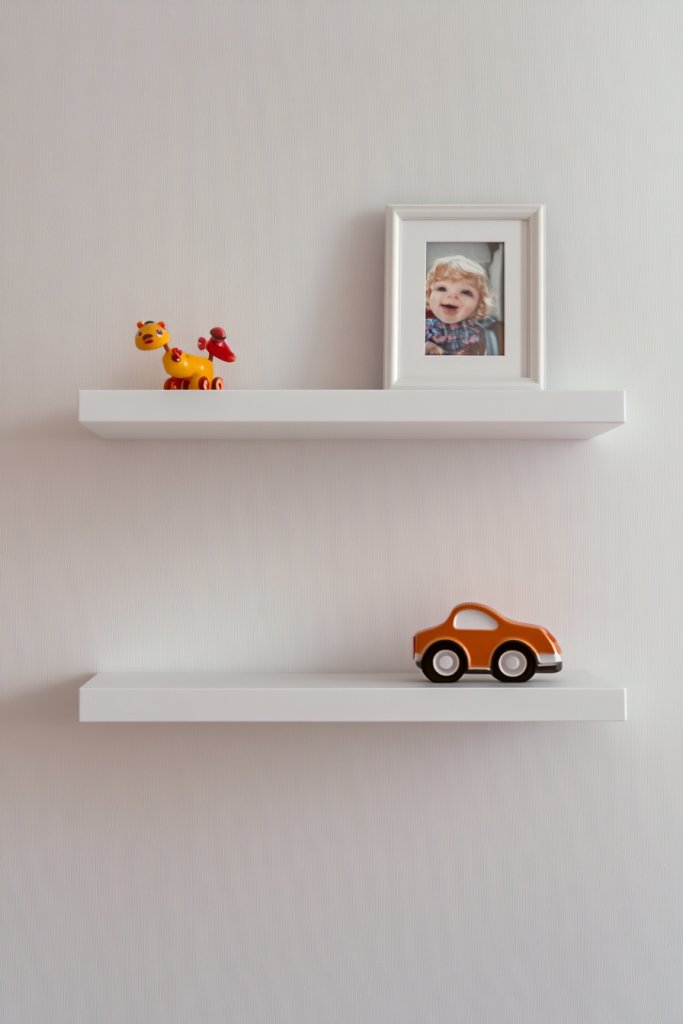
Cluttered shelves can make a room feel chaotic rather than cozy. But bulky furniture isn’t always practical in small spaces. Slim, minimalist floating shelves offer a sleek solution for displaying toys, books, or keepsakes while maintaining an airy feel. Who wouldn’t want a clutter-free, modern look?
Recommended Products to replicate this idea
| # | Preview | Product | |
|---|---|---|---|
| 1 |

|
BAYKA Floating Shelves for Wall, Wall Mounted Rustic Wood Shelves for Bathroom, Bedroom, Living... | Check Latest Price |
| # | Preview | Product | |
|---|---|---|---|
| 1 |

|
LEOPO 12-Pack 8 inch Floating Shelf Brackets, Hidden Shelf Bracket for Wood, Concealed Blind... | Check Latest Price |
Imagine a set of thin, floating wood or acrylic shelves mounted along a wall, holding a curated collection of favorite toys, framed photos, or decorative items. The clean lines and simple design make the room look spacious and organized. The shelves can be arranged in asymmetrical patterns for a contemporary vibe or aligned for a neat, orderly appearance. They add subtle visual interest without overwhelming the decor.
Choose materials like natural wood, painted MDF, or acrylic for different aesthetics. Use varying lengths and depths to create a layered, dynamic display. Incorporate small baskets or boxes on the shelves to contain clutter. For a themed room, coordinate the shelf colors or accessories with the overall decor. Change the displayed items seasonally or as interests shift.
Mark out the desired arrangement on the wall, ensuring level placement with a spirit level or laser guide. Drill into wall studs or use appropriate anchors for drywall, depending on shelf weight. Attach the floating brackets securely, then slide the shelves in place. Decorate with a mix of functional and decorative items—books, toys, or collectibles—keeping it simple and neat. Regularly review and update the display to keep it fresh.
Personalize shelves with themed items or small framed labels for a customized look. Incorporate your child’s artwork or favorite small toys for a personal touch. Use matching or contrasting colors to enhance visual appeal. Add LED strip lighting underneath for subtle illumination—if safe and suitable. The minimalist design keeps the room feeling open and uncluttered.
Floating shelves showcase your child’s treasures in a stylish, organized way, boosting their pride. They teach kids about visual balance and how to curate their favorite items. The sleek, simple design makes the room look modern and spacious. Ready to upgrade your decor? It’s a quick, impactful change that’s both functional and beautiful!
17. Fun Themed Window Treatments with Light-Filtering Fabrics
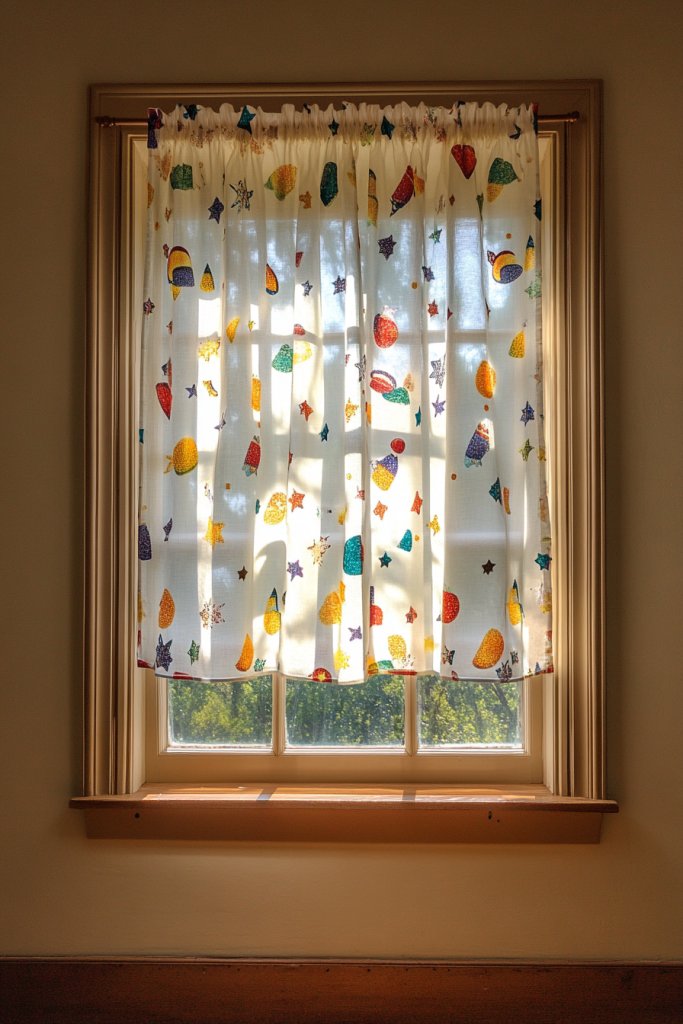
Sunlight streaming into a child’s room can be both a blessing and a curse—bright mornings or harsh glare can disrupt sleep. Fun themed window treatments with light-filtering fabrics balance natural light and privacy while adding personality. Who wouldn’t want window coverings that are both practical and playful?
Recommended Products to replicate this idea
| # | Preview | Product | |
|---|---|---|---|
| 1 |

|
KGORGE 63 inch Curtains 2 Panel Set, Privacy Thermal Insulation Noise Reducing Light Filtering... | Check Latest Price |
| # | Preview | Product | |
|---|---|---|---|
| 1 |

|
GENIMO 100% Blackout Roller Window Shades, Window Blinds Cordless with Thermal Insulated, UV... | Check Latest Price |
Picture curtains adorned with playful patterns—trucks, rockets, or animals—that coordinate with the room’s theme. Light-filtering fabrics gently diffuse sunlight, creating a warm, cozy atmosphere without the glare. The curtains can be layered with blackout blinds for versatile light control. Bright colors and soft textures make the window area a visual focal point, tying the room together.
Choose from various styles—rod-pocket curtains, grommet panels, or roller blinds—depending on your aesthetic preference. Use fabrics that match or complement bedding, rugs, or wall decals. For a whimsical touch, add decorative tiebacks or valances. Seasonal updates can include lighter fabrics for summer or heavier, insulated options for winter. Mix and match patterns for a lively, layered feel.
Measure your window carefully, considering the length and width for proper fit. Install a sturdy curtain rod or track at a suitable height, ensuring it’s securely anchored. Hang the curtains, adjusting the fullness for a neat appearance. Layer with blinds or shades if needed for additional light control. Regular cleaning keeps fabrics fresh, and quick swaps can update the room’s look. Consider child-friendly, cordless options for safety.
Personalize by adding custom tiebacks with your child’s favorite characters or colors. Incorporate small decorative elements like fabric pompoms or appliqués for extra fun. Use sheer panels to soften sunlight and add a dreamy quality. Encourage your child to help choose or arrange the curtains, fostering a sense of ownership. These treatments make the room feel complete and inviting.
Fun, themed window treatments elevate the room’s style and mood. They teach kids about color coordination and design choices. Plus, they help create a restful environment for better sleep and daytime naps. Ready to make your windows a cheerful focal point? It’s an easy upgrade with a big impact!
Conclusion
With a diverse range of bedroom ideas—from themed decor to smart storage solutions—you’re equipped to create a playful and practical retreat for your little boy. Implementing even a few of these ideas can transform his room into a space full of joy and functionality. Don’t hesitate to bring these concepts to life in your own home and watch as his face lights up with excitement and comfort. Your child’s dream room is just a plan away!