Ever struggled to find a place for everything in your tiny kitchen without feeling overwhelmed? Small spaces are incredibly popular these days, not just for their charm and coziness but also because they challenge us to get creative with storage solutions. When every inch counts, clever organization isn’t just a luxury—it’s a necessity! A well-organized tiny kitchen can transform chaos into clarity, making cooking and cleaning a breeze while maximizing your limited space.
In this article, you’ll discover a treasure trove of practical and inspiring ideas tailored for small kitchens. From hidden storage hacks to stylish display solutions, each tip is designed to help you create an effortlessly tidy and functional space.
Whether you’re looking to optimize wall space, keep your counters clutter-free, or find smarter ways to store your essentials, you’ll find a variety of ideas that fit different styles and needs. Get ready to turn your tiny kitchen into a welcoming, organized oasis!
1. Install Floating Shelves for Instant Accessibility
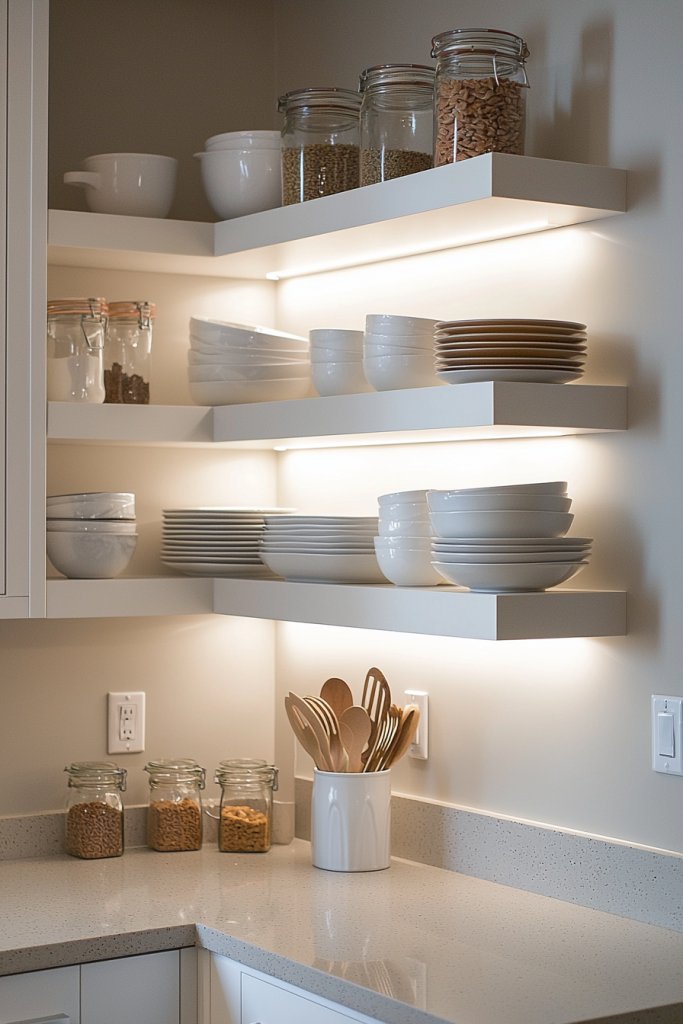
Installing floating shelves is a game-changer for transforming a tiny kitchen into a well-organized, accessible space. They provide instant visibility and quick access to your favorite dishes, spices, or decorative objects, making the most of limited wall space without cluttering the countertop.
Imagine sleek, minimalist floating shelves in a soft matte white or warm natural wood finish, seamlessly mounted against a gentle pastel-colored wall—perhaps blush pink or cool mint. The shelves hold a mix of ceramic canisters, with textured surfaces like ribbed or speckled glazes, alongside small decorative sculptures or vintage jars.
The open design creates a sense of airiness, while the carefully arranged items add visual interest and a cozy, inviting atmosphere. As you reach for a spice jar or a charming mug, you can almost hear the soft clink of ceramics and feel the smoothness of the wood under your fingertips, making the space both functional and aesthetically pleasing.
To recreate this look, start by choosing sturdy floating shelf brackets and a plank of your preferred wood or a ready-made shelf from your local store. Secure the shelves at your desired height on a clean wall—using a level to ensure they are perfectly straight—and then arrange your favorite canisters, mugs, or small decorative objects on top.
For added variety, you can mix materials like matte ceramics with textured wooden or metallic accents. If you prefer a different look, acrylic or glass shelves are simple alternatives that still maximize visibility. With just a few basic tools—a drill, level, and screwdriver—you’ll have an effortlessly stylish and highly functional storage solution in no time.
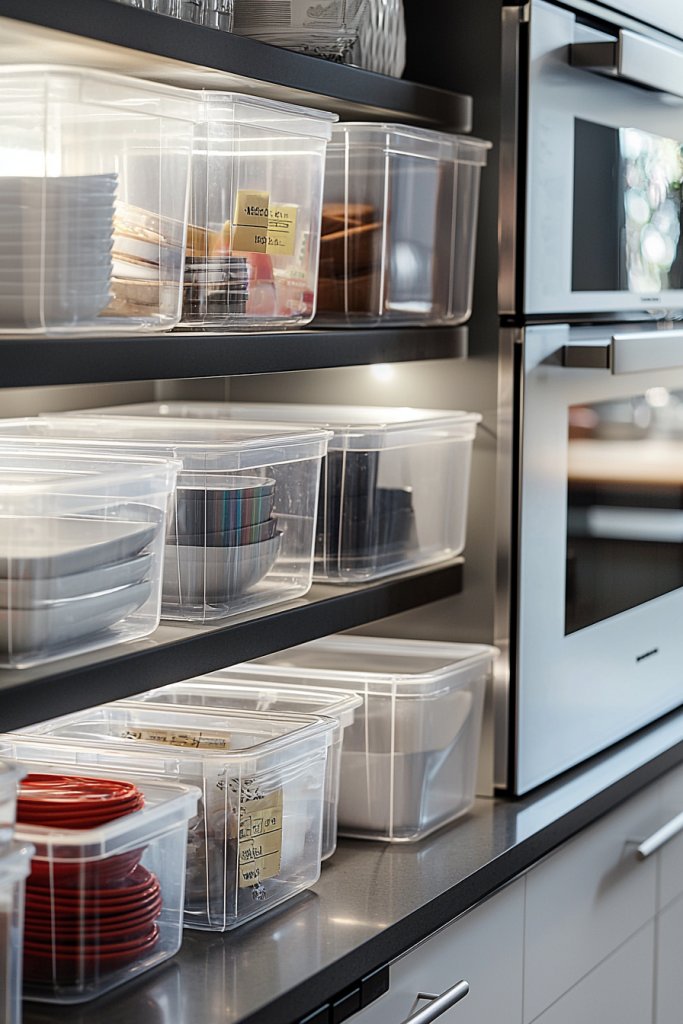
2. Use Clear, Stackable Containers to Maximize Visibility
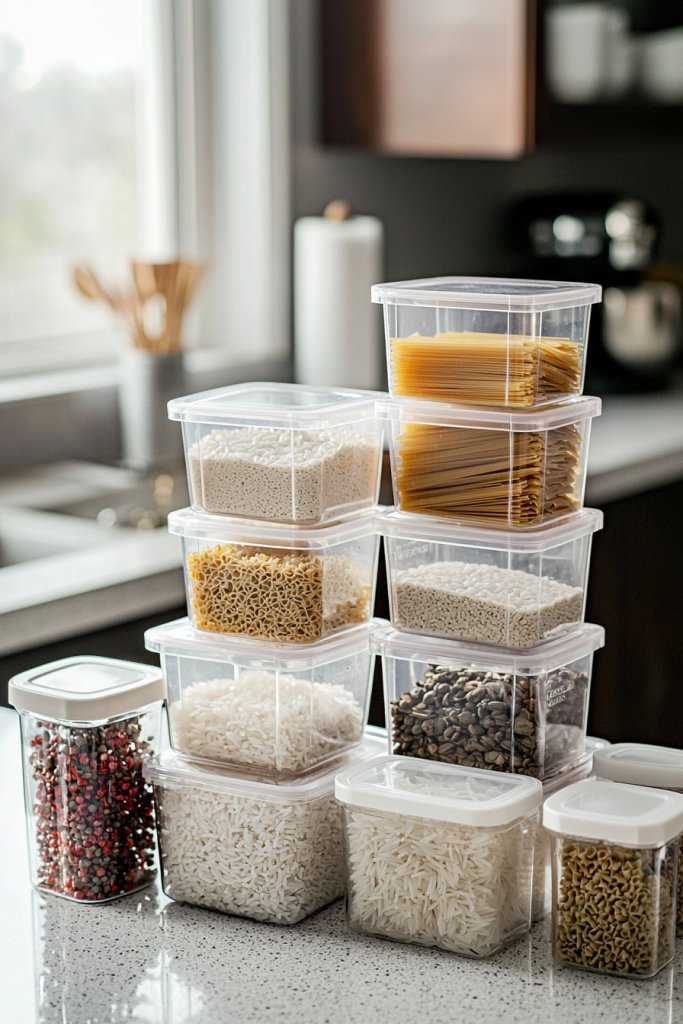
Maximize your tiny kitchen’s storage potential by using clear, stackable containers—an effortless way to see exactly what’s inside without rummaging through clutter. This simple upgrade transforms chaos into clarity, making your daily routine smoother and more enjoyable.
Imagine neatly arranged glass jars and plastic containers in soft pastel hues—light blue, creamy white, and smoky gray—stacked effortlessly on open shelves or inside cabinets. Their transparency reveals the contents at a glance, whether it’s colorful pasta, golden rice, or crunchy cereal, while airtight lids keep everything fresh.
The smooth, sleek surfaces contrast gently with textured wooden shelves or marble countertops, creating a fresh, organized look that feels both modern and inviting. As you open these containers, the subtle scent of dried herbs or baked goods might drift into the air, evoking comfort and order in your space.
Getting started is easier than you think: gather some clear, BPA-free plastic or glass containers with tight-fitting lids—many affordable options are available online or at home goods stores. For a cohesive look, opt for uniform sizes and shapes, but don’t hesitate to mix and match for a more eclectic vibe.
Label each container with simple chalk or adhesive labels for instant identification. Simply transfer your dry goods into these containers, stack them neatly on your shelves or inside your cabinets, and enjoy a clutter-free, visually appealing kitchen that makes cooking and cleaning a breeze.
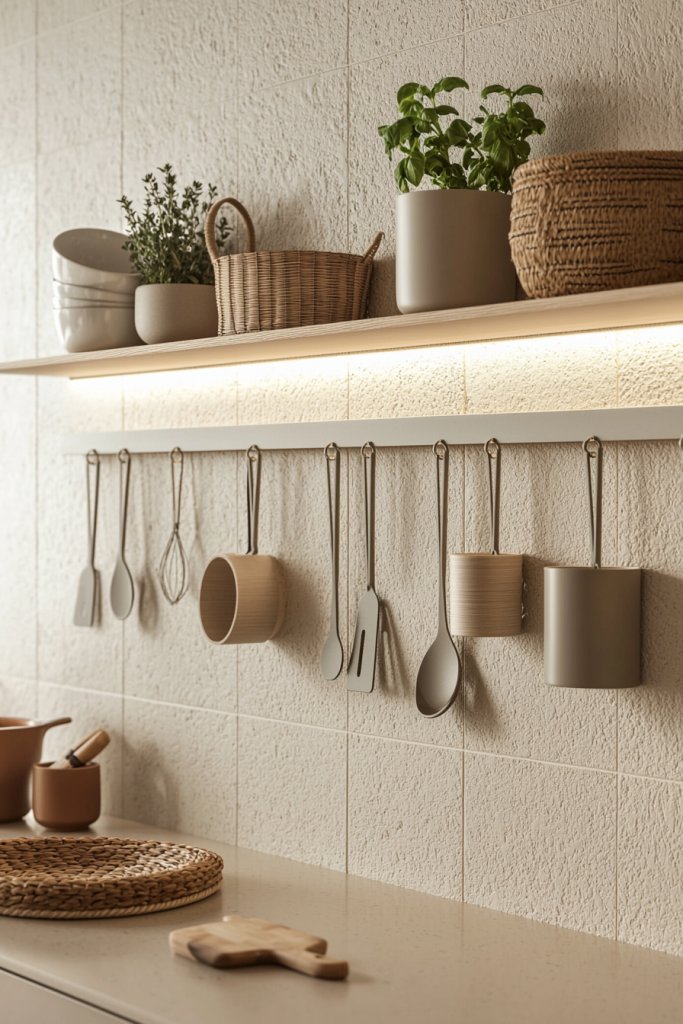
3. Incorporate Under-Cabinet Hooks for Utensils and Accessories
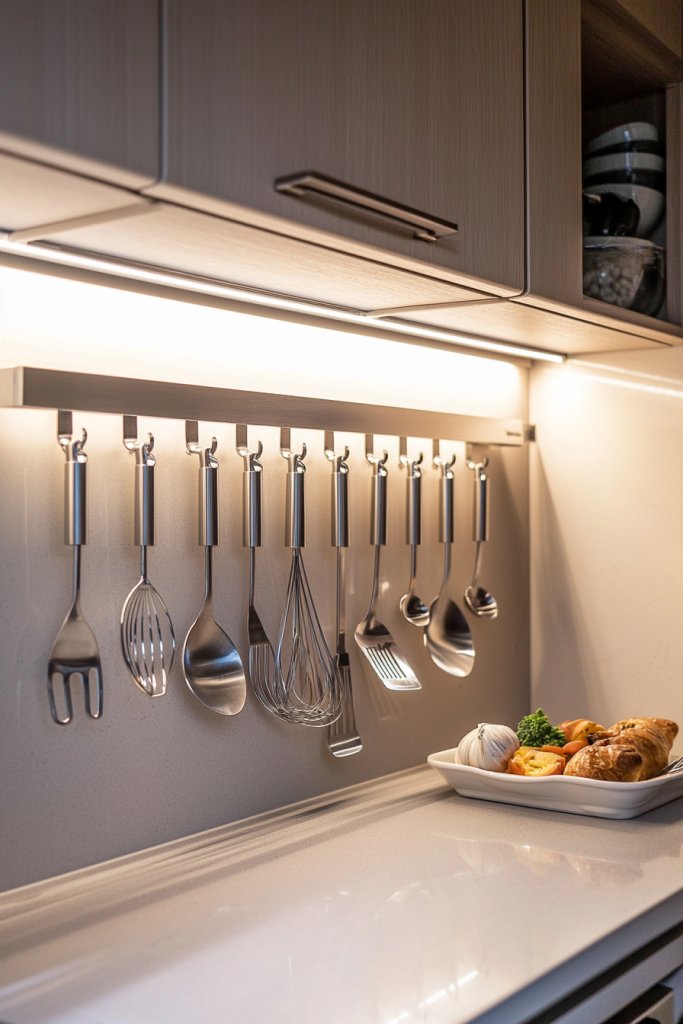
Maximize your tiny kitchen’s efficiency by easily keeping utensils and accessories within arm’s reach with under-cabinet hooks. This simple addition transforms cluttered counters into streamlined surfaces, making your daily cooking routine smoother and more enjoyable.
Imagine sleek, stainless steel or matte black hooks evenly spaced beneath your cabinets, holding a variety of utensils like spatulas, ladles, and tongs. The hooks blend seamlessly into the space, creating a tidy row that adds a subtle industrial or modern touch.
The area feels open and organized, with everything you need hanging conveniently close, while the soft glow of under-cabinet lighting highlights the clean, uncluttered look. The smooth texture of the hooks contrasts gently with the matte finish of your cabinets, adding visual interest without overwhelming the small space.
The smell of fresh herbs or warm baked bread might waft nearby, enhancing the cozy, functional vibe. To incorporate this idea, start by selecting durable, rust-resistant hooks—metal or silicone-coated options work well.
Measure and mark where you want each hook to go, ensuring they’re evenly spaced for easy access. Use a simple drill or adhesive strips (for a damage-free option) to attach the hooks beneath your cabinets, making sure they’re secure and level.
You can also customize the look by choosing hooks in a color that complements your kitchen’s palette, like soft white, matte black, or brushed nickel. With just a few minutes and some basic tools, you’ll create a smarter, more organized kitchen space that invites you to cook with confidence.
4. Opt for Compact Drawer Dividers to Tidy Small Items
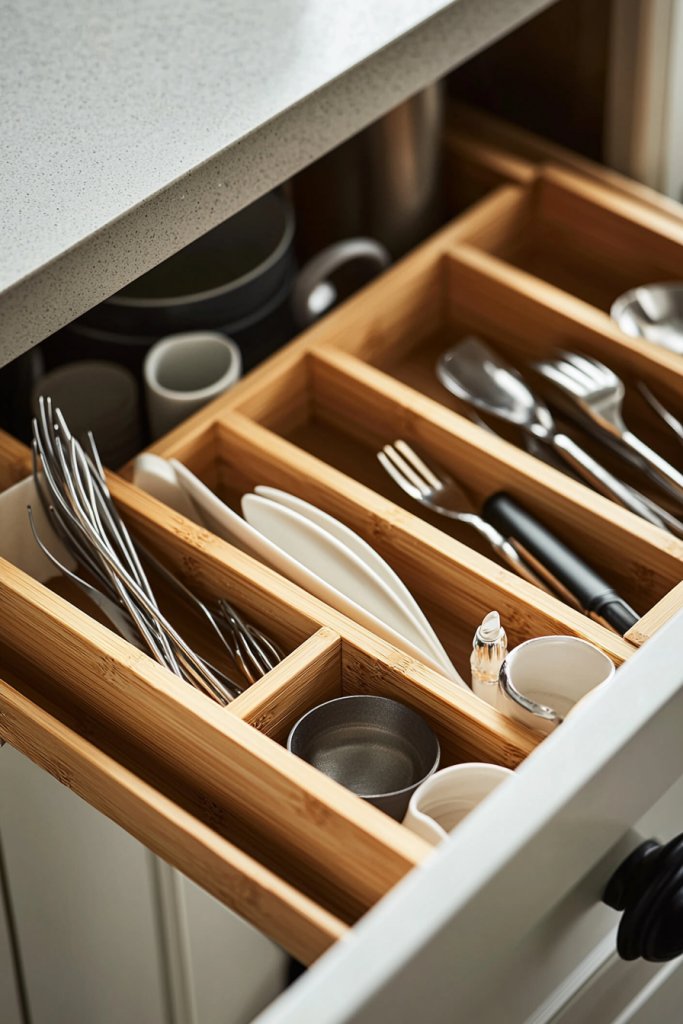
Maximize your tiny kitchen’s efficiency by using compact drawer dividers that keep small items perfectly organized and easy to find. No more digging through cluttered drawers—just quick access and a tidy space that feels instantly calmer and more functional.
Imagine a sleek, wooden drawer lined with customizable plastic or bamboo dividers, sectioning off tiny utensils, measuring spoons, and spice packets. The dividers fit snugly into the drawer, creating neat compartments that make everything visible at a glance.
The warm tones of natural wood contrast beautifully with the smooth, cool surfaces of plastic or metal, while soft drawer liners add a gentle scent and plush texture. The overall look is minimalist yet inviting, transforming chaos into calm with every open drawer.
Getting started is simple: choose adjustable or fixed-sized compact drawer dividers made of durable plastic, bamboo, or metal—whichever suits your style and budget. Clear plastic options are great if you want to see everything at once, while bamboo adds a touch of natural warmth.
Measure your drawers to ensure a proper fit, then install the dividers to create designated zones for small items. With just a few tools and a quick setup, you’ll enjoy a clutter-free drawer that makes your tiny kitchen feel spacious and organized.
5. Choose Slim, Multi-Functional Storage Bans for Walls and Corners
Maximizing every inch of a tiny kitchen requires smart, space-saving solutions that serve multiple purposes. Choosing slim, multi-functional storage bands for walls and corners transforms underutilized areas into sleek, organized havens, making your kitchen feel larger and more efficient.
Imagine thin, matte-finished metal or sturdy wooden bands mounted along walls and in corner nooks, holding hooks, shelves, or small baskets. These storage bands come in neutral tones like soft gray, warm beige, or classic white, blending seamlessly with your kitchen decor.
They create a clean, minimalist look, with smooth surfaces that contrast nicely against textured tile backsplashes or glossy cabinets. Small potted herbs, hanging utensils, or decorative ceramic mugs can hang from these bands, adding a touch of charm and functionality.
The overall aesthetic is airy and uncluttered, with the bands subtly defining organized zones while maintaining visual flow. To bring this idea to life, start by selecting slim, durable storage bands made of metal or wood that suit your style.
Measure your wall or corner space carefully, and mark where to install the bands using a level for perfect alignment. Secure them with appropriate screws and anchors, then add hooks or small baskets for your utensils, spices, or dish towels.
If you prefer a softer look, you can opt for adhesive-backed metal strips or magnetic versions that don’t require drilling. With a few simple tools and a bit of planning, you’ll create a versatile, hidden storage solution that keeps your tiny kitchen neat and visually appealing.
6. Utilize Magnetic Strips to Organize Knives and Metal Tools

Imagine a sleek, modern kitchen where knives and metal utensils are effortlessly at your fingertips, yet neatly out of the way. Magnetic strips are a game-changer for tiny kitchens, turning blank wall space into a functional display of your essential tools.
Typically, these strips are made from stainless steel or magnetic rubber, with a minimalist design that blends seamlessly with any decor. They often come in slim, elongated shapes, mounted just above your countertop or stove, creating a visual focal point that also declutters your drawer or countertop.
Visually, a magnetic strip is usually a long, narrow bar—about 24 to 36 inches—that holds your knives with their blades securely magnetized. The surface may have a brushed metal finish, adding a subtle sheen to your space, or a matte coating for a more understated look.
When filled with your favorite knives, the strip becomes a striking, organized display that adds a professional vibe to your tiny kitchen. The tactile experience of reaching for a knife from the magnetic strip is satisfying, and the open display helps you see your tools at a glance, reducing search time during busy cooking sessions.
To implement this, start by choosing a magnetic strip that fits your wall space—measure your knives beforehand to ensure they will hang comfortably without overcrowding. Mount the strip using appropriate brackets or screws, which are often included, on a clean, dry wall or backsplash surface.
For added safety and stability, locate the strip away from water splashes or heat sources. Attach your knives with blades facing downward, ensuring the blades don’t touch the wall or other utensils. For a budget-friendly option, magnetic strips can be found at major home goods stores or online, with some made from recycled or eco-friendly materials for sustainability-conscious cooks.
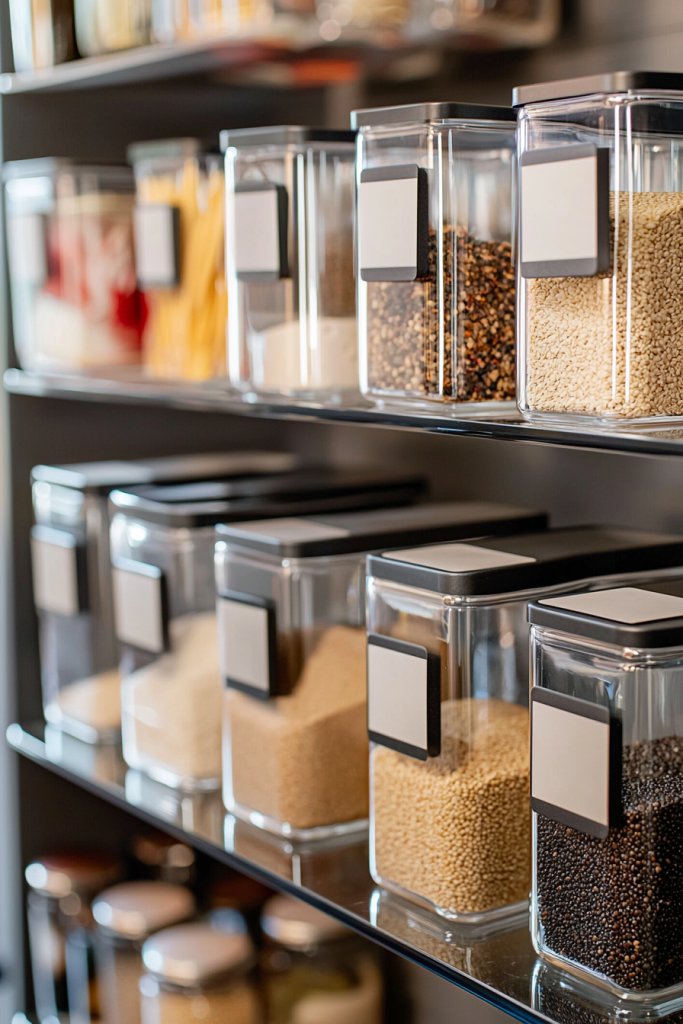
7. Incorporate Transparent Jars for Dry Goods with Labeling Tips
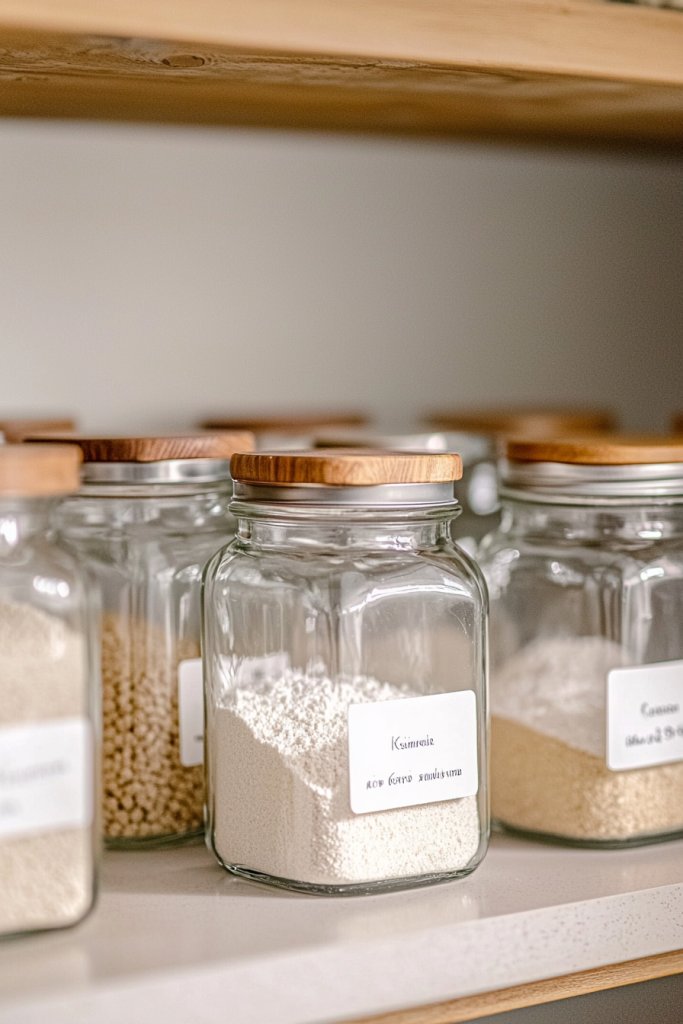
Transform your tiny kitchen into an organized oasis by swapping out opaque packaging for clear, glass jars filled with everyday dry ingredients. These transparent containers not only make it easy to see what’s inside at a glance but also add a chic, cohesive look to your shelves or countertops.
Usually made from durable glass with airtight silicone seals, each jar can be filled with rice, pasta, beans, or spices—creating a colorful, textured display. The transparency invites a sense of order and simplicity, making your kitchen feel brighter and more spacious.
Visually, these jars come in various sizes—small for spices, larger for grains—and often feature a smooth, rounded silhouette with a metal or silicone lid. You can enhance the aesthetic further with simple, hand-written labels or sleek printed ones, applied with a dry-erase marker or adhesive label paper.
The contents are on full display, so you’ll quickly notice when supplies are running low. The overall effect is a tidy, inviting space where every item has a designated spot, reducing clutter and unnecessary repurchasing.
The glass surface adds a subtle shine, catching light and making your kitchen feel open and airy. To set this up, gather a selection of clear, stackable jars—look for ones with wide mouths for easy filling and cleaning.
Wash and dry each jar thoroughly before filling with your ingredients. Label each jar with clear, durable labels—laminated paper or chalkboard labels work well—so you can easily identify contents.
Arrange the jars on open shelves, inside cabinets, or in a dedicated container drawer for quick access. For affordability, versatile mason jars or recycled glass containers are excellent options, and adding a uniform lid color or style can unify the look for a polished finish.
8. Use Over-the-Door Organizers for Pantry and Cabinet Doors

Maximize every inch of your tiny kitchen by turning unused door space into clever storage with over-the-door organizers. These versatile solutions are perfect for storing snacks, spices, cleaning supplies, or small kitchen tools, freeing up precious shelf or counter space.
Made from durable fabric, plastic, or wire, they typically feature multiple pockets or hooks that hang right over your pantry or cabinet door, instantly transforming cluttered surfaces into organized zones. Their slim profile ensures they won’t obstruct door movement or visual flow, making your kitchen look tidier and more functional.
Picture a set of fabric pockets in a neutral hue, neatly arranged on the inside of your pantry door—each pocket holding spice jars, tea bags, or small utensils. Alternatively, clear plastic pockets allow for quick visibility, while wire racks are perfect for larger items like cutting boards or cleaning bottles.
The visual effect is a streamlined, clutter-free door that keeps essentials within arm’s reach but out of sight when not needed. This approach is especially effective in small kitchens, where every inch counts and organized vertical space feels like extra square footage.
To install, choose an over-the-door organizer that fits your door’s dimensions, then hang it securely over the top edge. Load your items into the pockets, grouping similar items together for easy retrieval.
For added stability, some organizers come with adjustable straps or hooks that secure to the door frame. Use labels or color-coded bins within the pockets to further enhance organization. These organizers are affordable, easy to install, and can be moved or removed in minutes, making them a flexible solution for your tiny kitchen’s evolving needs.
9. Add Clear Baskets in Pantry for Easy Categorization
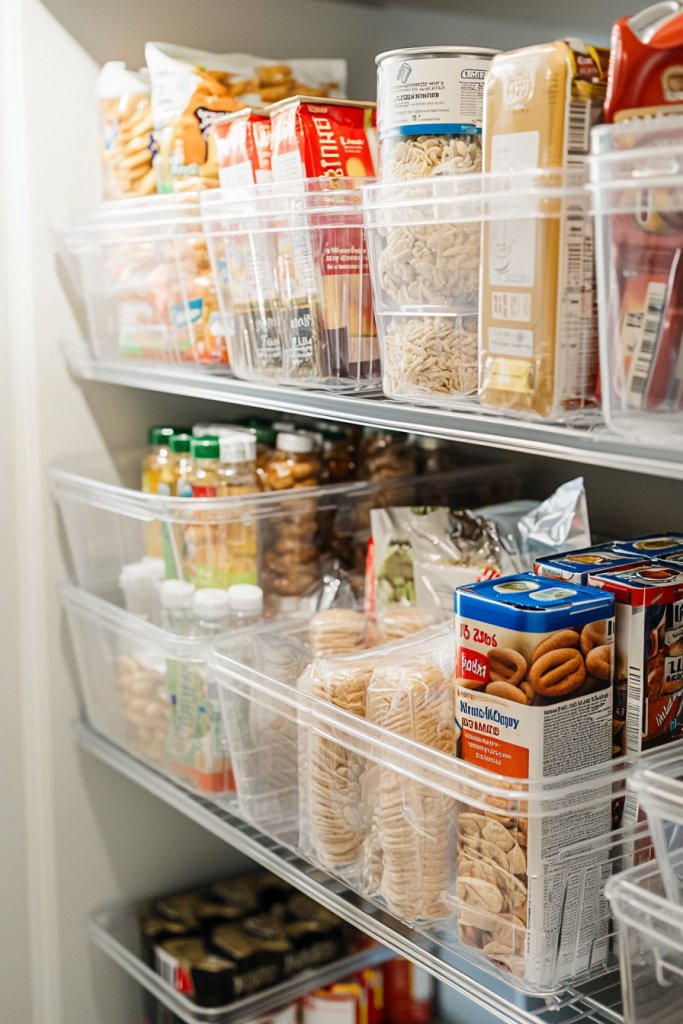
In a tiny kitchen, clutter can quickly take over, but clear baskets bring order to chaos by creating designated zones for different pantry essentials. These baskets are typically made from lightweight plastic, wire, or woven materials, with transparent sides that allow you to see contents instantly.
They’re perfect for grouping items like baking supplies, canned goods, or snack packs, making it easy to locate what you need without rummaging through piles of boxes and cans. Their uniform shape and size also contribute to a tidy, visually appealing pantry.
Visually, imagine a set of shallow, rectangular plastic baskets in neutral tones—white, gray, or natural wicker—stacked or lined up neatly on a shelf. Inside, you might find neatly stacked snack bags, organized baking supplies like flour and sugar, or small jars of spices.
The clear sides let you check inventory at a glance, reducing waste and duplicate purchases. The baskets add a sense of order and calm to your space, transforming an unruly pantry into a clean, inviting storage zone that makes cooking less stressful.
To implement, measure the available space in your pantry or shelves to select appropriately sized baskets. For versatility, opt for stackable or nesting designs that maximize vertical storage.
Fill each basket with similar items, then label the front with a chalk marker or adhesive label to easily identify contents. Group similar categories together—baking, snacks, canned goods—for an intuitive layout. These baskets are budget-friendly and readily available at home goods or container stores, making them an accessible upgrade to your tiny kitchen’s organization system.
10. Implement Pull-Out Shelves for Hard-to-Reach Areas
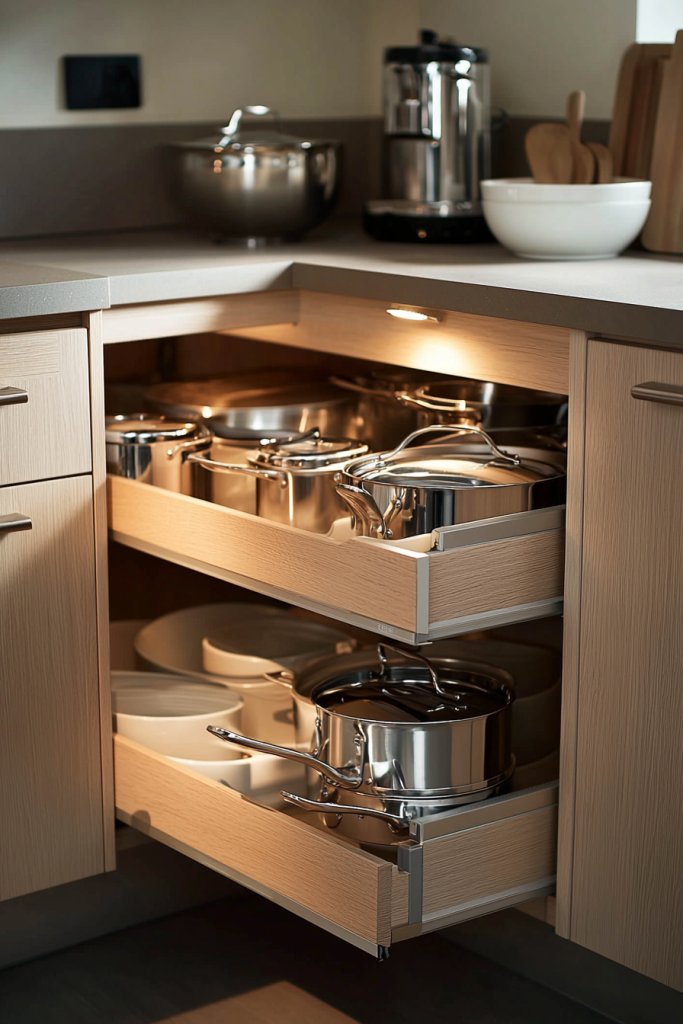
Say goodbye to awkwardly reaching into deep cabinets with pull-out shelves that bring stored items directly to you. These sliding shelves are a smart solution for maximizing accessibility in small kitchens, especially in lower cabinets or tight corners.
Made from sturdy wood or metal, they glide smoothly on metal tracks, allowing you to see and reach everything without hassle. Not only do they save time and effort, but they also prevent items from getting lost or forgotten at the back of your cabinets.
Visually, a pull-out shelf is a compact, flat platform, typically about 12-24 inches wide, that extends out from a cabinet opening when pulled. When retracted, it seamlessly blends into the cabinet, maintaining a clean look.
Fill it with pots, pans, or pantry items, and you’ll notice an immediate upgrade in organization and convenience. The whole setup creates a more functional space, especially in tiny kitchens where every inch counts, and reduces the need for unnecessary bending or crawling on the floor.
To install, measure the internal dimensions of your cabinet, then purchase compatible pull-out shelves or custom-build them if you’re handy. Attach the sliding mechanism securely to the cabinet sides, ensuring smooth operation.
Load your items on the shelf, and test the glide before closing the cabinet door. These shelves are an investment in efficiency, with many affordable options available at hardware stores or online. With just a few simple tools and some basic instructions, you can turn an underused cabinet into a quick-access storage hub that keeps your tiny kitchen neat and functional.
11. Use Stackable Stackable Bins to Save Space on Counters and Shelves
Maximize your tiny kitchen’s storage potential by stacking bins, turning cluttered countertops into sleek, organized surfaces. This simple trick transforms chaotic spaces into tidy, functional areas where everything has its place.
Imagine a set of clear, plastic stacking bins neatly arranged on open shelves or inside cabinets. These bins come in various sizes, with smooth, transparent sides that reveal their contents at a glance, reducing the need to rummage through clutter.
They can be filled with dry goods, snacks, or small kitchen tools, all kept tidy and easily accessible. The textures of the smooth plastic contrast beautifully with the matte finishes of your shelves or cabinets, creating a clean, modern look.
The visual appeal is enhanced by labels or color-coded items, adding a touch of order and style to your space. The overall effect is a bright, airy feeling where each item visually declutters the space, making your kitchen feel more open and inviting.
Getting started is simple and budget-friendly. First, gather a variety of clear, stackable storage bins—these can be purchased at most home goods stores or online, and alternatives include eco-friendly bamboo or metal containers for a more rustic look.
Measure your shelves or cabinets to ensure a snug fit and then organize your items by category, stacking the bins vertically to make the most of every inch. Label each bin with a simple adhesive label or masking tape and marker for quick identification.
As you assemble your system, keep it flexible; you can always add or swap out bins as your storage needs evolve. With just a few easy steps, you’ll create a streamlined, clutter-free kitchen that’s both practical and visually pleasing.
12. Incorporate Hidden Storage Solutions Under the Kitchen Sink
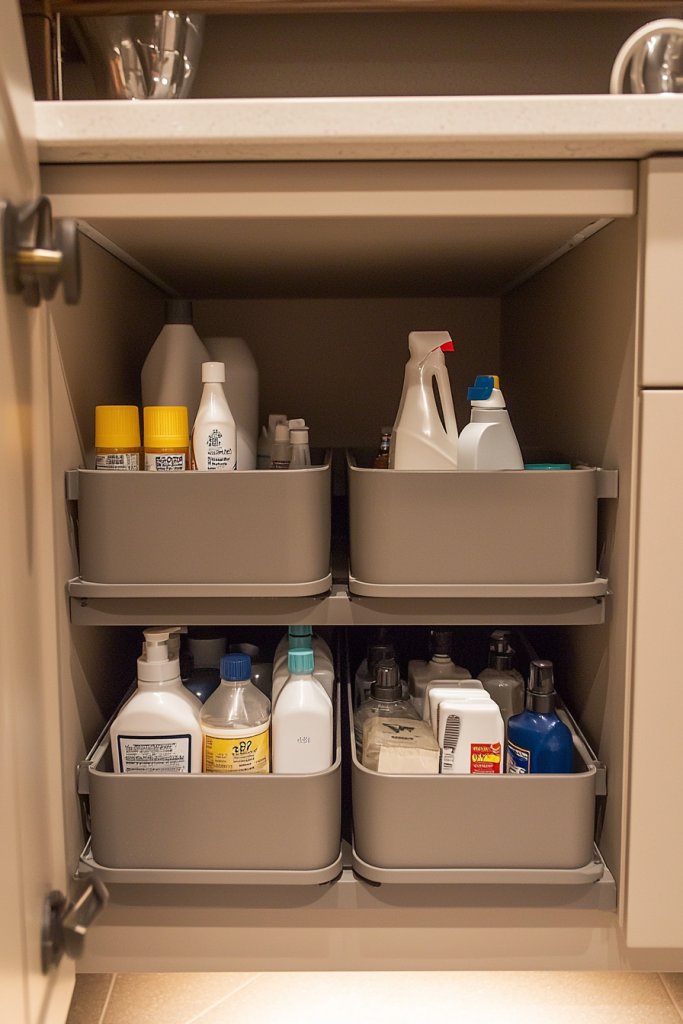
The space beneath your kitchen sink is often underutilized and cluttered, but with a little clever planning, it can become a sleek storage zone for cleaning supplies and miscellaneous essentials. Hidden storage solutions help keep your tiny kitchen looking tidy and free of visual clutter.
Picture a tidy under-sink area with a custom-fit sliding drawer or pull-out shelf made from light-colored wood or sturdy plastic. Inside, neatly arranged baskets or stackable bins hold cleaning sprays, sponges, and trash bags, each labeled with clear, waterproof tags.
The space is organized with dividers, so everything has its designated spot, and the entire setup feels clean and orderly. The area remains visually unobtrusive, with the doors closed, revealing only a sleek cabinet front that blends seamlessly with your kitchen decor.
You might even add a soft, citrus-scented air freshener nearby to make the space smell as fresh as it looks. To create this hidden storage, start by measuring the space under your sink, then purchase sliding baskets or adjustable shelves made from moisture-resistant materials like plastic or treated wood.
Use small containers or baskets to separate cleaning supplies, avoiding clutter and spills. Secure your items with labels, and consider installing a partial door panel if your cabinet lacks a front cover, to keep everything out of sight. With a few simple tools and some thoughtful organization, you’ll reclaim this often-overlooked space and make it both functional and visually appealing.
13. Hang a Pegboard for Flexible Storage of Cookware and Accessories
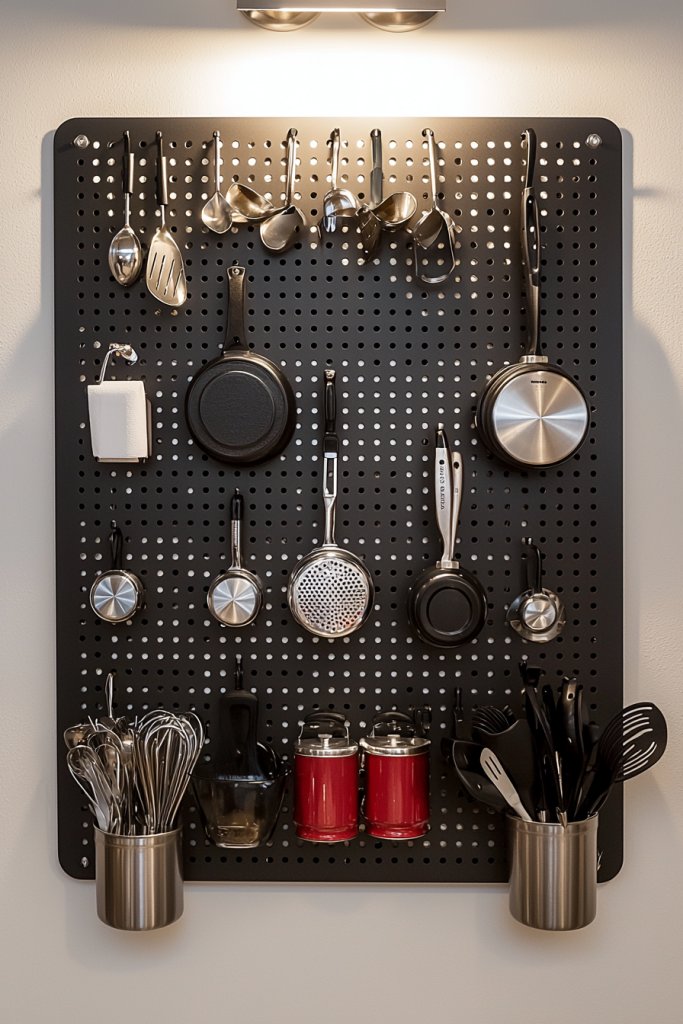
A pegboard is a game-changer for tiny kitchens, offering customizable storage that adapts to your needs while adding a charming, industrial touch. It’s a smart way to keep frequently used cookware, utensils, and accessories within arm’s reach without taking up precious counter space.
Visualize a sleek, white or matte black metal pegboard mounted on an empty wall, dotted with hooks, baskets, and small shelves holding everything from spatulas to measuring cups. The textured surface provides a visual focal point, and the arrangement can be tailored to your daily routines—placing your most-used tools at eye level and hanging larger pots and pans on the lower hooks.
The overall look is modern yet inviting, with the metal’s cool sheen contrasting beautifully with soft textiles or rustic wood accents nearby. As you reach for your tools, you’re met with a satisfying tactile feel, and the organized display adds a sense of order to your compact space.
Getting started is simple: measure your wall area and purchase a pegboard kit with mounting hardware. Select metal or wooden hooks and small containers to hold everything from spices to oven mitts.
Arrange your items in a way that makes sense for your cooking style, and hang them securely. You can even add decorative elements like wire baskets or small planters for herbs if space allows. With a little effort, your pegboard becomes a versatile, stylish storage solution that keeps your kitchen essentials front and center without clutter.
14. Use Decorative Storage Canisters for Frequently Used Items

Transforming your tiny kitchen into a stylish, functional space is easy with decorative storage canisters—an aesthetic upgrade that keeps your essentials close at hand while adding personality to your countertops. Picture a set of ceramic or glass canisters with lids, in soft pastel shades like blush pink, mint green, or warm terracotta.
Each canister is labeled with simple, elegant tags—perhaps handwritten or using sleek vinyl lettering—holding everyday items like sugar, flour, or coffee. The textured surface of the canisters contrasts beautifully with smooth countertops, and their rounded shapes introduce softness to the space.
Topped with natural wood or matte metal lids, they create a cohesive look that’s both charming and practical. The sight and feel of these canisters evoke a cozy, inviting vibe, making your kitchen not only more organized but also more welcoming.
To implement, choose material options such as ceramic, glass, or stainless steel based on your style and budget. Purchase or create labels using adhesive labels, a chalk pen, or vinyl stickers for a personalized touch.
Fill each canister with your most-used ingredients, and place them together on your countertop or open shelf for easy access. For a cohesive look, coordinate the colors and shapes of your canisters, and consider adding a small tray or mat beneath them to contain any spills or crumbs. With a few simple purchases and some thoughtful arrangement, these decorative canisters will enhance both your kitchen’s style and its functionality.
15. Install a Lazy Susan to Maximize Corner Cabinet Space
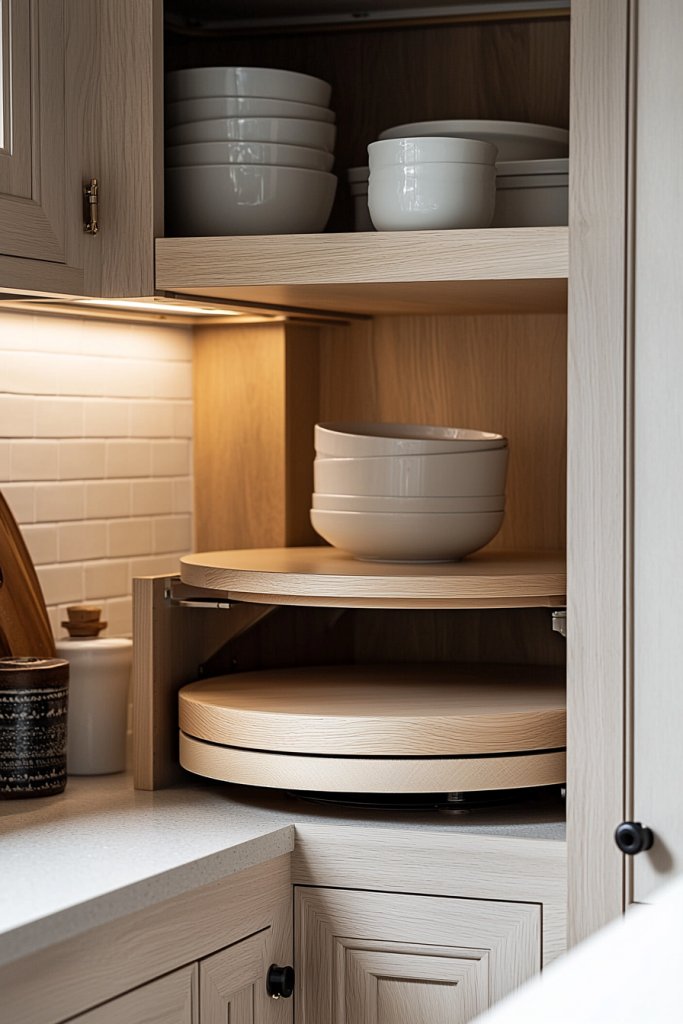
A Lazy Susan is a small but mighty addition to tiny kitchens, turning awkward corner cabinets into easily accessible storage hubs. It’s the perfect solution for making every inch of your space count while adding a touch of classic charm.
Visualize a round, wooden or acrylic Lazy Susan spinning smoothly on a sturdy base inside your corner cabinet. Filled with jars of spices, bottles of oil, or small kitchen tools, it allows you to access everything with a simple spin—no more reaching into dark, forgotten corners.
The surface is smooth and often lined with a non-slip material, ensuring items stay put when rotated. The overall look is clean and functional, with the spinning element offering a satisfying tactile experience.
This setup transforms a previously underused space into a highly functional, organized area, making cooking more efficient and less frustrating. To install, measure your cabinet’s corner space and select a Lazy Susan with a diameter that fits comfortably.
Choose a basic turntable made from wood, acrylic, or metal—many are easy to assemble with minimal tools. Fill it with your most-used spices, oils, or small utensils, and arrange items so they’re easy to see and grab. Place the Lazy Susan in your corner cabinet, spin it to find what you need, and enjoy a clutter-free, more accessible storage area that maximizes every corner of your tiny kitchen.
16. Incorporate Compact, Stackable Dish Drying Racks for Clutter-Free Countertops
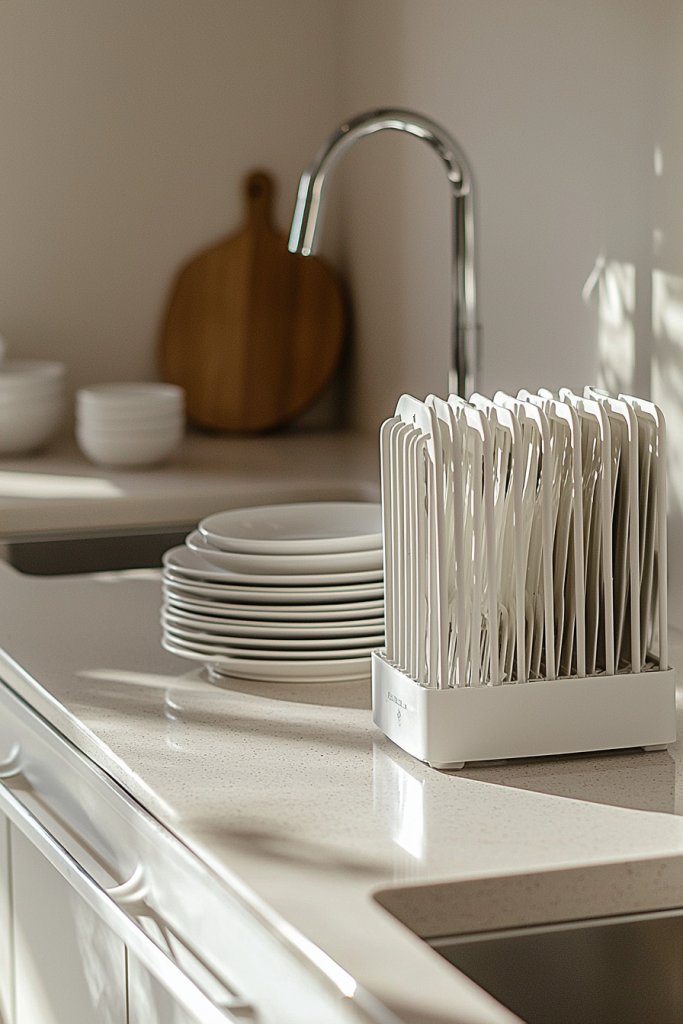
Keeping your kitchen counters tidy can be a challenge, especially when drying dishes leaves your space looking crowded. A compact, stackable dish drying rack offers an elegant solution, transforming a usually cluttered area into a sleek, organized zone.
This idea is perfect for small kitchens where every inch counts, helping you maintain a clean, airy workspace. Picture a slim, matte black or brushed stainless steel rack that fits snugly on your countertop without overwhelming the space.
It features multiple tiers—perhaps a small upper shelf for cups or utensils and a lower tray for plates—allowing you to dry several items simultaneously. The textured, non-slip base prevents dishes from sliding, while the open design promotes airflow, speeding up drying time.
The visual contrast of shiny metal against a soft-colored countertop, like creamy beige or pastel blue, adds a modern touch without cluttering your visual field. To implement this, measure your available counter space to select the right-sized rack—many are adjustable or foldable for flexibility.
Choose a durable material like stainless steel or bamboo for longevity and ease of cleaning, or opt for lightweight plastic if budget is a concern. Simply place the rack near your sink, and after washing, stack dishes efficiently. You can even add a small silicone drip tray underneath to catch excess water, keeping your counters spotless and dry.
17. Use Clear Labeling on All Containers for Effortless Clarity
A cluttered kitchen often stems from unseen or misidentified storage, but clear labeling turns chaos into clarity instantly. Labeling your containers ensures that everything from grains to spices is easy to find, saving time and reducing frustration during busy mornings or dinner prep.
Imagine transparent, airtight containers made of glass or BPA-free plastic, with crisp, black or white labels that stand out clearly. Whether you’re storing flour, sugar, or pasta, each container bears a simple, legible label—perhaps written with a chalk marker or printed with a label maker—that instantly tells you what’s inside.
Consistent labeling creates a uniform look, making your shelves appear organized and intentional. Using a color-coded system, like blue for baking supplies and green for grains, adds an extra layer of visual clarity and ease.
Getting started is straightforward: gather your containers and decide on the labeling method—chalk markers, adhesive labels, or printable paper labels. Write or print the names clearly, and affix them to each container, preferably on the front for quick glances.
For added durability, seal labels with a clear adhesive spray. Keep a small label refill kit nearby for new items, ensuring your organization stays consistent. This simple step turns your pantry into a well-oiled, effortlessly navigable space.
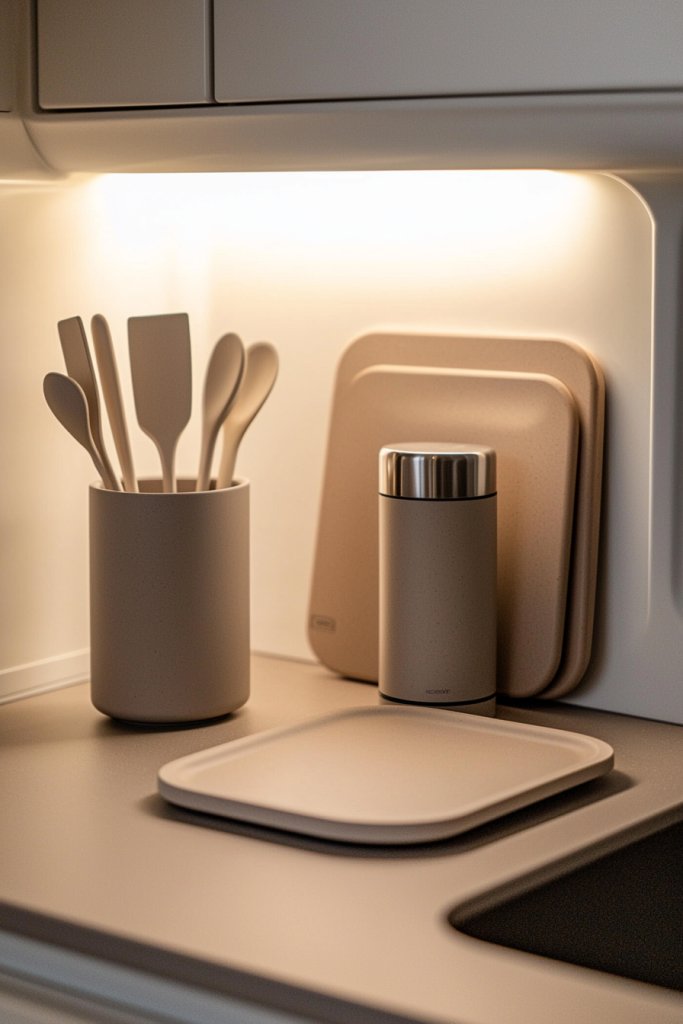
18. Choose Minimalist, Uniform Kitchen Utensil Holders for Style and Function
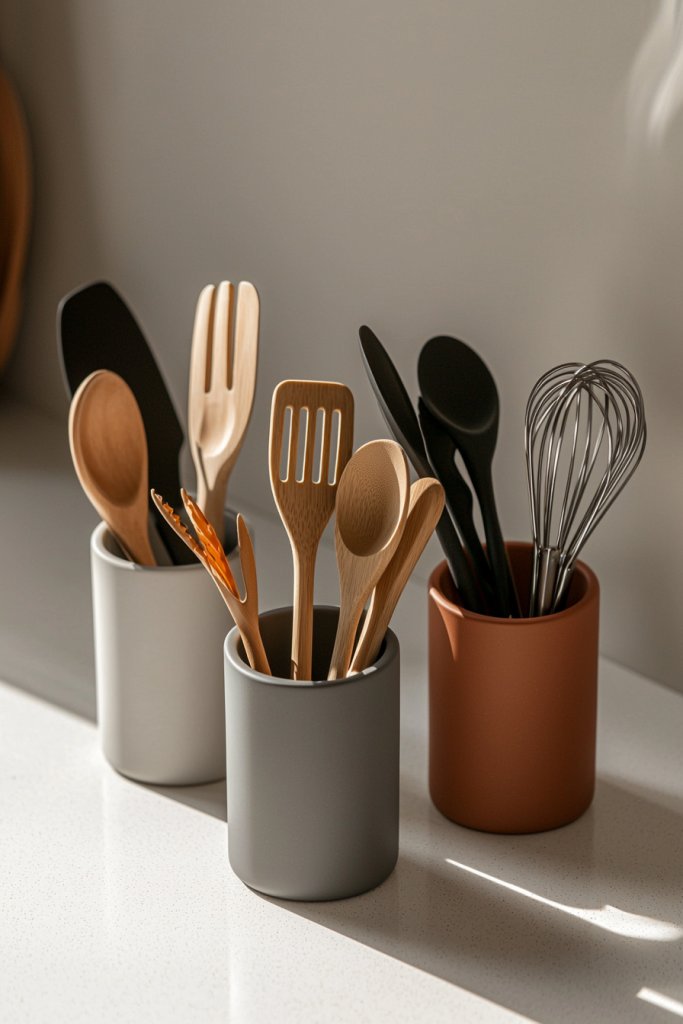
A cluttered utensil drawer or countertop can visually overwhelm a tiny kitchen, but a sleek, uniform utensil holder keeps everything tidy and adds a touch of modern style. Opting for minimalist designs in neutral tones creates a cohesive look that elevates your space without sacrificing practicality.
Visualize a set of matching ceramic or matte-finished metal holders—perhaps in soft gray, matte black, or warm terracotta—that hold your spatulas, wooden spoons, whisks, and tongs. These holders sit neatly on your countertop, with their clean lines and simple shapes complementing your overall decor.
The textures—smooth ceramics, brushed metals, or matte plastics—add subtle visual interest, while the uniformity creates a calming, organized vibe. The arrangement allows you to grab utensils quickly and reduces visual clutter, making your kitchen feel more spacious.
To implement, select 1-2 sturdy, dishwasher-safe utensil holders that match your aesthetic. Keep frequently used tools in the front for easy access, and store less-used items in a drawer or a separate container.
Regularly clean the holders to prevent buildup of food residue or grease. This small change streamlines your cooking process and enhances your kitchen’s style with minimal effort.
19. Opt for Drawer-Integrated Waste and Recycling Bins for Cleanliness
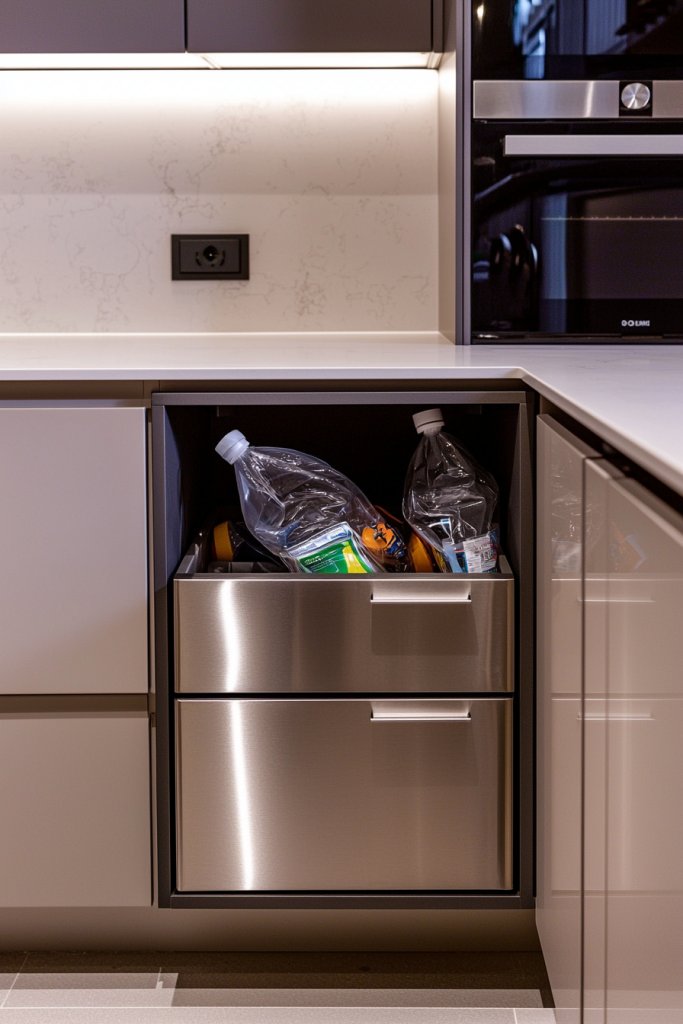
In tiny kitchens, space is at a premium, and managing waste can quickly become a messy affair. Drawer-integrated waste and recycling bins offer a seamless, hidden solution that keeps your counters clear and your space tidy.
Picture a slim, pull-out drawer installed beneath your countertop—perhaps in a cabinet close to your sink—that houses dual compartments for trash and recyclables. These bins are made from durable plastic or stainless steel, with smooth sliding mechanisms and ergonomic handles for easy access.
When closed, the drawer conceals any odors and keeps your kitchen looking sleek. The streamlined design minimizes visual clutter, maintaining an open, airy feel.
Installation is straightforward: measure the cabinet space, select a compatible drawer system, and follow manufacturer instructions for mounting. Use labeled or color-coded liners—like black for waste and green for recyclables—to keep everything organized.
Regularly empty and clean the bins to prevent odors or overflow. This smart setup makes waste management discreet, efficient, and unobtrusive, perfect for maintaining a clutter-free tiny kitchen.
20. Add a Rolling Cart for Extra Storage and Mobility
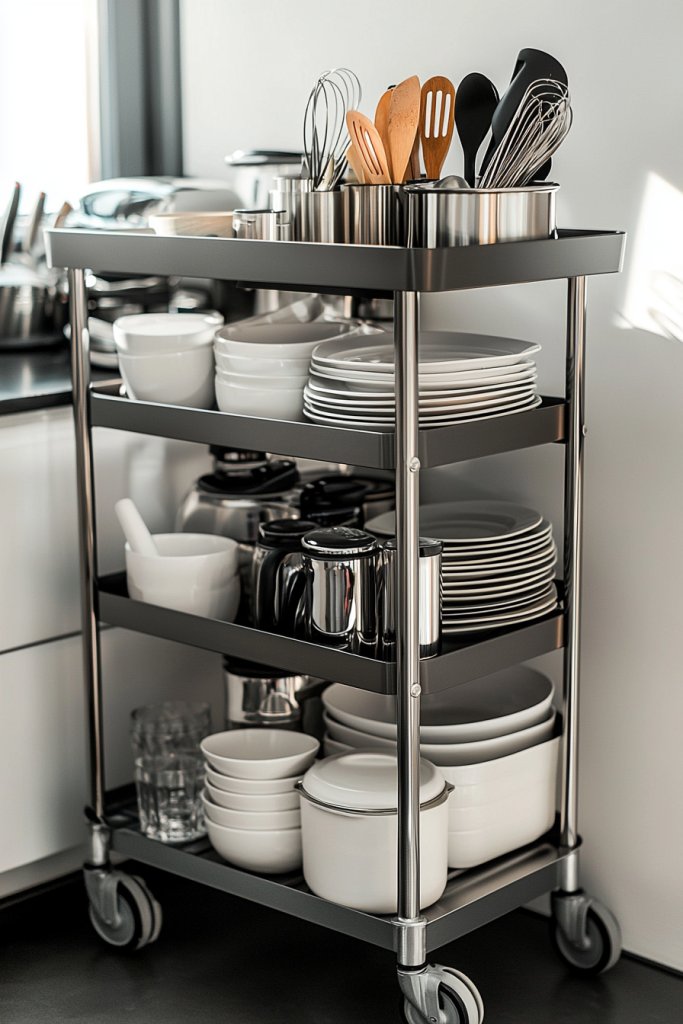
A versatile rolling cart instantly adds extra storage and workspace in a tiny kitchen, offering the flexibility to move items where they’re needed most. Whether used as a prep station, a place for cookbooks, or a mobile pantry, it’s a game-changer for maximizing limited space.
Envision a compact cart with two or three shelves, constructed from lightweight metal or wood with casters that lock in place. The top surface can hold frequently used appliances like a toaster or coffee maker, while lower shelves store pots, pans, or pantry essentials.
The cart’s design can be minimalistic—think industrial black metal or warm natural wood—that complements your decor. The mobility allows you to easily shift the cart for cleaning or to create temporary work zones during busy cooking times.
Getting started is simple: choose a size that fits your space, and consider options with adjustable or removable shelves for customization. Assemble according to instructions, then fill with items you use regularly.
Use baskets or labeled containers on the shelves for added organization. With a quick push or pull, your tiny kitchen’s layout can adapt to your needs, making every inch work harder for you.
21. Use Decorative Baskets or Crates for Bulk and Less-Frequently Used Items
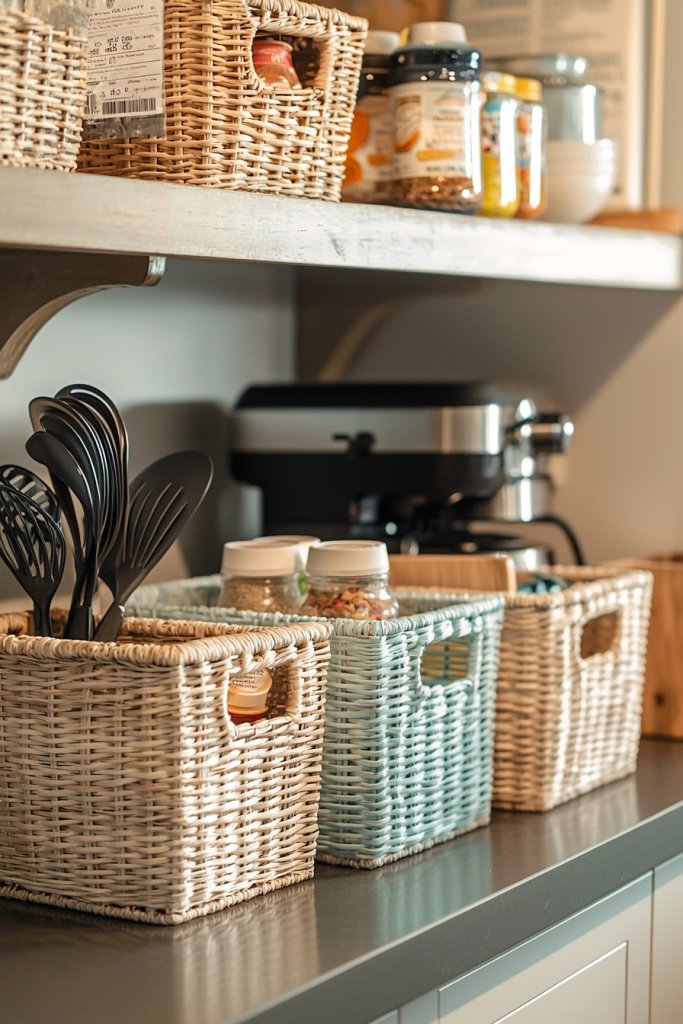
Keeping your tiny kitchen organized doesn’t mean sacrificing style—decorative baskets or crates are a perfect solution for storing bulk items or things you don’t need every day. These containers add warmth and texture to your space, transforming clutter into a curated display.
Imagine woven rattan baskets in neutral tones or rustic wooden crates stacked neatly on shelves or tucked under counters, creating a cozy, inviting atmosphere. Their open tops make it easy to grab what you need while maintaining a tidy look, and they can be customized with labels or tags for quick identification.
Visually, these baskets and crates introduce natural textures and earthy hues—think soft, braided wicker, smooth ceramic-coated wicker, or distressed wood finishes. They sit comfortably on open shelves or inside cabinets, filling gaps and providing visual interest without overwhelming the space.
When filled with seasonal produce, baking supplies, or even reusable shopping bags, they add an organized charm that’s both functional and decorative. The tactile feel of woven fibers or rough wood also adds a cozy, inviting sensory layer to your tiny kitchen, making it feel less cramped and more thoughtfully styled.
To implement, start by choosing baskets or crates that match your color scheme—neutral tones like beige, gray, or natural wood work well. Measure the space you want to fill and select sizes accordingly, opting for stackable or nesting styles to maximize storage.
You can find stylish options at home goods stores or online, or repurpose vintage crates for a unique look. Place these containers on open shelves, inside cabinets, or on the floor for easy access. Label them with adhesive tags or chalkboard labels for added organization, and fill them with your bulk or infrequently used items to keep your counters clear and your kitchen effortlessly tidy.
22. Incorporate a Magnetic Spice Rack for Easy Access and Visual Appeal
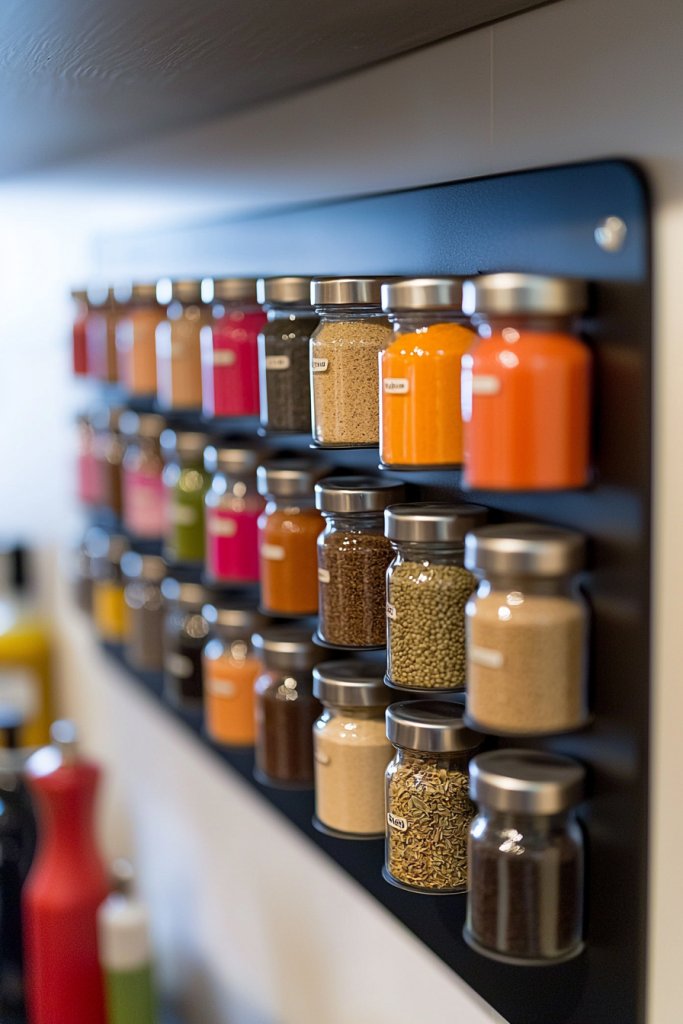
A magnetic spice rack is a game-changer for tiny kitchens, offering a sleek, space-saving way to keep your favorite herbs and spices within arm’s reach while adding a modern touch to your décor. Mounted on the side of a refrigerator, under a cabinet, or on a metal backsplash, these racks hold small metal jars or tins securely with magnets, transforming a cluttered drawer or countertop into a streamlined display.
Brightly labeled spice jars in vibrant colors or minimal matte finishes can turn an ordinary storage spot into a visual focal point, making cooking more enjoyable and efficient. Visualize a series of small, uniform jars lined up on a matte black or brushed stainless steel magnetic strip, each with a clear label displaying the spice name in crisp, modern font.
The jars might be filled with vibrant red paprika, golden turmeric, or deep green herbs, creating a colorful, organized palette against the sleek metal. The entire setup feels both functional and stylish, with a sense of order that simplifies meal prep.
The tactile experience of reaching for a jar from the magnetic strip adds to the sensory appeal, making your tiny kitchen feel more professional and thoughtfully designed. To implement, select a magnetic rack compatible with your space—these are often available in various lengths and styles.
Purchase small, airtight metal or glass spice jars with secure lids, which can be found at kitchen stores or online. Fill the jars with your preferred spices, label each clearly using waterproof markers or pre-printed labels, and affix them to the magnetic strip.
Mount the rack in a convenient location—near your stove or on a backsplash—ensuring it’s within easy reach. This setup not only declutters your cabinets but also enhances the visual cohesion and efficiency of your cooking area.
23. Keep Countertop Decor Minimal with Functional Items in Cohesive Styles
A clutter-free countertop is key to making a tiny kitchen feel open and inviting, and this is achieved best by selecting only essential, functional items that complement each other in style and color. Instead of random knickknacks or mismatched accessories, opt for a few thoughtfully chosen pieces—like a sleek ceramic utensil holder in matte black, a minimalist wooden cutting board, or a small, modern fruit bowl.
These items serve dual purposes: they’re practical for daily use and contribute to a cohesive aesthetic that makes your tiny kitchen look polished and spacious. Imagine a clean, white marble countertop with a matching set of monochrome kitchen tools—think black silicone spatulas, brushed stainless steel tongs, and a simple glass soap dispenser—arranged neatly alongside a natural fiber dishcloth.
All items reflect a consistent style, like Scandinavian minimalism or industrial chic, creating a sense of harmony and calm. This pared-down approach emphasizes quality over quantity, making your small space feel less crowded and more curated.
The tactile textures—from smooth ceramics to rough linen—add subtle visual interest without overwhelming the senses. To achieve this, evaluate your most-used items and select a few in matching styles and colors.
Use uniform containers for frequently used ingredients or utensils, and store infrequently used items out of sight. Incorporate multi-purpose objects, such as a stylish jar that holds both utensils and small kitchen tools, to maximize functionality.
Keep the surface clear by storing extras in cabinets or drawers, and only display what you genuinely use daily. This intentional, minimalist approach not only simplifies your routine but also elevates your tiny kitchen’s overall aesthetic, making it a serene and efficient space.
Conclusion
With these 23 innovative tiny kitchen organization ideas—from clever storage solutions like floating shelves, magnetic strips, and pull-out shelves to smart use of baskets, labels, and hidden compartments—creating an effortless sense of clarity is entirely achievable. Implementing even a few of these tips can transform your small space into a functional, clutter-free haven. Don’t be afraid to experiment and personalize these ideas to suit your needs—your organized kitchen awaits! Take action today and enjoy the beauty of a tidy, efficient kitchen that makes every meal prep a pleasure.
Leave a Reply